-
Posts
2,615 -
Joined
-
Last visited
Content Type
Profiles
Forums
Events
Everything posted by Eric2575
-
Thank you for looking at it this late
-
Just uploaded to youtube but still being processed. The help section notes that it could take up to eight hours. Since I've never done this before, I'll keep checking till I get some kind of results. I hope to get your guys feedback on this. Thanks Here is the link: Please leave your comments
-
Just a simple round bolt or rivet head - set lathe cross sections to four in options. Open a new model and draw a diagonal with two cps. With one of the cps selected, hit "l" for lathe. Select the bottom four cps and delete them. Go to top view and you should see a circle with four cps. Connect the opposing cps with a spline - do this for both horizontal and vertical splines a- you should have a cross in the center of the circle. Select one of the center splines and add a cp by hitting "y". Select the other cp and hit "y". Now connect the two overlapping cps by selecting one of them with a left click - don't let go of the left mouse button, and then simultaneously hitting the right mouse button. This action connects the two center cps. To check the connection, move the center cp. If you don't see an underlying cp, then you did it right and they are connected. If you got it right, select the center cp and got to the front view. Now use the up arrow to move the center cp ...well, up You now have a basic round bolt head.
-
Spray on starch and setting the iron to "Cotton" usually do the trick. Seriously though, thinking in 3D and lots of practice tweaking models did it for me. Once you get the hang of bias tweaking and knowing what effect the tweaking of one cp has on an adjoining cp will get you to really smooth models.
-

2001 - A Space Odyssey - Modelling the Discovery
Eric2575 replied to Tralfaz's topic in Work In Progress / Sweatbox
Al: Very nice model as to be expected from you I will try to finish my tutorial on raised plates tomorrow. You should be able to reduce your splines dramatically after watching it. Eric -
Tutorial being completed in my spare time - only narration left to add. Another update and different view.
-
As Steve said, create a percentage pose for the terrain. At 0% it stays unchanged; at 100% the section that needs to be flat will be flat. Just a matter of selecting the cps , translating the y pivot to zero and then scaling the selected group to y=100. This is all done at the poses 100% mark. In the chor, select the model and invoke the pose from hilly to flat with the percentage slider.
-
I also installed FFDshow and still don't get the ffshow Video Codec option in Camstudio. What did I miss? Edit: The above link for FFDshow apparently was not the latest one. I searched the web and found this one to do the trick: http://www.free-codecs.com/download/FFDShow.htm
-

What is the best free software for making
Eric2575 replied to Eric2575's topic in A:M Tutorials & Demos
Thanks guys, I'll play with Camstudio. -
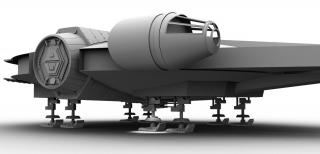
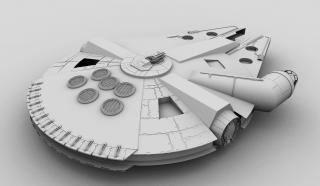
My process is very similar to the one you are already using, but It does change a bit. I also created an inner sphere so to speak, except mine is off course the saucer shape of the Falcon. In order to get a very smooth and accurate base, I use a pretty high count mesh. This mesh will be deleted later on and replaced by a very low count mesh. There is also another reason I use a high count mesh; I copy and paste one of the vertical splines to give me the base for my first plate. Not only does the high count help in getting a smooth plate, but copying it from the base saucer insures that it will totally conform to the saucer's shape. Since the plates vary from one to the next and since some of the plate edges do not line up with the cps of the copied spline, I add cps to the spline using the shift key in order not to disturb the curvature of the spline. The spline will also be broken, as there are several panels along the vertical line of the saucer. Unless you take certain precautions, the break will cause distortions. One way to avoid these is to .... Man, oh man, I need to do a visual tut on this. Let me put one together real quick....
-
I've searched the forums briefly, but wondered if I could save some time by getting a quick answer here? Thank you.
-
-
Al, post a pic of the area in question and I'll give you my take on it.
-
-
Ethan, come on now, you've been on the sauce since before I found it. Just look at your Pixar quality characters. I've reached into the mechanical drawer, and you're in the organic. I believe we are both expressing our love for this work in a fine way Btw, funny you should resurface this thread, because I've been meaning to get back to finishing the hull rivet patterns and got sidetracked by the Millennium Falcon. Thanks for the compliment and keep up the good work Cheers Eric
-
Maybe make his head rounder? When did you make him? Don't tell me you modeled him also last night?
-
Nope, just a modeling exercise I wanted to put in my portfolio.
-
Thank you guys for stopping by and giving me the much needed encouragement on a project that has it's tedious moments. More armor plates to go, than on to the little greeble details.
-
Finally got rid of the artifacts. This is only a 5x render that I stopped at 3x since I knew it did not have any distortions.
-
That looks like it came out of Pixar. Bravo!
-
Ha, ha, very cute. I agree, a simple bone rig should suffice.
-
Robcat, higher percentage AO settings equals less noise but higher render times. Experiment with a simple model setup such as a cube and sphere, then change the AO % and note the differences. I usually stay with 30% AO sampling. Just to explain, the AO settings in the chor are at 100%, the settings in the render to file dialog box I keep at 30% - see pic. Oops, I meant to underline the AO settings in the first pic, not the ambiance intensity
-
-
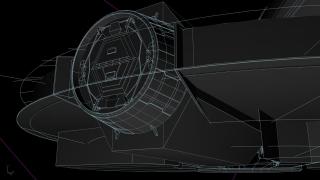
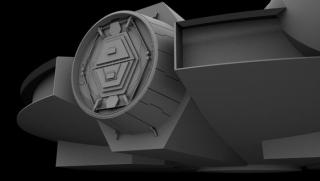
Let me get a little bit further with the whole ship and I'll put up a wireframe of it, unless you want to see the detail of something specific. I am not looking forward to making all the little greebles that cover the ship, especially on the top back and all around the sides. I am not going to skimp here though, so you guys can expect a very detailed model of the Falcon. Steve, seriously though, you do have a lot of talent and it shows in your modeling. Your latest Enterprise is very cool and not wobbly to my eyes. Ask and you shall receive - if there is something specific that you feel challenged by as far as modeling goes, post it on the forum and you'll surely get lots of replies to offer help and solutions. I'll gladly answer any and all questions about the construction of my models, although you may be disappointed when you see how simple they really are. The key thing to remember is to always think in three dimensions. I constantly reference the x/y/z axis no matter what orientation I am in. It will become second nature to you if it isn't already. Practice makes better and better Eric
-


