Eric2575
-
Posts
2,615 -
Joined
-
Last visited
Content Type
Profiles
Forums
Events
Everything posted by Eric2575
-
Very nice modeling you've got going there. I love both the Captain and the Gingerbread house. Are you using bump maps? The chimney looks a bit too straight considering it's made out of choc covered raisins. Other than that, great stuff.
-
Beautiful work Stian! How many models comprise the Cathedral?
-
Wheelhouse and upper deck are about finished. Now on to the rest of the hull.

-
It's taking me a while since I am having trouble with the orientation of the sweeper object. When I have a path thats not on a direct x,y, or z axis, I can't figure out the angle of the target object to make it align with the path. So many times I have to select the completed swept objects and turn them so they are parallel to the plates I am workin on. Can anyone give me a quick insight into sweepers magical orientation properties?
-
One night???? Amazing!!! Eric
-
Hoffendlich ganz toll!!! Bin in Muenchen aufgewachsen. Here is a small update on the rivet progress. It's slow going because I am using old Disney photos and DVD footage for the most accurate rivet placement. Every rivet will be accounted for and there are over 30,808 of them. I should be done next year
-
Thank you for the compliment Al. I hope I never have to go up against Stian, because he is absolutely gifted, whereas I have to work hard as hell to even get close to what he does in his sleep
-
Thanks Nino Well, I seem to have narrowed down the displacement problem to AO renders in V.13t. Displacement seems to work fine until I use AO. No matter. For the Wheelhouse I will use a combination of bump maps and geometry to portray the rivets. It's taken me some time, but I've finally gotten the bump rivets to look like I want in great part to Matt's help. Thanks Matt. Here is the render of the partially riveted Wheelhouse.
-
Stian: this must be a bug in V.13 because it took 12:14 minutes for the first pass to complete, and to top it off, the artifacts were as bad as ever. This is the project file you had no problems with in V.15. I know, I know, upgrade. Well, when it comes to making our house payment or upgrading, I pick the house payment and groceries. Thanks for testing the file Stian Eric
-
Pixel, your stamps look fine, but I am talking about a decal that is a map of rivets, not one single rivet decal stamped several times. This subamrine has over 3000 rivets, and I 'd like to avoid stamping those in AM. Making complete maps of large plates in Photoshop and then applying them in AM is much better. Now if Stain can only figure out what's going on with my maps???
-
Thanks for helping me out Stian Rivets.zip
-
Well, if anyone can repeat a simple test using a displacement decal with AO that doesn't cause any artifacts, I'd sure like to see it. The project file with included decal would be nice.
-
I'm at a loss right now. No difference when using tga. I also tried it on a simple one patch plane and it was the same. Normals are pointing out as they should.
-
My edit post function doesn't work, that's why all the new posts. Here is the partial bump render. The rivets are just a bit too small, but this will suffice for the test. Next up the displacement render with the TGA.
-
It's gonna take a bit because I am rendering with bump right now and it's looking pretty good. I already took the bump map and converted it to a tga file. That will be the next render as a displacement.
-
I'll give that a try Stian
-
Bump mapping is an option I will consider, but I would still like to know if displacement maps and AO don't mix. I even tried a plain 128,128,128 gray jpg as a displacement map - it should not have done anything to the mesh - and it came out the same as all the other tests, major artifacts.
-
First of all, thank you for all the great comments, it makes it all worthwhile. In short, yes, the pipes are just as they are supposed to be according to all the Disney plans, straight and hexagonal. That's good tip though on working with sweeper and a nice diagram to boot I've started on a revised rivet pattern and am having a bit of trouble. When I do a quick render in the modeling window, the displacement map for the rivets comes out great. When I do an actual render with AO, the part that has the displacement map has grainy artifacts all over it. Before I post the problem, I'm going to experiment a bit and try to figure this out. Probably something to do with the jpg. Eric
-
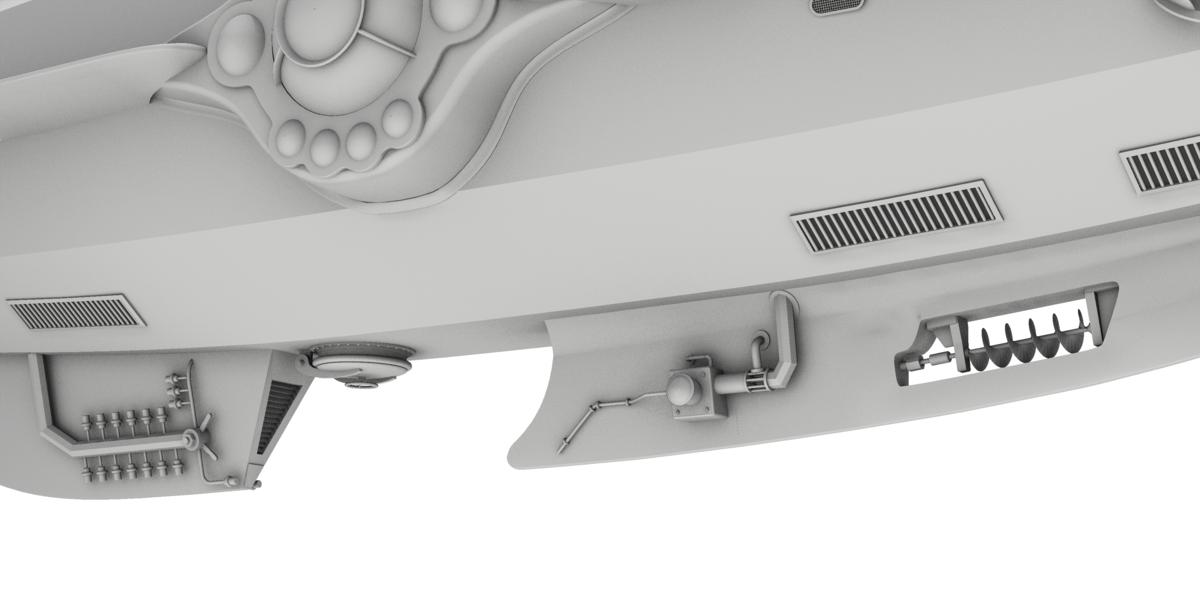
Some more details as I refine things
-
Another great reference. Thank you.
-
Great work Josh. I gave it a 5 star rating. Thanks for posting the links to your work on the Ocean challenge page.
-
Thank you Mike
-
How big is the little fellow? Looks great!!! Which outfit did you use?
-
Don't worry about having me fill any holes.
-
William: you are still doing the 3D milling? I posted not too long ago to see if anyone who had submitted models to you has gotten any back in exchange for letting you use them in your portfolio. Al said he submitted his Star Wars walker but doesn't have the model yet. I'm sure he's too modest to ask, so I will: When can he expect the milled model? Many of use here at the forum would love to see the finished product. I hope you weren't just teasing??? Regards Eric