Eric2575
-
Posts
2,615 -
Joined
-
Last visited
Content Type
Profiles
Forums
Events
Everything posted by Eric2575
-
Thank you Stian. You really keep me inspired in trying to do my best in Animation Master. Besides, I don't want you to send the Bismark over here to keep me from slackin....those are some mighty fine and powerful guns Hey Ken, you're not too far off, I have been considering trying my hand at a human figure. Yves' female model, well, her head anyway, got me thinking in that direction. Not that there is anything wrong with the body, but I will be trying for a more natural vs stylized look. That's a bit into the future, though. In the meantime, I may do a basic tutorial on smoothing surfaces. It seems that topic comes up quite a bit in the beginner's forum. Anyways, stay out of the heat and keep cool... Stian, are you guys having unusual weather up north these days? The US is having a pretty bad heatwave right now and it's gonna continue into next week. I fully believe in Global Warming and am seriously hoping that we haven't screwed up the planet beyond repair just yet.
-
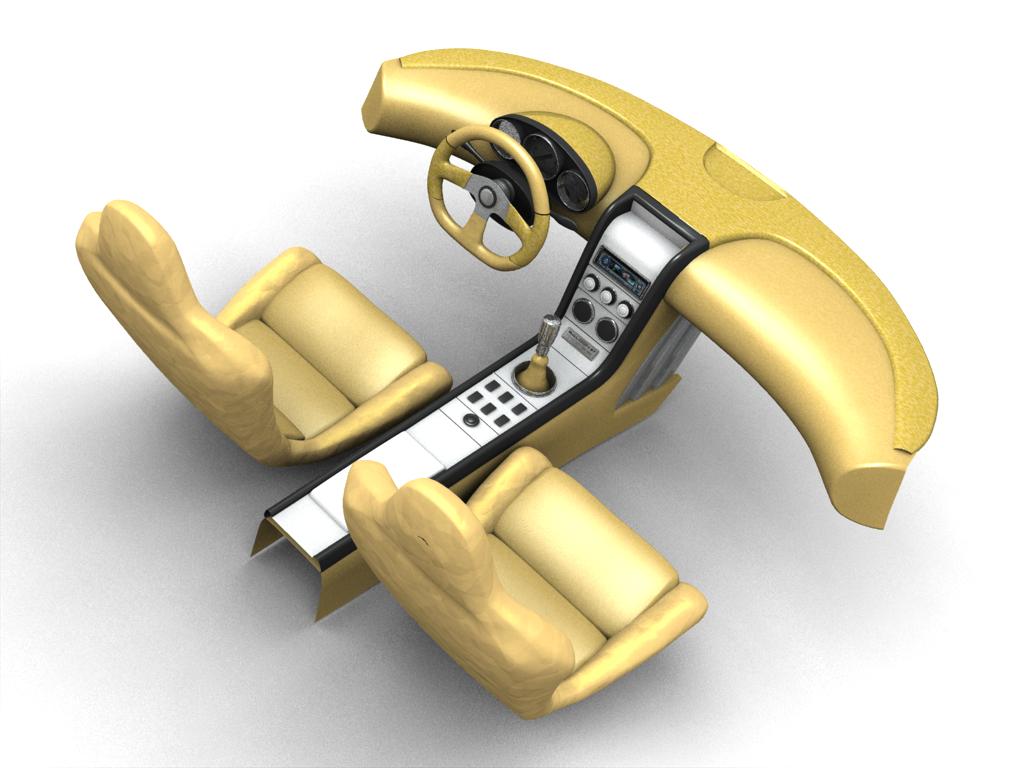
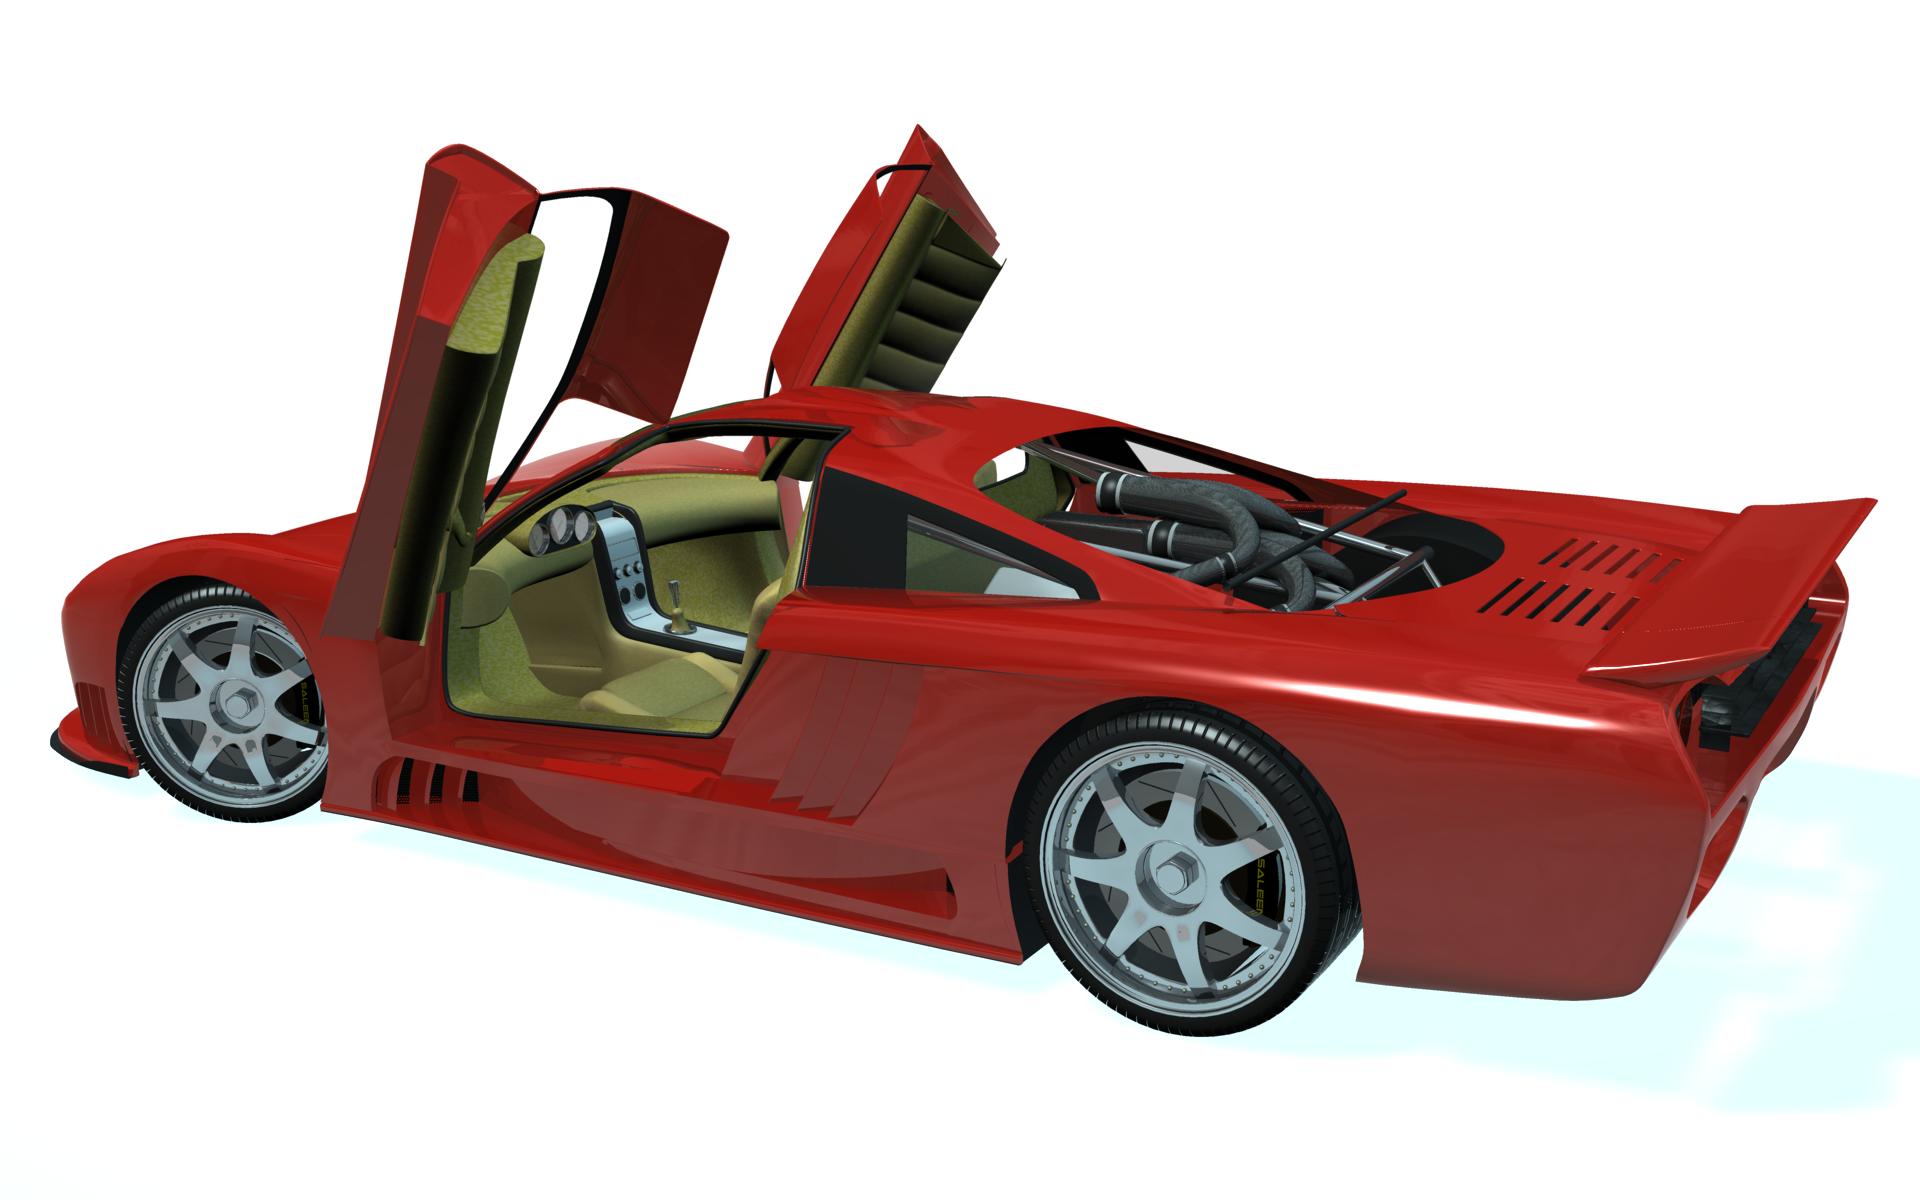
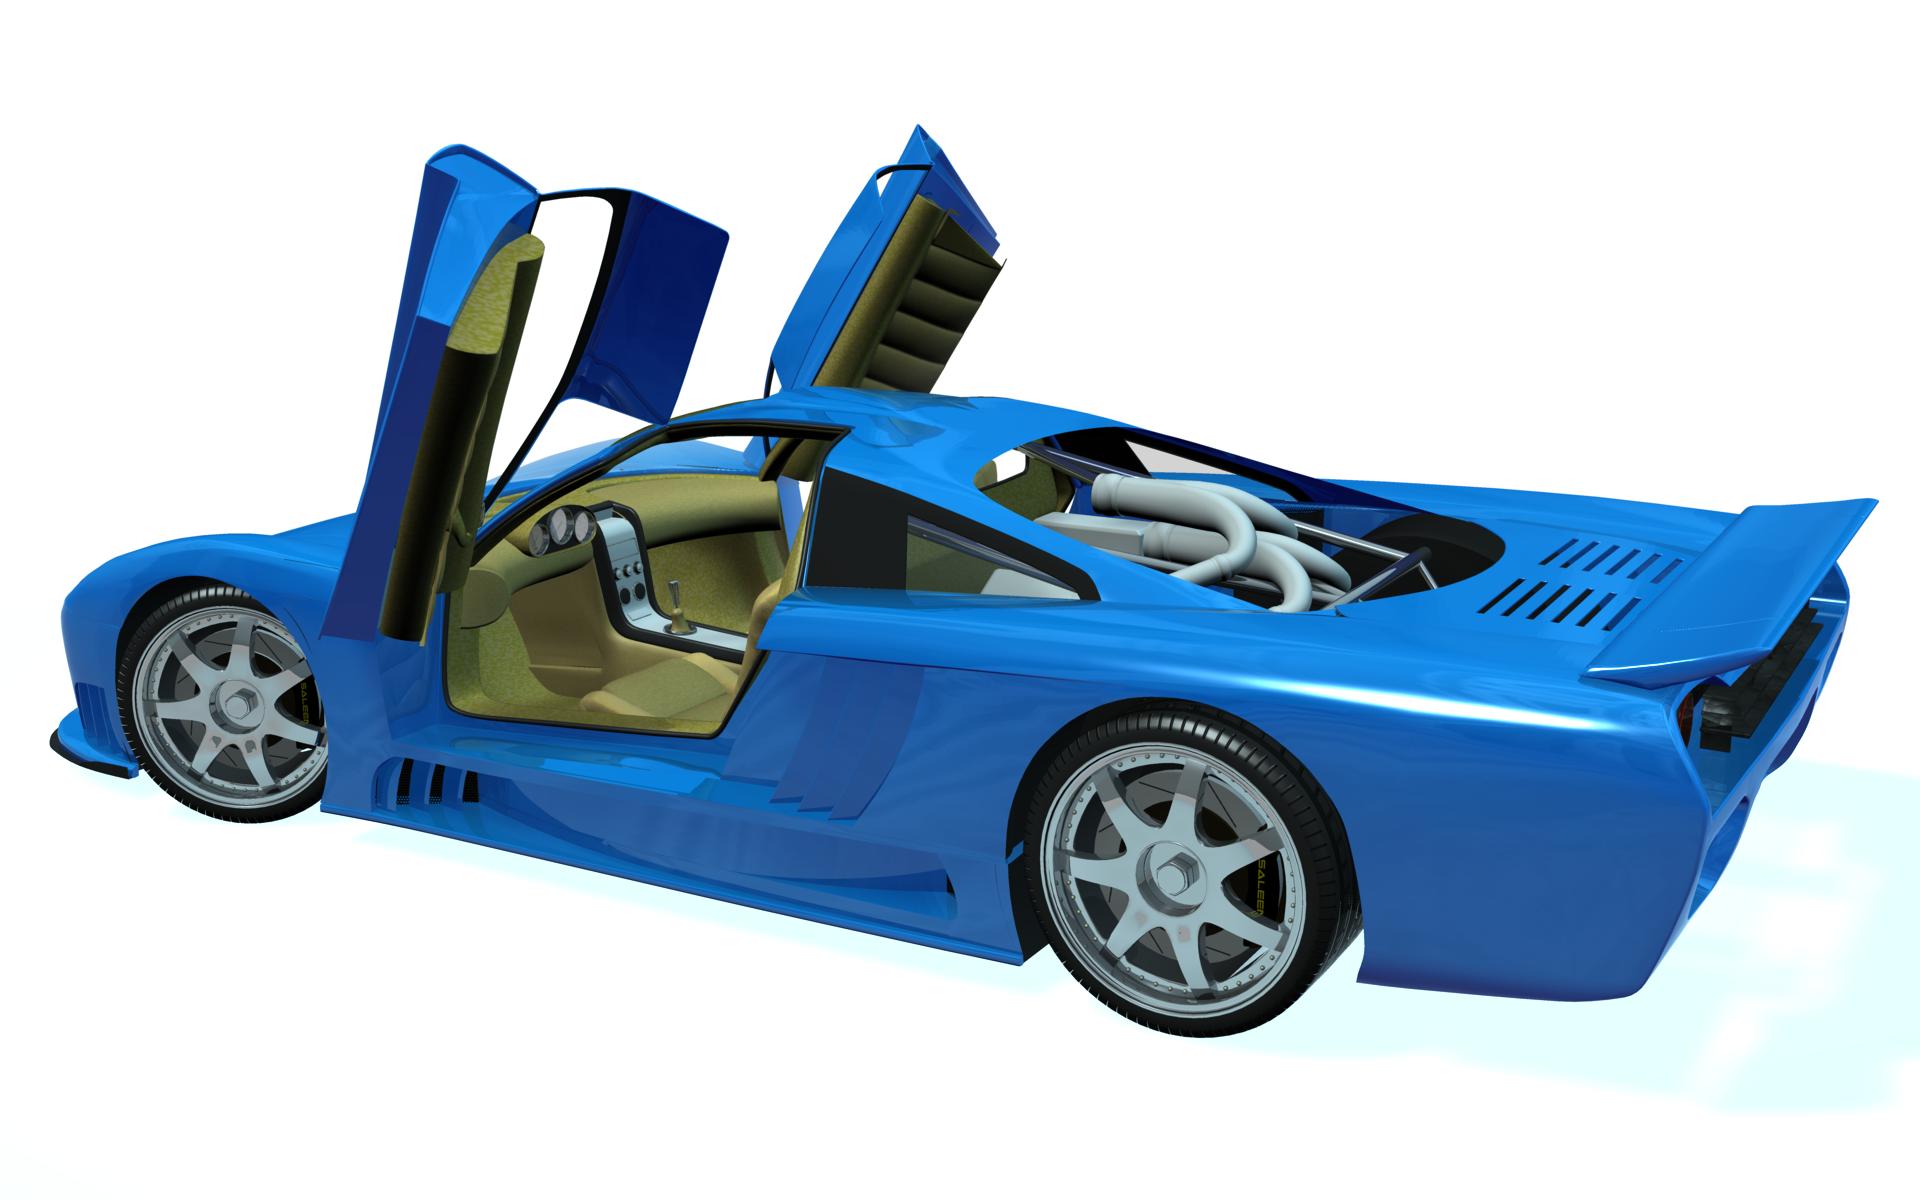
Interior update.

-
Rodger, now you're gonna give him a headache
-
T Dogg, just to give you an idea, the body of my Saleen S7 without any chassis or interior is 4226 patches. As far as the body goes, that's just about done. I would recommend that you model the wheels and interior as a separate model. Once you are satisfied with the exterior of the Batmobile, copy it, and then paste it into a new model. That's just so you can line up the tires and interior to the body. Once pasted, go into the PWS and delete all group names - you don't need them since you will delete most of the body in a sec anyway. Now go back into the modeling window and delete most of the model, except for some key reference points such as the wheelwells, the basic outline of the interior, door lines, whatever helps you get a good reference for where you need to continue building the interior, etc. Once you have most of the model deleted, select the rest and name it "reference". This way you can easily select it later on, lock those cps, so they don't mess with what you are currently modeling, and once you're done with the interior and wheels, you can delete the "reference" completely. Since you pasted the reference model without moving it around, the original body model and the now finished interior model will line up perfectly when you import them to a chor. There are many different ways of modleing a car, but this method has worked for me rather well. Since you are modeling the interior separately from the body, you won't have a problem with cp overload and the dreaded slowdown in the workflow. The best part that I've found in modeling such a complex subject is the fact that you learn so much from it. What you are learning here will make future models better, faster, stronger...wait a minute, I haven't even seen the new Superman flick yet Keep it going, you've gotten this far, just a bit more.
-
If the lander is supposed to be big enough for human occupants, it looks too small. I'm not sure what to do about it, but at first glance, I would have thought it was about two feet tall. Maybe reduce the size of the dimples in the tank for starters.
-
Right click in the modeling window and select "Info" from the menu.
-
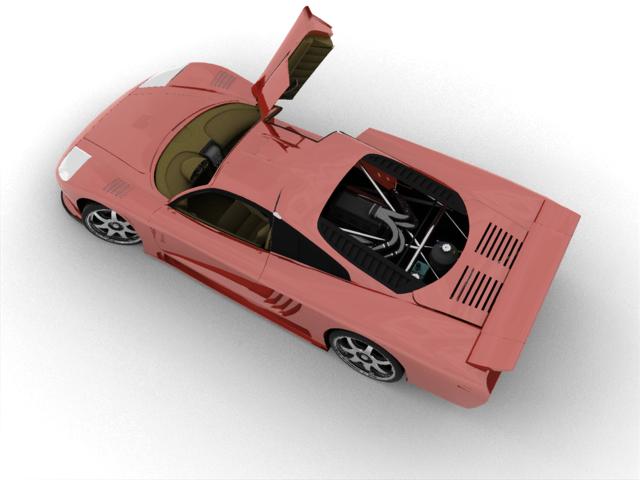
I did some post scanning on AO and actually did a small render with it. Seems to me that AO is primarily used for the black and white renders without specularity? So, not exactly the right solution to get a photorealistic render of the S7?
-
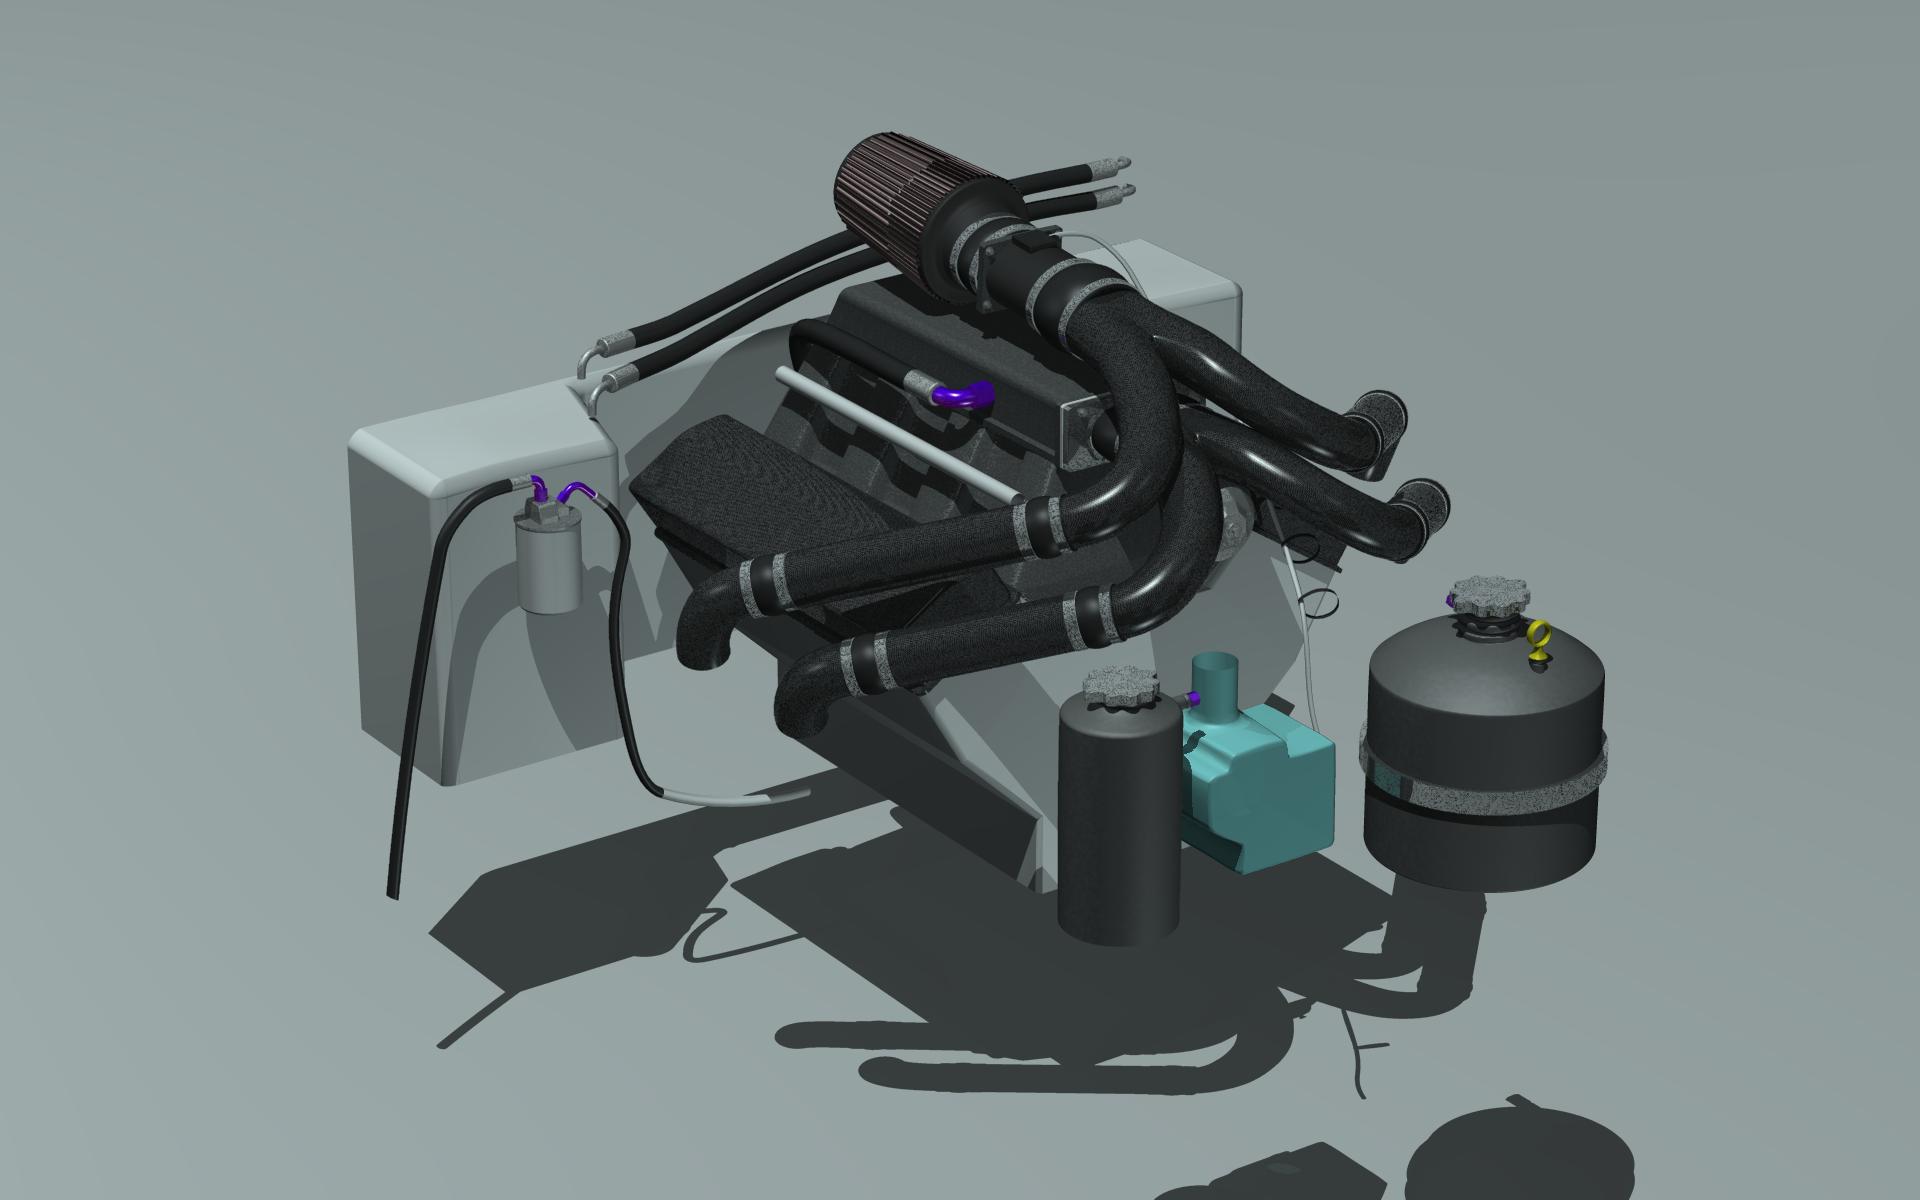
Thanks Scott. Your Chevelle got me thinking about doing a more detailed engine for the S7. As far as the rendering goes, I'm not sure why the S7 turned pink in the skylight setup. The settings are not that much different from other lighting setuup, it's just that the renders take so long that I get somewhat frustrated about putting in another 3 hour run just to find that the latest small tweak in the lights ruined the render. That's why I'm hoping Dan can shed some light (pun intended) on the subject. I re-read his post on the Retro and will try and see what I can make out of that. There are also several posts about ambient occlusion that look interesting. I feel like I'm out of the loop, cause no sooner does AM v.13 come out and everybody raves about AO. Where do people get info on how to use AO and how is is implemented in V.13 anyway? I'm gonna do a search with ambient occlusion as the key word and see what I come up with. I feel like I ditched school, everybody has done their homework, and I'm clueless.
-
Sorry about the crappy render, but here is an update on the engine progress. Btw, Dan, instead of me having to reinvent the wheel, would you refresh my memory on the lighting settings you used to get your best render of the Retro? I want to render the S7 as large as possible (poster?) but don't want to wait 10 hours for a crappy render due to lighting issues. I tried one render with Yves skylight rig- hey, I'll post that as the second pic - but the body color came out pink, although it renders a cherry red with a standard 3 light setup. Need settings for a multipass skylight setup to render as natural as possible. Thanks
-
T-Dogg, the wireframe isn't very clear about what is going on with those two close splines, but you can really trim down the splines going vertically down the car to get a smoother look. Also, toward the front of the car, it looks like you have a spline going horizontally and vertically. I'd cut that spline and make two separate splines to avoid problems later. Why are those two splines so close together? If they make up the fin, shouldn't they be even farther apart? Like I said, it's a little hard to tell. You're doing a really good job, keep it up. Can't wait to see the finished product. Maybe you can get together with that guy who made the Batman model to create a cool render together?
-
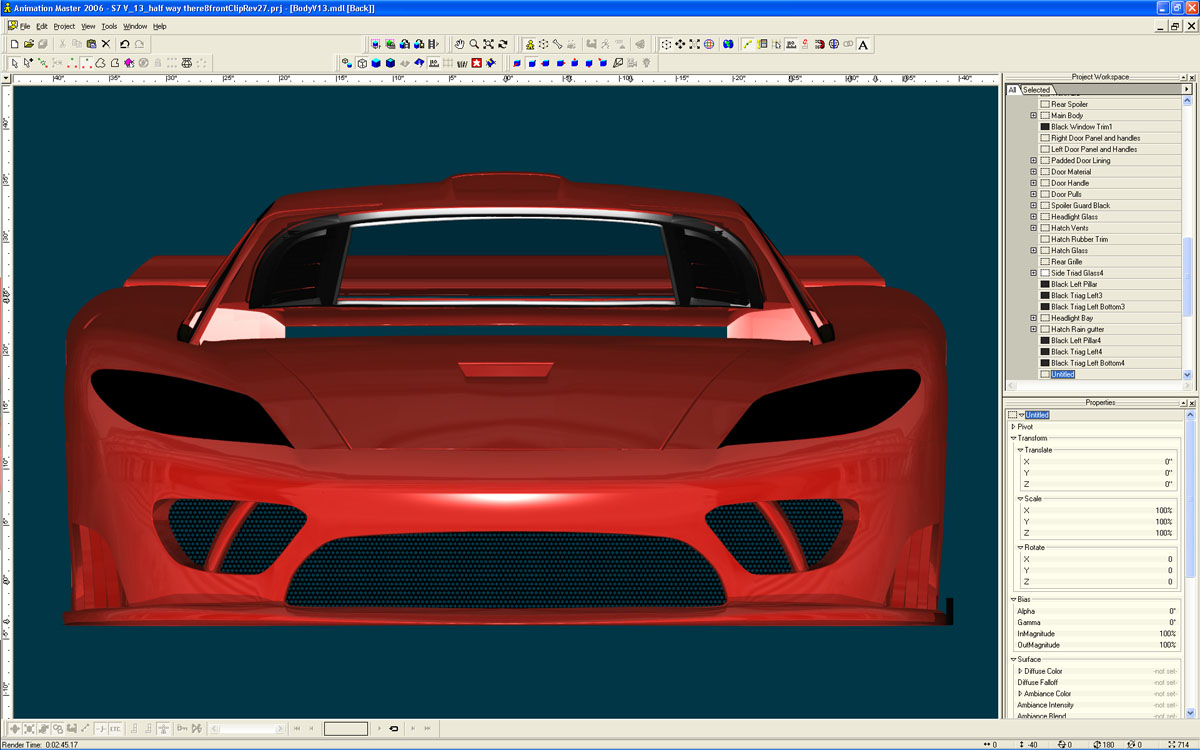
And one more update on tweaking the body. Frontal body shell view.
-
I've had that happen a few times but don't remember how I solved it. Try selecting the offending spline and hitting "y" to insert another cp along the spline. Then try deleting the offending cp. If that doesn't work, I'll try and rack my brain to see if I can remember how I solved it. Oops, wrote this at the same time as Ganthofer. Yeah, like he says also.
-
Have attached arm and hand, let me know what you think...
Eric2575 replied to Roger's topic in Work In Progress / Sweatbox
Yes, when you have a spline that is peaked and you cannot get it smooth by hitting "o" then you have two separate splines meeting at the peaked point. Select the left or right side of the point and hit shift "k". Move the cp off the point to make sure it has separated. Do the same with the other side just like I showed you in the tutorial. Now select the right cp and drag it over to the left cp to join. Then reconnect the continuous spline to the original point of detachment. This is easy to write, but a bit hard to visualize. Sorry. -
Did a little more work on the engine and another color change. Will post a better render with hatch glass and engine vents tomorrow.
-
Give a kid a car and he'll find some muck to drive it trough! Wouldn't it be cool to have a group shot, kinda like TWO of all the cool cars we have made over the last few years?
-
Woohoo, who needs an amusement park???? John, can I take a ride? That's great!!!
-
Glad that Colin Freeman's paint worked out for you
-
Have attached arm and hand, let me know what you think...
Eric2575 replied to Roger's topic in Work In Progress / Sweatbox
Here is the tut link: http://www.hash.com/forums/index.php?act=S...t=0#entry186928 -
Have attached arm and hand, let me know what you think...
Eric2575 replied to Roger's topic in Work In Progress / Sweatbox
Roger, I've almost finished making a Wink tutorial on making a three toed foot. It's very basic and just one of many ways to do it. Hopefully Rodney will find a to get it loaded into the tutorial section if he deems it helpful. If you want, send me your dino model file and I'll see what the problem is. I won't change the original, but will return a modified one with explanation of what went wrong. I'm sure it's pretty simple to fix. Let me know by sending me a PM. Eric -
In the PWS look under materials and open the paint material. After you open the material, you should see a turbulence as one of its properties - been a long time since I looked at the original material. Remove that turbulence and you should be good to go. I actually just looked at the main properties of the paint and used what I found helpful.
-
Have attached arm and hand, let me know what you think...
Eric2575 replied to Roger's topic in Work In Progress / Sweatbox
Roger, select the whole area you were working on and hit "O". It looks like your splines were somehow peaked. -
What causes splines to loop back, or do other funny things??
Eric2575 replied to Roger's topic in Work In Progress / Sweatbox
Roger: You might want to rethink about the way you do your dino foot. As an example of what you are trying to do, I've attached a pic. This is just another way of doing what UnglaublichUSA has described. Try to visualize in 3D. You are obviously still thinking in 2D, the flat section of your foot model. I may do a small tutorial on creating a foot if there is interest in it. Using circles that get extruded will give you much better results than trying to create an organic shape from a flat plane. As a beginning, you could use one extruded tube as the base of your foot, three more for the toes, and another one for the ankle. Splice them all together and you've got the beginnings of a monster foot. Let me know if you want me to do a basic foot tutorial - keep in mind that I may not get to it until this weekend. Keep it up. Eric
-
Ok, started work last night on the visible framework under the rear glass, added the glass and started on the engine. The engine work is really difficult, since there are only shots of the frame and engine as seen from an open rear hatch. As hard as I could, I could not get any clear references of the transmission or any other part of the engine as seen from the side. When you only have an overhead perspective view with all the body panels in place, there's a lot of trial and error in getting a good looking representation of the real thing. Martin: You're welcome. Just wait until you see the completed model. I want to add this model to the high res pics you are collecting for Hash. Not sure if I'm going to add some sort of background or leave it just plain white? Oskar: The body properties (paint) is a variation of Colin Freeman's paint found here (thanks Colin): http://www.hash.com/forums/index.php?showt...amp;hl=carpaint I tweaked it a little bit to my liking - still a long ways off - and removed the candy flake. Play with it on some spheres until you get a look you like and then apply it to your model. Be aware, the panels need to be very smooth, or the paint will show every flaw. You've got a nice start there on modeling cars with your Viper. Just think, every model you do from now on will get even better! David: Thanks! If you ever have a reconstruction that involves a Saleen S7, you know where to get one Hi Stian: Congrats on your contest win! Never mind about the Bismark - wow!!! You were born to do computer modeling and animation. Too bad I wasn't able to attend this years Hash Bash, I really wanted to meet you. Maybe next year
-
I keep watching your guys posts here. Tweaking can get tedious and it's slow progress, but that's how you get a beautiful end product. Your progress has taken a lot of work, keep it up - nice job. Eric
-
Started a new wip thread for the S7 here: http://www.hash.com/forums/index.php?showtopic=23004