heyvern
-
Posts
5,210 -
Joined
-
Last visited
-
Days Won
4
Content Type
Profiles
Forums
Events
Everything posted by heyvern
-
So... who got to put on the last piece of tape? Someone always has to put that last piece in. Was there a big ceremony? Did you wear hats? cool... very cool. I... uh... darn it. I can't say why right now but this is very relevant to me at the moment. That's all I'll say. -vern
-
I agree Rodney. Good idea. You can easily remove the lights as well. A second "version" of that technique would be to add the lights in the model and use actions to move them around and key them on and off or change colors etc. The bonus with action lights... you could change the light TYPE very easily... go from a klieg to a bulb by changing the actions... better yet just duplicate the action and change the light/action object shortcut (can you do this in an action like in a chor?). Another problem I've had with lights in the model that action lights would solve is trying to view the model in shaded view in the modeling window. The model lights over ride the "generic" model light making it hard to see what you're doing. I guess it's a trade off as far as effort. Lights added in an action will need to be constrained and may need additional bones in the model. Lights added directly to the model wouldn't need constraints and Since the lights ARE bones in the model not as many bones needed. p.s. The specific problem here was trying to explain one technique while LIGHTBEING was trying to do something else. -vern
-
Look at the PWS (Project Work Space). Expand the model triangle and the bones triangle... There is a "light" bone. It should be a light icon listed as a bone. Drag the light to the parent bone until the parent bone highlights and then let go. The light "bone" will now be indented to the right underneath the parent bone. It is now a child of the parent bone. You may want to review the tutorials and help files again. --------------- Here is what I started to do a long time ago... Create a new project in AM and just... play. There is no goal, no final image to create. Don't create anything serious. Just... play. Add bones... drag the bones around in the PWS... change the hierarchy... rotate and move bones around... create an action and test every single constraint... fiddle and experiment. Add action objects and see what they do and how they react. You would be amazed how much you can learn by doing this. Reading about it can only go so far. It is the hands on experience that locks it in your brain. Look at the help files. If you see something you didn't know... open AM and try it. If you have trouble with something and learn the solution DO IT 10 TIMES IN A ROW! Do it over and over till you could do it with your eyes shut. Especially something you have trouble with. This process would be the same as if you were using AM to do "real" work on many projects or doing a bunch of tutorials over a long period of time... instead you are sort of... focusing and speeding up the memorization process. I use to be frustrated using the mesh flattening feature. So one day I just did it over and over and over... changed the variables till I understood EXACTLY what was going on. Now I can do it with my eyes shut... well.. not quite shut... I can squint my eyes really tight and still do it. I did that with bone constraints... just applied and tested every single constraint (except that... motion capture constraint thingy) By doing this with an "unimportant" project... one that serves no purpose... you aren't concerned with results. You are concerned with seeing how these features work together and what they do. Often during a "real" project when I have trouble I open a simple project to "practice" or learn that one thing that is giving me headaches. Once I get the hang of it I apply that to the real thing. I do this with features I don't understand. I just fiddle and doodle and see what happens. I did this with composite when it was first added, and hair when I just couldn't figure it out. I actually loaded a project and did all the things I suggested to you in this thread. I tested all those things so I knew what was going on. Don't worry... you can't break anything. p.s. I still need to fiddle with composite some more. -vern
-
If I rub my magic lamp could I wish for a light? Seems appropriate. Thanks Rodney! You are a wealth of information. -vern
-
You want to add the light in the model window not the action window. the light doesn't need to be "locked". It should just stay where it is in the model window. If you place the light in an action it won't be attached to the model. You could put a constraint on the light in the action (same as you would in a choreography). It would be simpler to just add the light in the MODEL window. Also if you are creating an action for the ship/light model you need to add a "parent" bone and assign the mesh of your ship to it in the model. Then make the light bone a child of the parent bone. If you are only creating the action in the choreography this parent bone isn't needed. p.s. Uh... you did do the tutorials right? -vern
-
Man it's like... some kind of mind meld in here today... "lights in models" is in the air... I suppose there would be two ways to do this and that might be the confusion since both have been suggested. You could add the klieg light to the model and rotate it into position to point exactly where you want it. Or you could have a klieg light in the choreography, rotate it into position and use a "Translate to" constraint to "lock" it in place (be sure to click the "Compensate mode" button when assigning the constraint). If the light is in the model and you move the model in the chor the light just goes along for the ride without needing to do anything else in the choreography. If the light is in the chor you will need to use the "Translate to" constraint aimed at the model to keep it attached. I am assuming this is a "functional" light that is part of the ship, like on Star Trek. The Enterprise had a light above the call letters... like a license plate light on your car. p.s. Did you hear they lost Scotty's ashes? He went for a ride in space and they lost the capsule when it landed. Luckily he had his communicator with him so they can track it (it has a locater signal... thingie). I thought they were going to leave the ashes up there. Apparently it is just a ride. -vern
-
I may be wrong and it's been ages since I added a light to a model... but I thought you could drag and drop a light into a model? Even hard core AM users ask newbie questions. -vern
-
Yes you can add a light into a model: Create one street light model and place a light in the model. You move the light in bones mode in the model window. Now place multiple shortcuts of the street light model in your choreography. Using multiple copies of one street light model in a choreography is more efficient that creating a single model with many street lights. -vern
-
We can celebrate my birthday as well (06/27) I never get parties anymore. And please please don't spend more than $500 on my gifts. That is more than plenty. Or you could all pitch in together and get me a new car or a new computer. That would be special. Fine fine... no gifts... but I'm bringing hats dammit and I will make you wear them. -vern
-
Thanks Matt! I can sleep soundly tonight. I still think he would have set off some kind of alarms. When does beta radiation become final? There never seems to be a "final" release of beta radiation. After all this time you think they would have finished it. -vern
-

V.13 pastes new object slightly offset...
heyvern replied to Kelley's topic in Work In Progress / Sweatbox
This happens when installing an update or new version of AM. The old settings will go back to the defaults. The defaults for pasting/extruding have an offset of like 10 pixels in the X and Y and the Use CP spacing is checked. When ever I install a new version of AM I go in and change some of my settings. -vern -
Matt should have special privileges to rial the management. Like suppose if Superman jay walked? Would they give him a ticket? If Albert Einstein added up his golf score wrong would he be thrown out of the club? I don't think so. p.s. How the heck did Clark Kent ever get through the metal detector at an airport???? I lie awake at night thinking about that. -vern
-
Martin's not annoying... in this case. I agree with him 100%. I think though this should be in the guidelines somewhere. Really big letters since some people don't realize you have to actually read some of the software manual and not just put it under your pillow at night. Isn't it really stupid how "Read the manual" has this negative connotation? It is considered too harsh and mean for the sensitive ears of new users when in reality it's the best advice to give anyone. Students need to put in as much or more effort than the teachers in my humble opinion. -vern
-
Write a pilot episode (don't produce it, write it). Then create a short trailer. Very short. You are proficient with Photoshop and Flash? But you are not an artist? Hmm... You may want to get a second opinion on that. You either need to find someone to do the character design and learn A:M or learn it yourself... or both. What ever you do... keep it SHORT to start with. Do a simple short test "episode"... something that you could use to show around. Maybe... big maybe here... you could use it to get others interested. Use your artistic partner to draw character designs and simple story boards. You need something WRITTEN DOWN. A solid story and characters before even considering the animation. It is a cut throat business and you will most likely fail. The odds are against you from the start. Most of these things fail. That's just the truth. For every "hit" there are a thousand flops. Even the hits fail (veggie tales?). If you want it bad enough that shouldn't matter. It is as realistic a proposition as you want it to be. Just start small so you don't burn out. If you plan to do this for the money and fame than just stop now. Start with NO expectations WHATSOEVER. There have been many many many ideas like this on this very forum over the years that have never seen the light of day (some of them are mine). It can be discouraging to have what you think is a great idea and just not have the resources, the time or the energy to make it happen. Start small, do whatever it takes to just get it done before the enthusiasm fades. If you do it for fun and because you believe in it first and foremost you are more likely to put that feeling into the work. And lastly, I have absolutely no idea what I'm talking about. It just seems to make sense to me from my own experiences and from what I've observed. Good lord I sound old and bitter! -vern
-
Hmm... It says in the manual to look at the properties when changing pivot rotation? Hmm... as far as I know pivot rotation doesn't show anywhere in the properties... unless this is a new feature added in the latest which I haven't seen yet (I am still using v12 and v13). I just sort of do it by eye. from the left view I hit the "S" key to change the pivot rotation (using scale I don't accidentally rotate the mesh when dragging the pivot) I can see the pivot handles and grab the red one and drag it back. It doesn't have to be "exact". As far as I know you won't see any feed back on the rotation in the PWS but you will see that that "red handle" should point backwards. What is really happening is that the Y axis is now pointing straight back. You rotate the X axis pivot handle but this actually is done so that the Y points back. Y is "up down" and X is "left right" so by rotating the X pivot the Y goes front to back. Don't know if this is in the manual but I also make a group FIRST for flattening so I only have to do that pivot rotation once. Changing the pivot of the group will stay with the group. If the flatten isn't correct I can easily select it again and change the pivot translation or rotation. Remember that if you do any other transformations like scaling on that group it won't do what you expect because you changed the pivot, Y is back to front, and Z is up and down and if you moved the pivot point back to adjust the flattening this will effect transformations as well. You also don't have to use -90 degrees for the pivot rotation. Sometimes depending on the model changing the orientation of that pivot slightly up or down will help. Basically that axis pivot rotation "points" to the direction of the flattening. I had a face that was turned slightly up so when I flattened I rotated that pivot a little lower. I was getting some odd "squishing" when flattening with the pivot exactly at -90. Afterwards I rotated the whole face and scaled it to 0 on the z axis (front to back). It seems tricky the first few times. As you get use to it it becomes really really easy and second nature. -vern
-
Chic with hair... You are evil and mean teasing like that. p.s. Strangest looking... chic... ever. But kind of cute. His hair seems too... "hard"... either not feathery enough or not fuzzy enough. Depends on what effect you are after. Good start. -vern
-
The tutorial would be specific to the image application. It wouldn't have anything to do with AM at all. If you use The Gimp, you would need a tutorial for that.... Photoshop would be different steps... Paint Shop is different... etc etc. The only concept to understand is that the 3 channel color image (RGB) has an extra channel (alpha) that is used by AM to "hide" the parts of the image that are masked by the black values in the images alpha channel. This is a universal concept used by all kinds of applications, video, 3D decaling, Flash etc. If you open that color JPG image I created, in an image application then created an extra alpha channel in it with what ever application you are using, you would open the second image (the black and white image), select all and copy/paste it into the new alpha of the color image then save as a 32 bit targa. I am only familiar with how to do this in Photoshop. -vern
-
I use Photoshop but look for The Gimp on the internet. It has many of the same features and is a free application. This took 5 minutes in photoshop to produce. These are JPGs which don't support alpha but you can see what you need to end up with. The first image would be the color part of the image. The second image would be the grayscale alpha channel that would mask out the background. To work this would be all in one image. 24 bit with an 8 bit alpha... 32 bit targa. -vern

-
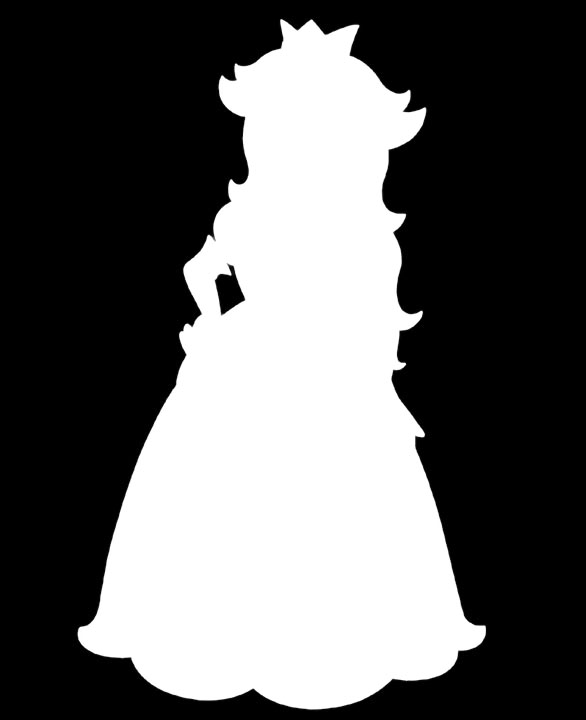
You need an image editor that can save out TGA with an alpha. First in the image editor select the white area, with the "magic wand" or similar tool that selects contiguous pixels of the same "color". Save this selection as an extra alpha channel in the image. It should be "black" where the white background is and "white" where the image "shows through". Save as a TGA (targa) as 32 bit. This actually depends on the application and how they describe it. You want a 24 bit color image (RGB) with an extra 8 bits for the alpha. In photoshop this is described as a 32 bit image when saving a targa with an alpha channel. In addition to the above if you want to avoid "fringies" around the edges of the princess image you should fill the white area with black AFTER creating the alpha channel. You may have to go and paint in the edges to make sure there are no white background pixels around the image. The alpha will mask out the background part and having total black completely around the image will prevent any white or gray pixels from creating a fringe. You will end up with a perfect image completely cut out with no fringies. -vern
-
Not in the program but there is a free plugin that does this: http://www.sgross.com/plugins/ It's called "Autosave". -vern
-
You need to reinstall the application. Something got "broken". Or... There is also a tab in the preferences (tool options?) for... links to folders. Can't open AM right now to check what it's called. It has directory links to your plug-ins, library etc. I just can't remember off hand what that darn tab is called. Just check through them until you see one that has paths listed for libraries and plugins. If that isn't set to the correct location for your plugins folder in AM then BINGO no plug-ins. (this happened to me a long time ago and I was able to relink it.) However if the plugins folder isn't even on the computer for some reason reinstalling should fix it. -vern
-
Translating a bone in an action or choreography is a "two step" process. Click once to select then, click/drag the base to move it. If you want to rotate the bone grab the tip and drag and it rotates. As was mentioned this might not be good since dragging the tip for rotation won't limit the axis of movement. You could rotate in unexpected directions. The problem occurs with many bones overlapping. It can become difficult to select a bone for translating. It might be easy to click on the tip to select it if it sticks out, but then you have to click the base to move it. You can always use the arrow keys to move a bone or If you want to limit translation select the bone and press "N" and you can drag in a specific axis and you won't have to worry about the other bones that overlap. -vern
-
Can a bone in Model 'A', be a child of Model 'B'?
heyvern replied to Kelley's topic in Work In Progress / Sweatbox
You could use a scale like constraint. I believe you could target the model of the... whatsit... whatjamcallit... the model that is scaling. If either of these models are scaled differently initially you probably need to use that... dang... what's it called... compensate mode... phew. My mind isn't what it use to be. You can constrain bones from one model to another model. So the muzzle flashes could be constrained any way you want. Almost like "attaching" one model or bone in that model to another model or any bone in that model. So yes you can make the muzzle flash orient like anything you want. -vern -
I think this could be the sound of "one hand clapping"... with itself. -vern
-
Yes, 100% cross platform on the same disk. I have been doing this for years. I have Mac and PC and run AM on both machines. -vern