thefreshestever
-
Posts
821 -
Joined
-
Last visited
-
Days Won
2
Content Type
Profiles
Forums
Events
Everything posted by thefreshestever
-
a mantasharctopus! looking good so far...
-
nice... the sound is better than the original one... i didn´t spend much time on finding the right audio, i just took the first grind i could find on youtube...
-
thanks. the best Thing about this style is that it renders really fast. this scene with 10 models in it took only 1 min 6s in 720p, 5 passes. but i will render it at double size with 4 passes to get the depth map smooth. that will take a little bit longer, but 3-4 min per frame is still pretty cool. i'm wondering why the multipass can't be applied to the depth map, too.
-
too bad. i think you should make a trailer... without knowing what the final result will look and feel like, people won´t invest in it. it doesn´t have to be long, just a few seconds. but you can show tar´s personality and the overall look and feel without having to explain a lot.
-
rodney, the sound is slowed down 400%, just like the animation... go on youtube and search for skateboarding and grind, you´l notice that the sound of a grind is much much brighter... what do you think of the sketchy look? i´m not 100% there yet, the models and the textures still need tweaking

-
i had to let him grind down that rail once, just for fun regarding the look: i´ve decided to go for some sort of sketchy low-poly look with hand-drawn fills. let´s see how this works out. thegrind_lower.mov
-
that looks fantastic! one thing, though: the pot seems to be too clean compared to the stove.
-
@ robert: thanks for the tips. but i don´t want to have outlines, i want the no-outline cartoon look... i was going for a look similar to the short"salesman pete" or something like that, which isn´t all flat shaded but still very cartoony. regarding the character: it´s not a character that will be in the video, but i guess i could make the limbs a little bit thicker anyways. @ david: thanks.. that´s what i suspected...
-
a new client wants an animation which explains the order process of his new business idea, it´s a special kind of courier service. they want the animation to look like it´s a real cartoon, but it should also look modern & stylish. so right now i´m trying to find a style that looks like a hand drawn cartoon, but also modern and somehow hip & cool... i just took a character i had and retextured him (the characters in the animation will look different) and modeled a few props and buildings. it´s more about the general look and the render style first. any suggestions what might get it look even more cartoony? david, if you´re reading this: what would be the proper setup for perfectly round arm and leg bows with the squetch-rig?... i can get it only 95% round, there´s always a slight kink in it, no matter how i weigh the cps... right now the splinerings of the arm from upper to lower are weighted like this: bicep bow1, bicep bow2, 70%bicep bow3/30%forearm bow1, 50%bicep bow3/50%forearm bow1, 30%bicep bow3/70%forearm bow1, forearm bow 2, forearm bow 3.. i guess i´ll have to add either more splinerings or delete two of them, so that there´s only one splinering left around the elbow, but then the arm will always have a bow.... but for a cartoony character that might work. i´m just asking in hope you might have a magic trick for that up your sleeve
-
i like the characters a lot i´m curious about the final result!
-

Animation Contest - Entry 2 - Pirates
thefreshestever replied to higginsdj's topic in Work In Progress / Sweatbox
great stuff... i´m eager to see the final result! -
very nice! the new version looks great, although i liked the pale red in the earlier version better, looks a bit more washed out by the sun.
-
pretty cool.. thanks!
-
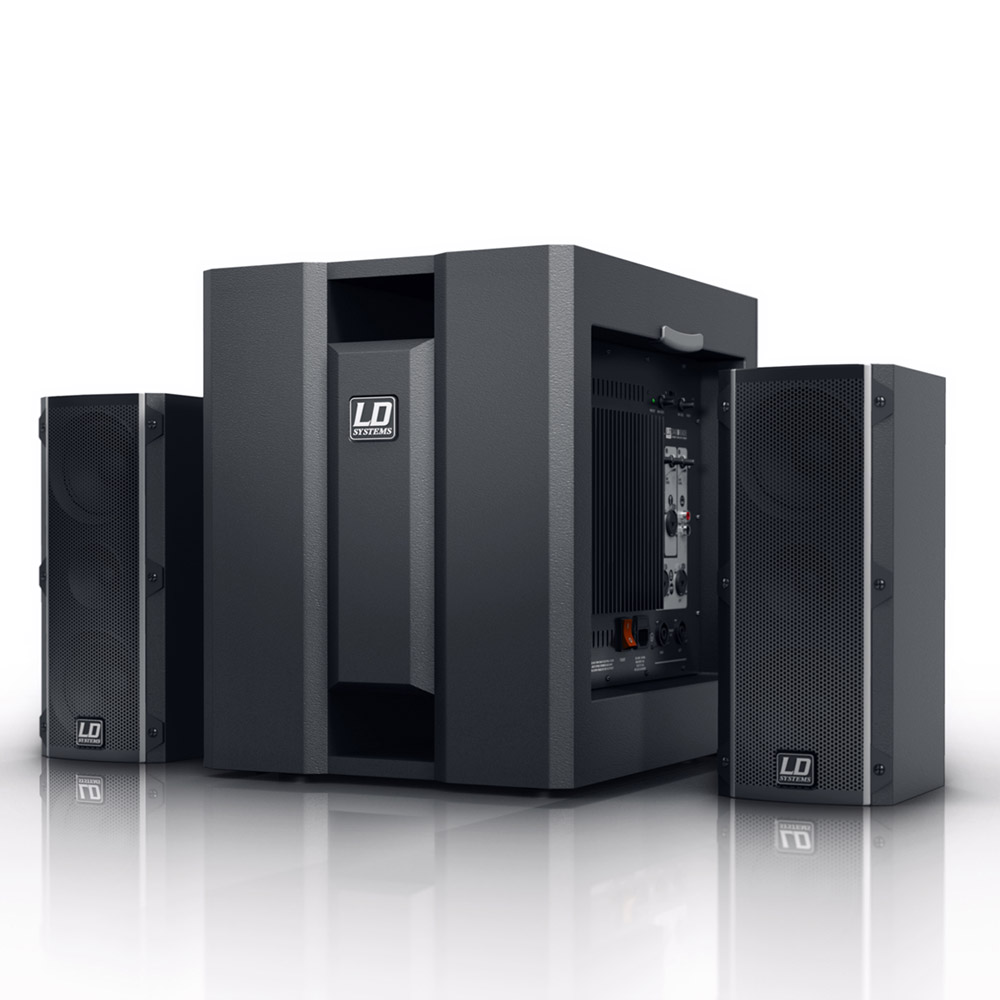
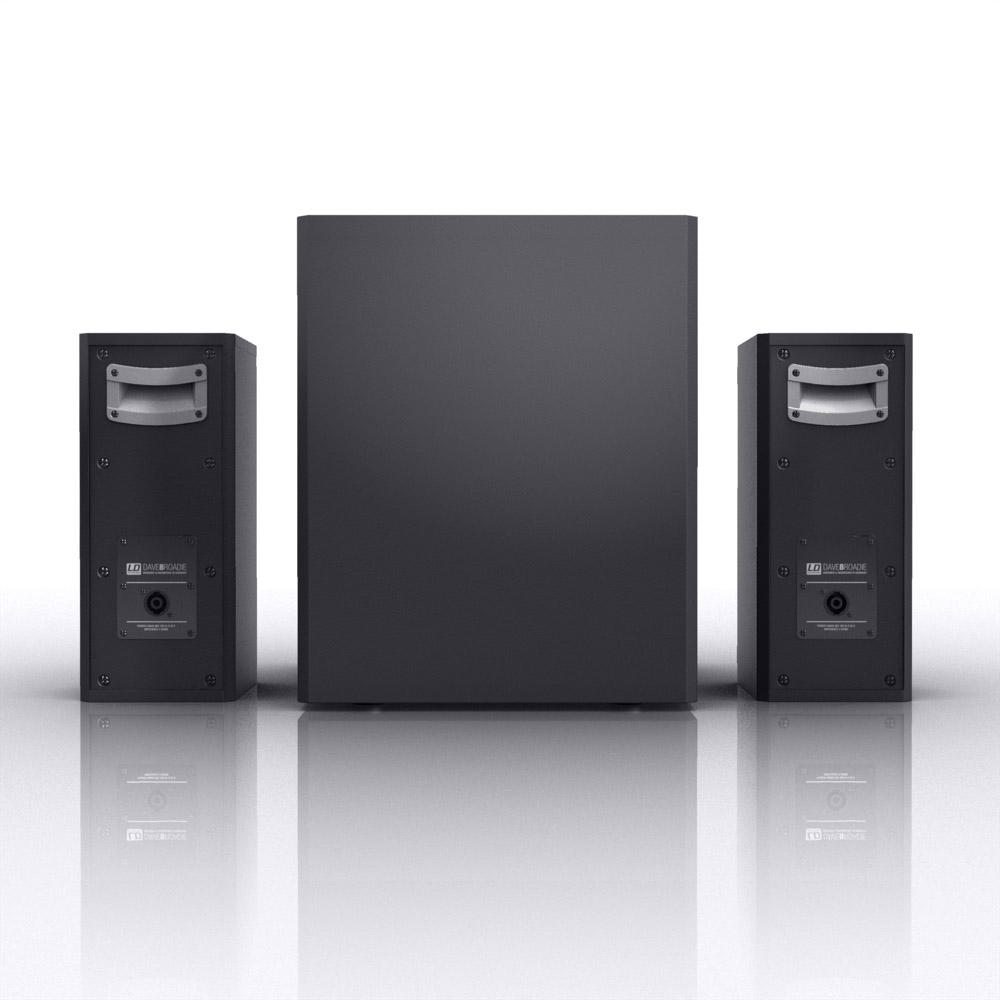
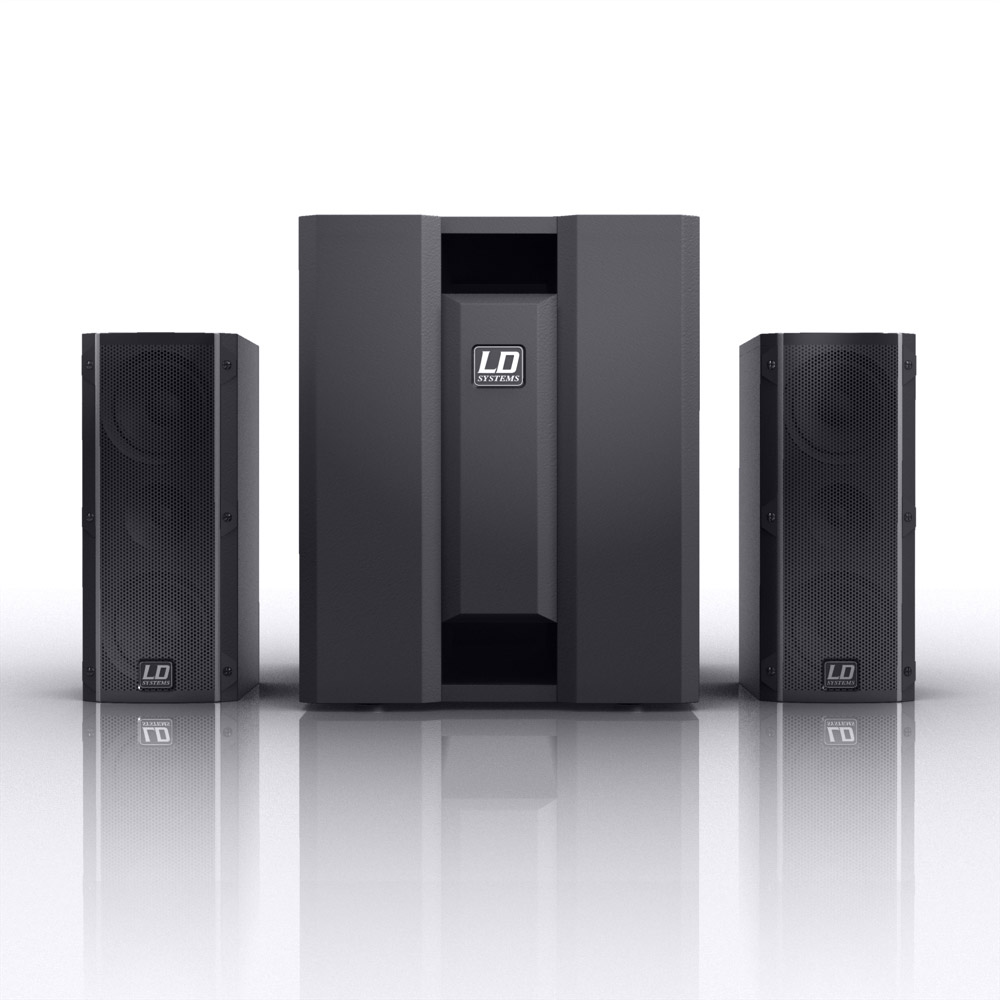
thanks, gerald. the model for the wireframe is actually the final CAD-model, which the technician at the speaker factory exported for me as an obj (i couldn´t use my initial design-state model, because it differs too much from the final product), so i could import it into the plexus plug-in in after effects. i had to do a lot of clean up work on that model, because it was awfully complex. the obj-file i was given had a file size of round about 30mb, you can imagine how many details that model had. so i imported it into a free 3d-application (blender) and deleted all the stuff i didn´t need for the wireframe, separated the speaker, the handle, and the ampflifier module, exported everything as single obj-files, imported them in plexus and put them together, so i could animate them separately. the horn flare was not included in the model, so i made that in a:m, and exportet it as an obj. (because modeling in blender is a pain in the ass ) edit: not only modeling
-
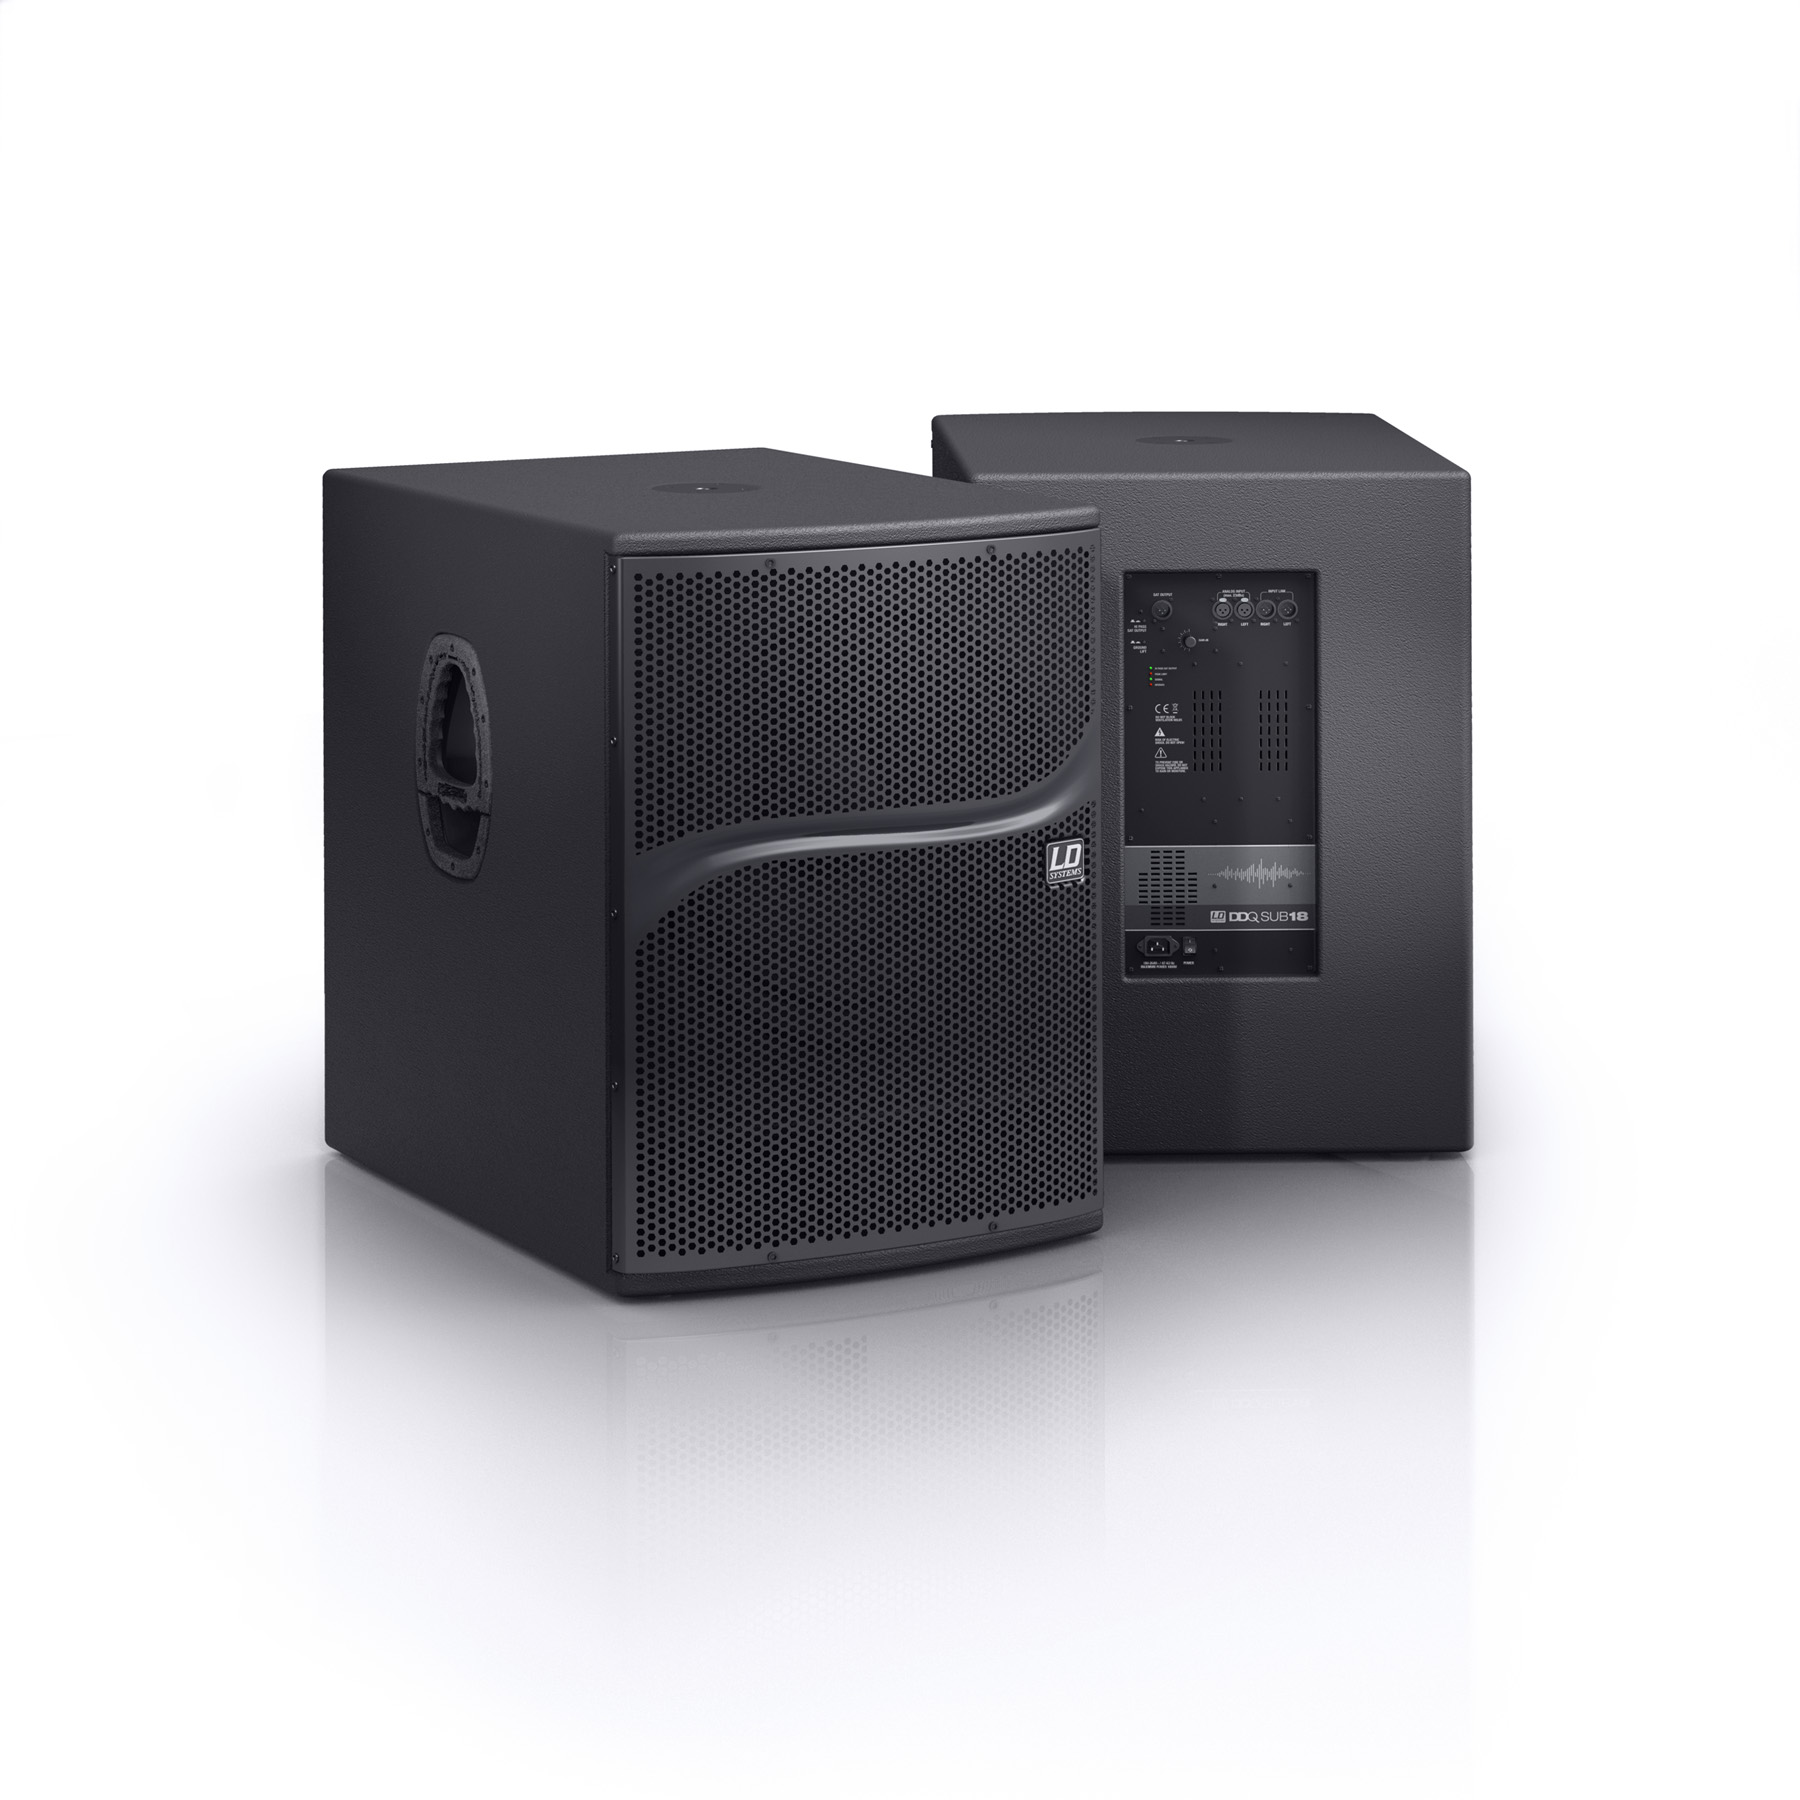
here´s some stuff i´ve made lately with the help of a:m. 1. DDQ Series video: those are touring class PA speakers which i´ve designed two years ago. i did the layouts for those speakers with a:m (they looked a little different in the development stage, some things were too difficult to realilze in production). so the design for the speakers was made in a:m, the speakers you see in the video are real video-shots though. the only 3D footage besides the lines-stuff was the compression driver, i had to model it in a:m, because the prototype we filmed didn´t have the right driver built in the animation was made in after effects, the lines with a plug-in called plexus. 2.DAVE8Roadie i have not designed this speaker system, but i´ve had to model and render it in a:m, because the prototype wasn´t ready yet before the exhibition, and my client wanted to have ads and flyers for this product. it took about one day to model, another day to get the renderings out the way i wanted them. [vimeo]60318993[/vimeo] https://vimeo.com/60318993
-
thanks guys.. @ rodney: cameo is a sub-brand of my main client adam hall. they are one of europes biggest distributors for studio and stage equipment. i created the whole branding for cameo, the name, the logo, the mascot, and everything else. the first animation was done in 2012, when the brand was first introduced at the prolight&sound exhibition in frankfurt. this year i had so much to do with all the other things (catalogues, ads, websites, 3D renderings of unfinished prototypes) i had to create for the exhibition (i don´t only do cameo, i make the advertising for all the other brands of adam hall, too), that i only had a few days left to the start of the exhibition, before i could start animating. the last frame just rendered out one day before the exhibition, and i still had to put everything together in after effects. i will open up another thread, where i show the product-renderings and some other stuff i´ve made lately that involve a:m....
-
some dance-animations i´ve made for the prolight&sound exhibition 2012 and 2013. i´m not tooo happy with the second one, since i´ve had only 4 days to animate, so there was no time for polishing. turns out animating a robot-dance is kinda tricky, who would have thought? BiHPOnIOy8c dosPLVOo9xk
-
if you really want to have some fast moving objects without motion blur, and some slower moving objecs with motion blur (not sure why you´d want that), i´d suggest to render without mb and do the blur in post. you could render out those objects seperately with an alpha channel and then composite the whole thing in after effcts for instance and just apply motion blur (and control the intensity) to the layers you want. good mb plug-in for after effects is reelsmart motion blur.
-
i´ve tried it on a few characters, all have five pointers and hooks... worked fine. maybe it´s not the default because it´s someting that has to be calculated and can slow things down on a complex character?
-
wow! this IS big!!! makes everything silky smooth THANKS!
-
i don´t know if something similar has been postet before, i couldn´t find anything. we all know the problem: you love the soft AO shadows. but when you light a scene and you need to light the ground model as well, your soft shadows around the feet of your character will almost disappear completely, depending on the intensity of your additional light source. if you don´t need to light your ground model, you could prevent that with the use of light lists. but let´s say you want to have your character standing in a fairly bright spotlight, and you want the spotlight to effect the floor as well. your fantastic looking shadows will almost completely be gone. so here´s the solution: create a new bulb light, set the fall of to a low range (in my case 25cm), and the light intensity to something like -15%. turn off shadows and specularity for this light. place a few of those bulb lights slightly above your characters feet in the chor (in my case i´ve used 4, 2 for every foot, more lights with lower values will get more precise results). then constrain the lights to the characters feet (in my case i´ve constrained it to the foot ik nulls and the toes bones). in the PWS drop those lights on the ground model to create a new light list, activate checkbox "exlude light from models without lightlists" in the lightlist-dialogue. you will now have soft shadows around your characters feet, if you raise the characters feet the shadows will get lighter and lighter until they disappear, just like shadows do. and the best part of this is: 1. absolutely no additional rendertime, it´s just absorbed light, no shadows. 2. you will see those shadows actually in realtime in the chor video.... because: it´s just absorbed light, no shadows i hope this is helpful to some of you.
-
great model, really really cool! would be even more realistic with a little DOF.
-
i´ve used trapcode form and trapcode particular for those animations, they´re different to element3D. in trapcode form you actually can import obj files, but you only can rebuild this obj with particles, not use the obj as particle itself. but since element 3d is on sale, i think i need to get it, i wanted it for a long time. maybe TODAY! thanks for the tip! and yes, of course, more particles increase the rendertimes. ja, ich bin noch in hh, gehe hier auch so schnell nicht mehr weg... mit heute abend kann ich noch nicht so ganz sicher zusagen, aber ich versuch´s...
-
it works just the way i imagined it thanks again. here´s a quick test: boxboywalk_low.mov
-
thanks the music of the first clip is the intro of o song called outubro of the brazilian 70s funk/jazz band azymuth. the second one is average fruit by quadron. a:m does fluids, but that´s a totally different approach. like fluid simulations in other 3D software a:m fluids simulate the whole volume of a fluid, that´s why fluids in 3D are so rendertime-intensive. the particle plug-ins i use in after effects just have particles on a surface-grid (in those cases, the emitter can be a sphere or a box, too), and the flow is emulated by a fractal noise field. maybe you could achieve something similar with a:m, you could take the ocean rig and have the surface emit sprite particles or so. but those after effects plugins render fast (the clip with the green ocean rendered about 8 hours, the squid invasion clip rendered about 3 hours) and have a lot of settings, plus you can control different parameters direcly from the waveform of the soundfile, the particles cast shadows etc...