Darkwing
-
Posts
2,708 -
Joined
-
Last visited
-
Days Won
1
Content Type
Profiles
Forums
Events
Everything posted by Darkwing
-
Well after a bunch of searching, I found a few pics from the comics which I used as rough rotoscopes. Haven't done much tweaking since the CFA, but this turned out surprisingly well. Usually there's a lot I have to tweak after a CFA

-
Thanks. My big concern right now is what to use as a reference for his head. I would like front and side rotoscopes for it.
-
So how's this look, better? Seems the inside of his foot needs some tweaking though
-
 How would this work for making a lasso? That's something I'm curious to see
 -
Right! Would you say that goes for the ankle too?
-
Well, I tried some feet. This is my first time on feet. I dunno, at some angles they look all right, at others, not so much.
-
So muscles here has turned into some form of Superman now... don't ask how or why
-
Yeah, what happened there is as test, I lifted the center up some (cause pecs aren't all one piece obviously), however, with the current density of the mesh, it makes the pecs become pointy and lose some definition, so I got to go in and add some more splines around the center so I can sculpt more properly
-
Thanks, here's some more, though I see I recently messed up a bit under the pecs, but that's an easy fix
-
Okey dokeys, so here's Mark 2. actually I didn't model from scratch, just manipulated my current mesh to fit the rotos that Photoman provided EDIT: Oops, I can notice some spots now that need fixing!
-
Yeah, I should've gone into that. The key with faces and especially lips because they do a fair amount of moving and posing, is to keep it all legal 4-point patches, meaning two splines per CP and four CPs per pathch. You will most likely get to a point where a 5-point patch is required, but the further out in the face you can push that, the better, because then it won't be experiencing as much movement and won't be that noticeable
-
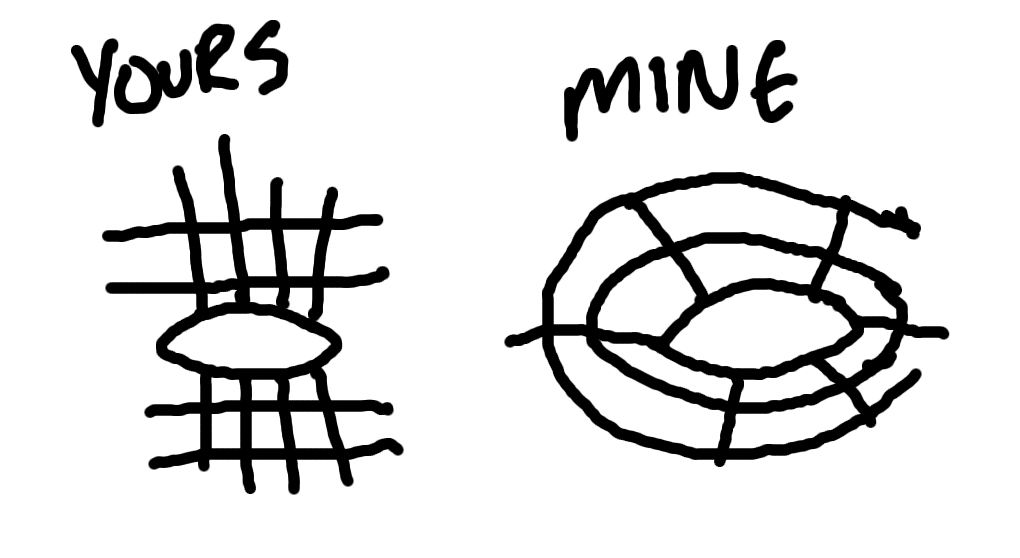
Okey Dokeys, a few things stand out to me. For starters, that's an improvement on the density, but it can be lowered even more. Try to adapt those concentric rings to the mouth as well as the eyes. Try to avoid the grid thing as much as possible. In fact, the onle really "grid" type line will most like be a center spline running through the middle of the face horizontally. So time for more illustrations! The red indicates splines that can and should go. The green is splines that should most likely go, but I can't tell without working the model myself. Thirdly, the yellow are places where trouble will arise when trying to pose/animate. Now in this illustration, I've drawn up a mock mesh. Though this won't be entirely accurate due to it not being modeled, you can get an idea of what the mesh for your face should most likely look like. The nose only needs a couple splines, only have splines where definition is necessary, namely, the nostrils (which even I can't model yet). Notice the rings around the mouth and the eye and how some even flow into each other. It's a good idea to use hooks to end splines when they become unnecessary, however, don't use hooks or five pointers on key ares, such as the corner of the mouth as that will cause creasing and other artifacts once posed.
-
It's a bird, it's a plane, it's....thom?
Darkwing replied to Darkwing's topic in Work In Progress / Sweatbox
Thanks for the tips, I'll give em a try in the morning -
It's a bird, it's a plane, it's....thom?
Darkwing replied to Darkwing's topic in Work In Progress / Sweatbox
Yeah, something I noticed yesterday and why I didn't see it months ago is that his arms swing up too late. They should swing up to give him momentum to spin around, not his spinning causing his arms to go up. -
Here's a pretty picture to help illustrate
-
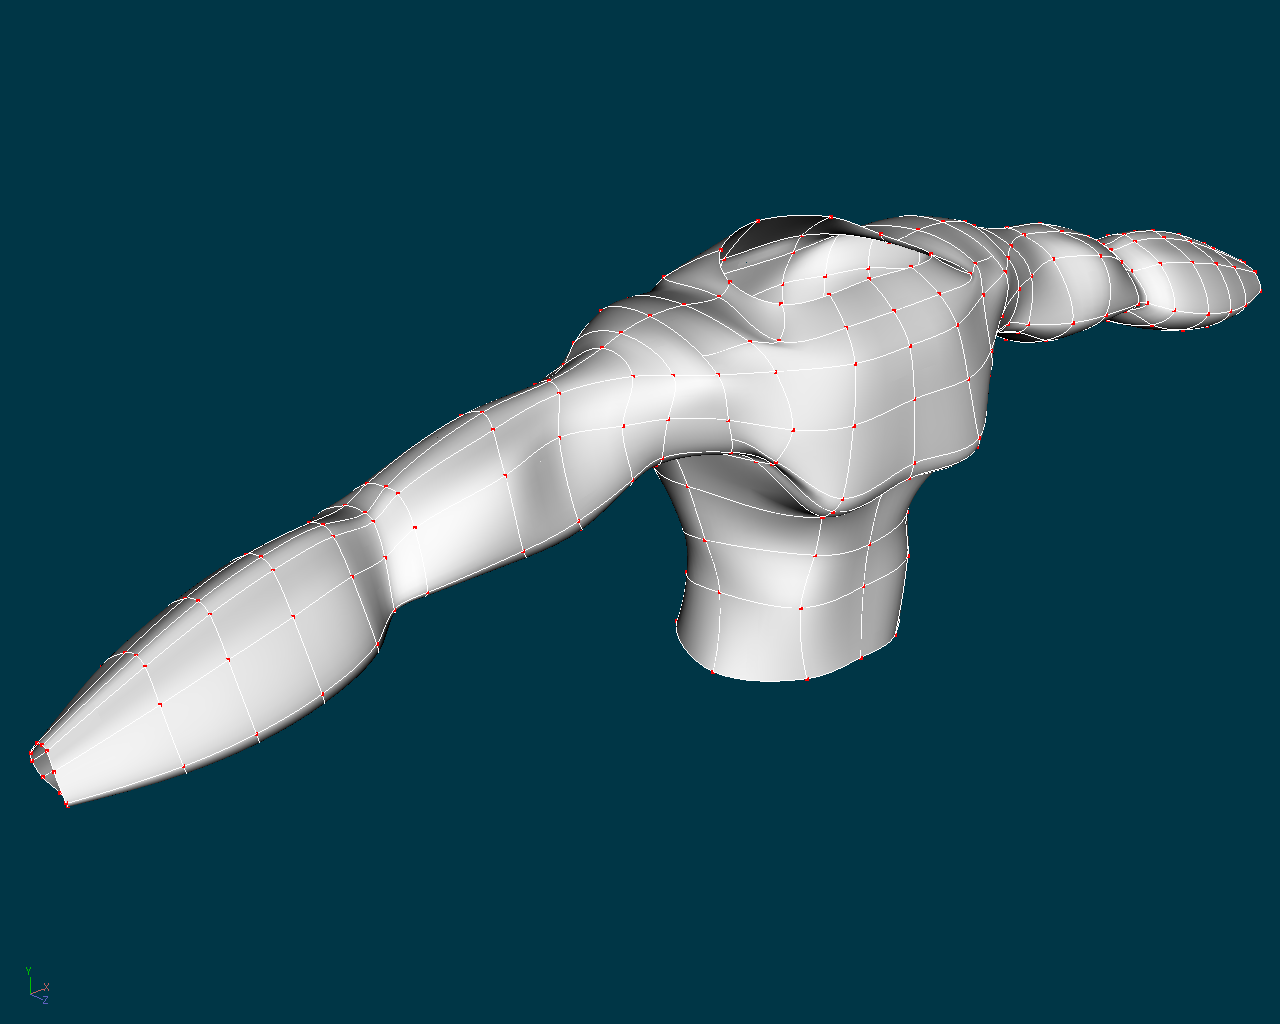
Just the circular motion of the splines around the eyes. Look at my meshes there and you'll see how the eye socket is circular, than almost like pond ripples, the splines go in a circular direction
-
You may find this thread helpful: http://www.hash.com/forums/index.php?showtopic=37415 There was a fair amount of advice and examples and stuff that should help, cause it helped me
-
Not bad for 2Am, though the mesh is considerably more dense than need be
-
Oh...wow. Thanks a billion dude!
-
How do you get anything done if your renders take 15 hours per frame? I can't imagine doing an animation
-
David Rodgers Animation Master:A Complete Guide
Darkwing replied to mulls's topic in General Discussion
Heh, I got this as a Christmas Present a few years ago, it's certainly a handy resource -
Yeah, especially with the arms out type thing, there' very little to judge by whereas if the arms are down, you can judge their length by how far down the thigh they go, so yeah, guess it's time to design a superhero
-
No, this isn't for a specific character. As I said, I was just kind of following Rogers' tutorial and he just kinda went at it. Of course I'm making mine for more realistic proportions, the character he was modeling it for was short and had different proportioned body parts for the look he was going for. Perhaps I shall draw up some sort of superhero character or something to use
-
Wow, that's really cool. And it's done with cloth? That's nifty!
-
Well, I've tried following David Rogers' tutorial in his book. Here's what I have so far. I'm not necessarily going for 100% anatomically correct, but I would like that muscular/superhero style look. Please, crits are welcome as I'm not very good at the organic side of modeling Fortunately, about a year ago I did this fairly intensive study of the muscular male body for some superhero drawings I was doing, so I have a fair idea of the proportions on paper, translating to 3D is a bit trickier for me