-
Posts
2,708 -
Joined
-
Last visited
-
Days Won
1
Content Type
Profiles
Forums
Events
Everything posted by Darkwing
-
Thanks you ever so much! Works like a charm!!
-
I was doing some digging through the shortcuts in AM, looking for the Hook CP. It appears that there isn't one that we can customize. I say this because I use a Magic Mouse and with the magic mouse, you can't left click and then right click simultaneously, so I was thinking, oh, if I can just change it's command so that I hold down a key and click, that would work. So if there is a way to do this that I missed (cause digging out my older mouse and connecting it for one click is a bit of a pain) please let me know. If not, perhaps it could be added to the development of AM to be able to customize the Hook CP command. Thanks
-
Ha ha ha ha. Well his browser should be spell checking, it just amuses me to do this sometimes, it's all meant in fun Jason
-
So now isn't a good time to point out that mascot is spelled with one t is it?
-
It's a bird, it's a plane, it's....thom?
Darkwing replied to Darkwing's topic in Work In Progress / Sweatbox
OK, so I have a question. I'm trying a new sequence, one in which dude is strutting forward. A car is in his path. When he comes to the car, without stopping, he looks and pushes the car to the side. So I have the strutting action created and applied to him in the chor, so how do I go about making his arm go from whatever position it's in now in the action, to pushing the car, to going back to where it should be when he's done. DO I have to in the chor set a keyframe on any bones I think will be effected where it starts and then go about it manually in the chor? Cause I'm not entirely sure how one character animates if the character does more than one thing at a time -
Sowwy Jason End of January, I had an idea, started today and I'm already halfway done the modeling. I was kind of expecting it to take a few weeks, but guess not Gives me time to focus on better rendering and lighting and texturing I guess
-
Ha ha, yeah, in fact don't most countries use thee dd/mm/yyyy as opposed to mm/dd/yyyy? Well, we do in Canada
-

It's a bird, it's a plane, it's....thom?
Darkwing replied to Darkwing's topic in Work In Progress / Sweatbox
Well, been a while since I tinkered with this, kinda forgot where I was at so I fixed buddy's arm here and re-rendered shot10.mov -
We're so nitpicky But hey, what can you expect from animators anyhow?
-
Hey there! Well, this is something that I've done extensive fiddling with as my partner uses the OBJ format for his models and this has proven to be very challenging. The max export does not export texture maps and trying to load .max models from AM into other software generally causes that software to crash or not work. OBJ is the best so far for the export/import process. The OBJ for sure exports the diffuse colour of the groups, however glows and ambience and whatnot don't export. As for texture maps, it will rename the textures into the 8 character requirements for poly software like 3DS Max, however, the mtl file never seems to associate itself with the model, even if the directories are correct in it. So basically, if you must export into a poly program from AM, expect to do the texturing in the poly software. Fortunately you'll have the 8 character requirements, but unfortunately, most poly software uses UV mapping as opposed to decaling (my theory as to why the .mtl doesn't work and the textures don't assign). Now a problem I had when trying to UV map in Max with an AM model, is the export is ugly at best. When the model gets unwrapped to be mapped, you'll find that there are a lot of broken pieces and very, very tiny faces that belong to the model. This is because the export disconnects pieces of the model. The most noticeable places are where there is a change in the specularity direction, however there are places so small you won't be able to tell until you unwrap the model see a hundred small dots unwrapped that you will have no idea where they belong. Now the newest option I've been playing with is modeling and texturing in AM, but if it needs to interact with a Poly environment or model or whatever, you use compositing. Tricky yes and a fair amount of planning is needed (how many render layers will you need, shadow passes etc) but your results will be much better than trying to import an AM model into a Poly program
-
And perhaps a few thousand years earlier too?
-
Well that was the thing actually. When I played it in the choreography things looked lined up where I wanted them. But the render didn't go so well, I must've moved some objects without realizing. Anyways, the whole look I didn't like anyways, was way too much red. This new render is much better
-
Oh and it got so far that I stopped it just so I could do other things. So I played it back and the animation was purely awful so I've re-set the stage and am now rendering again
-
Heh, I ran into that problem about a year ago with the macbook going to sleep. I have since rectified that issue I think ultimately it's just this laptop isn't really powerful enough to render that much stuff
-
Yeah I figure that, I'm talking when pretty much the same amount and even the same spot take longer to render frame to frame. I mean there's nothing actually overly intensive about this model, just a lot of decaling
-
So, outta curiosity, do renders start taking longer the longer they've been going? I mean I'm rendering frames now that only would take 15 minutes to render, but 147 frames into the animation, each frame is about 45 or so minutes rendering and there's nothing going on except a flyby. And I did notice the frames taking longer and longer to render. So, does AM or my Macbook need to take a break every once in a while or something?
-
Indeed and those happen fairly frequently in my works, especially editing, so I'm getting cocky enough to call it skill/talent
-
On further review, I know why those spots are brighter and it's a bit of a coincidence thing. See the hull texture also has a specular intensity map applied. So certain hull plates are brighter than others and that looks like what's going on there, is the specular is more on those plates and so when the registry light hits it, it appears brighter than the others
-
Nope, it's just the registry light (which is a Klieg) that is hitting it. It's just the angle of the light I would assume that's giving that illusion. And I do not have After Effects. I'm limited to the capabilities of AM's post and FCE's post
-
-
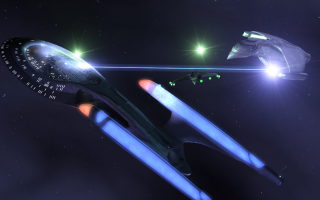
What's going on is I have a light casting over the Registry and so it goes just a bit further lighting up that raise in the hull . There's no displacement, just bump. The image was assembled in Gimp (gag) using I believe four layers. This image is actually messed up cause what happened was the two romulan ships were rotos, but I didn't realize one didn't have an alpha on it (there went 2 hours of rendering out the window). So I re-rendered without the ships and I rendered Midnight with the weapon effects. Now they were rendered with an alpha, but lens flares and glows don't render in alpha (bye bye two more hours). So what I did then was rendered on a black background with no alpha, the lens flares and phaser glow, however, I forgot about the disruptor pulses because the glow for those were on a different layer that got covered over by some other layer. So yeah, this was a trial and error test that has taught some valuable lessons for the future. Now as for glow sizes, I've been sticking to about a size of 6 or 7 and an intensity of 125% which I like. However, the AM glow isn't controllable for isolated objects, so the thin phaser beam gets the same thickness of a glow as everything else. As for doing it in Post, I have no idea how to do that. The phasers might be easier cause I could render them as a separate layer and give a gaussian blur or something in FCE, simulating their glows. But as for doing independent glows on the bridge and warp nacelles, no idea
-
Yeah, this ship was actually built for someone else, it wasn't a just for kicks model. It's gonna be for a friend's fan star trek series (He already has 2 episodes released) and this ship shows up in episode 4 or something like that. So yeah, this sucker's gonna be animated, in fact, I'll be starting test renders soon, but if all goes well, he'll purchase AM and do the animating, cause dammit, I'm a modeler, not an animator Jim But I'll be doing the compositing cause all of the other models and things are done in 3DS Max and seeing as the conversion in either direction doesn't go well, we'll be animating Midnight in AM and everything else in Max and compositing it all together Lots of work ahead! But I can't let it take away from my serial that I'm doing
-
It's pretty cool too, all these combat effects can be done in AM and they look very sharp if you ask me. My biggest complaint is that I'm doing everything on a laptop and that previous pic took 2 hours to render, so rendering when it comes to animation time is gonna be a killer!
-
Thanks. And now, some shield effects and shields of this style are very difficult to execute, so animating it's gonna be a pain!
-
Thanks, I have another one coming but it takes 10 minutes per pass to render and it's a 9 pass image. But there's this funny magenta bar at the top which is odd


