


Caroline
-
Posts
1,248 -
Joined
-
Last visited
Content Type
Profiles
Forums
Events
Posts posted by Caroline
-
-
Name: Caroline Begbie
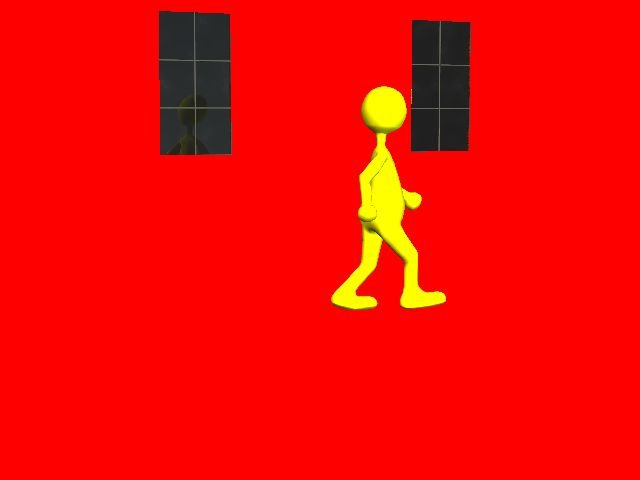
Exercise: Exercise 19 - Flying South
Date Completed: 19th January 2007
4 months doing TaoA:M - what's the record? Almost finished now.....gasp.....
I'd forgotten how difficult it is to do a walk cycle

-
The odd part is, I haven't been able to get the birds to be visible in the flock since then. I'll try again a little later.
I'm working on flocking, too, Phil and happened to me. A lot. By about the fourth time I remembered what to do - you need to turn particles on in the renderer. If you have rendered with particles off, then flocking remembers that. So just go to Tools Menu > Options > Rendering and turn particles back on.
That was great flocking by the way, really smooth.
-
What are the links to Jerry's movies? I want to watch them too, and say words like googliy moogily, and I can't work out how to get them

-
Nice. You have reflections - how did you do them?
On the right hand window, the van's reflection shows for a long time. If it's supposed to be a moving van, not parked, then the reflection shouldn't be there for so long.
Cute character - I like his shininess (please change that word to some 3d technical term that I haven't learned to trot out yet
 ).
). -
I think I'm coming to the conclusion that if you're going to use reflections, you must expect a long render time anyway.
I put up a greenscreen (red actually) over the building, except for the windows, and turned everything on the redscreen to OFF, and rendered reflections only = ON. That was 5 mins for a 3 second one-pass. For 16 multipass to match the original still tga, it'll take 1 hour 45 mins for 3 secs.
My reflections tga looks like:
and the resulting movie:
Movie has these layers: Reflections (red layer), main street still with alpha channel where windows are (photoshop elements selection - I was hoping not to have to photoshop), shadows, thom.
I deliberately left red edges around the windows, where I wasn't very careful, so you could see the idea.
So this method of doing reflections separately, would only work where you are willing to compromise the quality of those reflections. Although, I guess, even if you did render for 1 hour 45, we're still only up to 5 hours 15 total render, as opposed to 89 hours of the original estimate.
Quiet note: you may realise that I am really bad at lighting and setting up reflections.
-
Thanks, Rodney for the info on green screens.
The problem that I'm having with reflections, which may be insurmountable in the example we're using, is that I am unable to isolate only the windows into an alpha. When I delete the materials on the building, to decrease render time, the lighting changes, as you might expect, and the reflections are different. So it may be a question of rendering the whole thing very slowly on 1 multipass, then render the still on 16 multipass, then alpha the still in places, so that you can see through to the 1 multipass. But that seems way too complicated for what should be a simple compositing.
Still thinking.
-
The side view of the giraffe is the only rotoscope in this exercise. The top view is just for adding a decal at the end of the exercise.
When you switch to the front view, you don't need the rotoscope - you know what a giraffe looks like from the front, so you can make him fatter or thinner depending on how you want him to look. The side rotoscope gives you the difficult proportions. You should also be turning your model to look at it, and the rotoscope will not show then either.
This is a very long exercise that teaches you many things about modelling, so take your time, and you'll get there.
-
My computer's even got a glass side, but as it's under the desk, only the dust bunnies get to see the eerie blue glow.
I think reflections here, because aren't we going to alpha channel those as well?
Did you catch this post from satyajit?
Can't see why it needs to worry about materials on a shadow render, though. Although perhaps shadows would be affected by bump and displacement maps, so perhaps it makes sense.
I'll have an hour tomorrow to play with a greenscreen.
-
Not too small for a postage stamp
If you render your animations to use the Sorenson 3 codec, the file sizes will be a lot smaller, so you could maybe even render to VGA, rather than postage stamp size.
1. Make sure that on your Render to File Settings dialog you have Advanced ticked.
2. Change the format to mov
3. Click the triangle next to format, and click Set.
4. Change the compression type to Sorenson Video 3
5. Change quality to Medium.
-
Does the low-res version make the shadows quicker? Surely, it shouldn't make much/any difference.
No, there's no reflection render option. I've been pondering on this, reading This Post, which suggests doing a greenscreen.
I'm trying to work out how to do the reflections with an alpha greenscreen, though. I haven't got very far with that. Any ideas?
Of course, now we're almost getting into the realms of spending 150 hours rendering to openexr format and tweaking lighting in composite.
I still think it's useful to be able to render in parts like we're doing.
-
Great - I remember doing that too, because that's how other programs work.
About the shadows, I have a feeling that happened to me the first time, but because I was experimenting, I didn't know what to expect. Try exiting A:M and starting again.
I just checked again, and all I did was change those settings - make sure the shadow only for building & street is ON - make sure you've set that on frame zero, because I think it's animatable, so if you set it on frame 30, frames 0 - 29 won't accept shadows (?not tested?).
When you put the shadow only to on, deselect the building, and it goes away, and you just see blue sky. Same for street, so Thom looks like he's in the sky. Does that happen for you?
When you say nothing showed up in the viewing window, I'm not sure what you mean. My tga was entirely black, and I couldn't tell whether it had worked until I looked at the alpha channel.
To compare, because I may have a faster system (mine's dual 2.8Ghz, 1GB Ram), with those settings - multipass = 1, shadows ON, everything else OFF, my shadow took 1:32 Mins. Rendering the whole scene, multipass = 1, shadows ON, everything else OFF, the scene took (bother I just closed it) I think it was 3:30 - 4:00.
So from that I guess we can tell that shadow only isn't rendering the materials.
-
Phil, I think I may know what you're doing.
I rendered out 180 tgas, then loaded them back into a new project, put them as a rotoscope to a camera, rendered out to mov all 6 seconds no problem at all.
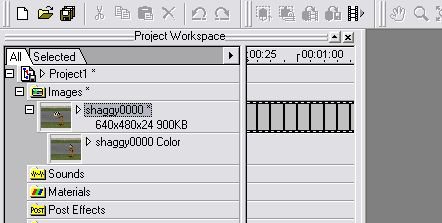
When you are importing them, don't import them all.
Right click Images in the PWS, then click Import > Animation Or Image Sequence. Then ONLY click the first tga - like Shaggy0000.tga. Then click OK, and the others will all be there. It may only look like one frame, but they are all there. You can then apply this one to the camera rotoscope in the chor, and each frame in the chor will go through the tgas.
This is how it looks in my PWS on a blank project having imported 180 tgas.
But like Rodney says, the 000 sequence when you render is important, took me ages to work that out,
, I really got to know renumbering in Irfanview. -
Fabulous, Jerry - love the action, and he's even blinking.
Lateral foot slippage - I think you've been looking at it too long - I couldn't see any. If there really is some, then it would be in the channels somewhere - maybe changing the spline interpolation in places - have you looked at that?
It's here in the manual:
http://www.hash.com/htmlHelp/v12.0/CustomH...sed_Drivers.htm
In the bouncing ball example there, if you don't change the interpolation to hold, when the ball reaches the ground, it will continue the spline line and actually go through the ground, before going up.
But your walk is so good, you probably knew all that already

-
lol, Dhar
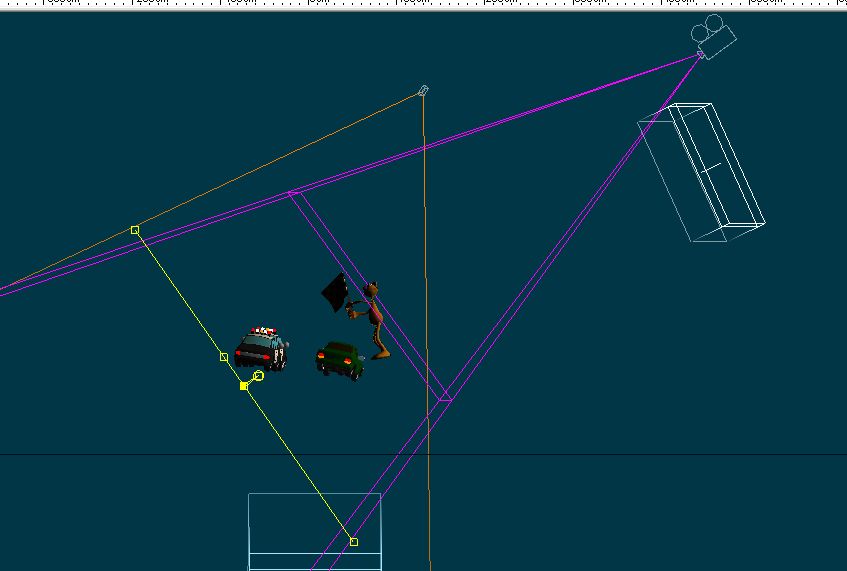
- www.sxc.hu - fab site with royalty free photos. Great for rotoscopes and ideas too. But not so good for backdrops.Actually, I wanted to post a screen grab, to see if anyone else would approach this in a different way. The problem is when you have a photo, you have to deal with camera angle and sky. This was the only way that I could work out, to put everything on angles, which was very clumsy.
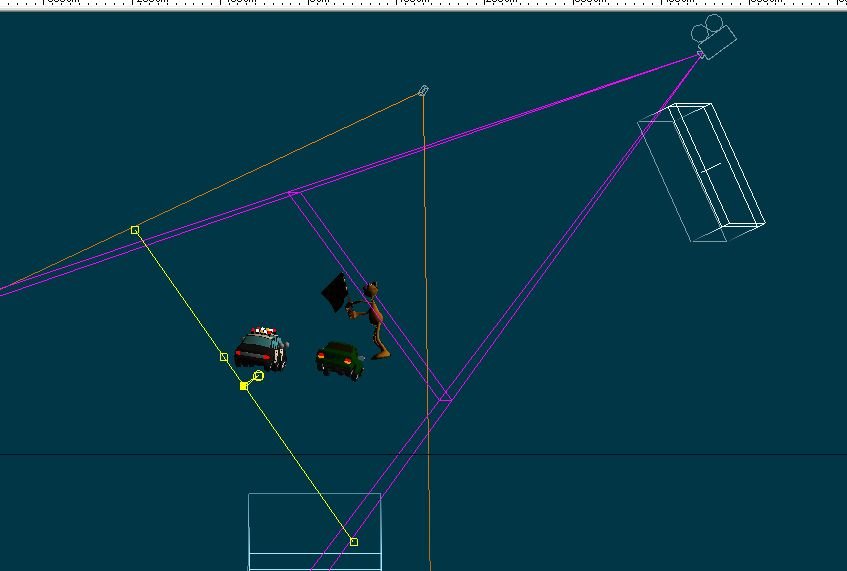
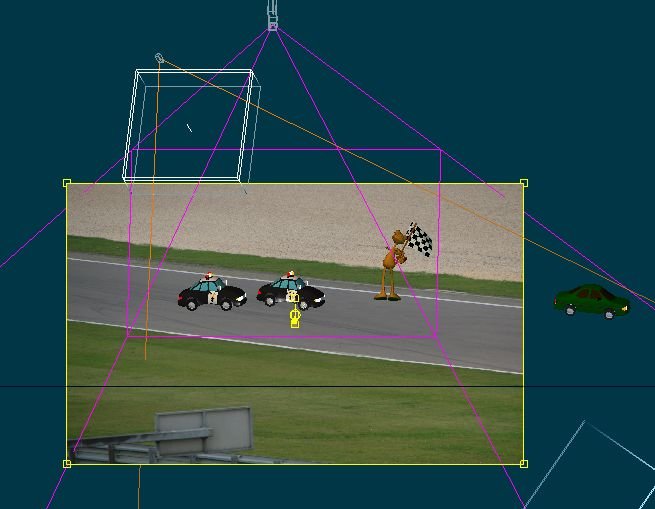
First is side view, and second is front of the exact frame. The yellow is the photo of the track, and everything else goes at an angle across it. (That's why I was lazy on Shaggy's size, but thank you for being kind, Rodney
) -
You're absolutely right, Elliot - I posted too late, difficult to get the angles when using the background as a flat rotoscope, had eyes closed - there are 100 excuses, but there's no real excuse.
When I showed my son, he said exactly the same thing
, and that I should always go through him first before I post. Lesson learned. -
Thanks, Phil, it was really fun.
Don't know about over 100 photos - I can't 'play' until tomorrow
Which tutorial?
-
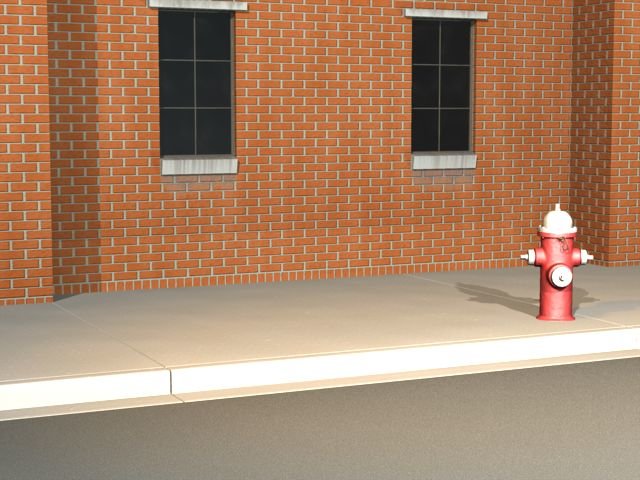
On the assumption that I'm talking about the same thing as you're talking about, I've been having some fun.
1. Render of main street with 16x multipass, shadows on - 52 mins.
Compressed jpgs, so quality is not as good as original.
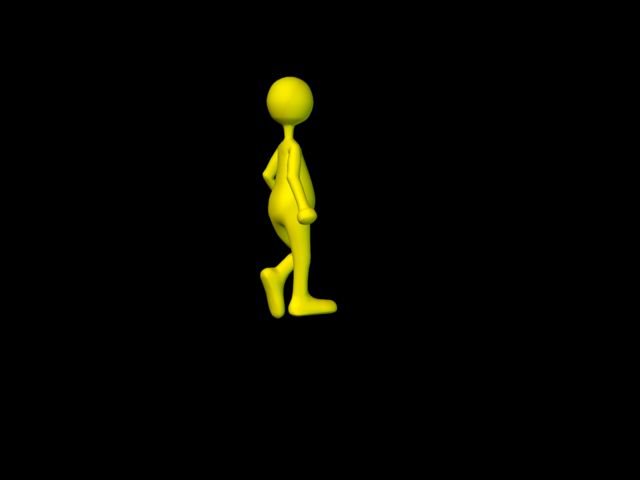
2. Render of Thom into alpha channels - I made all other objects ACTIVE = OFF, and rendered with Alpha Buffer = ON, no shadows. - Render 28 mins.
(jpg here, so no alpha channel, but there is in my tgas)
3. Render of shadows - finally worked out settings. Under Options for warehouse and street, Receive Shadows AND Shadows Only have to be ON. I set Fire Hydrant to Cast Shadows = OFF, but this only saved 2 secs per frame. The render options: Alpha Buffer = ON and Shadow Buffer = ON. I did Multipass = 1, and Shadows =ON.
Total rendering time of 91 frames (3 seconds) was 2 hours 10 mins. (I think - I forgot to check).
Pretty scary - 2 hours of rendering pure black frames. The alpha channel screen capture from PSP looks like:
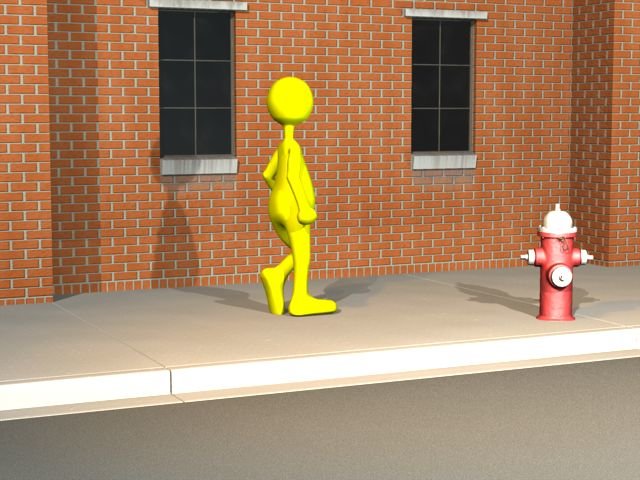
4. New project in which I imported the main street tga, the tga sequence of Thom, and the tga sequence of shadows.
New choreography. Deleted ground. Set up 3 rotoscopes on the camera - first main street, then shadows then Thom.
44 seconds to render, with all settings off, no multipass.
Total rendering time: 3 hours 30 mins, 44 secs.
To render original would be approx 89 hours (mostly just due to materials).
This is the movie result:
In retrospect, Thom walks in front of the fire hydrant (doh!), so the firehydrant would need to be rendered at the same time as Thom, and firehydrant shadows with step 3 shadows.
And in the original, Thom's walk action sinks into the sidewalk, so it looks a bit odd in the composite where he's a layer on top of it.
Rendered a still of frame 1:00 - 58 mins.
(Sorry, the lighting sucks
) and the composite render of 1 second
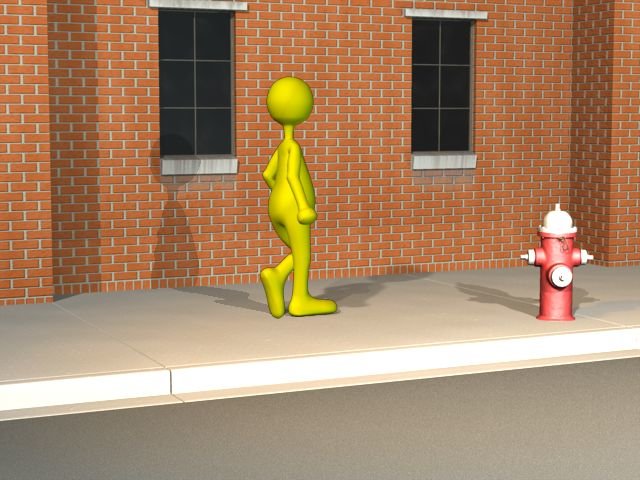
I do hope we're talking about the same thing.
Next is to work out how to put reflections in - I was thinking of just rendering the windows, but will have to sleep on it.
-
I think I'm caught up with the situation now.
I can see that in this particular situation a decal renders much faster than the materials, however it is useful to have the skill to do something, even if not immediately required. (It's called "come-in-handy", like junk in the attic.
)I have my project set up with the wall, street and fire hydrant, just like the first picture. I have Thom walking down the street. I have default lighting, with an extra light to cast stronger shadows. (I'm not very good at lighting - I have put that on the "later" list.)
My projected workflow is:
1. Render one frame of just the wall, street and fire hydrant, in highest quality, 16x multipass, with shadows (reflections maybe, haven't understood them yet) to a tga.
2. Render just Thom walking down the street, with wall, street and fire hydrant not active, multi-pass 1, with alpha on, no shadows or reflections, to 3 seconds of tgas. Tgas will have the alpha of Thom.
3. Render just shadows of Thom walking down the street to 3 seconds of tgas. tgas will have the alpha of Thoms shadow.
1. to be achieved in about 50 mins (rendering now). (the lighting is horrible though)
2. achieved in 28 mins.
3. having difficulty rendering just shadows - am reading various threads now. I thought I'd set it up correctly, but I'm just getting blue sky with no alpha channel, so I've made an extra light that casts a definite shadow.
Am I on the right track to join in the discussion?
(There are so many aspects to this - I have learned only this morning about the shadow buffer. By exploring how to do this, I watched a composite tech talk - wow - much later. I also discovered Post Effects - also later.)
It will be really exciting to have a thread exploring a simple scene like this and how you can put it together in various ways.
-
I put in your settings and applied them to Thom.
This is what I got:

Not what I expected.
I looked at the Choreograph properties and found a force Y of -100 (this was the default), when I set it to 0, this is what I got:
No random particles anywhere, I'm afraid. What version are you running? Have you tried taking it back to basics - delete the material, and start again, with a few properties at a time, and apply the material to Thom? (Are your normals all facing outwards?)
-
Are we the only ones that care about Alpha Channels and sequential TGA conversions?
Definately not! But you're going too fast - I shall have to catch up on all that I missed today.
And, Phil, you can do alphas with Photoshop Elements - only black and white ones though, I think - I've used Photoshop Elements to do simple alpha selection in the fly particle movie that I did. All you do is a selection, then you do Selection Menu > Save Selection, and save it to Alpha 1 (or whatever). You then save to a .tga, I think 32 bit, but I'm not sure that matters, I can't remember for the moment, and it's a working week (bother work).
I also have Paint Shop Pro 5 off a magazine, in which it is easy to check the alphas.
Photoshop one day maybe, but Elements has been good enough for me so far and is 1/5 the price, and being so used to it I much prefer the workflow.
-
That was funny, Jerry - good job!
-
Name: Caroline Begbie
Exercise: Exercise 17 - Cosmic Bowling
Date Completed: 7th January 2007
I took the liberty of using the Newton Plugin instead of using the manual - thank you to Steffen and johnl3d for your help.
It's a really exciting alternative, with so many possiblilities, and I'd really like to spend some time experimenting with it later on. Here's the very basic, getting started, instructions to do the Cosmic Bowling exercise with Newton:
-
Hi, TanMan - Have you worked through The Art Of Animation:Master - TaoA:M? This is the manual that came with the software.
There is an entire forum dedicated to completing this, and each exercise takes you further along the road.
The address of the forum:
Exercises 8 - 12 will take you through modelling, and Exercises 10 and 11 show you how to use a rotoscope (that's the term for a 2d picture) to create your 3d model.
I'm currently working through TaoA:M myself, and at the end of the book I look forward to receiving a certificate. So I look on this as a full on-line self-paced course to teach me 3d modelling and animation. It's not easy, (Animation:Master is easier than others, though), and if you take it in small steps, you will learn the basics in a few months. And it's fun
-
Thanks Richard - it's my newbie "don't hurt me!" avatar - when I've finished TaoAM I'll have the skill to make my own, I hope


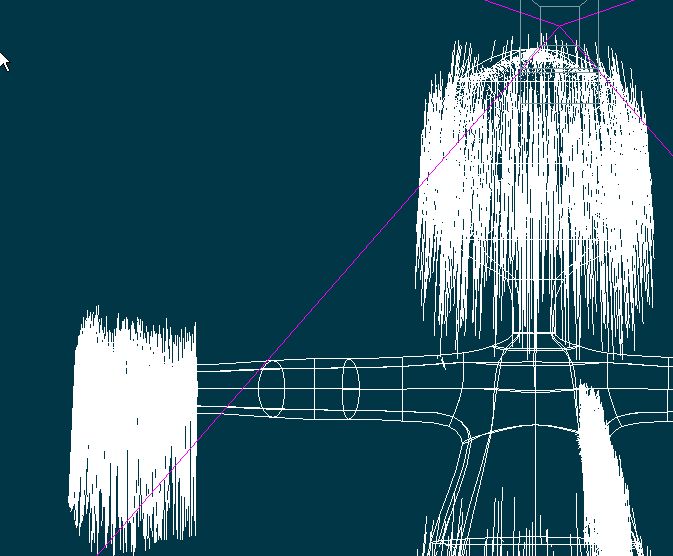

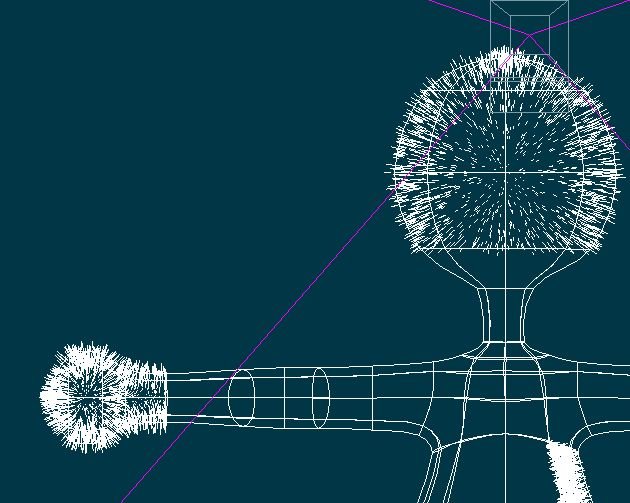
Exercise 20: Its getting a bit hairy
in TaoA:M and the A:M Technical Reference
Posted
Name: Caroline Begbie
Exercise: Exercise 20 - Wookie
Date Completed: 20th January 2007
It's a wrap. No - it's a wookie. But I have now graduated from TaoA:M! Yay. Thank you to all who helped me through, I appreciate it.
On the exercise, my computer does not like quantities of hair, so be warned - my future models will have comb-overs.