Slipin Lizard
*A:M User*-
Posts
204 -
Joined
-
Last visited
Content Type
Profiles
Forums
Events
Everything posted by Slipin Lizard
-
I can't help you with the technical aspect of this question, but just wanted to ask could you possibly composite your audio and animation in a different software package? Since you've used the audio as a "guide track" already in Animation Master, all you now need to do is render the animation, and then composite it with your audio file, assuming that the audio file and animation both start at the same time. If not, simply note the beginning time of the audio and sync that with the start of your animation. Any editing software should easily be able to do this for you. I-movie, Vegas, Premerie, Final Cut, After Effects... if you have access to any of these it'll do the job. Keep all your render settings at "no compression" and you won't lose any quality.
-
Hey guys, how much does it cost to upgrade from version 11 to 13? The $299? I've been out of the loop for awhile.
-
Very nice work indeed. I really like how you used the eyes to add to the effect that he's straining. Really nice look to it, I'd say perfect job! Congrats!
-
Have fun with whatever software you choose.
-
Looks great! Could you tell me the render settings you used and how long it took to render the one image?
-
Just a little more food for thought. My Juno 60 model is still hanging out in the Showcase forum. I used basically one big decal for it (there were a few spots I decaled separately, but most of it is one huge decal). I was able to make the decal just a little bigger than needed in Illustrator, so if you can imagine how complicated all those little numbers and lines are, and yet if I sized the decal to something like 93.5 % and then applied, everything matched up beautifully. I only mention this because the decal holds up to close ups. As a matter of fact, the writing becomes more legiable the closer you get. Are you sure your can't use one big decal for and still get close ups? What if you make your model bigger, so that when you zoom in, you're not reaching the pixel limit of your computer? Maybe I'm just wacked out of my gord...
-
I can't speak for version 10.5, but I'm using version 11.1 and if it were me, I'd have the crab as one model, then in another, separate model window I would right click and select Wizard/Grid and create a grid, maybe 100 by 100 or whatever works, and just group various CP's, pull them into "mounds", color the whole grid sand color, give it some roughness and then put that and Crabby into a Choreography with the default ground turned off. You could still use a sky image for your background, but that's how I would make a quick and easy sandy beach, just to get the project done. Just a suggestion. It's not necessarily the best way, just a way.
-
When you have a set goal, such as your crab animation, it really helps you learn because, as you've found, it raises lots of questions. At some point though, now that you have seen some of the cool things AM can do, you need to back up and go through the fundamentals. Now that you've had fun modeling Crabby its time to make sure you have: -done all the tutorials in your manual. -opened up your library, looked under models, opened the Primitives folder, study how each primitive was made, and then build it yourself, from scratch. -redo a tutorial in the manual (you'll do so much better the second time round) and then post it in the students forum for feedback. -take a simple object from around your home and model it to the best of your ability. Finally, you may want to invest (uhh Mom/Dad? $$?) in some instructional material that will help you greatly. Worth its weight in gold is the Anzovin "QuickStart 2" CD. I just can't tell you how great that CD is, it will help you so much. http://www.rafhashvideotapes.com/amquickstart.html David Rodger is also coming out with a new book for AM, and he has one out already which is quite good. http://www.amazon.com/gp/product/customer-...=283155&s=books I would suggest the QuickStart CD for you though. Its very easy to follow and really covers all the basics well. My modeling and general understanding of AM really improved after getting the CD. Its really worth it to cover the basics. You'll have more fun, and won't get frustrated. The stuff you're doing now will pale in comparisson to what you'll be doing a year from now, IF you take the time to learn the fundamentals. Good luck!
-
Josh, to use the Boolean cutter operation, just select the heart, hide the door, and go into bones mode. Create one bone over the heart shape, and with the bone still selected, select all the CPs of the heart shape to assign them to the bone. Go back to modeling mode, and in the project workspace window select the bone you just created for the heart shape. In the properties window, select Boolean Cutter/ON. It will cut through the door, but only in the final render. I'd be more tempted to create the door, then stitch in the heart shaped window, depends on how much detail you want, and how hard you want your edges.
-
It was working ok... but then the Blue Frog bit part of my ear off and the whole thing just got out of control! Ok, just kidding. I think its brilliant. Instead of writing down instructions on how you did it, why not make one of those video/screen capture CD's and market it with Hash to schools or even colleges that offer introduction courses on 3D game creation? So many people I've talked to say their kids want to be 3D game developers, and institutions all over are racing to try and keep up with the demand for courses about it. Seems like a great marriage to me; Hash, software that's easy to learn and affordable - Froggy Boxing, a great way to learn 3D animaton and game creation. If you package it all up professionally, people will glady pay for it. Nice work, fun game!
-
This is a repost of the same answer I gave someone to the same question: I can totally relate as I had the same problems when I first started using AM. However, having used After Effects extensively, I was familar enough with keyframes to be able to unravel what was going on. When you have a character or object you are trying to animate, you must tell the computer not only where the animation takes place, but where it doesn't. In a way, you sometimes sort of have to think backwards as you animate. A really simple example would be to take the Thom character, and have him facing the camera tilting his head side to side for 3 seconds, then stop tilting his head and wave at the camera with his right arm for 2 seconds. This means your entire clip with be 5 seconds long, 3 seconds of head tilting and 2 seconds of waving. You start by moving to the 1 second mark and tilt his head to the right, then to the 2 second mark and tilt his head to the left, and finally at the 3 second mark bring his head back to center. You play the animation and all is going as you would expect. Now at the 3 second mark, you start to make his right hand raise up and begin to wave, and set some back and forth keyframes up to the 5 second mark. But hold on, now when you play the animation he starts raising his arm right away, why? Because when you set the first keyframe for the arm at the 3 second mark, the computer sees that as the first keyframe to move to from 0. Instead, you want to set the force keyframe on the arm in its unmoved position at the 3 second mark, then begin the wave action, say setting the next keyframe at 3 seconds 15 frames, then one at 4, then 4:15, then finally at 5 seconds. Now the computer knows not to start moving the arm before the first keyframe at the 3 second mark. In After Effects, its what we would call a "hold" keyframe, that does just what it says, holds the position of the animation until another keyframe specifies otherwise. So try doing really simple animations first, and then work your way into more complex ones. You'll get the hang of it quick enough. AM tends to have a lot of automation when it comes to setting keyframes, and at first it may seem a bit counter-intuitive. However, I've used Maya and find AM a lot easier for animating and setting keyframes, you just have to remember if you start moving something in the middle of an animation, and haven't set a force-keyframe prior, AM will start moving it from the begining of the animation. A couple of things to mention: -its good to see the graph below the timeline so you can see that you are indeed creating keyframes. -you can create a keyframe for something just by nudging it up, then back down, using the up and down arrows.. MOST IMPORTANT: animating takes a bit of practice, so instead of trying to animate a character, animate a simple object like a ball or square. Get it to do EXACTLY what you want... move up, down, stop, roll, whatever... but get the hang of it first, so you understand how it works, then dive in to your character animation. Good Luck and keep going!
-
Don't forget to send your cheque or money order to: Robocat Savior of Newbies Inc, 100A+ Mercy St. Hope, Salvation, THK S2U
-
Hey there Robert, I had a similar problem, and I'm probably the "other thread" Vern is refering to. While I can't offer much in terms of a solution (I ended up solving the problem by creating the all the images to be stamped in one Illustrator file, and then applied them as a single decal to the model) I can suggest a test to see if you're dealing with the same issue I was. Is there a point where you can add decals, and they render smoothly, and then you add one more and the smearing starts? My situtation was that I could apply the decal, and it would look normal. I would only see the smearing in the final render. Even using the render lock mode would make the area appear to be rendering normally, but the full, final render would be smeared. It could be just as Vern is saying, that the single patch can become "over-loaded". Its probably all dependent on how many decals there are overall, the complexity of the model etc, so if you're luck like you and me and just hit the right formula, you get this problem! Hopefully adding a little spline density will solve the issue for you.
-
I don't think this will help at all, but you're not alone... I had the same problem, I'm also using 11.1. I had a fairly complex mesh, and made a different part in a new modeling window, copied it, and pasted it in the window where my original model was. When I tried to delete the pasted model, AM closed. I eventually solved the problem by fixing the pasted model and just moving forward. I was never able to successfully delete the pasted model. I started with Maya, and while I would say its maybe a little more stable than AM, it too used to crash. Not so much in closing down, but more lock-ups. I think maybe that 3D pushes the computer so hard that its just a matter of finding the right combination of instructions that cause the computer to crash regardless of what the software is.
-
Do you have your properties window open? To check, look under "View" on your menu tool bar, and see that there is a check mark beside Properties. If not, click it to open. The User Properties are near the bottom, you should see "Pose" and beside it "not set". Click it to turn it on. Also, you can open your Pose window as well (View/Pose) and turn on your pose there.
-
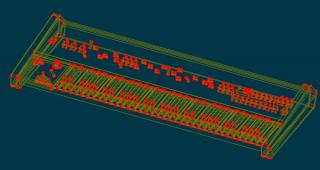
Thanks guys... Rodney, no, I haven't rigged any part of it, though I might give that shot a little later and try animating. I'll post the wireframe below. Vern, thanks! Yeah, it was going to be decal city the other way. Doing it all in one shot was the way to go. Flock of Seagulls/Howard Jones... oh man yeah! That's what this synth is all about. The Juno 60 is an analogue synth, that has a warm, almost haunting sound that I've never found matched. I wouldn't part with mine for anything. Can you believe the 80's is totally coming back now? Finally, everyone one has realized what I knew all along... now where are those Miami Vice reruns??
-
I haven't heard of a set way to create a watermark in AM, as in "here are the instructions for creating a watermark.." Watermarks are usually done in post, with a simple layer added on top of the finished video, bearing the watermark. However, there is one way you could do it that I can think of. Create your watermark and save it as a 32 bit Targa file. In AM, with your Chor window open but nothing selected, right click and select New/layer. Import your watermark targa file. With the newly imported watermark selected, right click and select New/Constraint/Orient like... the little eye dropper will appear, click on the camera (you might want to do this in top view, and make sure you can see the watermark and the camera). Next right click on the watermark again and select New/Constraint/Translate to... and again, choose the camera. Using different views, position the watermark (which is now position right on top of your camera) so its where you want it in your camera frame. You'll want to keep hitting "1" to switch back to camera perspective. Once you've lined it up, it will follow the camera where ever you position it, and will always appear the same way in your frame. You'll probably want to reduce the watermark opacity by setting its transparency level in the properties window. One difficulty with this is that if you use depth of field with your camera, you'll have to make sure that the watermark is within range of acceptable focus. This will be a real pain if you're shifting (racking) focus in your shot. There's probably better way, but I tried this and its pretty simple. If you aren't using dof in your shot, it will work just fine.
-
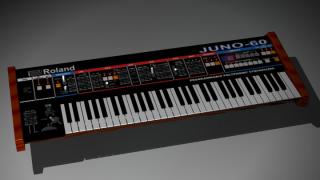
Thanks guys. There are seven decals total. The white graphics on the top/center portion is all one decal. I initially was trying to do them seperately, but ran into problems having too many decals on the same patch. Fortunately, I was able to line things up in Illustrator so that when I brought the really complicated decal in, it lined up on the model. This was also easier and faster than bringing in the decals one at a time into AM. Thanks again!
-
I don't know enough about rigging, only that its hard... Robocat's a whiz though, so keep plugging away. I just wanted to say hey, thats a really great looking crab.... you're in Grade 7? Man, you're off to a great, great, start. There's a book about AM by David Rodgers, called "Animation Master: A Complete Guide 2002" that's really good. The Anzovin Quick Start 2 CD is really good, well worth the money and it covers rigging. David Rodgers is coming out with a new book, that is updated, so you might want to wait for the release of that. Keep going!
-
Vern thanks for all your help. You too Robotcat. You were both very helpful and patient. In the end, I figured Vern was right, that all those decals based on just those four CP's was just overload. When Robocat got the same result, I figured it was good enough to say that was the problem and move on. I didn't really want to mess with the geometry, I did give it a shot, but as I got started I realized it was going to be a real pain, so I brought an image from AM into Illustrator, and built the decal as one large piece. Worked out well. Thanks for all your help you two, you're da bomb! I posted this same pic in the Showcase forum, along with two close ups if you want to check it out. Thanks again!
-
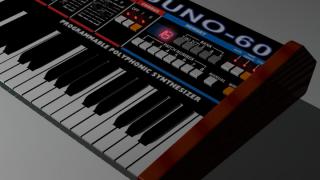
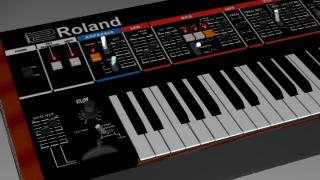
In trying to learn modeling I gave myself the task of creating my Juno 60 synth in AM. The shadows are a little dark around the black keys in one of close ups, as I was trying to show of the glowy numbers. This was a fun build, not 100 percent accurate, but still pretty close. Learned a lot about decaling and using Illustrator, thanks for all the help from Vern and Robocat.
-
You're taking on quite a challenge for your first AM project, but that's good! Thats great that you want to be an animator! Animation is fun, but it takes a lot of work, and a lot of practice. But stick with it. The more you model and animate the better you will become. At your age if you keep going with it, by the time you're in high school you'll probably be ready to work on feature films! In the meantime, as far as your class project goes, this is what I do when working on corporate video content for a client and I have a great idea. I get all excited about what I am going to do for the project, and usually write down my idea, and plan it out a bit. I try to get a feel for how long its going to take, and if there are any areas where I might run into problems, like trying to learn a new program in time for meet the deadline for the project. If my really cool idea looks like it might take too long or be too hard, I come up with a second idea, a back-up plan. It may not be as good as the first, but I know it will work and client will like it. Sometimes I'll actually finish the back-up plan first, and then I'm free to explore the really cool idea. If I get it done on time, great. If not, I go with the back-up plan and at least I get the job done, and usually the client is still pretty impressed. You have got at great program, Animation Master, for learning animation. While in the animation industry people tend to work on specific areas of animation, such as modeling, rigging, or animation, Animation Master will allow you to explore all these areas and more. Keep coming back to this forum, and keep us posted on your progress. Show us your work, post some pics of what you're working on. If you don't know how to post pics, just ask. The only dumb questions here are the ones that don't get asked. We'd really like to see what you're up to, so when you get a chance post back with some pics.
-
Just wondering for people who have done a lot of decaling, what resolution do you save your decals at? I've been using AI to create decals, save them as 32 bit Targa files, and I choose 300 dpi for resolution instead of 72 dpi for screen resolution. My thinking was to use the highest resolution I could so that if I'm getting close up on a model the decaling will still hold up and look good. Is this correct? Or am I just adding unnecessary file size to the decals? My final destination for most projects is to end up as an AVI file going to DVD.
-
You guys are the bomb! Thanks for the effort you're putting in. I too think Vern's onto something, because when Robocat placed his first decal, it was on a part of the model that is not the same four patchers. I'll trace it down later today and let you know what happens. Robocat, I did try make a PDF for you, but I couldn't get the file size down so I could post it, even as a zip. My wife set up a link for me, if you're interested, but you've seen the problem. www.burntlizardmedia.com/postings/problemguide.zip Again, thanks for all your help, and for the tip Vern. I was actually doing that with Illustrator, lining up the decals and then seeing how they work in AM, continuing to adjust in AI. What would be great would be to have the units match in Illustrator to AM, but they don't. That way I could use both the grid features to create one big decal. What I might do is just render out a large file size of the keyboard from AM, and then bring that image into Illustrator to use as a guide. Even if the size is off, it might still be proportionally correct so it would just be a matter of scale. We'll see. I can also go over to Hash headquarters and let them take a look at the file. I live in Portland so its just across the river, in that big old church they bought (pretty cool). Ok, I'll let you know later what worked and what didn't. Thanks for putting in so much effort to try and help me out. And thanks for compliment on the model Robocat!


