-
Posts
28,259 -
Joined
-
Last visited
-
Days Won
403
Content Type
Profiles
Forums
Events
Everything posted by robcat2075
-
Thanks! That there is the core concept of CG animation work flow (and most hand drawn animation, too). You nail down the big landmarks of your performance and then refine the motion by staking out smaller and smaller landmarks in between. Also known as "Pose to Pose" animation.
-
Bare bones example of animating a walk in the chor: http://www.hash.com/forums/index.php?s=&am...st&p=345735
-
Probably just a blip. Rodney?
-
I'll note one other thing about "actions". They are good for things that must be repeated, but that's rare in most character animation. Most character animation is done directly in the chor without doing it in an action first.
-
It's under User Groups
-
My solution is a two pass solution. First mirror the whole model. Then mirror the Hips alone to fix it. Possibly. It's your first encounter with it. You don't have to master it all in the first try. AM2001 is one of the more ancient rigs. It lacks several conveniences like heel raising, I don't recommend it, but for the purposes of this tut it's adequate. My personal pref is TSM2 for its "easy" (relative term) install and useful controls.
-
I like that! I'd like to see a larger version.
-
A quick test with v13t with the Rabbit from that CD Shows two problems -the various spine bones in Rabbit are not exactly on X=0 in the model. If they are centered they will get their rotation mirrored correctly. "Bone Position" Start and End for each must have X=0. RabbitSpineCentered.mdl If i do my Copy, then Paste Mirror with the "Key Model" filter on, the Hip Null gets its translation mirrored incorrectly by CPM. Other nulls seem to be treated appropriately but not the Hip Null. This bug persists in V17 In v13 and v17, if I do my Copy and then Paste Mirror with the "Key Model" filter on everything mirrors correctly except the Hip Null. If I then set the "Key Bone" filter, select the Hips Null, and do Copy and then Paste Mirror on it alone, it will be correctly mirrored and the whole pose will be correctly mirrored now.
-
Why, when i was a boy I was trapped with just a 7MHz Amiga Computer with only 512K of RAM and no hard drive and I had to . And we didn't even have bones back then. And I liked it! Whatever you are doing wrong that is making CPM not work, it is either not a serious hazard because you will never need CPM again or it will reveal itself in greater clarity on some future endeavor at which time we will be able diagnose it more completely.
-
It's possible in the older version you have that either Copy/Paste/Mirror had a bug (that has happened) or that the Rabbit on that CD had a setup problem (that has happened). It's possible you dont' have the right keyframe filters on when you copy the pose. "Key Skeletal Translations' and "Key Skeletal Rotations" need to be ON. But worry not. Do the pose manually. I've never needed copy/paste/mirror in any character animation situation and when I get around to doing a tut on walks I won't teach it.
-
My quick advice is to just make the mirrored poses manually. It's good practice, and making EXACT mirrors is neither necessary nor even desirable, usually.
-
When i first got A:M v4, at work in 1996, there was a graphics card for the mac that could could natively do splines and patches without needing to approximate them with subdivided polygons (what we have now). It was reasonably zippy and A:M supported it but for whatever reasons it didn't catch on in the industry and I don't think any card does splines now.
-
Why, when I was a boy we didn't have no graphics cards. We had to wait a year for a shaded render... and we liked it! The card vendors seem to make sure that their OpenGL implementation is a good one now-a-days. In 64-bit A:M it's the only choice. Which ever one works best, use it.
-

Welcome to the A:M Forum! Introduce / Reintroduce Yourself
robcat2075 replied to Rodney's topic in New Users
Welcome back, none-the-less! -
OK, I got something like an expected result from the plugin, still using v15... It's not quite as functional as the AI wizard but it might be useful in some circumstances.
-
I've tried it in v15. It runs but it doesn't do anything like the pictures show. What version are you using?
-
thanks for the tip, Malo! Fortunately the page still exists via the Wayback machine at Archive.org http://web.archive.org/web/20050315082059/...structions.html It includes the download and the instruction page, minus a few jpgs. I'd say it's safe to post here since it was free anyway. It will probably only work in 32-bit PC versions of A:M if it still works. Brian Levine is the name on that. Anyone know him? How to contact him? He probably still has the source code.
-
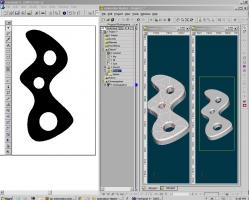
So, let me see if I can wrap my head round this: you can make a silhouette of a shape in Illustrator like that and import it into AM and have it auto-extrude and cap it? And will bevel the edge if you want, too! It all started with the font wizard which did that same maneuver for standard outline fonts. I think I made feature request for what you are wondering but it hasn't been taken up yet.
-
I just found I also had a CD for FreeHand V9. That does work on Windows 7, and can export a proper AI file.
-

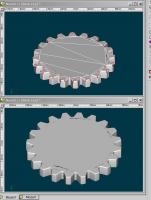
A little drilling and milling for fun...
robcat2075 replied to MMZ_TimeLord's topic in Work In Progress / Sweatbox
that's going well. You could use a force to blow the particles away if you need them gone but not disappearing. I presume you are going to do something more with the lighting? -
-
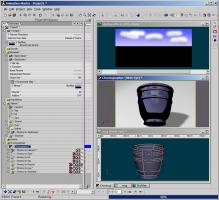
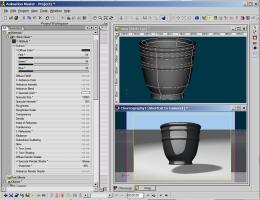
If you don't need the actual reflection effect, here's a simple approximation using specular reflection with the "Glossy" specular shader. Remember to turn "Plugin Shaders" ON in your render settings. The actual effect of the real glazed surface depends on it being slightly reflective AND the fact that the SKY is WAY brighter than any other surroundings. The sky gets a noticeable reflection but the ground and other environs are so dim that they don't obviously show.
-
Can you show a picture of a black ceramic you are trying to mimic? That would give us a starting point.
-
The installer for FH 7 on my original installation CD won't run under Win 7 or any compatibility settings i can apply to it. That's as far as i get.
-
I wish A:M could do with outlines made in A:M what it can do with outlines made in AI. OR expand the AI plugin to accept SVG plugins. I used an old version of Macromedia Freehand to make outlines and export them to AI but it stopped working under Windows 7. Someone on this forum said that an EPS file is almost the same as AI and you could make the change with a text editor, but I never found out how to do that.


