-
Posts
28,244 -
Joined
-
Last visited
-
Days Won
399
Content Type
Profiles
Forums
Events
Everything posted by robcat2075
-
I would have thought the difference would be far greater than a 2X speed up. Is that Bela Lugosi?
-
I am very surprised to find out that that is all the difference there is between CPU and GPU rendering. I thought it was nearly real time. I thought it was supposed to be like just seconds to render a frame. If that is all the improvement there is, I'd say, no, it's not worth putting more programmer hours into after so much effort has already been put into it with no useful result. If 11 minutes is the problem and 6 minutes is the solution I would do the thing I already know I can do today, that already works today... get a box with some cores in it.
-
-
I'm not sure about this one but I occasionally notice weird things that happen only in a certain project. Like in my contest image the simcloth shirt starts out looking normal when I load the PRJ but then it turns black in shaded mode and stays that way. But it still renders OK.
- 1 reply
-
- 1
-

-
If you wanted to texture the grain on the models you coudl make several variations of the grain and make the texture an animated map that cycles so it would not be the same all the time. Toon rendering can get you the flatness and terraced gradations to the lighting. I think this is something you do with separate passes and add the grain in post to each pass , then composite.. For example the couple walking in the lower right..., One pass is the background, that gets grained once and stays the same for each frame. The couple is grained differently on each frame and then composited onto the background. That way the parts of the poster that are still stay completely still and don't detract from the moving parts.
-

"Paint fall" Image Contest WIPs
robcat2075 replied to robcat2075's topic in Work In Progress / Sweatbox
The paint spilling out of the bucket needed to look wet. However, the GI illumination makes it look chalky.... Add in a specular highlight only helps a little. The paint surface needs to have reflections in it but I can't turn on actual Reflectivity since there is nothing to reflect except the house. An environment map will simulate reflections. This is using the same map that I used for the GI. The detail in the reflections is too fussy. This next one uses a simpler treatment of "ground" and "sky" that I painted in Photoshop. I liked that but I liked it better if I took out the color. I also tried a blurred version of that. I decided that did not look as wet and returned to the previous version with the sharp horizon line. -
Sorry... I hid it when I realized I had put the wrong video up. It's back up now.
-
The scale manipulator appears to change to world view but it is still scaling in the object's world. That's probably a bug. I'll note that you can rotate in worldview by going to an orthogonal view and using the yellow ring to rotate.
-
I have posted the first part of a tutorial in a thread of it's own... https://www.hash.com/forums/index.php?showtopic=48566&hl=
-
Thanks, guys! I made that character for animation exercises several of us have been doing over the past few months. You probably will see more of him.
-
I'm looking at it. I've run into a constraint problem I need to figure out.
-
-
How exact do the treads need to be? Is it enough for each to go around the path? Does each link have to maintain exact connection with its neighbors? Can you show the model you want to do this with?
-

Haven't tinkered for awhile but got an idea on vacation
robcat2075 replied to johnl3d's topic in Tinkering Gnome's Workshop
I think that fell on the Brady kids when they went to Hawaii. -
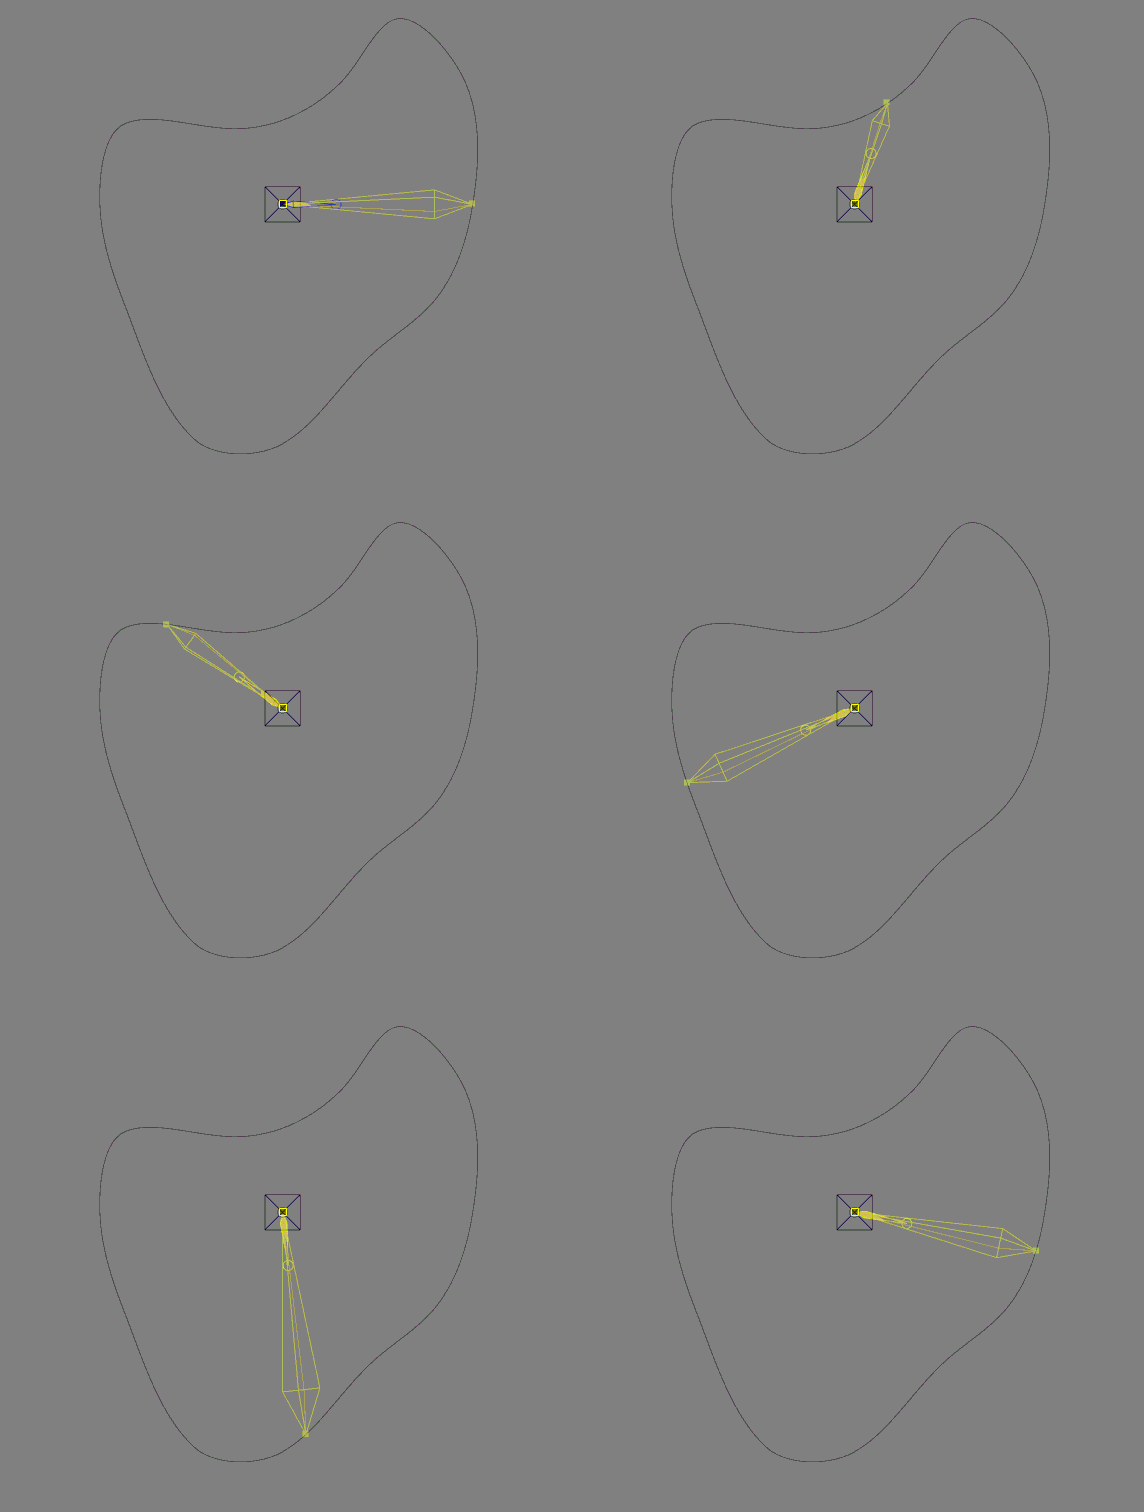
Here is an overhead view of one lap around the object. A small bone in the center is animated to point outward and rotate 360° The large bone has surface constraint on it, so it sticks to the mesh wherever the center bone is pointing. It is also constrained to Aim at and Scale to Reach the center bone. If I Bake that action, the scaling of the long bone gets keyframed into the Chor. Only the Z scale is needed. I can strip that out in a spread sheetand convert that data into single byte values. That string of single bytes is pasted into a .TXT file, then saved and renamed to be a .RAW file which I can load into Phtoshop and resave as a TGA.
-
That was a TGA. It was easy to make an 8-bit RAW image out of the numbers then resave that as TGA.
-
Here's something I've been wondering about for 20 years... Could i use A:M to scan a complex model to make a displacement map to put on a simple model and give it the shape of the complex model? In this test case I used a surface constraint to measure the difference in radius between the left shape and the right one. With some text editing and spreadsheet jiggling I made a bitmap out of that data and applied that to the simple shape on the right. The "scan" was very lo res, just 30 pixels around the perimeter, and it has a glitch in it, but the basic concept worked. If I could streamline and automate the workflow a bit, the scans could be very high res and work in all dimensions
-

Bullet Physics No-Go on Mac Version? [FIXED]
robcat2075 replied to largento's topic in Animation:Master
Mark, here's a sample PRJ that works in my Windows V19. in the Chor and do Simulate Bullet. If it crashes, this would be a case you could send knowing that it does work in Windows but not on Mac. Bullet_Die_Test.prj -

Bullet Physics No-Go on Mac Version? [FIXED]
robcat2075 replied to largento's topic in Animation:Master
Sounds like a good prospect for a bug report. -
I enjoyed that very much, Tore! The look is very impressive, especially the body. I look forward to more productions!
-
What? It's done already?? I thought it would be rendering for at least another year! It looks great, Tore! You should post it in "Showcase" I didn't catch this right away because I figured it was just another update.
-
He looks fierce!
-
I've sometimes thought larger buttons would be needed for touch screen interfaces but I figure you still need a mouse to use A:M so finger-sized buttons might just be using up needed screen space.
-
This might well be a case where multipass gets you a faster result with comparable quality. There is no waiting for an anti-aliasing pass in multipass, you just have to wait for the multiple passes. If you had a long animation to render, i'd test a few representative frames in both modes, see which is preferred and go with that for the whole run..
-
If you have an example of that, it would be interesting to see.


