paradymx
-
Posts
155 -
Joined
-
Last visited
Content Type
Profiles
Forums
Events
Everything posted by paradymx
-
Zero Slope huh? I'll give it a whirl. I tend to to use linear for my foot holds and plants. And use Zero slope and spline for certain motion depending on context. Or am I thinking of the wrong thing? Zero slope is the 0 quick key under the spline selection right?
-
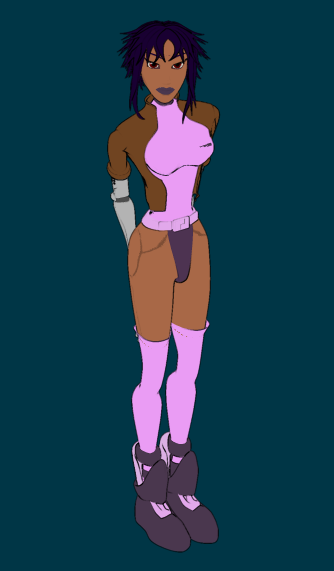
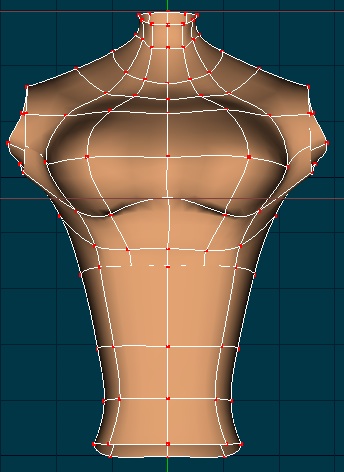
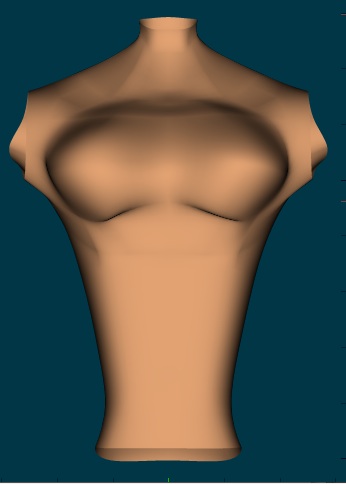
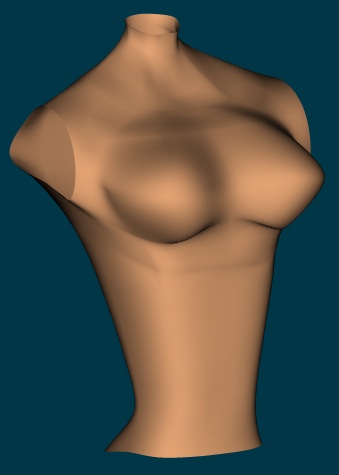
Thought I'd finally end out this post. I tend to flip/flop between to finish project to project to keep from getting burned out. This was the result from that torso, my first female model for my SCIFI High series.

-
Latest update to the overall scene. It's coming along but i'm starting to get burned out on ideas. I know how it want to end it, but I need to figure out the last 10 seconds or so. At any rate: mirrortest02.mov crits and comments always welcome......
-
Thanks Bruce. You have a good body of work but, not much variety. I am always updating my portfolio with both commissioned projects and self projects to fill in the gaps of what I feel needs to be shown that I can do well. Always taking with a grain of salt...... sometimes simpler can be better. Its easer to relay certain concepts and emotions with full set atmosphere and detailed model. However, if you can do the same thing with minimal set dressing and a stick figure...... But that all depends on your focus. From you, I'm getting character animator. So it might be something you want to try too.
-
Love the flying render....looking good.
-
That is soo cool. I though I was good with "Frankenstein" modeling.....lol She looks great!!!!!
-
My moving holds are in there....but I guess not enough...lol. I add a little more sway and I certainly see some parts where I can add more antsipation. That's why I love having you guys look at my stuff. Robcat: thanks for your tute(was looking under the wrong link) Yes and no....... on a stride, when say the left foot is down and right foot is transitioning forward, the body is stationary if only for a moment. That's where the "illusion" of a foward push comes from. I've always found it difficult to find the sweet spot for that in a stride length. I sometimes get what I call " the ice skater" if I'm not careful. lol
-
I have to go with the "angel wings". I think they are the better contrast vs. his helmet, especially if he is a villian. Now the "bat wings" are not as majestic, but that's where they have some contrast too. Go smaller. It would be cool (depending on the tone of the story) to have this huge hulking figure with these "tiny" wings strong enough to support his weight....lol
-
Thanks for the response Robcat. Looking back...the over-all walk can be scaled back a bit. And thanks for the suggestion about the sudden stop too. I've not seen your tut on walk poses. Thought I would find it on your page but it wasn't there. As of late I've been using the ol' trusty dusty animator's guide as my walk cycle template. One thing I've always wondered about stride lengths.....How or where do you compensate for the time where there is not foward motion, the "lift" phase where you switch feet. I played around and "covered" it up in the past, but there is still foward movement during.
-
Always adding to the old portfolio, wanted to try at some "physical" comedy. Hoping to get some crits and opinions from the first segment. mirrors.mov Here's what I see: I can tighten the walk cycle a bit... it's slipping on the stride. The transitions between poses might need some re-thinking. Some of the holds...(mostly the ones toward the end) are a little off.
-
That is looking good thus far! I really like the establishing shot of the house. Can't wait to see your third pass animation.
-
Love the stylized anatomy. It gives tons of character to the model. Have you boned it yet? I would love to see how you animate him given the size of his shoulder area. I have a similar model and his trapezius doesn't look right in certain postions.
-
Looks really good! Are those materials you've applied or just surface properties? Is there a blade to go with or are "effects" not part of your modeling challenge?
-
Watch it wiggle, see it jiggle...
paradymx replied to brainmuffin's topic in Work In Progress / Sweatbox
Nice work! Between you and robcat, you guys are making me want to play with some simcloth.. -
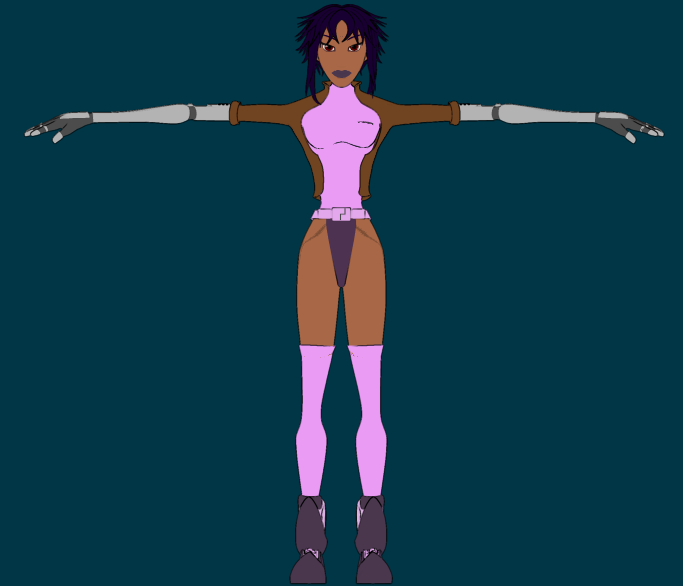
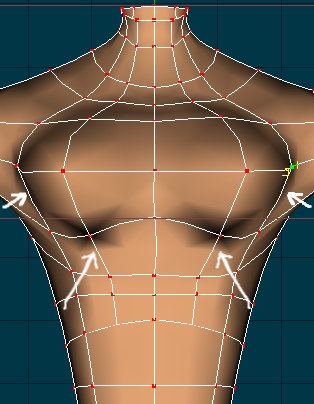
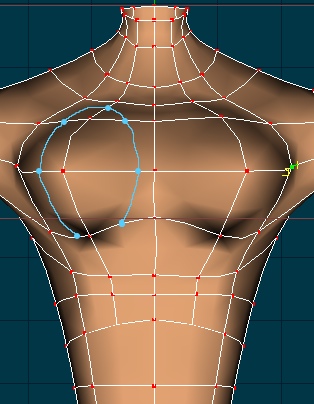
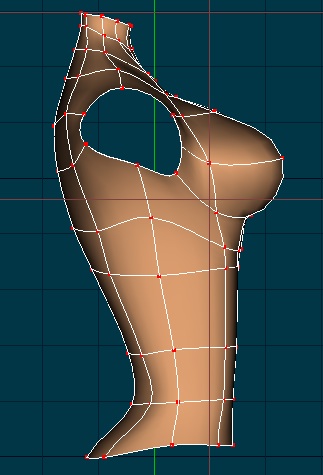
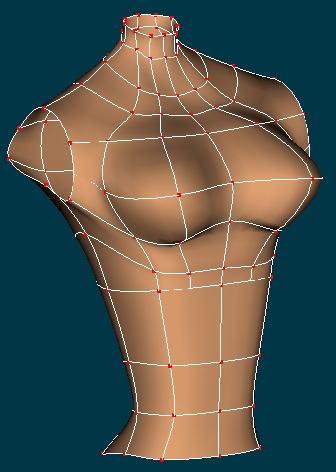
Robert: I had the same issue in my head too. The four patches may be where my issues begin. But it was the best way I could get the splinage to "work" in that area. When I applied more splines like how John suggested, I started losing shape and started to have some very "ugly" patch connections. I guess I don't have to be so economical, but I was trying to match the style of my web series. http://www.scifihighanimation.webs.com/ This will be the first female model I've done in this style. John: I love your......enthusiasm over this topic. Good to know I have a friend out there when it comes to this subject. I liked you idea for the rib cage and have re-done that. Like I said my splinamanship is not great and handling those bias handles can lead to trouble but I'll try that as well. I'm trying primarly to get rid of these patch issues. My best solution when working it out comes down to the following But I know there are going to be some bad patches in there around the rib cage. Do I need to rebuild the shoulder area and then remake a better, stronger, breast?(six million dollar man theme playing in my head)lol
-
Been trying to improve my Splinemanship as of late. Looking for suggestions or major "no-nos" I did on this model. I have alot of hard lines(creases) I can't seem to get rid of. I'm concerned with the breast area(that's where I see the most issues).
-
That does look good! Are those emitters? I can kind of see a shape of a ring or circle in the particles and was just curious.
-
Your textures look great. Did you make those with materials or are they all decals? The bun looks a bit too round though. With those cracks in the top it should be a little more uneven.
-
Your solution here is to just use one camera if possible. You can keep the others as back-ups if you like (I would because I'm anal..lol) Start with the first camera and get to the point where you want to change angles; now copy the keyframe of the camera with the next angle you want on to the first camera at the frame you want it. After you've done that as needed for the different angles through out the timeline. Go back and change the interpolation method to hold. Now, if the camera pans or moves between angles, then you will need to set some more keyframes before the angle change. To make the camera follow, you would need to attach a constraint. Orient like, translate like, or aim at. Maybe even a combo of them.
-
Thank you guys for your responses. Addressing the lip synch: I'm with you wholeheartedly Robcat. In the original run, I had a whole lot more syllables and it looked really chatter-boxy. So I when back and dumbed it down so to speak(even pulled out the old facial mirror and mouthed everything out myself). Then I though I wasn't giving enough. So this last run I exaggerated some of the phonemes to better try to relay the sound in a short amount of time. I love letting other look at my stuff just for these types of instances(I really have to give my audience more credit) As for the hands: Yeah, it was a issue for me to try to come up with things to do with her hands. I did think about adding a prop or something to have her fiddle with, but I didn't want to take away from her performance. I'll sit on it and see if I can come up with a happy medium. Not sure if the color issues(lips and inner mouth) are truly issues. This was only a shaded render. Here is a Final render: Thank you guys(especially you Robcat!!!!!) for your feedback. Sometimes having that second pair of eyes(and not so self doubting judgmental opinion) is a lifesaver.
-
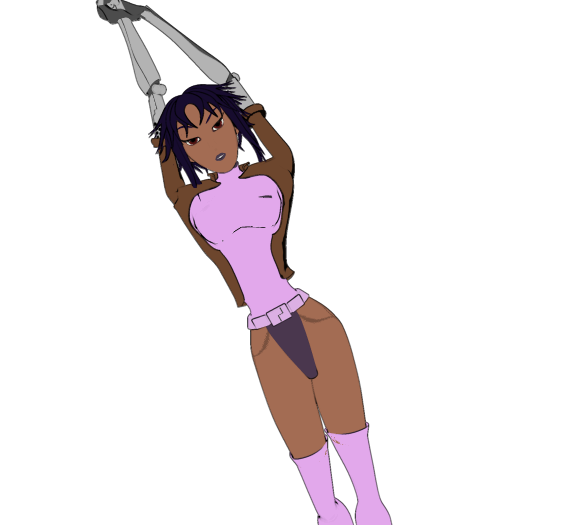
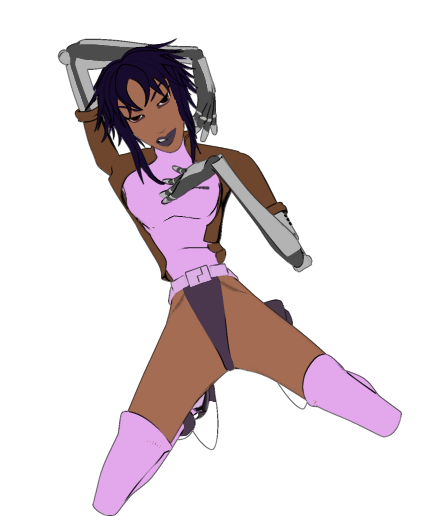
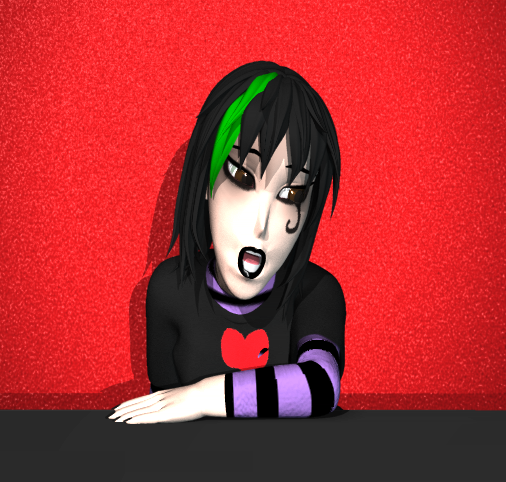
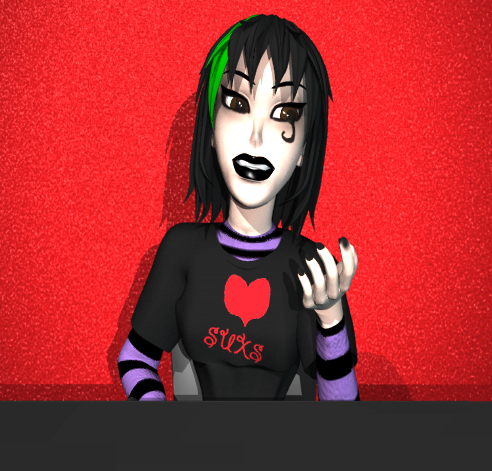
Working on polishing up the old portfolio, though I share and get some opinions on my character study. Right now I'm kinda ify about her hands. I think I need some more variety in the finger positions. raven_01web.mov Any tips on lip synching are always welcome and wanted.
-
I can't look at your model cause I'm at work right now.....I'm guessing that the whole model is transparent? I had the same issue with the beaker in my toon shaded episode. At diffrent levels of transparency the lines would change up on me too. One way around is to combine a render lines only with a render without lines pass. One thing I've always found as a quick fix when it come to "controling" toon lines is to make them yourself. When I was working on SciFI High I was finding spots where I wanted a line to accent or define but just wasn't there on the model. What you can do is copy or make the splines and group those and bone them to the model where they should rest. then just define in the suface the thinkness for just that group.
-
Not sure how to describe it. It blurs the image some, the render isn't as sharp. For the longest time when I first started using AM I couldn't understand why my MultiPass renders were always blury til I discovered that option.
-
Those engines look great keep it up! Are you using the sweeper plugin for those? If not, an extra WOW!
-
Okay guys, I'm up and going. SCI FI High is on the web. I want to thank you'll for you responses. Hope you guys stop by the site!!!! www.scifihighanimation.webs.com