zandoriastudios
-
Posts
3,868 -
Joined
-
Last visited
-
Days Won
1
Content Type
Profiles
Forums
Events
Everything posted by zandoriastudios
-
I'm thankful for any avenue that allows independent creators to show their work, and get paid, without having to go through the traditional gatekeepers.... If I had to pitch TAR of Zandoria to get it onscreen, and please someone other than myself, then I don't know how I would ever get MY vision in front of viewers--that I hope to turn into FANS
-
Simon's Cat...He has over 2 million subscribers [so that should make $2,000/month?...] l5ODwR6FPRQ
-
Maybe William Detweiler can give permission to use the Knights horse from "Adventures with Boomer". It had cloth barding, but he had trouble getting it to work and abandoned it for the project.
-
You could do a multi-part example: not just clothing, but layering clothing simulations, and using cloth for other things (soft-bodies?)
-
Welcome to the forum! Let us know if we can help
-
yes, you can do that. In this case, I made a low-res proxy for the cliff and exported an OBJ from A:M. Then I subdivided it in ZBrush and sculpted and painted it. Then I exported the lowest subdivision back out as an .OBJ and imported into A:M. If you setup your decals in A:M, then you should be able to do just what you said--however, once you try UVMaster inside ZBrush, you may not want to bother
-
When you create UV's inside of ZBrush and export an .OBJ and then import it into Animation:Master, your imported model will have a DECAL that uses them. Here is an example of a cliff that I created in ZBrush and imported into A:M. You can see the UVs in the Decal View, and the cliff in the final shot:

-
Congratulations on this accomplishment--It is something to be proud of! We all start projects, but it is a long slog to get from the beginning to the end! I hope that you will continue and not go back to the day job thing! I'm ready for the Wannabe Pirates movie
-

Tutorial: Composing Models from other models
zandoriastudios replied to mouseman's topic in Design Dynamics presents
Ahhh! Thanks for the explanation -
Tutorial: Composing Models from other models
zandoriastudios replied to mouseman's topic in Design Dynamics presents
Great tutorial! I didn't know that you could do that either!--it is revolutionary!!! I am going to adopt this technique myself One question: in the video you turned the relationship to OFF before you started positioning objects, and then turned it on and made the objects active. What is the reason for this? Would it work to just position the objects in the Pose without that step? I didn't understand--can you elaborate? -
(I think) you can assign a ring of points 100% to one bone, and a distant ring 100% to a different bone. Then select those rings and everything in between and EDIT CP WEIGHTS. That should show you those two bones+ whatever was in between (model bone?)--remove that bone/bones from the list, then BALANCE SELECTED. That should blend between the 2 bones.
-
wow-great tip Robcat! I will start using that!!!
-
I don't think there is a way to mirror it (although Robcat could probably do it in a spreadsheet, because he is so clever), and I agree it is a bit tedious... I have some smartskin and weighting videos on my YouTube channel (but they are tedious as well )
-
Thanks for the critique
-
So here is a re-rendered version of my poster image. I've added a gradient material that changes the diffuse falloff at the edges and toon lines--this looks really good straight out of the renderer, but I ran the oil paint filter on this in Photoshop to give some subtle brush strokes. I think it is a pretty good emulation of a Boris Vallejo "look":
-
KlPlK46gKvA I made some changes to the eyeline, and some major changes to the look. There is something homogenous in the look of current CG animation that is unsatisfying to me, and I want to get a more stylized look (see blog post)
-
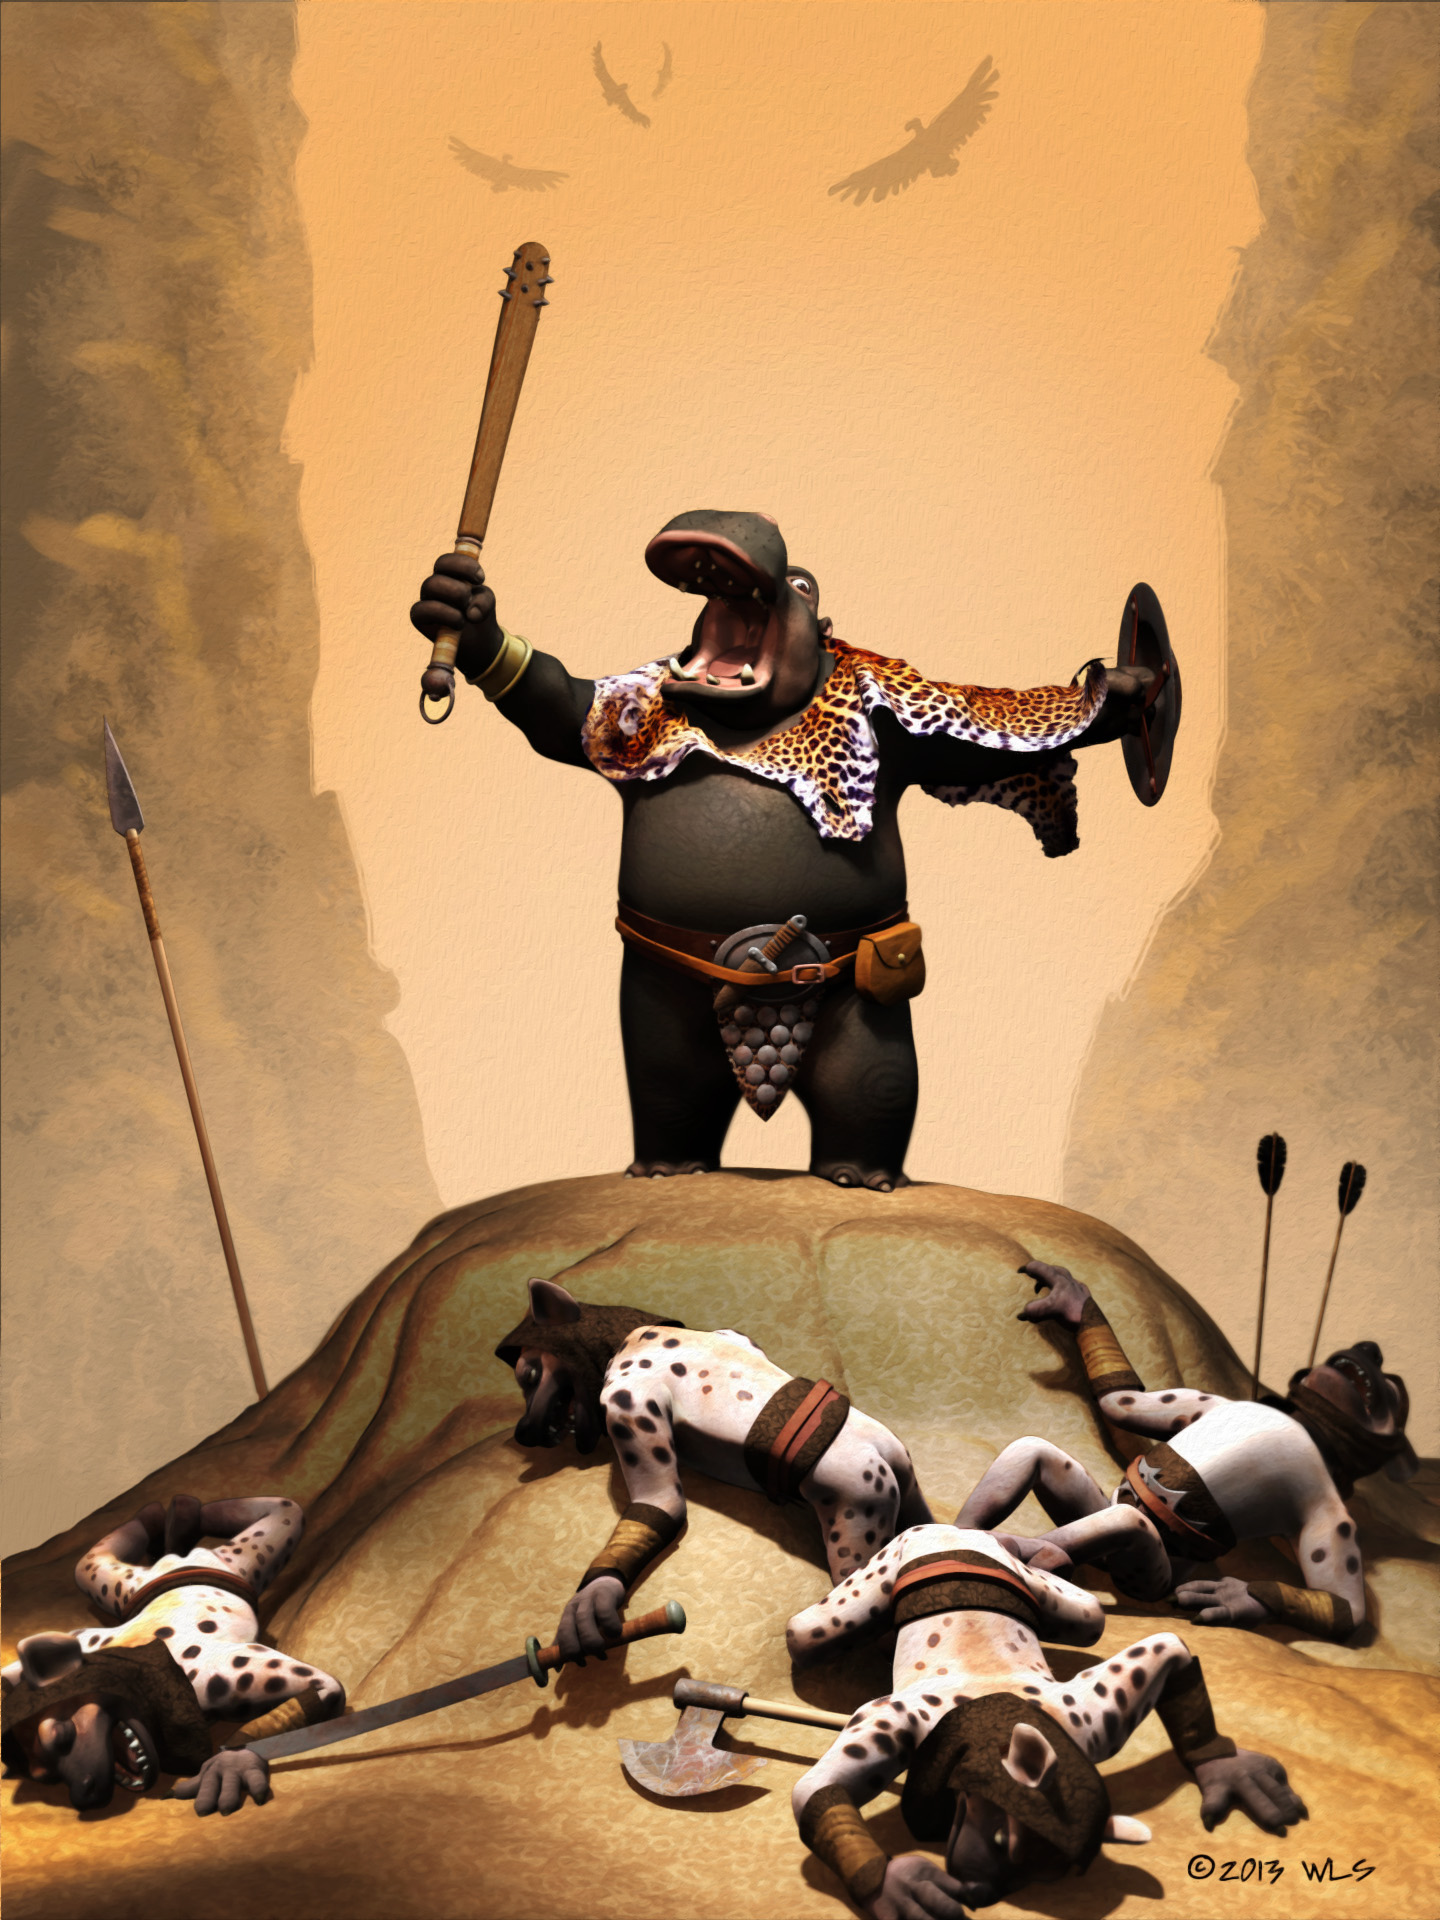
anthropomorphic hippo--its a great idea Had similar situation with Richard Starkings and his character "Hip Flask"--I'm sure this artist has never seen TAR, it is coincidence.
-
Painting with Light? It Can't Be Done! Feb 2014
zandoriastudios replied to robcat2075's topic in A:M Tutorials & Demos
Great job all around, Robcat! -
He is actually looking up on purpose. He stops before this pass, a few seconds earlier in another shot:
-
ps_jlgzuTV0 I just finished rendering a shot that I used a video reference of myself as a rotoscope. Pretty cool to get the timing and spacing for free--made it a lot easier to animate. Although the hand-off of constraints between the head and hand and the way he rolls the hat against his belly to take hold of it was really tricky!!! I was really pleased with the result (except the eyeline is too high...). I made a blog post about it here
-
Painting with Light? It Can't Be Done! Feb 2014
zandoriastudios replied to robcat2075's topic in A:M Tutorials & Demos
Elegantly simple! Nice job! -
I've got my own project to work on
-
I think it is up to you to complete it...
-
It Can't Be Done! Feb 2014 Nominations...
zandoriastudios replied to robcat2075's topic in Open Forum
I remember that I made the Balrog, simply because when LOTR came out people on the forum gave it as an example of something that couldn't be done in A:M. So I like that recreating (or parodying) a shot from a BIG NAME animated movie would be worthy. We already have a "Buzz Lightyear" model--maybe recreating a shot with him, with full facial animation, lit like the latest film -
draw guide curves before running it, and it will use them to determine edge loops and stuff