zandoriastudios
-
Posts
3,868 -
Joined
-
Last visited
-
Days Won
1
Everything posted by zandoriastudios
-

Animation Bootcamp: TAR of Zandoria
zandoriastudios replied to zandoriastudios's topic in Tar of Zandoria
I need to post the simbiont materials! -
Animation Bootcamp: TAR of Zandoria
zandoriastudios replied to zandoriastudios's topic in Tar of Zandoria
Nice, Rodney! I usually hit the R key and use the rotate manipulator to animate the fingers, since it is sometimes easier for me to control. -
Animation Bootcamp: TAR of Zandoria
zandoriastudios replied to zandoriastudios's topic in Tar of Zandoria
Send me an email, Douglas! -
If you want to be an animator on this project, you will want to download the character assets and try them out! Send me an email zandoria@gmail.com with the Subject line: "TAR assets". Include your contact details (Name, address, phone #, forum username), and I will send you a download link. Please DO NOT share the link, as I need to control who has access to my Intellectual property. These files are the property of Zandoria Studios. You may NOT share or modify these models or textures, or re-purpose them for any other project. A limited license is granted to use these models for animation practice and to share the renderings and animations online at the Animation:Master Forums, or your personal website or YouTube Channel. You must display a credit that says" ©Copyright Zandoria Studios. Used with permission". Post your animations and tests here in this topic for feedback! Mace-test.mov
-
Concept Sketches: TAR of Zandoria
zandoriastudios replied to zandoriastudios's topic in Tar of Zandoria
I love the way Sculptris dynamically tesselates the mesh as you sculpt it! I really expected ZBrush to adopt that when they bought it... -
Concept Sketches: TAR of Zandoria
zandoriastudios replied to zandoriastudios's topic in Tar of Zandoria
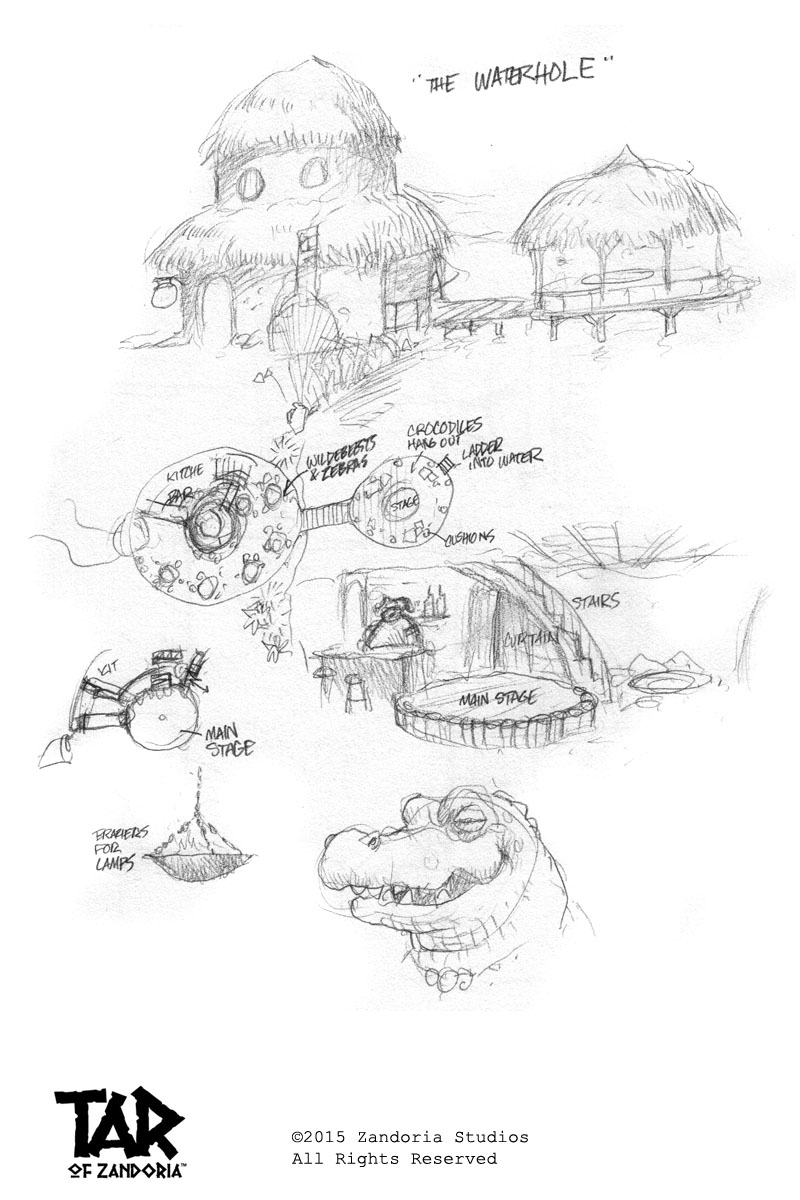
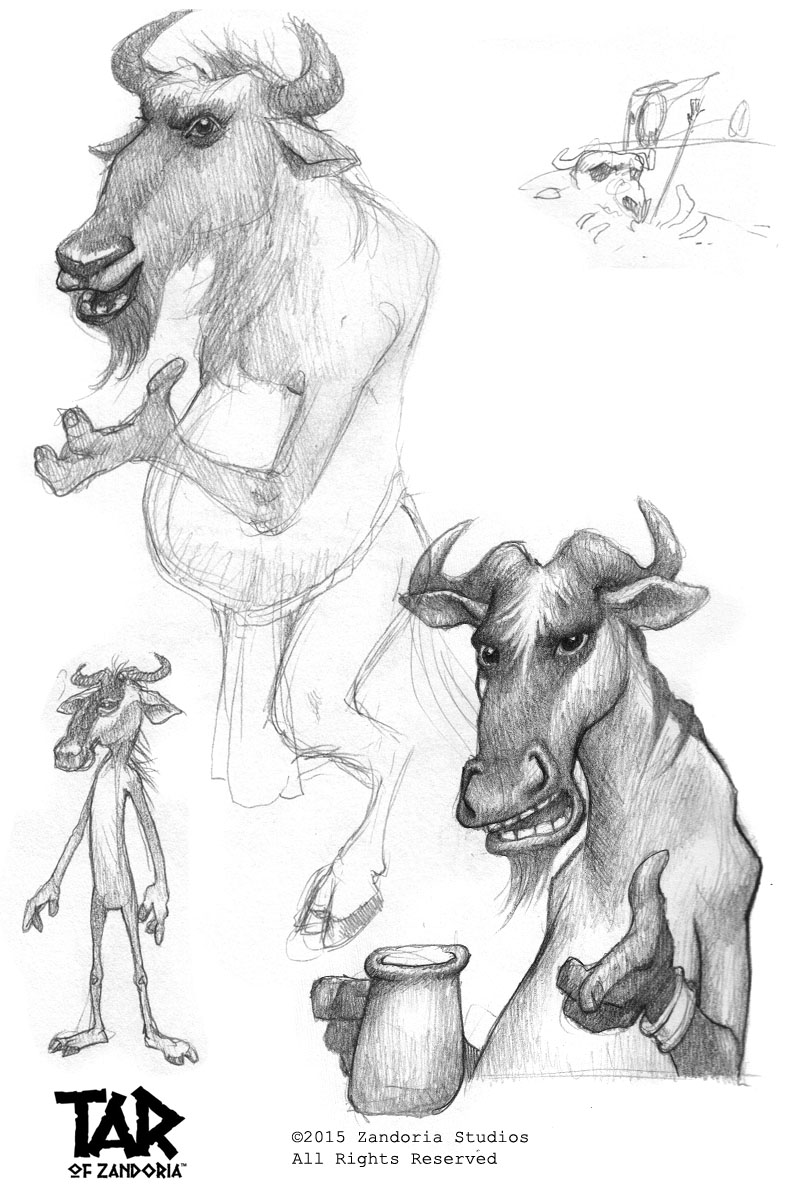
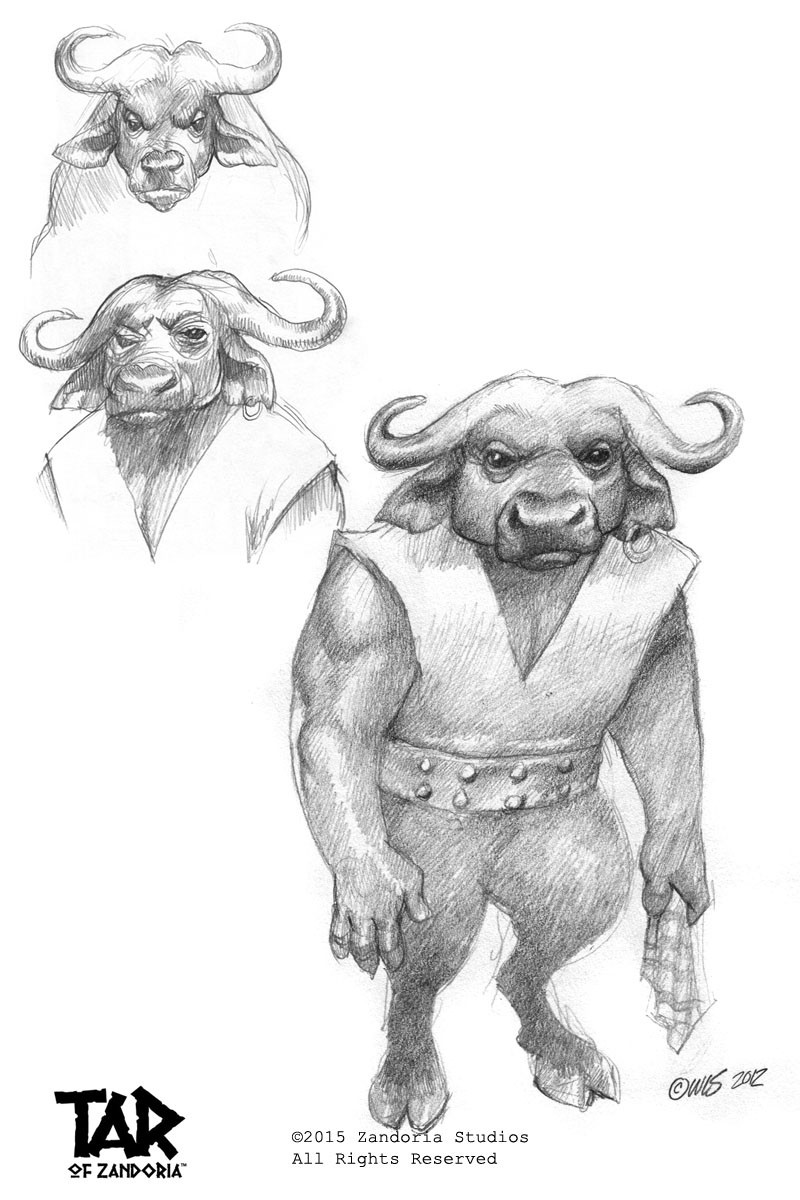
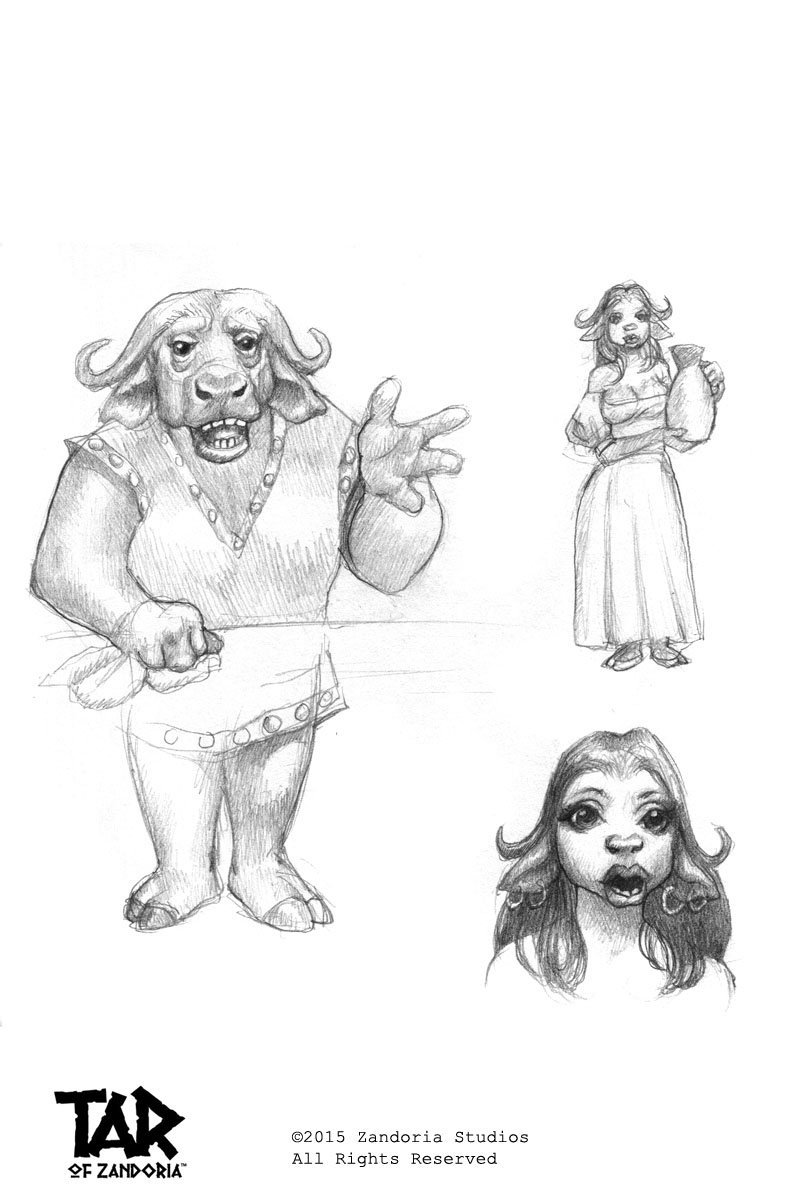
Yeah, that's my thought at this point...the 3rd sketch of the waterbuffalo is the bartender, Mike. a retired adventurer who runs a bar called the "waterhole" with his wife Robin. He loves to re-live the glory days... -
Douglas, You should start a folder and start putting bits and pieces of anatomy that you like into it. You can import them into a new model and stitch them together. Great for eyeballs, teeth, hands,etc...
-
Concept Sketches: TAR of Zandoria
zandoriastudios replied to zandoriastudios's topic in Tar of Zandoria
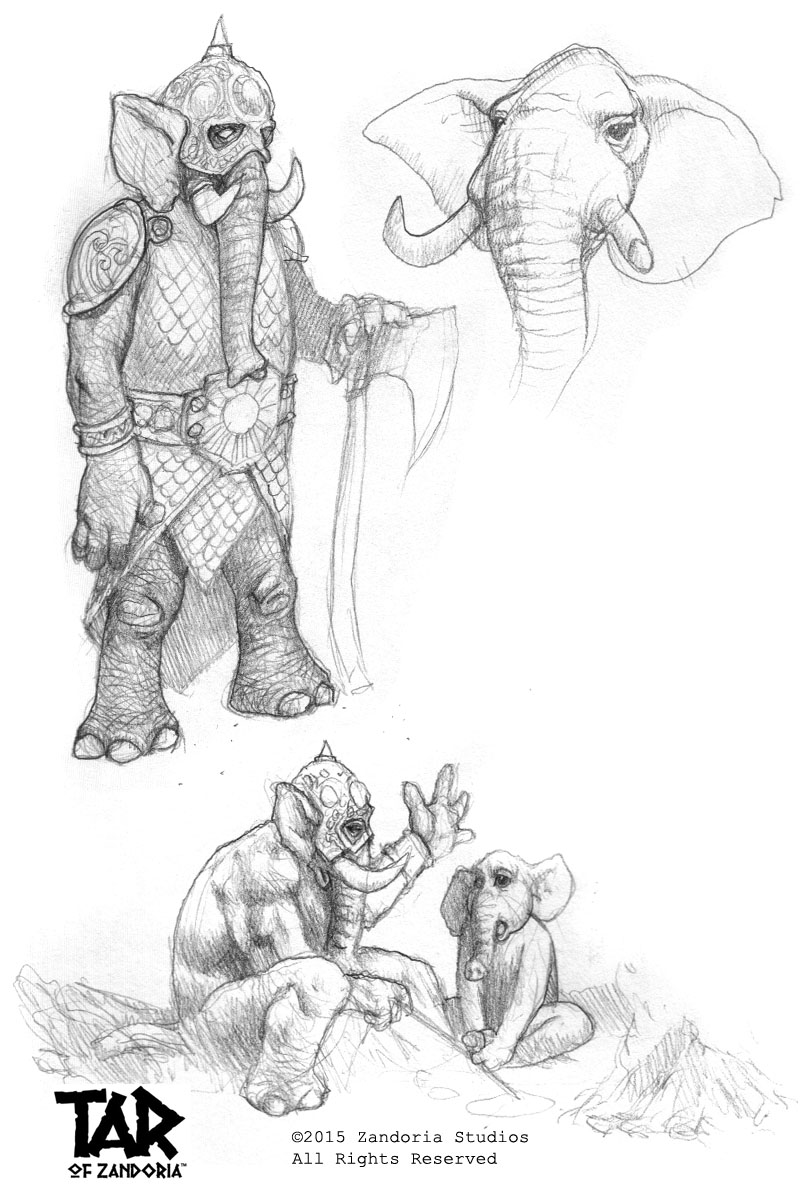
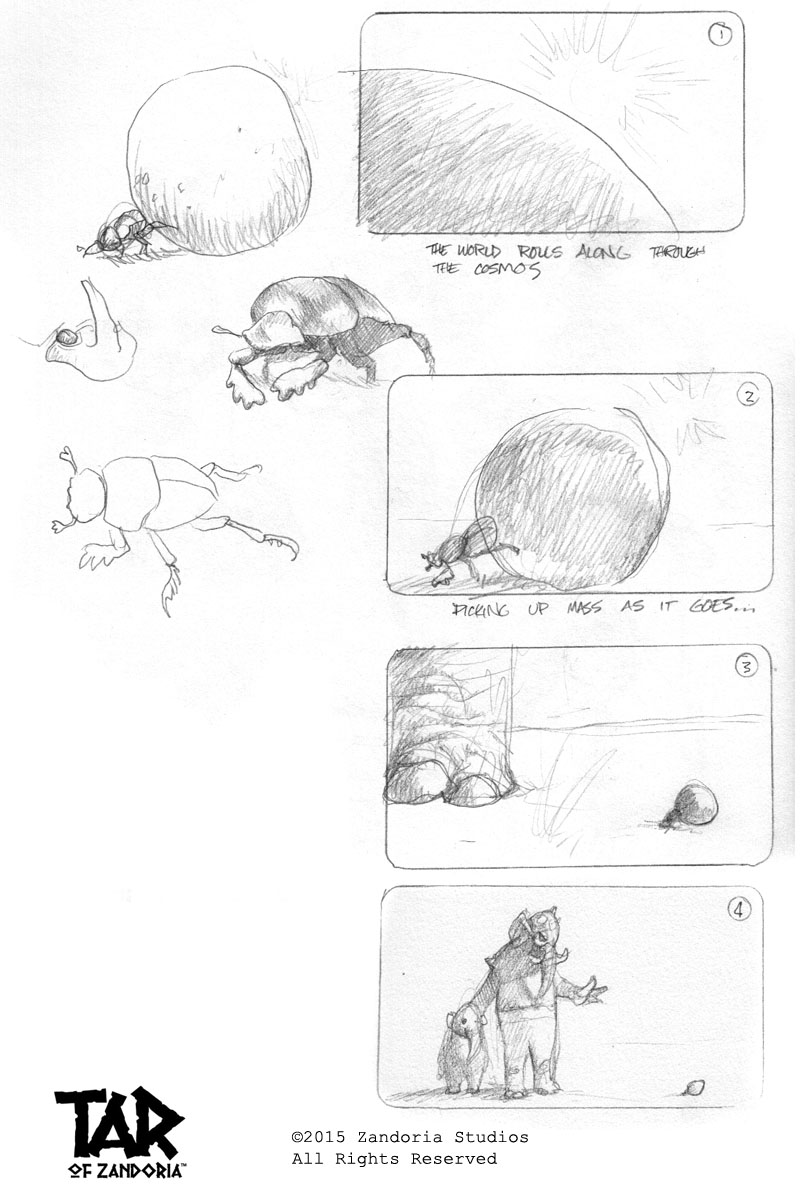
I appreciate your efforts thus far, and I can do as you say and use your sculpt as a starting point--so thanks! Crocodile needs some sketchbook time, as I think he will be in a shot in the next episode....I've got to get this Pitch Bible online, so everyone can see where this is going -
Concept Sketches: TAR of Zandoria
zandoriastudios replied to zandoriastudios's topic in Tar of Zandoria
William, are you working with Sculptris, ZBrush, or Mudbox? The workflow that I'm using is bringing the base mesh into A:M, tweaking the size and topology, then exporting back out to .obj. That exported OBJ becomes the base for the clothing,helmets, etc. If you Texture those objects (subtools) separately in in ZBrush, then you can import them into A:M as new models, keeping the textures as decals. and then you can paste them into the main model (or add them in a pose). OBJ doesn't let you have multiple decals like A:M, but this workflow overcomes that (and .A:M models don't have that limitation)... I like seeing the sketch in the round--I can see things that look good, and things that I would change. The designs of the legs I keep messing with different ideas, between quadruped legs or "normal" ones to see what looks best. And I am trying to push myself towards a 4-head cartoony proportion (but my pencil fights it...) Do you want to pick one of these guys and model it all the way? I can give feedback as we go, until we end up with an animation-ready model. I think it would be worthwhile, because you could take your sculpting to a finished state, generate displacement maps and normal maps to apply that detail on the A:M version. It would benefit us both, right? -
Concept Sketches: TAR of Zandoria
zandoriastudios replied to zandoriastudios's topic in Tar of Zandoria
Wow, William you are on a roll! -
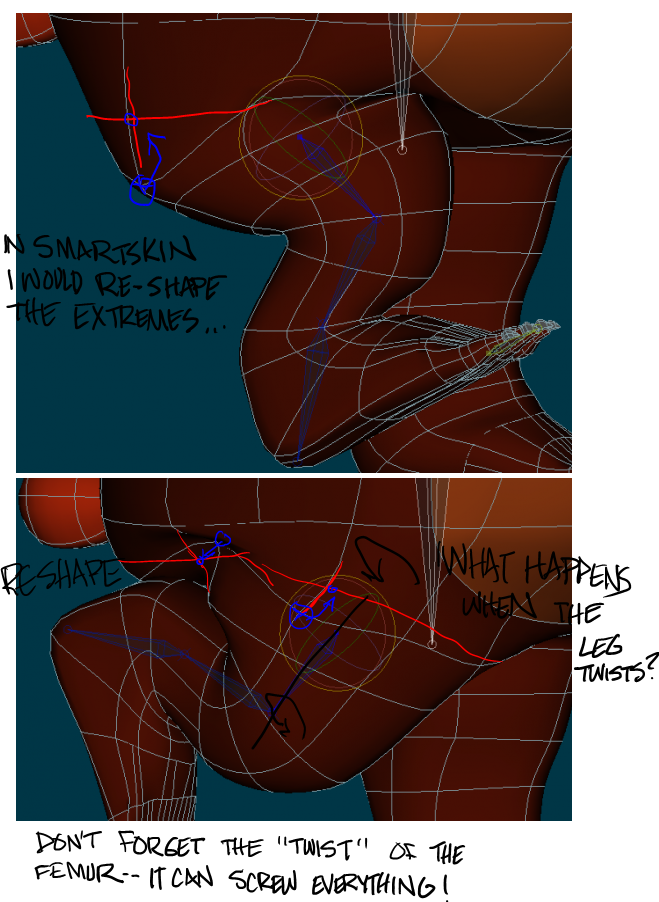
Looking at your screen capture, I would re-shape the two extremes in your smartskin. I hope you have these joints weighted to a fan bone, so that it doesn't screw up when the leg twists...Otherwise, keyframe the smartskin at 3 different roll positions for that.

-
Concept Sketches: TAR of Zandoria
zandoriastudios replied to zandoriastudios's topic in Tar of Zandoria
William--that looks pretty awesome, dude! It looks very much like the sketch. -
Hotkey "a" to add, then click on the end of the spline you want to add to. NOTE: when you start stitching things there on the centerline (where you want to copy/flip/attach), often you will connect into the horizontal spline...So add to those splines an extra point and leave it dangling, then stitch the vertical spline. Afterwards delete the dangling CP.
-
So answered a question at another forum
zandoriastudios replied to Dpendleton77's topic in Animation:Master
haters gonna hate... -
A:M Technique: Decaling & UV Editor, 3D Painter
zandoriastudios replied to zandoriastudios's topic in A:M Tutorials & Demos
Oh--and PLEASE subscribe to my YouTube Channel. I lost all of my subscribers when I accidentally deleted everything... -
Siggraph demo from 2006. 2 hours of video on decaling, using the UV editor, and 3D Painter: https://youtu.be/czaYXaf_9D8
-
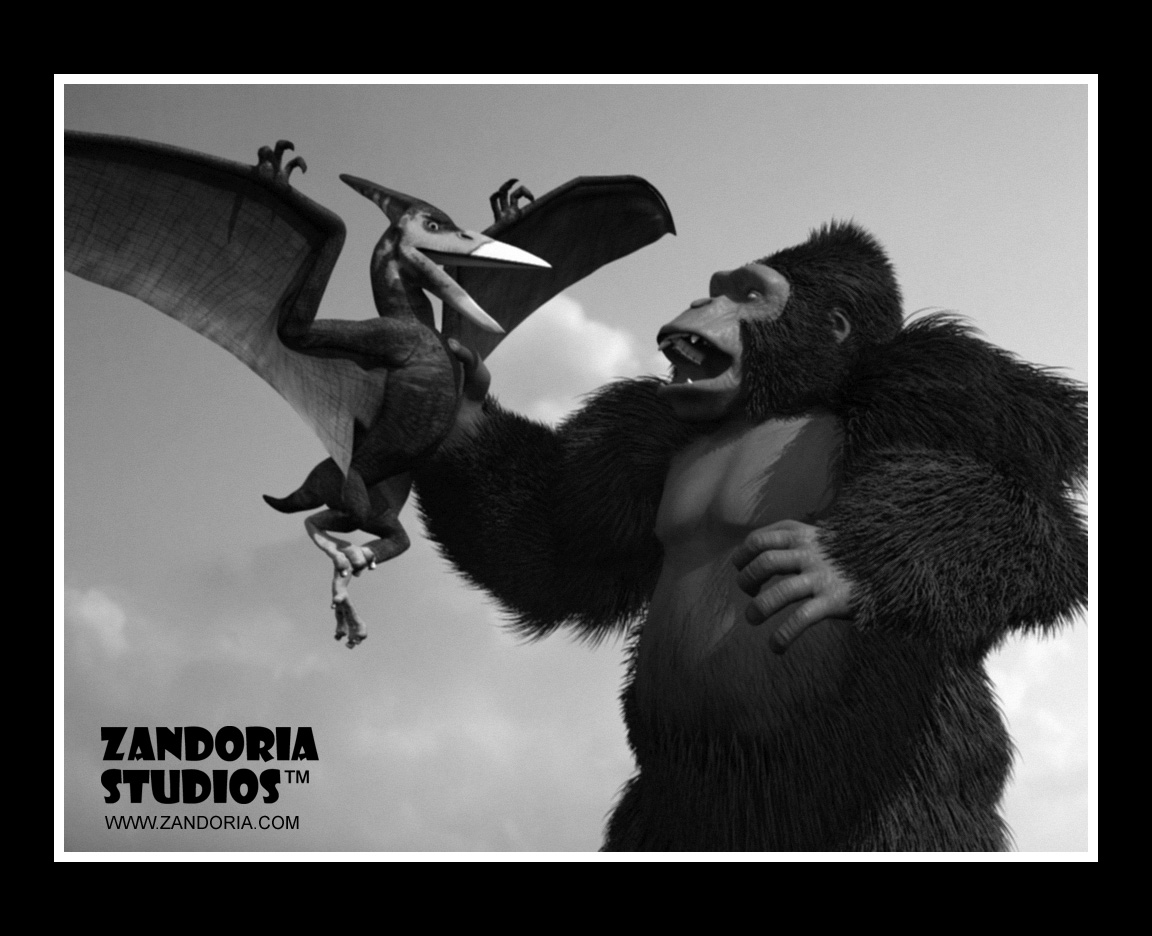
Pretty cool thread! I hadn't seen it before, so I didn't even know that Mark had re-rigged the Kong model. As you can see from the modeling video, I developed this character over a weekend to prepare for a Siggraph modeling demonstration. There was a lot of excitement about what Peter Jackson's Kong was going to look like (this was before the movie came out) and I thought it would be a good subject. I hadn't made a character with hair before, but was inspired by seeing it on the orangutan in V11, so I also thought that this would be a good subject for learning that. I think Mark's grooming looks really good, so I'm glad that providing the model to the community was helpful for someone... I have mixed feelings looking at the renderings, and reading the comments. I can see the frustration of getting critiqued on proportions and other things that were already there. But I also feel a frustration as I see things evolve away from my own vision--even though I knew that when I donated it that it would become something else, not of my making. So there is an emotion of loss, even at the same time I see some changes (like the chin whiskers) and think, "I like it". So I would advise, that you just have to make it your own--change the proportions. Remodel areas that you don't like. Plus it up! Then post it back up for someone else to learn from and watch the cycle start again. Here is the black & white image that I rendered as my final:
-
Whaaaat?
-
When I get overwhelmed looking at the almost infinite number of other artists,better artists, out there...I try to remind myself that it doesn't matter, because whatever it is that I'm going to do, good or bad, is unique to me. No one else is going to do it
-
Concept Sketches: TAR of Zandoria
zandoriastudios replied to zandoriastudios's topic in Tar of Zandoria
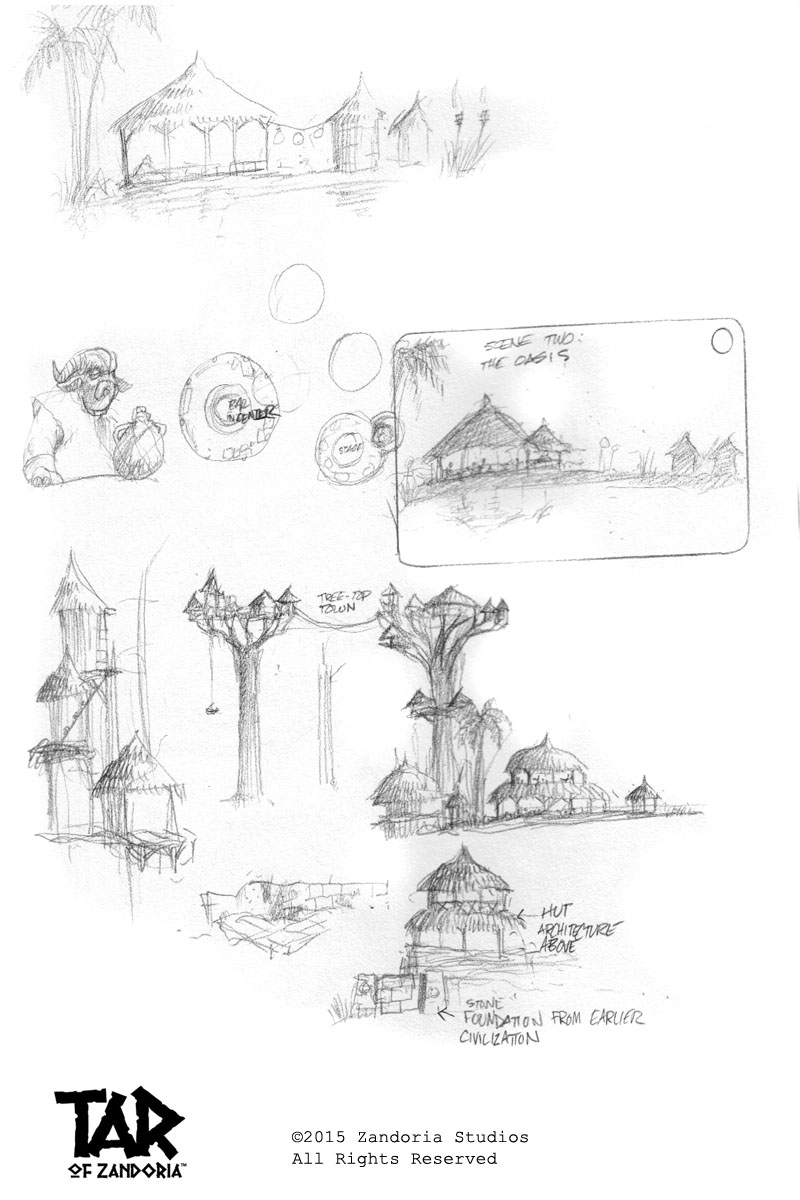
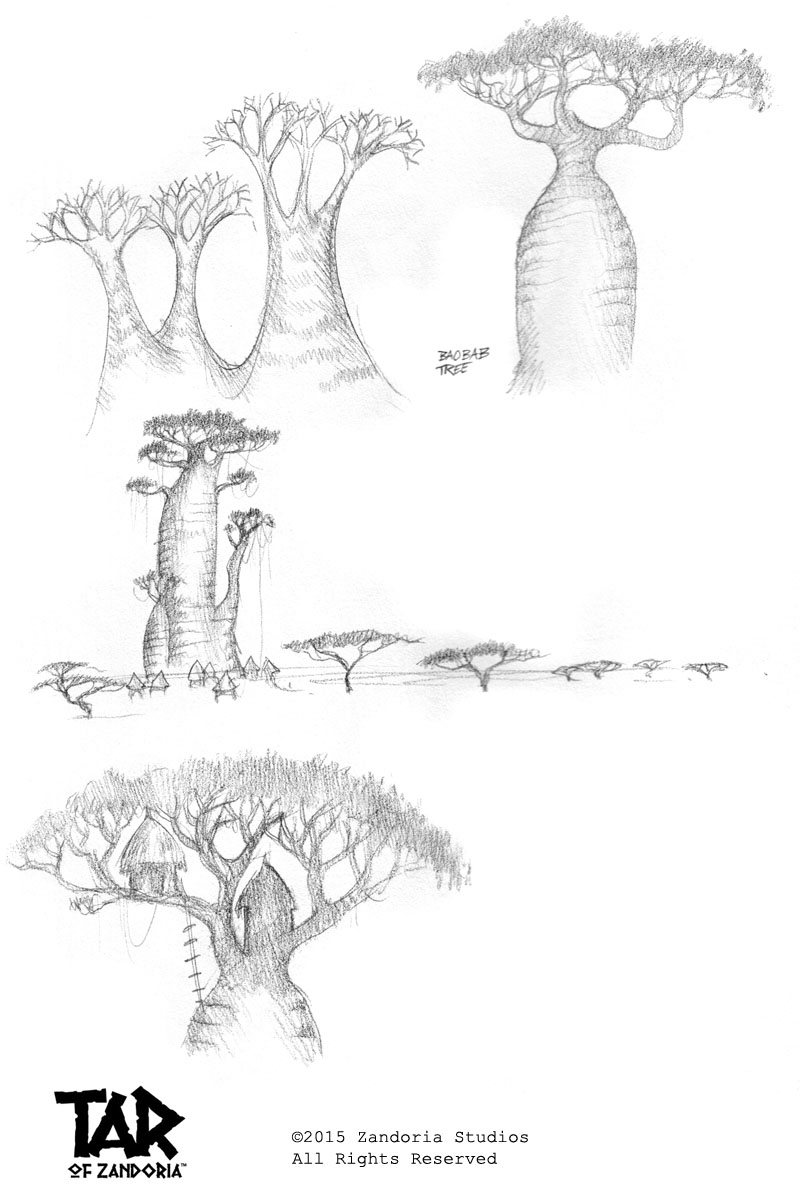
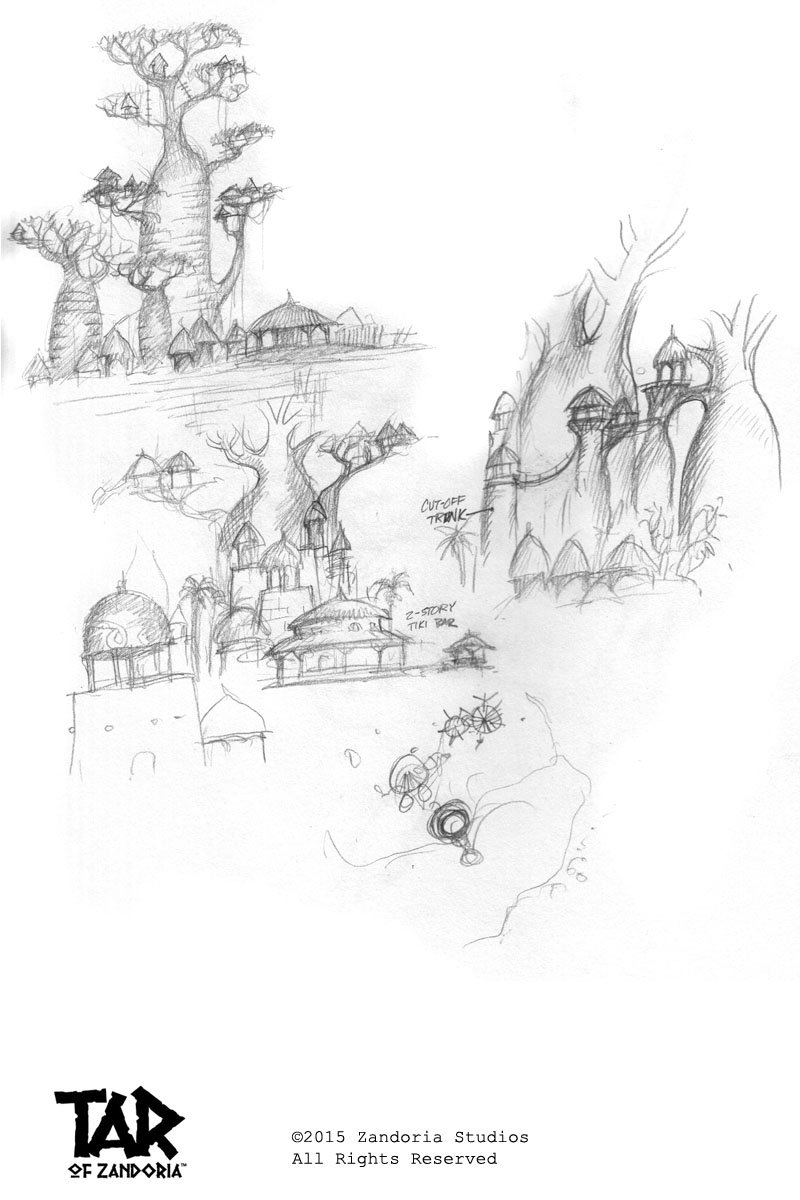
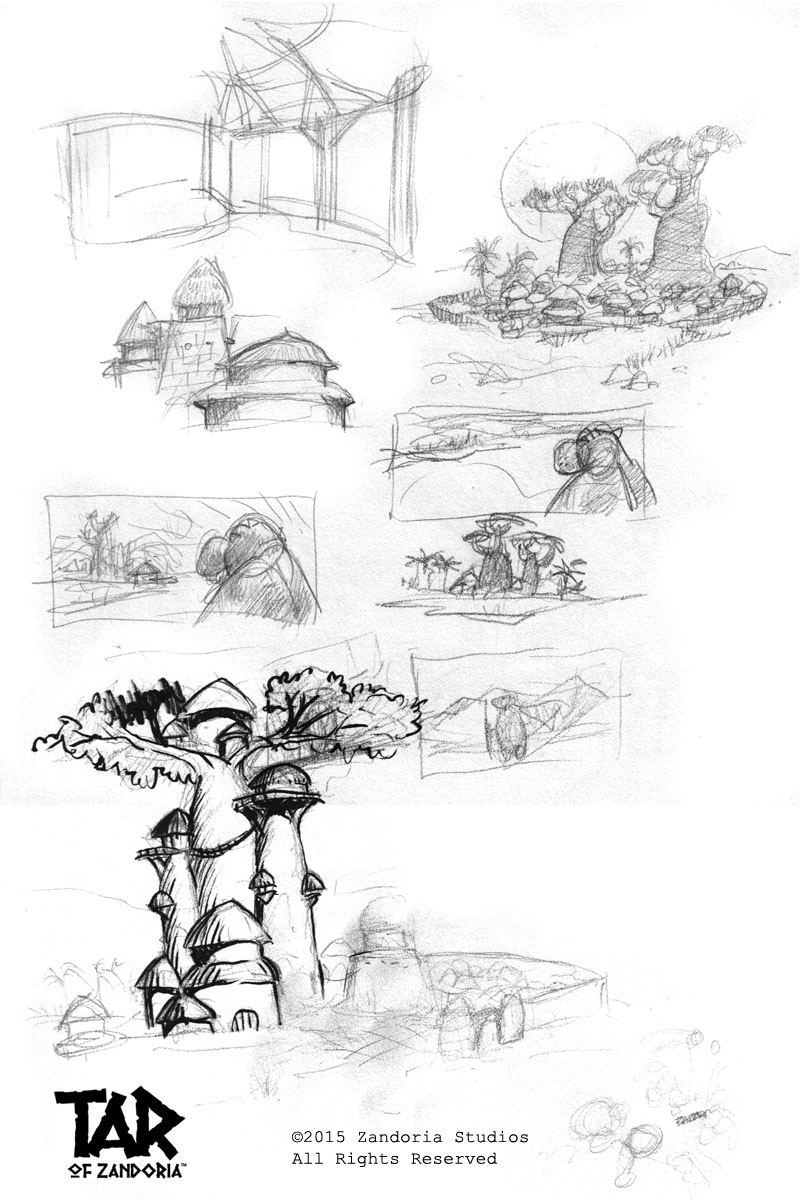
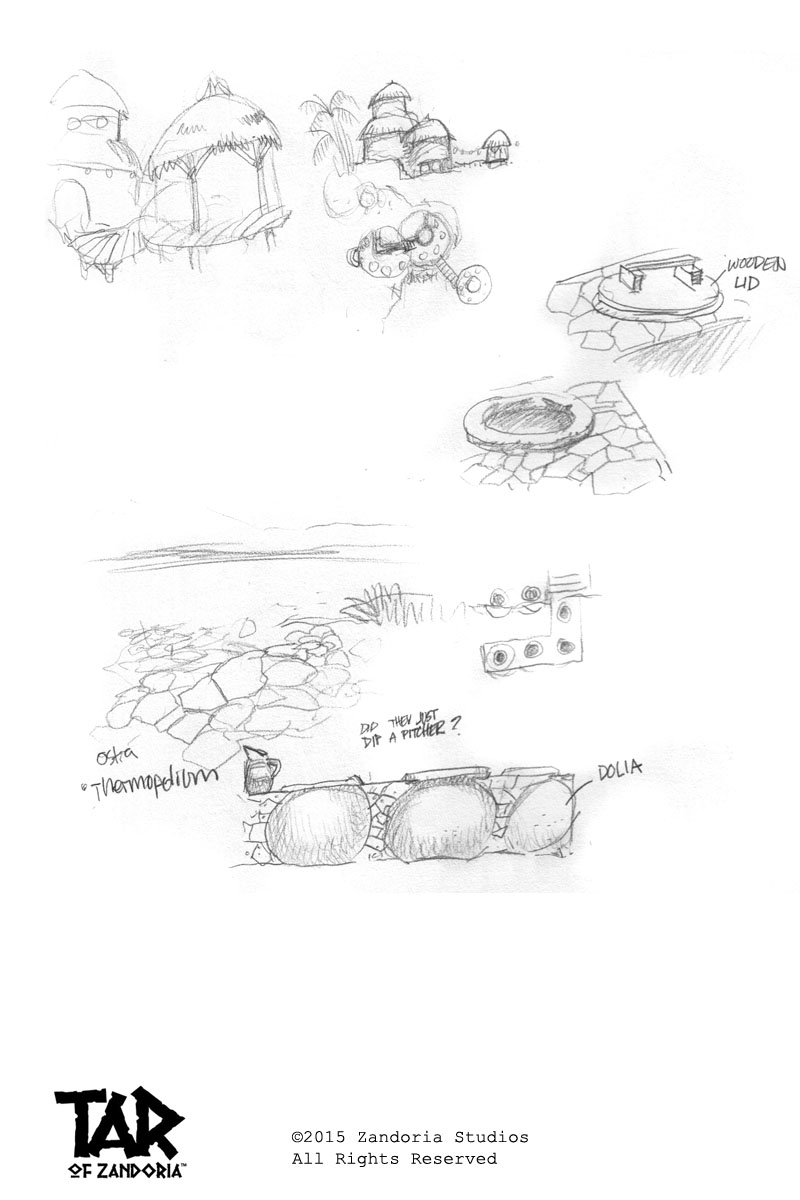
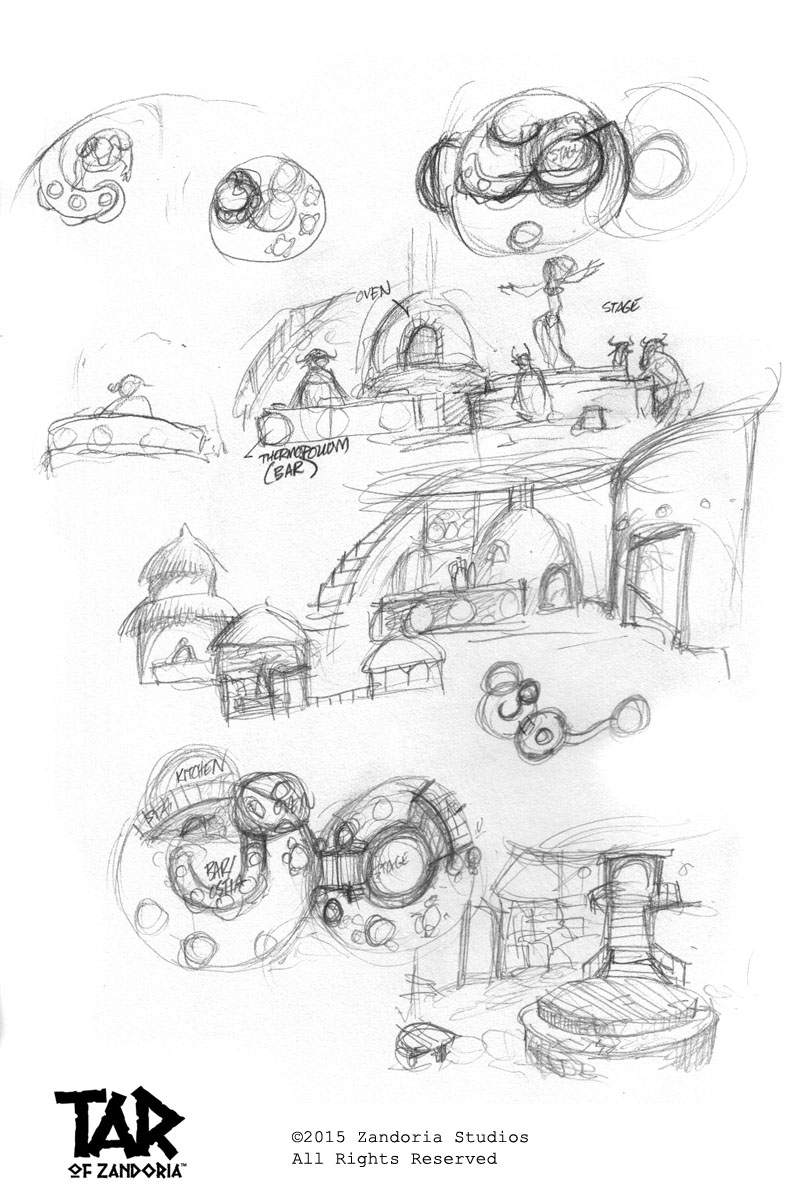
Not much--even the boabab tree that I showed in an earlier thread was just experimenting... I don't want anyone to jump in just yet--Im going to post a bible for the series, and storyboards so that choices can be made about what can be modeled vs painted. Though I see the need for individual huts and buildings trees to be combined for different locations. -
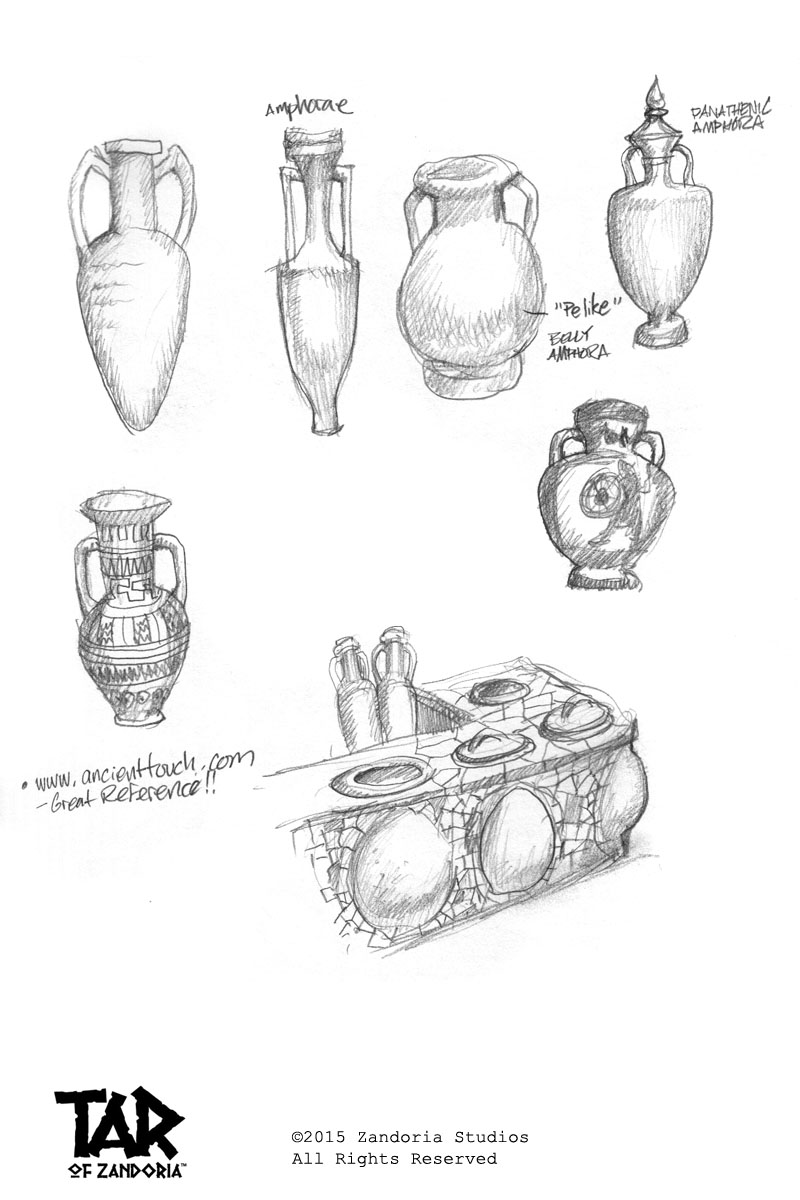
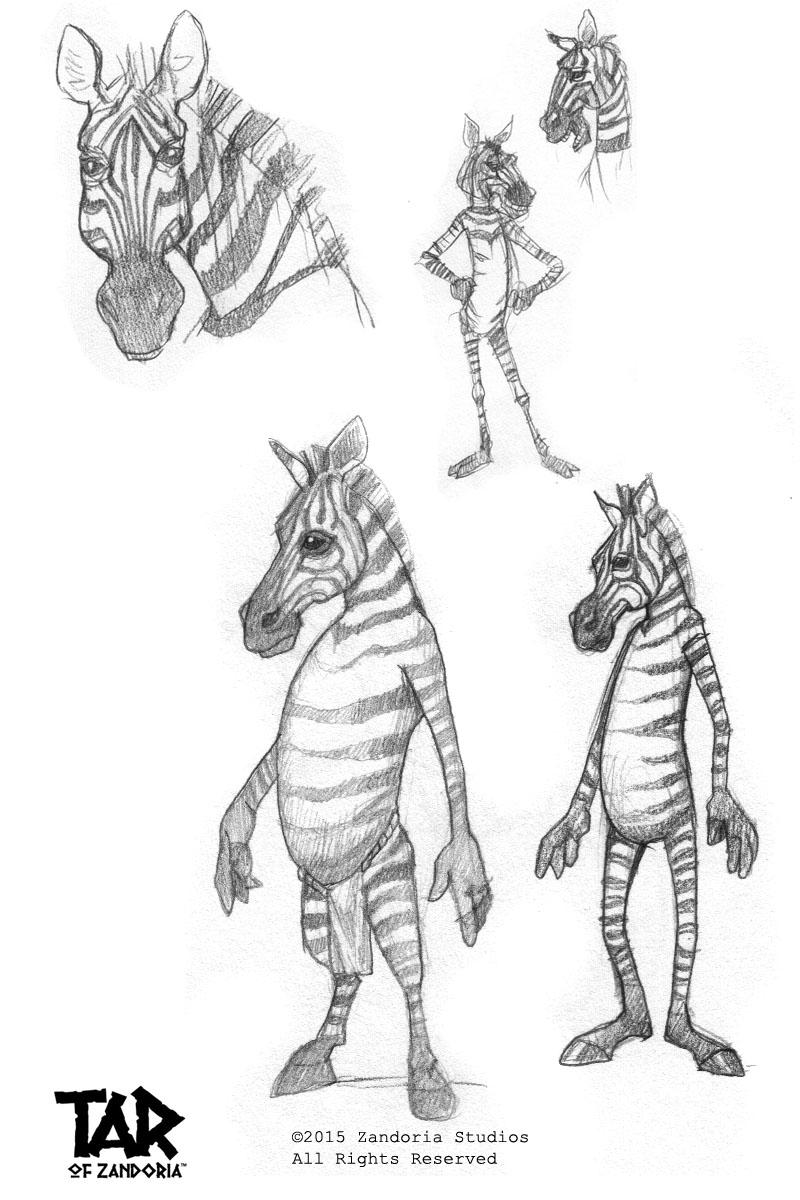
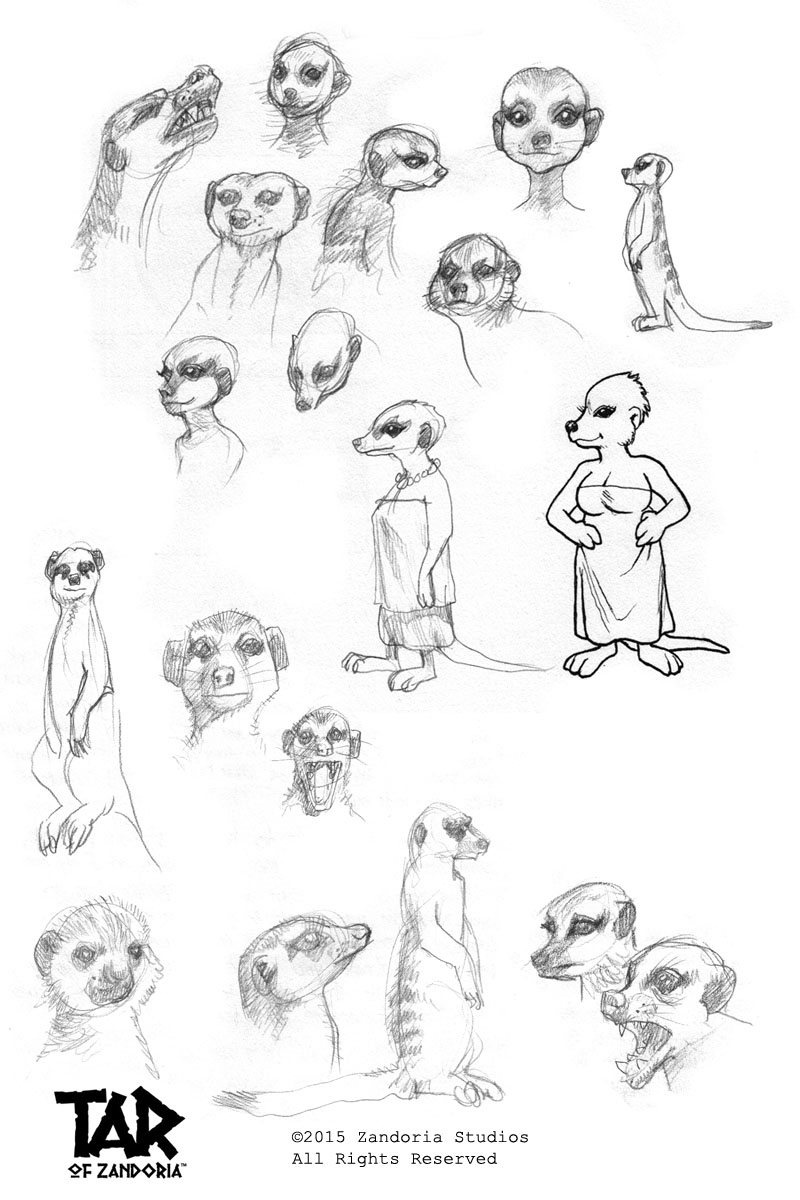
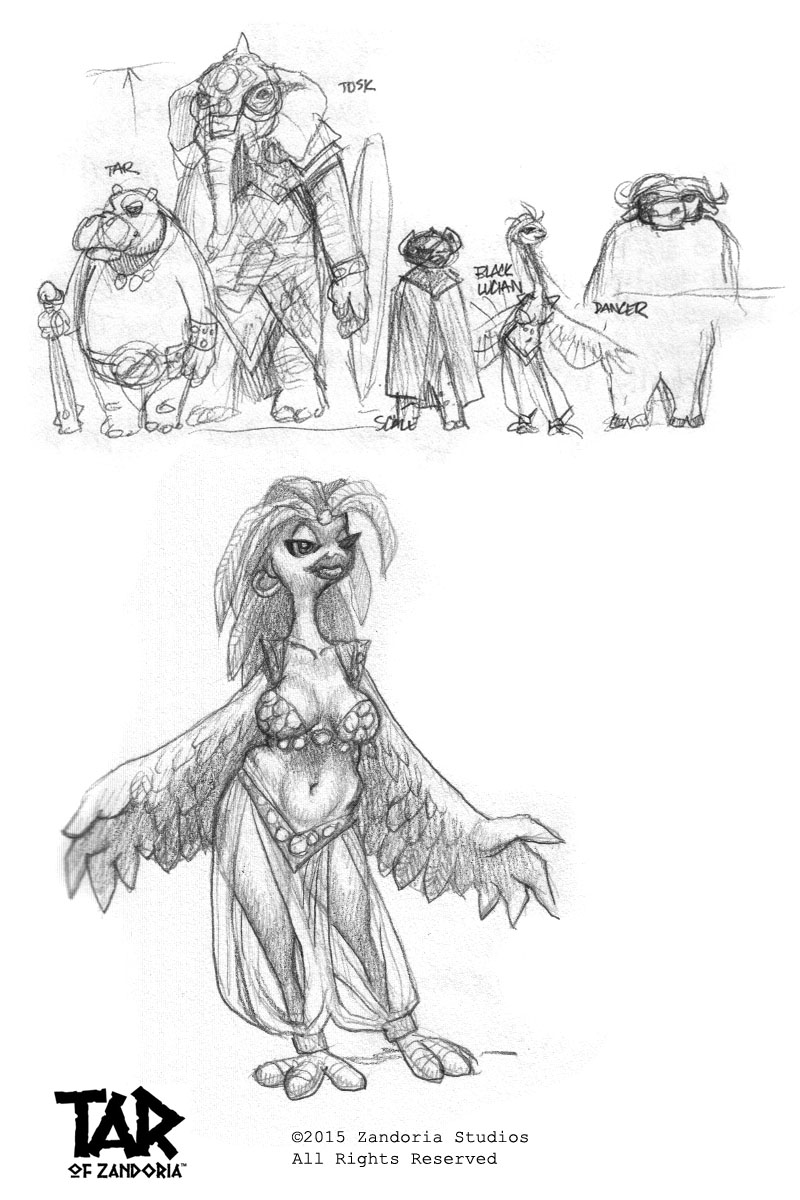
As part of the 2015 Open Studio plan, I thought that I better throw my sketchbook up here with some concept sketches of some of the locations, props, characters, etc of things upcoming... One of the main locations is a bar called "The Waterhole" at the Oasis of Lund. There will be a lot of buildings, and set pieces that will be good beginner projects for apprentices to work on (Details to come...).
- 47 replies
-
- 1
-

-
- Tar of Zandoria
- Concept art
- (and 1 more)
-
I have been a little distracted...I have been focusing on generating some freelance business to keep the lights on. I've been a little depressed too, struggling with the whole "meaning of life, why am i here?" existential angst that all artists go through...[its not just me, right?] I will get the bootcamp set up in the next week or so--I promise! This will launch an exciting time that I hope will revitalize the Animation:Master community
-
Douglas, I will be happy to mentor you or any of your friends who want to work on the TAR of Zandoria project!
-
http://www.garagegames.com/products/torque-3d Torque 3D cookbook These resources might be helpful
-
Well said, Rodney. I completely agree--A:M is not lacking in features. But A:M does need more users. That's why I keep coming back to the open studio--because people need to see that path as a way to bring their dreams to life.