-
Posts
1,303 -
Joined
-
Last visited
JohnArtbox's Achievements

Mentor (7/10)
0
Reputation
-
Rodney, thanks for that very useful link. Matt, I thought the same, although maybe it was the cloth solver. The hair salon proved useful, but do far the most useful solution seems to be to use keyframes to judiciously pull the hair back into position, and to use styles that minimise the issues. I'm going to pull apart the project you posted to see what else I can learn.
-
Genius, Thanks Matt
-
Thanks guys Robert, I tried baking particles without success, I'll try rendering in 17 to see if it makes a difference. the a-buffer motion blur is significantly worse than the AE option as it only operates on the model patches and ignores the hair. As for the interpolation I think the hair points are stagnant but the points that are attached to the patches move with them, hence the stretching. Matt, tried your settings without success. Increasing the two values didn't seem to affect it, and there seems to be no sub-frame interpolation on the hair. I'm having reasonable success with various settings on non-motion blur renders, now I'm just working my way through all the different options to try and work out what they all do, and which ones work. Is there a comprehensive outline of hair settings anywhere?
-
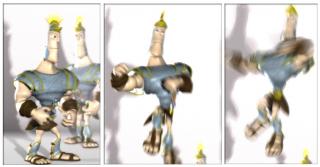
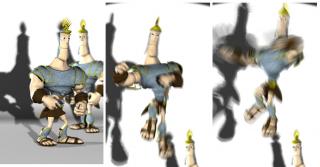
I've played with Hair a few times and then put it back in the box because i could never get it to work. So I tried again today and it worked perfectly, until I turned motionblur on. The first subframe renders perfectly but then the geometry moves while the hair stays static on individual frames, causing it to intersect the geometry. I ran some tests by rendering without motion blur, with motion blur, with motion blur added in post(the best option), and lastly by rendering at 120fps without motion blur and then combining frames to create motion blur manually. The last option works but seems to add extraneous jitter to the hair, although this may just be my settings. So does anyone have any advice on hair, or can you confirm that my surmises are correct. The movie shows all of the tests labelled HairTest.avi.mp4
-
Thanks for the warm welcome. It's good to be back using AM after a long hiatus. I've just uploaded the new render and sound mix to my website at thinkdesignact.com
-
it's been a long time but I'm rerendering things in hd for a new showreel, including the old "Investigating Jack" trailer. The animation is still rendering away but here's a still.
-

punch babies in the face - finished project
JohnArtbox replied to thefreshestever's topic in Showcase
Beautiful short Sebastian. Made me laugh out loud. One question...how did you rig your characters? Especially curious about the pipestem arms and legs. -

Creating Locks of Hair (Braided, Kinki, Twisty, etc.)
JohnArtbox replied to Rodney's topic in Work In Progress / Sweatbox
To use a decal to drive the old hair, add the decal and change the map type to "other". right click on the properties driven to add a property and you can control all the shag parameters -
As fuchur said, it probably isn't the best option for games but you can use a hash obj mdd to blender to fbx export if you are not concerned about file sizes. The resulting fbx is huge though.
-

Hash mdd export rendered in cycles(blender)
JohnArtbox replied to JohnArtbox's topic in Animation:Master
l used 16 Poly export for some tests, but it basically came down to running tests quickly. The same reason I used an existing animation rather than create something new. Using jittered lights in the opengl render has given me soft shadows, and I think I might be able to generate a light dome as well. Ive added bump and specular decals, a slight fog, film bloom and grain, and render times are sitting at around 5 seconds at full hd. Potentially I guess Blender's openGI/Game engine could do the same? -

Hash mdd export rendered in cycles(blender)
JohnArtbox replied to JohnArtbox's topic in Animation:Master
Hi Jake, by decal driven I mean that most of my models have decals set up for colour, bump, specular and diffuse so that it's relatively ease to translate them. For me AM's main strength is its character tools. That's my understanding of cycles too. It appears to be quite powerful and fast. Admittedly it means taking on the headspace of other software, but I think the positives outway the negatives. -

Hash mdd export rendered in cycles(blender)
JohnArtbox replied to JohnArtbox's topic in Animation:Master
For texturing I tend to use decal driven materials a lot, and these are easily translated col to col, bump to bump etc. For lighting i'd set it up in the final renderer anyway. For anyone using 3d in a compositor with a 3d environment like fusion, this adds a huge amount of functionality, relight, reposition, rerender and reuse AM assets with animation. -

Hash mdd export rendered in cycles(blender)
JohnArtbox replied to JohnArtbox's topic in Animation:Master
Robcat: I exported the roman character as an mdd. The blocks are blender primitives. The render is different, it's the nature of the beast. The main advantage is that cycles is a gpu renderer and, if you have a good graphics card, much faster than AM's renderer. It simulates radiousity by bouncing lightrays, which is something that makes lighting setup simpler and it's similar to AM's Progressive viewport in that it can be turned on while you are fine tuning materials and lighting. On top of that Blender provides integration with a whole bunch of new capabilities, without having to give up AM's sterling character tools. Mr Bigboote: I don't know that Cycles is a faster renderer...my gpu is just a hell of a lot faster than my cpu. My gut feeling is that cycles is also natively faster, but the other major factor is the ability to have far more complex geometry in the scene and to play nice with other software. Using the same process I've put the same animation into Fusion and rendered it out in almost realtime. I think it averaged 8 fps with multipass motion blur and depth of field. It's not AM quality in that the obj files are only a 4 poly subdivision, but without the mulitpass settings it was outputting hd in realtime. FusionRTSmall.mov -
After seeing Soulcage's wonderful renders and lusting after GPU rendering speeds, as well as some of the non-character tools in other packages I finally spent a couple of days on the export and render pipeline from AM to Blender and it's cycles GPU renderer. Bearing in mind that my knowledge of blender is minimal at best, it was surprisingly easy. I exported the model as an obj file and then exported the matching mdd. In Blender I imported the same. turned on the cycles renderer and pressed go. RomanJump.mov
-
Robert, Rodney and David: Thanks guys that helps a lot. I tend to use the setup machine because it's easy, but I have a fair bit of customisation floating around so the idea that I can create my own installrig is intriguing....


