fae_alba
-
Posts
1,122 -
Joined
-
Last visited
-
Days Won
22
Content Type
Profiles
Forums
Events
Everything posted by fae_alba
-

Prehistoric! Image Contest! Deadline December 20!
fae_alba replied to robcat2075's topic in Animation:Master
well, time to dust off my a:m skills again and get to it. -
I use a monoprice iiip. Love the thing, and spend way too much time printing on it. Really, which printer you get will be decided by a few things. 1) print size ( mine prints a 7 inch by 7 inch by 7 inch model). Most of the cheaper ones are much smaller than that. 2) dual or single extruder. Don't spring for a dual, overkill in my opinion . 3) heated bed...get it! It takes practice, and even the most experienced users will have issues from time to time. If you have something you want to try and print, shoot me a message, I will be happy to help out when and where I can.
-
It has seemed twitchy toe, but I always chalked it up to having my mouse too sensitive and being too ham fisted.
-
If you had another force acting on the smoke higher up would that get the curling effect at the right end?
-
Now that is a nice site! Might even be able to use that as a screen grab/rotoscope
-
My plan is to have the inner gear ring mounted to a plate so that it performs as a spinning ride deck, ala mad hatters tea party ride. I'm modeling the bed and inner plate that will mount to the tea pot and motor. I'll include pics when I get home Appreciate the assistance ..makes the heavy thinking a bit easier!
-
Oi, there's math in that link!
-
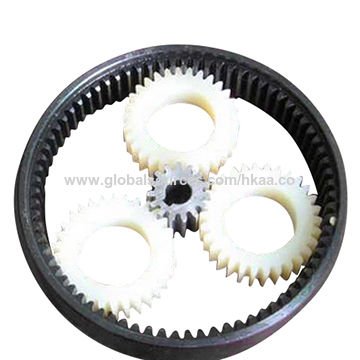
Can anyone give some good tips/tuts on modeling a set of gears like the image below. The goal is to 3D print them so the tolerance of the teeth need to be fairly good.

-
Planes Trains Automobiles Image Contest Results!
fae_alba replied to robcat2075's topic in Contests/Challenges
All I'm saying is Robert should have kept the book! He has earned it many times over -
now you need to do a "fly by" so we can see the city from a birds eye view! Looks fantastic.
-
The issue lies with the fact that the model wouldn't lie perfectly flat on the build plate . When there are overhangs you have to print a support.
-
welcome! come on in, kick your feet up and enjoy!
-
I actually did some of that. The fish for instance is printed with the fins off, then the fins as separate prints and glued in place. The rod was printed separately as well. All of this was done in a chor. I pose as I want, then hide all but one model, export to stl, then move on to the next. The issue with the hands not gripping properly was that I needed to print them open with enough tolerance to allow me to get the rod in place after the fact. Doing as you suggested is a valid approach, BUT would lead to extra supports having to be printed then removed and clean up. Since this was a fairly small delicate print, I doubt that a print like that would survive the clean up process. As it was, Papa Bear lost a few toes because of that.
-
Wait till you see the animatronics that are coming next!
-
and the job is done...at least for now!
-
Testors has a plastic filler that I use quite a bit. 3D printing is tough to get perfect every time, especially with smaller finer detail. Use the plastic filler, then lightly sand. Then a good coat of spray paint primer and paint. Also, 3D printers are sensitive to the environment they are in. If your printer is in an airconditioned room, or a draft, or even an open window, it will affect the quality of the print, since it wants a controlled temperature for the PLA. But, that being said, your print looks pretty damn good to me! Keep experimenting and have some fun with it.
-
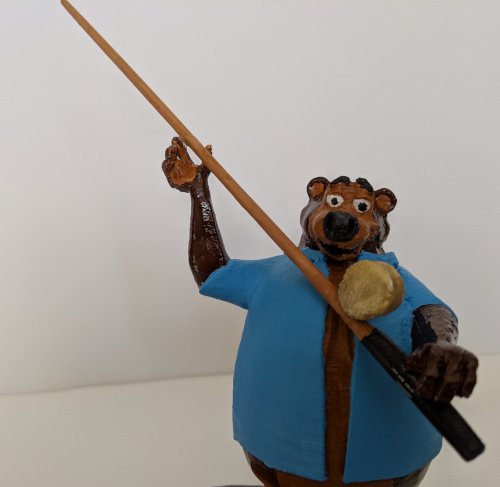
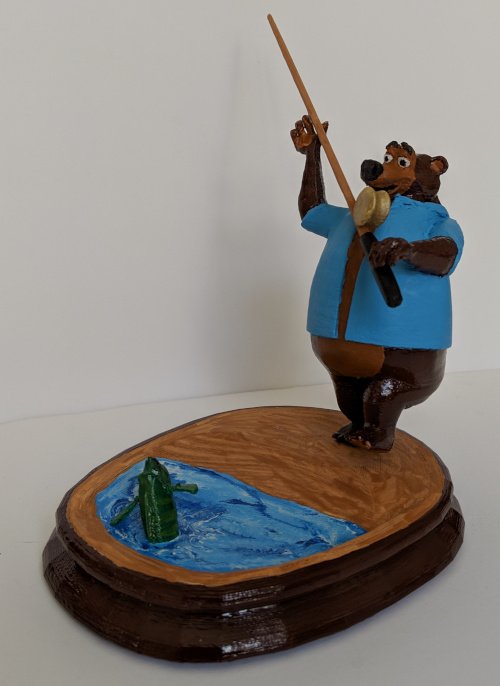
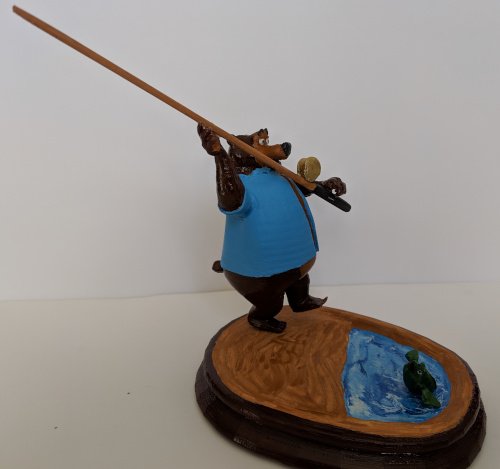
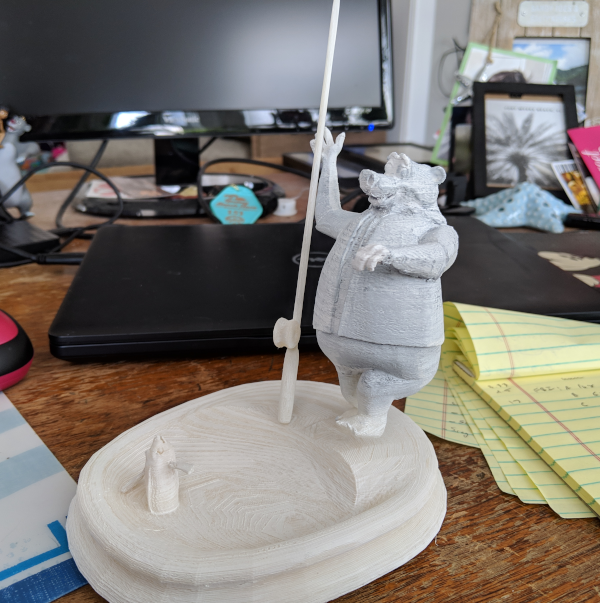
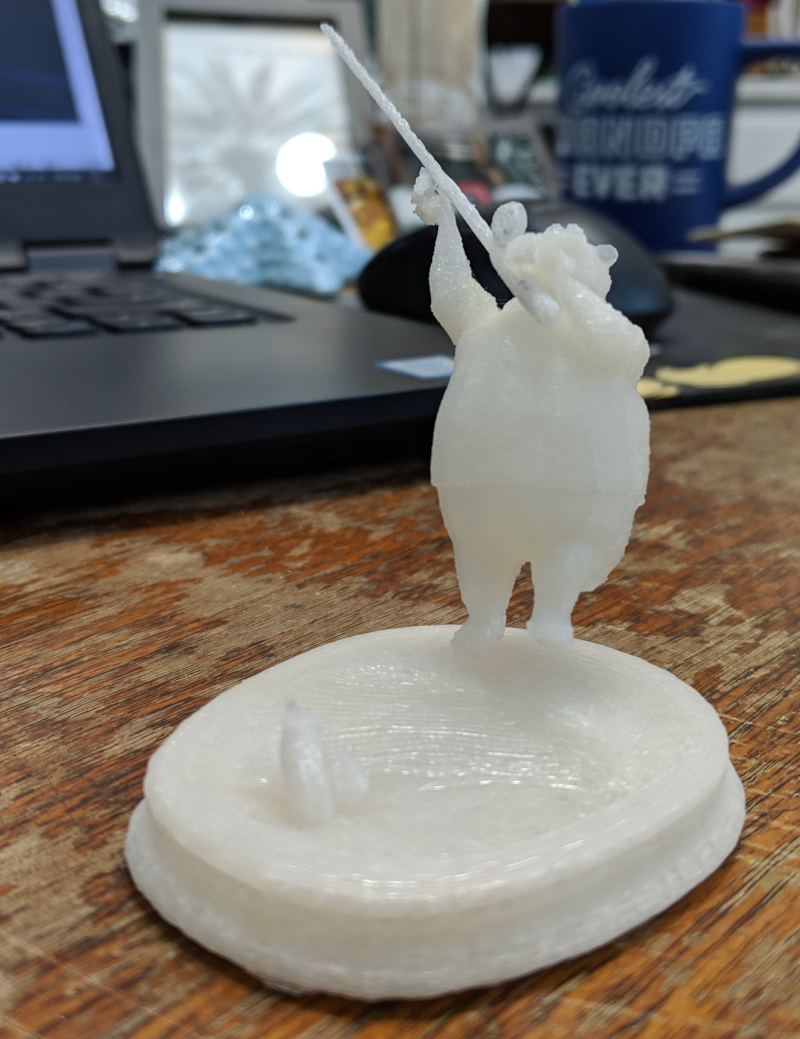
well it's taken a bit, but this project is ready for paint. Some stats: Papa Bear stands 4.15 inches tall. The base is 5.5 inches long. There are 5 separate prints done; Papa Bear, his fishing pole, the base, and the fins of the fish. All were modeled in A:M, exported at 64 subd. Printed under a normal setting with 100% infill (the fishing rod and fish fins) to 20% infill (papa bear and the base). The fish in the base is a perfect example of being able to print merged models. The fish is a separate model which I placed in a chor with the base, scaled down, then simply set inside the base and posed. The slicing software (CURA) had no problem with it. The fins I had to model and print separately since they were simply too fine and at a bad position for 3d printing. Once printed it took some cleanup. Heavy sanding to get the support ridges smoothed out, then I hit Papa Bear with two coats of model filler to hide much of the layering. Sanded, then painted with a car body primer filler spray paint. Now I will paint with some Testors Model Paint, then a clear coat. Then Papa Bear will take his place on the shelf of glory in my office!
-
that's actually a pretty normal time frame for a good print.
-
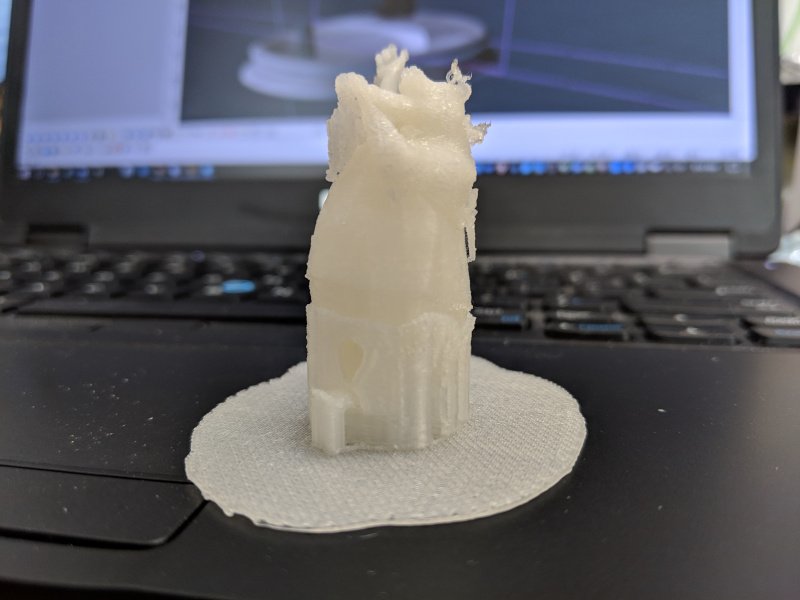
Well, broken prints happen to the best of us! This last run took over 4 hours. I ran it at a normal resolution with only a 20% in fill, full supports. Untrimmed it looks like so: Kind of looks like a melting fantasy game stature! Trimmed: Trimming uncovered a weakness in the wrist, which broke off since it was nearly hollow. So I'm now reprinting, a bit larger, at a finer resolution, and with 100% infill. This run looks like it will clock in at 7hours.
-
Once the larger, final print is done I will clean it up, hit it with some filler and paint primer, then paint it up, yes. This print only took about an hour for all three pieces. I'm printing the larger Papa Bear now. It's 4 inches tall and will take about 4 hours as opposed to just shy of 2 inches for the first copy.
-
Here's a time lapse of the print just for giggles
-
I haven't had too much of an issue with multi-mesh models. The canon carriage that I did a while bit was actually multi individual models laid one over the other. I just had to make sure that there was a bit of overlap to the mesh or it would just fall apart. I will say that 3D printing is not straight forward nor easy. There is a lot of thought process that goes into it, and each 3D printer has different capabilities and mannerisms. But it is fun, and it is rewarding to see a model created in A:M or any other application printed so you can hold it.
-
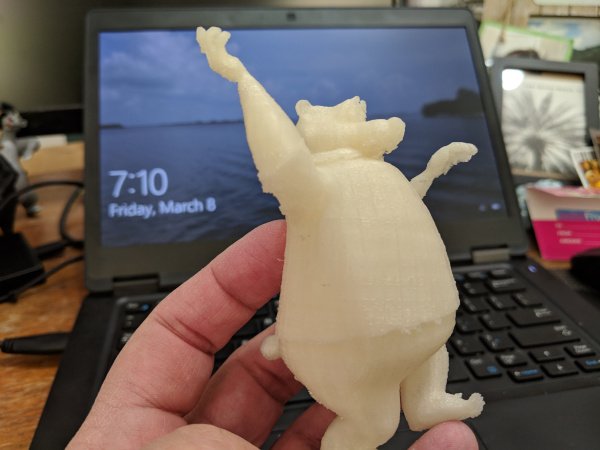
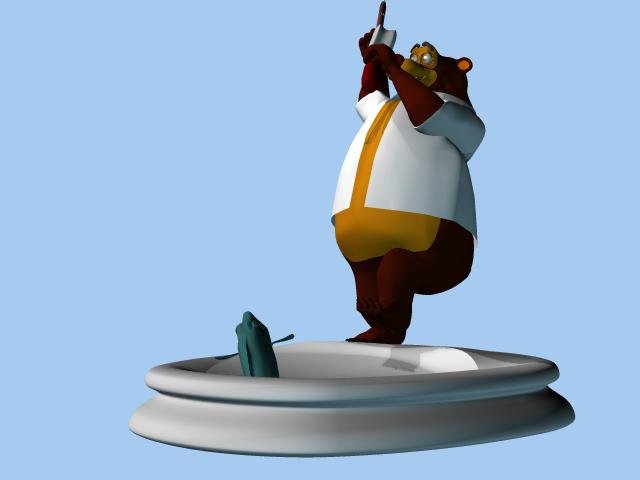
In between other projects and work, I sometimes get a free moment to continue with A:M. Of course my latest obsession is my 3D printer. I decided to push the limits and create a print of Papa Bear fishing. Below is an A:M chor image of my model. The base with fish, Papa Bear, and the fishing pole all will be printed separately and glued together once cleaned up. As a first test run I printed them at a small scale (Papa Bear is only 2 inches for the test) with a "normal resolution". Papa Bear I printed standing up, with full supports to try and reduce the amount of surface contact and clean up. This is what he looks like coming off of the printer... Cleaned up (roughly since I'm only interested in deciphering what may need to be adjusted ) the entire model looks like this: Already I can see the hands need to be opened up a bit so the rod can be fitted better, and re positioned a tad. Also Papa Bear looks a little off in his pose so that needs some addressing. But overall, I'm happy with how the first pass looks. Next we print larger with a higher resolution.
-
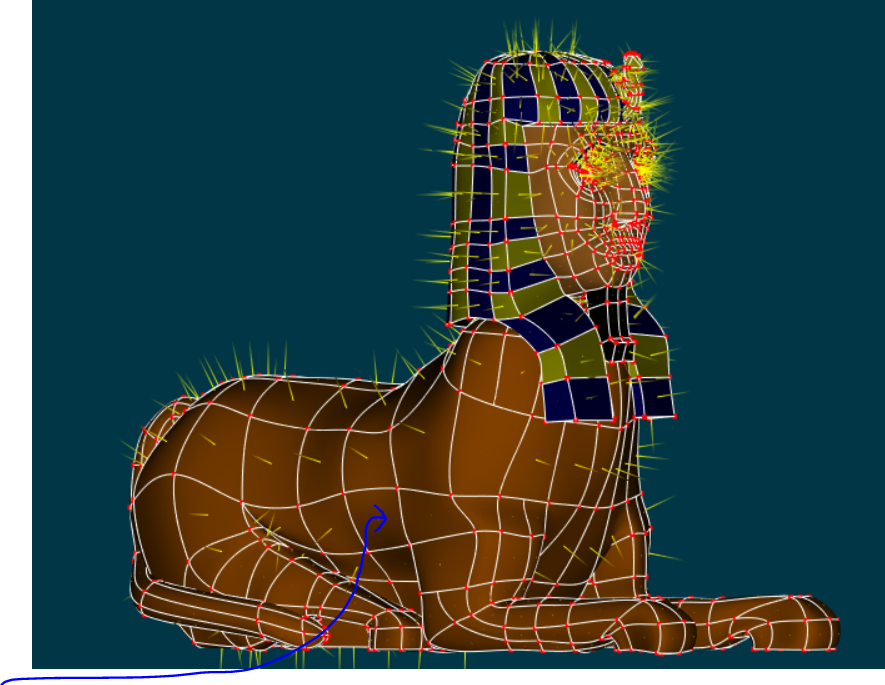
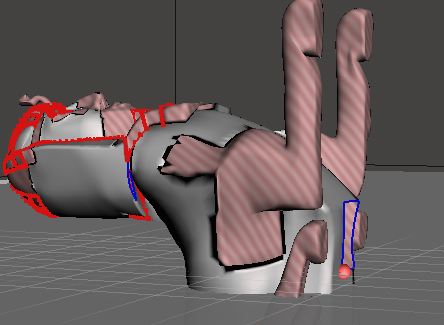
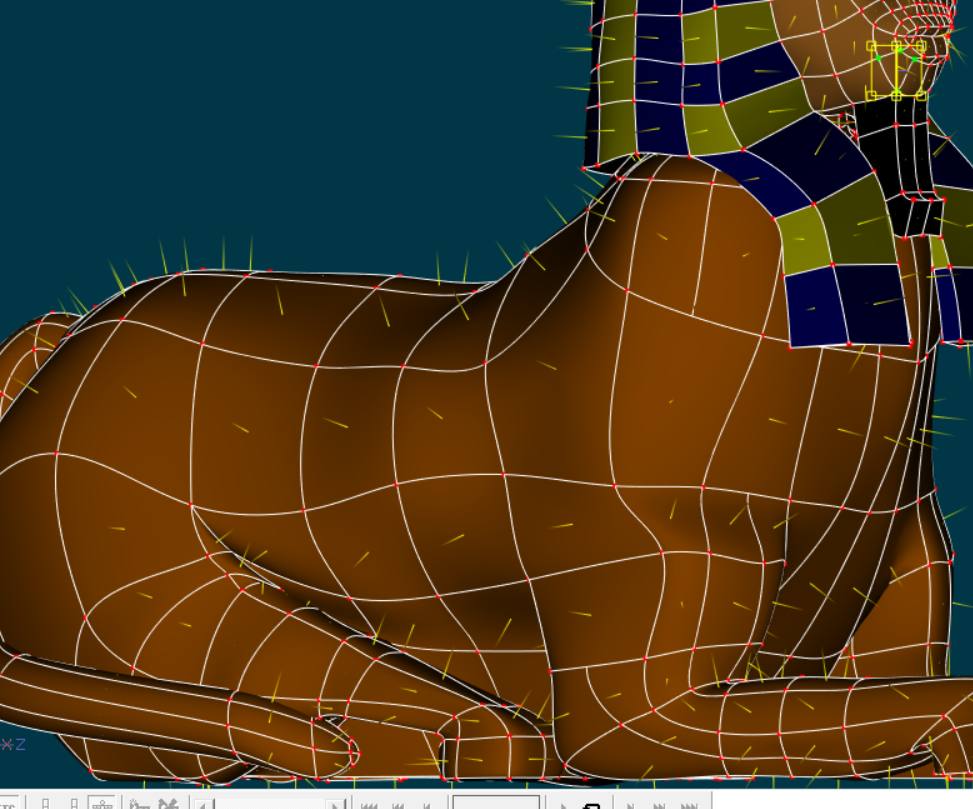
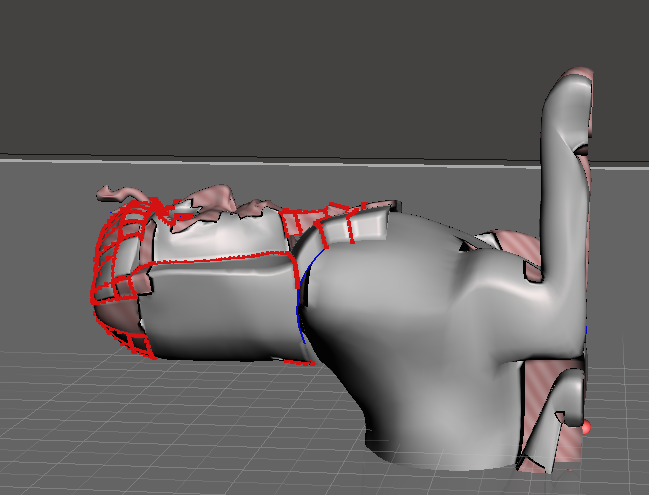
It is definitely wrong facing normals. I took your model and exported to stl then brought into MeshMixer (yet another free app, but a nice one becuase it can analyze and identify problems with a mesh). Your A:M model looks like this Note the normals facing the wrong way on the shoulder. In mesh mixer it looks like this: Now, back in A:M I flip some normals on the shoulder and leg And check again in meshmixer Having the eyeballs free floating isn't really an issue with 3d printing, and has its uses (we can model a gearbox with multiple moving parts in one model and print all at once if we want) but of you model the eye and socket too close they will be merged(printed) together simply because the tolerance of the print nozzle is larger than your gap. Once the normals are set right, the only real issue I see with your model will be the snake on the headdress. It is small, and the printer will need support printed or it will break. It being so thin, once printed removing the support could very well break it off as well. I usually print things like that as a separate model and super glue it on after the fact. Fix your normals, and you will be off to the races!
-
Pitcher, Don't Give Up! Believe me, it took me a long time just to develop a basic understanding of how an A:M model translates into a 3D printed one. From what I'm seeing from your libraries screen grab you have most likely issues with normals facing inward. That gets interpreted as a whole when sliced. While it is a real pain in the A$$, inspecting each and every patch in your model to make sure normals are facing right will save a lot of grief in the end. Also, if you really want to see your A:M model in plastic, send me a message with your A:M model attached and I will tackle it this week.