NancyGormezano
-
Posts
7,863 -
Joined
-
Last visited
-
Days Won
15
Content Type
Profiles
Forums
Events
Everything posted by NancyGormezano
-
Nice!
-
Most excellent, stunning!
-
Yes...I have the same concern. The females appear in a different style. I would rather see them with a muppet mouth, as well as ball nose, eyes, similar to the guys. It would be funnier, and more consistent. You could add thick "felt lipstick" lips to their muppet mouth, to further enhance and distinguish their femininity. I love where this is going - very engaging!
-
Google "sphere" - click on images - you will find a plethora of sphere images that you can modify in photoshop, and use in A:M. You can create your own sphere image in photoshop/other image editing apps. Best results are a sphere with black background. You don't need zbrush. There are probably other easier ways to create a nice "sphere" image to be used with Matcap. The trick will be finding the lighting that you like in the image to be used with Matcap in A:M. heres an image I quickly grabbed and modified (from googling). Start with this and modify to taste. (Yes as Robcat said - you will have to turn on plug-in shaders in render options (camera). In this render, there are no specularity settings on lego man - all highlights, specularity comes from the matcap shader. EDIT: and yes decals work funny with matcap - you could create additional splinage for decaled areas to "sit" on top of the plastic that could have different surface settings (sounds icky)

-
You could try matcap for the ambiant shader. But then you need a "sphere" type image that looks like the lego plastic (I don't have one, so picked something close). Make sure the diffuse color for the group/model is black. This was done with diffuse color = black, spec color = white, 100% size, intensity, glossy shader, 95% sharp, Matcap ambiant shader with image, 100% You can also give it some reflectivity, if the lego pieces have any (a low number) and fool with other specular shaders as well.
-
Feliz Cumpleaños! Enjoy! Enjoy!
-
Srečno novo leto!
-
It's been almost 20 mins. What's the hold-up?
-

thought I might get with the season
NancyGormezano replied to johnl3d's topic in Tinkering Gnome's Workshop
There are others among us who hesitated to ask and wonder as well. -
thought I might get with the season
NancyGormezano replied to johnl3d's topic in Tinkering Gnome's Workshop
getting cuter -
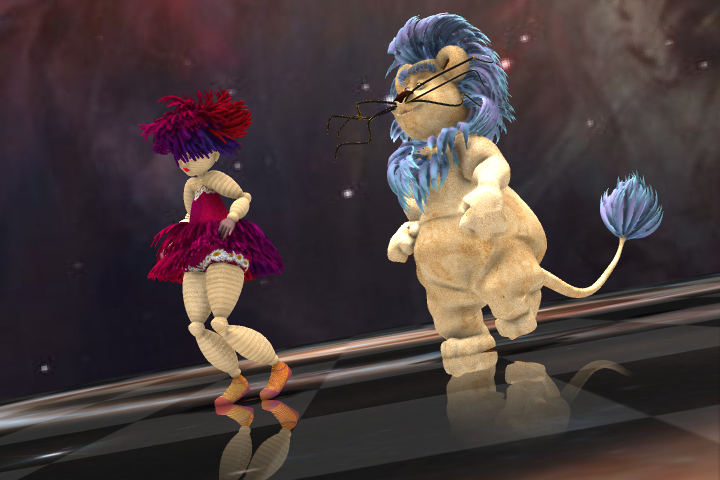
I did a mishmash hybrid of rigs. I went for simple, and something I could understand and modify. Lothario uses 1) modified literig for torso, arms, head, hands. I prefer this because it gives me "squetchyness"; 2) modified 2008 rig (for legs only) deleted the auto balance stuff, like the foot controls better; 3) modified literig face rig, simplified, could still use work on lid control. 4) My own dynamic tail rig, ear rig, whiskas. Ida is modified literig only, and modified literig face rig, but probably would have been better to do something similar to Lothario. At some point I could document what I did, if you or anyone else is interested.
-
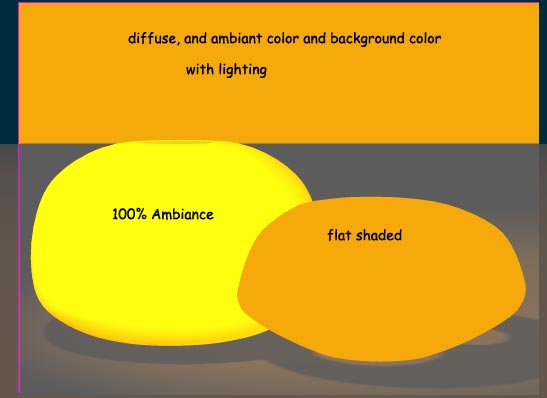
Here's to get you started. I only did 3 pass render - you will get less grainy, the more passes you use. pretty simple. start with default choreography, drag your model into it, use these settings to test, then tweak to taste choreography/Global ambiance type = global Color choreography/ambiance intensity, ambiance occlusion to 100% (set to taste) turn off all lights camera/background color/ white camera/render/ambiant occlusion = ON render (Multipass on) Turn on lights (turn off shadows) if you want it to look "whiter", or decrease Ambiance occlusion (
-
I think this is excellent! It surprisingly caught my interest, as it wouldn't be a genre I would necessarily be attracted. I really like the quirkiness of the characters, the situations, and can see it has great potential for humor (not sure you're going in that direction). I have nothing to add, except - KEEP GOING !
-
Thanks Jason for adding this - but I can't view it here in this thread, but I CAN view it from A:MFilms here weird.
-
I sure hope you are backing up your stuff.
-
Blah vista (I have no experience with it). I'm running xp pro. I'm stymied. I don't know what to suggest. Did you restart A:M after you switched to opengl (probably won't make difference) Did you happen to change the screen resolution right before you experienced this problem? Did you use a different version of A:M right before the problem? see here for what I experienced with trying different versions of 15 at one time. The versions interfered with each other. Did you install some other program before this problem? Something has changed.
-
OK ...stabbing in the dark here...What are your Tools/Options/Global settings? I at one time did not have resizeable file dialog set, and are you working in OpenGL? I am using 16b 32 bit on PC. What are you using?
-
Does this only happen with 1 project - or all projects? And didn't you just install a new video driver?
-
That works, it bring in the image and then it lets me select the image as a decal. Just doesn't seem to want to do it directly. I don't know what you mean by "directly". One can import images (right click on images), drag images into the project workspace, or use file open. Then those images are available for decals/decaling. To get a decal, you can right click on Decals (for model) - select new, and a list of images (already imported or dragged) appear, along with the command to "Open" - which should bring up a windows file open dialog box. Or you can drag already imported images ontop a model and get a A:M dialog that lets you choose decal or rotoscope. However I am guessing that what you might be meaning is that when you right click on decals and select new, the list that appears for images already imported does not include some of the images that are already loaded? This happens to me when I'm working with an inordinately large number of images in my project, and I've been dragging them into the project space, rather than importing them. When this happens you choose OPEN (from decals/new/open). And you have to reimport them again (even tho they already show in the images folder) However are you saying that when you do that either the windows dialog box isn't working? or if it is, then you have to navigate to the windows folder where the image is that you want to use for the decal and you can't select the file?
-
thought I might get with the season
NancyGormezano replied to johnl3d's topic in Tinkering Gnome's Workshop
YES Cute! -
objects that clips rendering of other objects
NancyGormezano replied to adamSpline's topic in A:M Rendering
To get back to the original question: In case it isn't clear, currently, the answer is NO. You will have to do some extra steps and use that info in a compositing program. -
objects that clips rendering of other objects
NancyGormezano replied to adamSpline's topic in A:M Rendering
I'm not getting that boolean cutters would be a solution in this particular case. From what I'm gathering Adam wants to isolate just one model as it moves thru the scene. I believe this model cuts into multiple models? But not in a "boolean way". I was under the impression that this model is occulting other models - not necessarily intersecting them. -
objects that clips rendering of other objects
NancyGormezano replied to adamSpline's topic in A:M Rendering
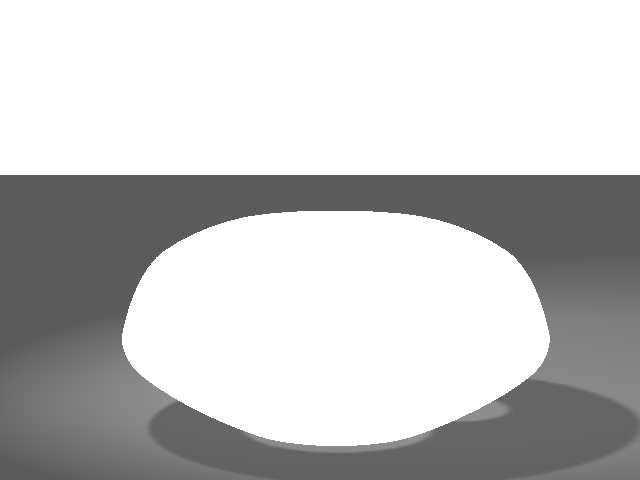
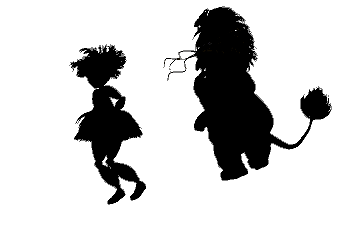
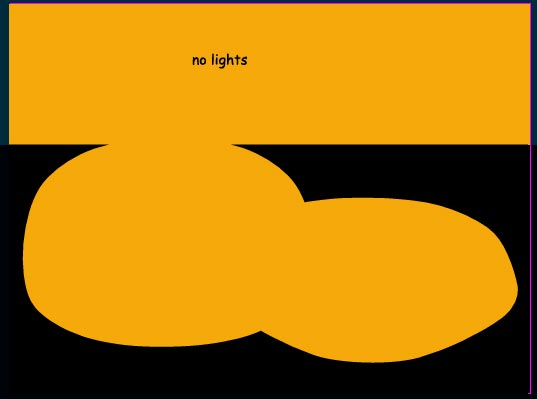
If you render your image with 1 pass you will not get any antialiasing. But you will get the "jaggies". See up loaded pngs. I took the orange colored one into PS, and "selected" with 0 tolerance to get the 2nd png. My guess however is that you will probably have to render normally, and then at least do another render to isolate your "hole" object mask/matte. I did something similar (but not the same) just recently. I wanted to isolate some models from their background in an animation that had already been rendered, because I wanted to manipulate the background and ground plane, separate from the characters. I didn't want to rerender just the characters (would take too long). So I rendered the characters as all black 1 pass, and the background and everything else white. I used that as a tracking matte in AfterEffects as a LumaReverse plus the original render, and then composited that result again with the original render. I was then able to insert things in another layer behind them, but in front of the background.
-
objects that clips rendering of other objects
NancyGormezano replied to adamSpline's topic in A:M Rendering
I forgot to add if you make your clipping object flat shaded, also make receive shadows = OFF (if it's been textured already, and front projected in chor) -
objects that clips rendering of other objects
NancyGormezano replied to adamSpline's topic in A:M Rendering
For me it's always easier, my preference to set something to flatshaded, can do it in the chor, least amount of twiddling on model. The results would be the same only if one turns off all the lights in the chor. If you want to render with lighting then the results are different. It was not apparent that he wanted to render without lights.