Scottj3d
-
Posts
485 -
Joined
-
Last visited
Content Type
Profiles
Forums
Events
Everything posted by Scottj3d
-
Still working on the upper wingbumps.

-
And the front.
-
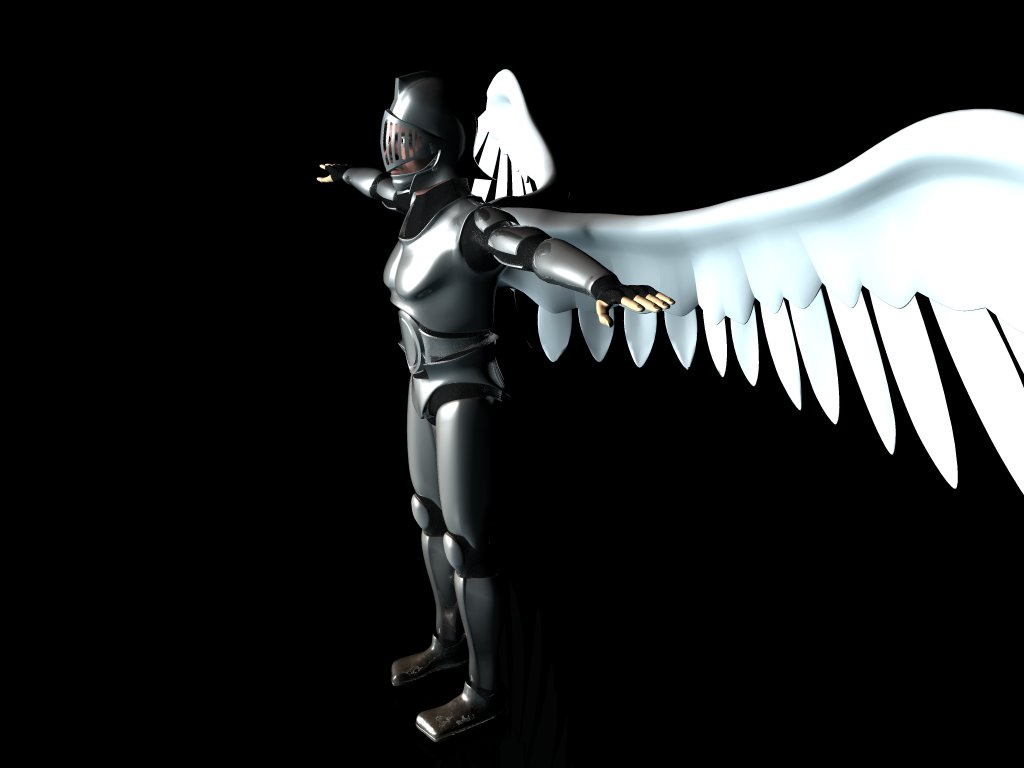
And here is where the decals are at this point. It still isn't exactly how I want it to look but close. I have made about ten or twelve decals to get it here...Apply...render...nope not yet, over and over but it is getting closer. I have the rigging down for the most part and have copied half the model except the head to make all the spline mod's I made while testing and tweaking the older version of the model. Once I have the decal to a point where I am happy with it I'll copy and paste the left half in and hopefully not have to place the decals on the left side... It's a real pain! The wings come off the body at an angle and even flattening them the decals are not easy to line up with each other. This is a side shot to show the "bump" effect.
-
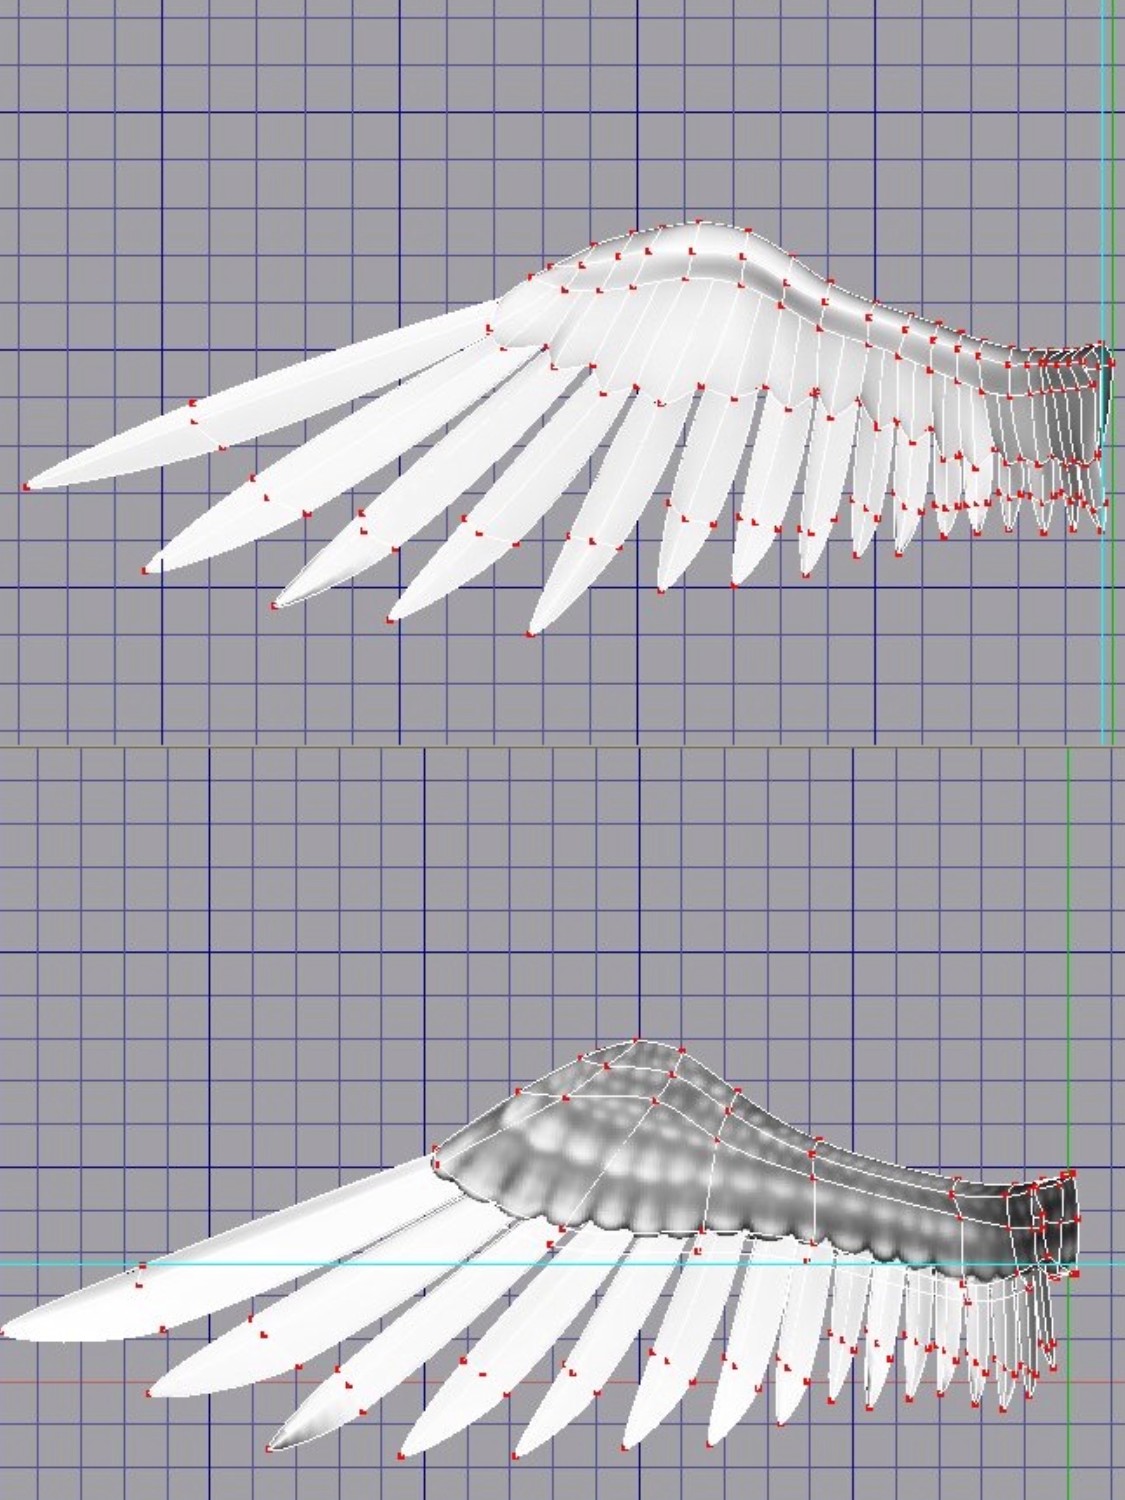
Still working on it! I have been working on the wing decals for a few days now. This is the spline modification I have decided to go with. Instead of using splines to get the detail I want (and to lighten the model) I am using a cookie cut and a bump decal. The cookie cut gives it the transition from the main wing to the flight feathers. The pic in this post shows the old wing verses the new one and the geometry I have cut back on.
-

Yeah, you know what this car is..or you better
Scottj3d replied to pixelmech's topic in Work In Progress / Sweatbox
Nice economy on those splines! -
A cog is a radial arrangement of fan bones with constraints to allow the ring to move the mesh in a realistic motion. 3D Artz uses a system of them in his (Mike Fitz) rigs. It gives an impressively realistic appearance of interaction between the torso (in the case of the shoulder)and the shoulder and arm. It's still way over my head so that's the best way I can discribe it. If you go to his site I believe you can find some .mov files that show it in action. In a big muscular character such as this one it would come in handy.
-
He's coming along nicely. Are you gonna rig him to test your geometry? Looks like you may run into the same "ring around the shoulder" I had. Unless you're gonna use cog's. It'll be real easy to fix those rings before rigging cogs. Keep going!
-
Almost there! I have the wings off until I work out the upper feathers.
-
Ok, just one more....The concept. An airbrush mural I did just because I like Dragons. I'm fighting the urge to work on him! Back to Seraphim..yeah that's it!
-
And here with some attempts at decaling at the point where Windows 98 went squirrely and ate my model(I really like XP) but I know so much more now than I did then. Anyway's back to Seraphim....I am gonna finish him!!!
-
Ain't that a HOOT! I have to admit somehow I feel flattered! I have pictured him slaying a dragon I'm also working on (or re-working on because I lost all but the first stages of the model), or an (Still Image) of him fighting the army of the dead or something. The thought of him as a game character has never even entered the old gray matter. Here is a sneek peek at Drago's. In it's current state it has grain crunching teeth on the lower jaw, as it was originally the Ram skull I use for my avatar. Hmmm...Too much to process!
-
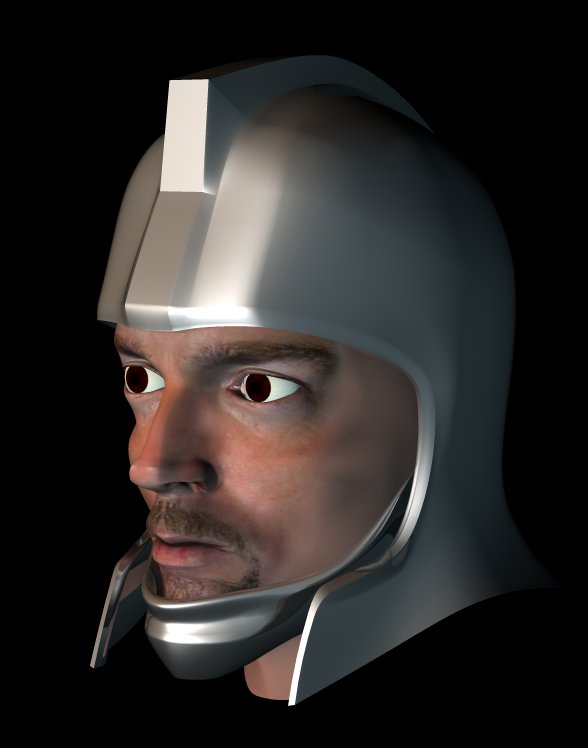
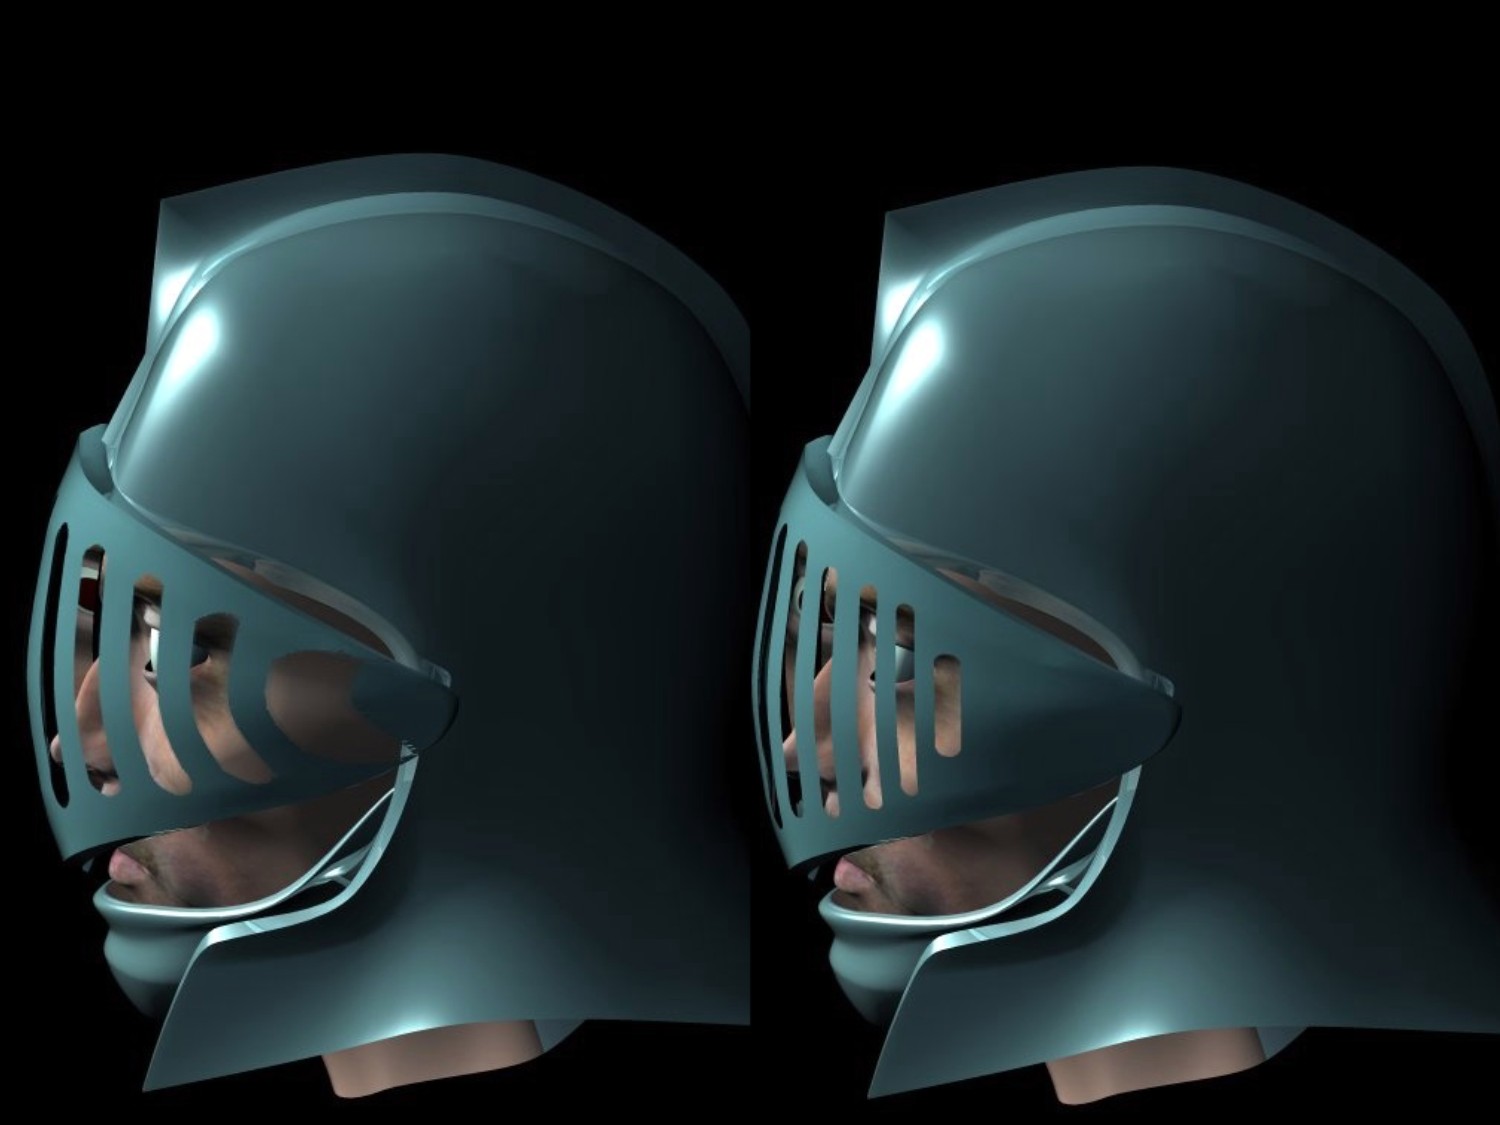
I noticed the that you changed the 5 point patches into 3 point patches. Does that cause any problems with the look. The head render that Remote Viewer said look's just like me(silver helmet) is after I made that change and it appears to have smoothed out the mesh in that area just under the eye about even with where the nose blends to the cheek. I don't know if this will be a problem animating but I look at it the way it is now and just "feel" it is better than the 5pointer. The 5pointer had some odd effect on the patch making it look indented where the cheek bone would peak. I probably could have adjusted the bias handles but I have no experience doing that so I opted to re-think the way it was splined.
-
Yes. I've never messed with the settings other than diffuse and specular color and size. I'm still not sure if I like it. It might be cool to try renaming a few groups and combining the smooth with a hammered finish. Smooth around the neck and shoulders. I think I'll try some decals to "dent and scratch" the armor just a bit. It took me a couple day's to figure out the steel so if anyone's interested I'll try to explain it. Diffuse (medium gray)Specular color(White) Specular size(272%) Intensity(154%)Reflectivity(73.33%)presently(50%)and reflectivity(170cm) but there is room to play. Hammered,Roughness(1)Scale(10-15, could be (30) but I have deleted it so I'm not sure). I've seen some nicer metallics on other peoples work but I am happy with this for now. Now back to rigging. Thanks!
-
Just for kick's here is the first attempt at the hammering.
-
Thanks Gerald! Well he's getting rigged this weekend after all the practice on the parts last week. I have the armor looking like steel but it's still very clean. I tried some roughness adjustments in the properties window and need to experiment with getting the hammered look right. I have some bumpmap ideas but may only need to do that for close up work. I have a lighter version I am working on as this guy has gained weight in A.M. I'll be removing the wings and replacing them with the hybrid after rigging and testing the body. Joakim...check out that Beer Belly, there is still a slight bulge to the belt but I think it looks better and I think his eyes are too white.
-
And the front.
-
As promised here are the wires. I basically wanted to clean it up a bit. I hated all those hook's. The side show's better what I have done. Old mesh on the left.
-
Originally a rotoscope photo. But tonight I resplined it (in spots) freehand. I'll get some comparison wires together and post them. What seemed very hard is seen very differently now.I know these splines well. Still tweaking the decal. I cant wait to see what it looks like in a year. Heh,Heh!
-
Finally getting closer to a steel with diffuse and property settings. Now to hammer it up a bit. Revised my head mesh as well.
-
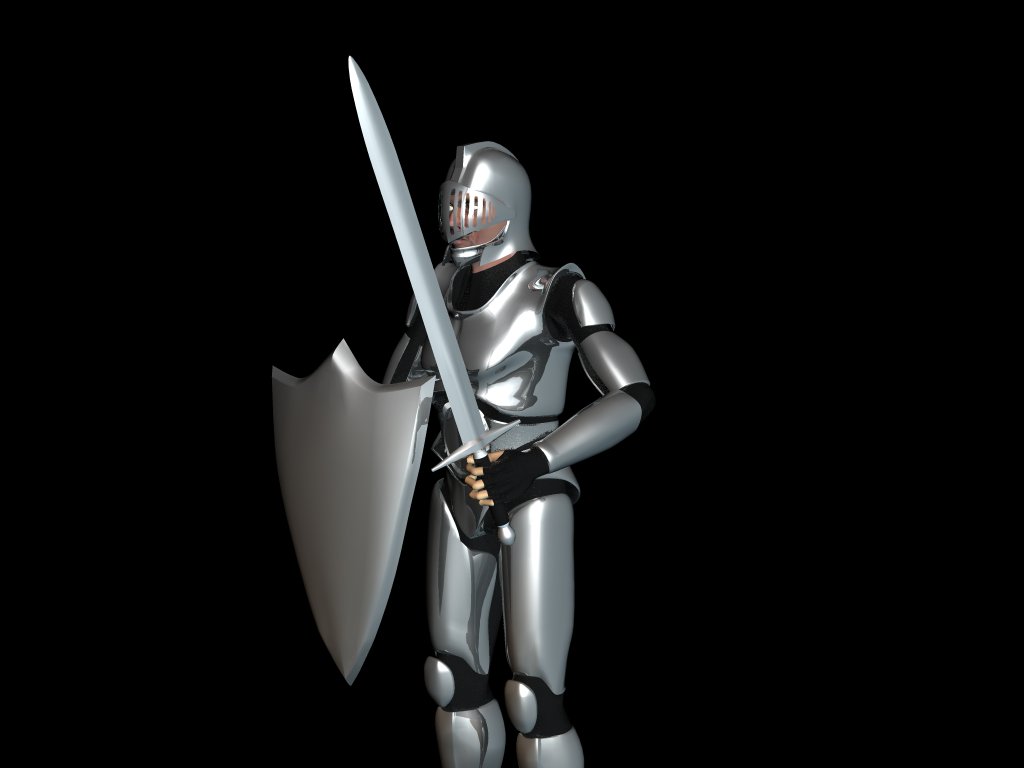
Thank's John! I posted it about a year ago. It was my 3rd attempt at my 1st head if that makes sense. I can see many things I want to fix now (eyes and sockets particularly) and am working on a better decal and have the teeth(also 1st WIP) about ready. The decal is a photo of my face that I have steadily (occaisionally) been improving. You can't see it too well through the shield which I was counting on. I have some bump maps I'm playing with but they are not applied here. I originally thought this guy was going to go together faster but for a change I'm taking my time and learning to use more of A.M than modelling a non-rigged static model(which has proven to be a challenge). As for texture I am not sure how to properly use materials to give the armor the metallic look but will by the time I get this guy into the showcase for my 1st post there(Next Year!!! L.O.L). I'd like to hear any ideas you have on using materials(everybody). This render is using th default lighting. I've downloaded Yves skylight plugin but haven't become familiar with it yet. I pulled the shield off of him for this render to give you a better look.
-
And here I have improved my transparency for the face shield as well as the bad one. I dusted off my head from my first WIP on the forum and fixed some splines(it's cool to go back and see how differently you modelled a year ago) to give this guy a face but I am still re-hashing the head mesh. I had trouble with the nostrils and today when I copied him in it took maybe a couple of minutes to figure out how to fix it.
-
OK, here is a test to see the feathers would fold right. I'm pretty happy with it(but not my animating skill's). I had a heck of a time meeting the 1 meg max limit for posting an animation. I have removed the upper geometry of the wing as I am going to use some transparency decals on a less dense mesh to define where these feathers meet the rest of the wing. The guy's in the rigging area are very knowledgeable and patient to boot! I am finally getting a loose handle on rigging and it will change my approach to modelling for movement or just posing for stills. I have learned alot this last week. wing2.mov
-
We've just witnessed Rodney and Vern's catapult into stardom being released right here on the A.M forums.(theme from 2001 playing in the background) What an Honor! I can see thier adventures on saturday mornings. Heh, Heh!
-
This is a riot! I recognised them both from just thier avatars.
-
It looks like you have found it but I don't see a model in your PWS to apply it to. I think if you open a model and are in modelling mode the grooming thingy will show up once you apply the emitter to the model.