R Reynolds
-
Posts
176 -
Joined
-
Last visited
-
Days Won
47
Content Type
Profiles
Forums
Events
Everything posted by R Reynolds
-
Nicely done! What's happening along the red border, reflections?
-
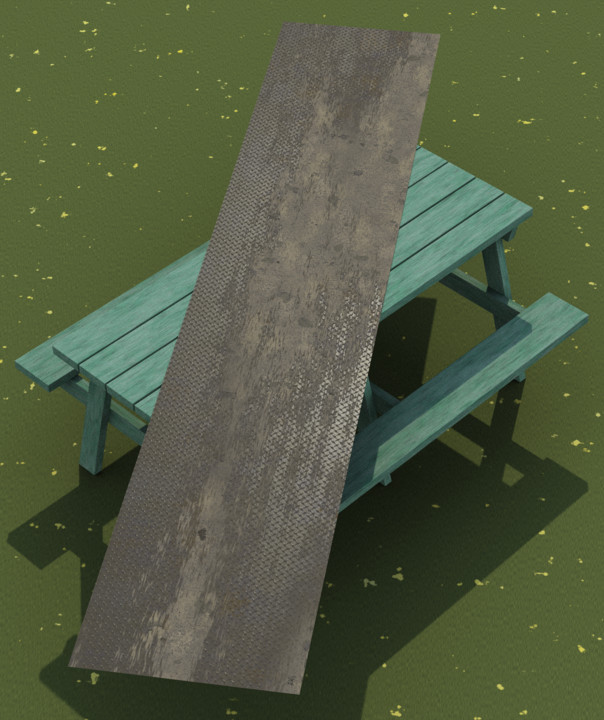
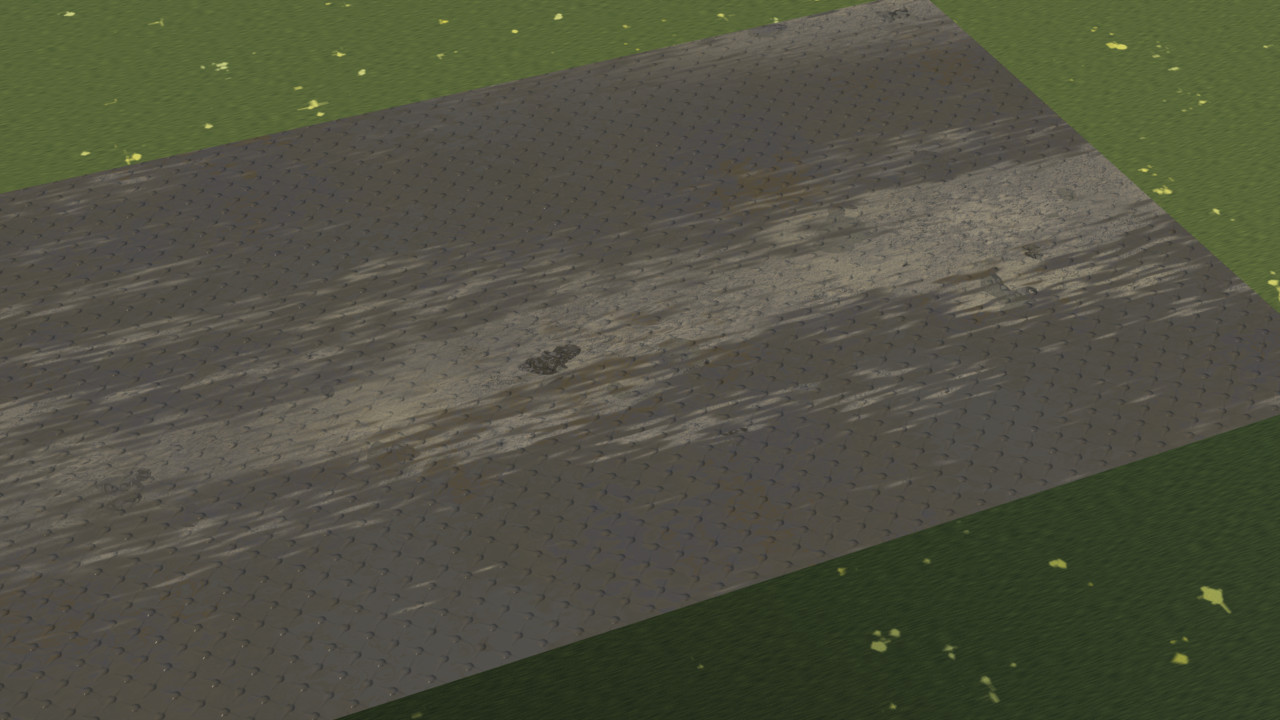
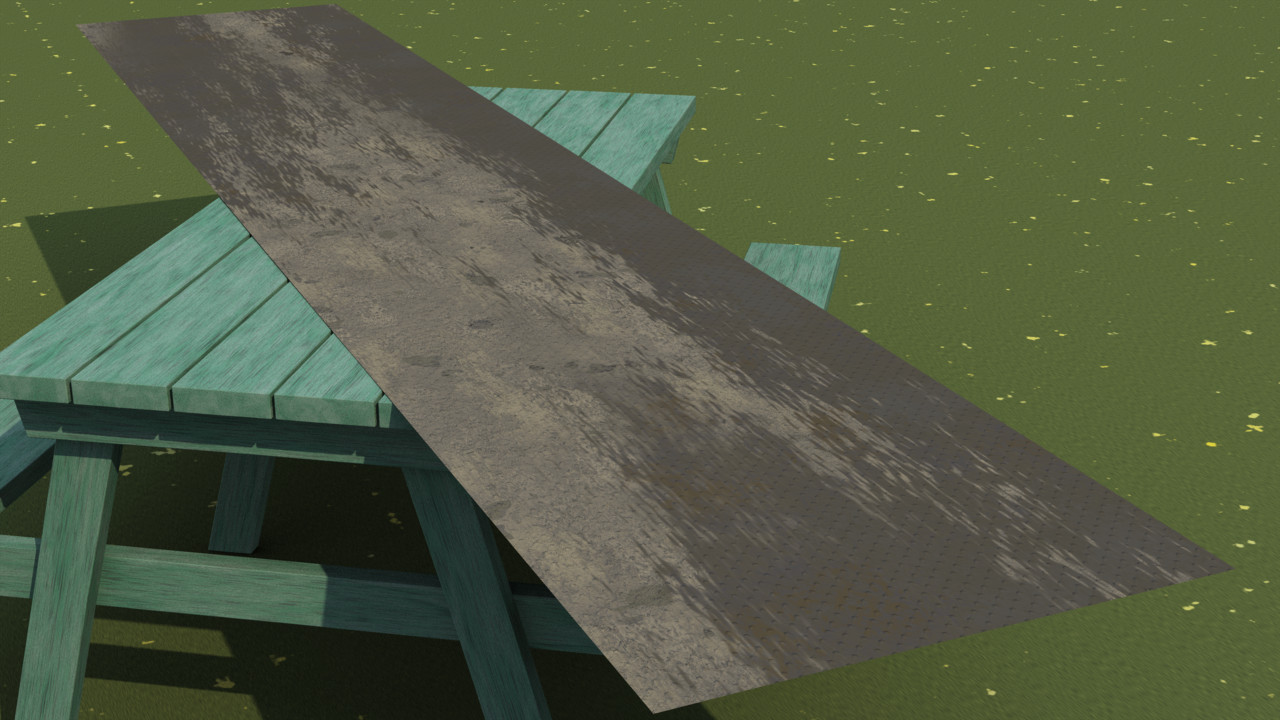
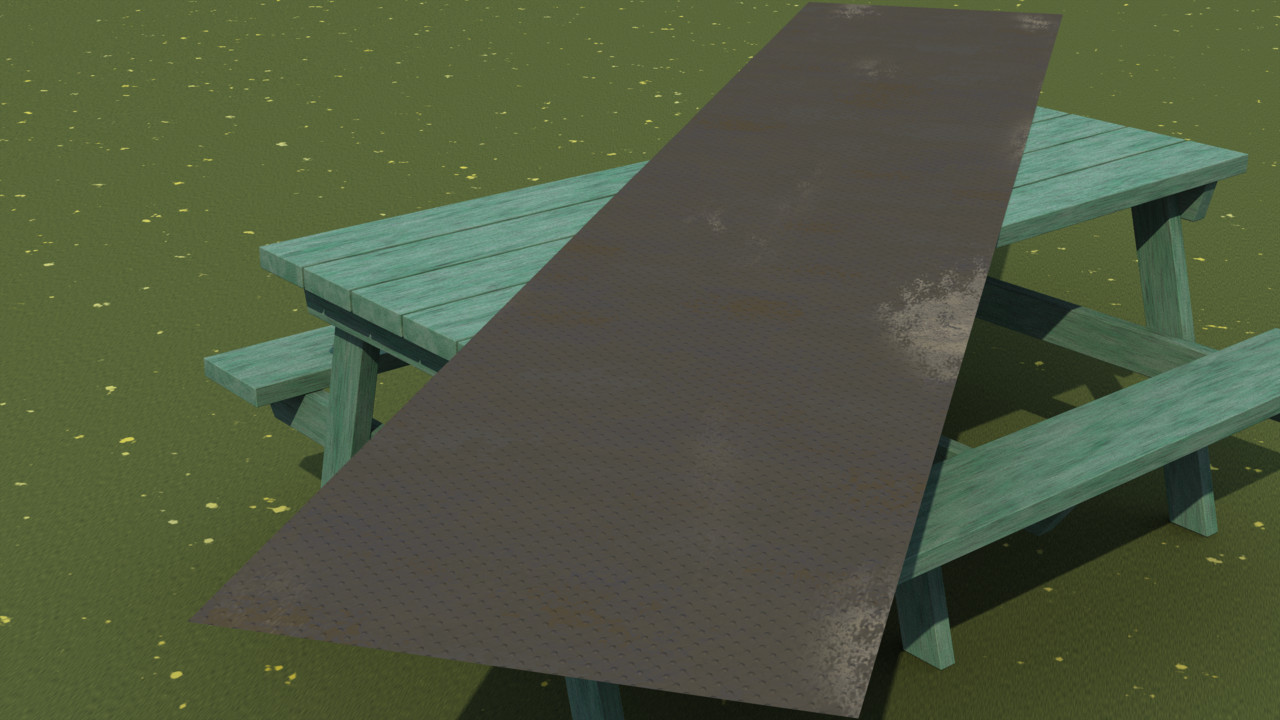
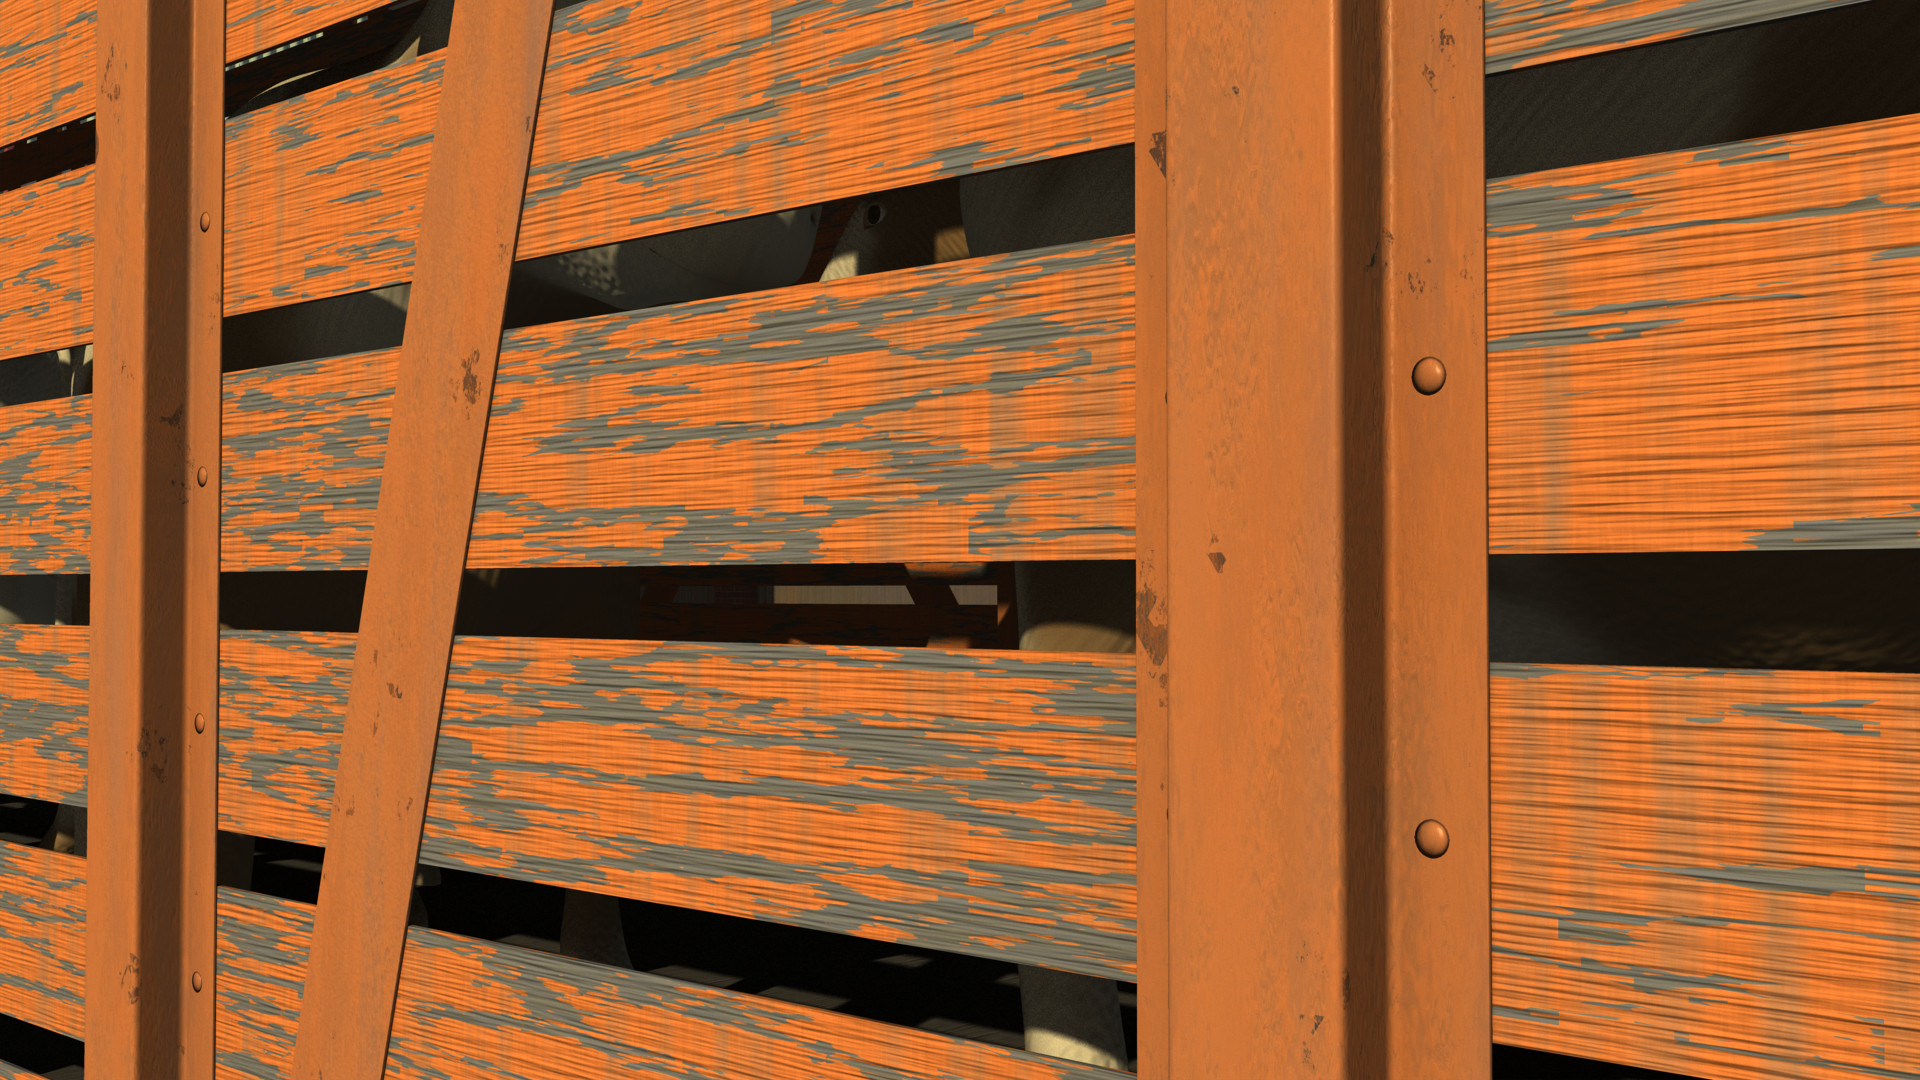
The latest addition to my railroad needs long sheets of diamond pattern steel plate. I wanted these plates to look well used, slightly rusty and to have varying amounts of dried dirt on them. I wasn't looking forward to building the material because while it's relatively easy to build show-room new surface finishes, I had never been happy with any of my attempts at old steel and procedural dirt looked too much like soft edged clouds. I thought the only way I could get hard edged dirt would be a decal. However after much experimentation I've got a material that's more than adequate. At this distance it's fairly convincing. The diamond pattern is a tiled normal decal. And it almost holds up at arm's length. The best part is that since it's procedural you can have a lot of dirt. Or just a few random patches. The materials (one for colours and one for textures) use a combination of native A:M and Enhance:AM combiners. If anyone's interested, I can post a schematic of the materials showing how they work.

-
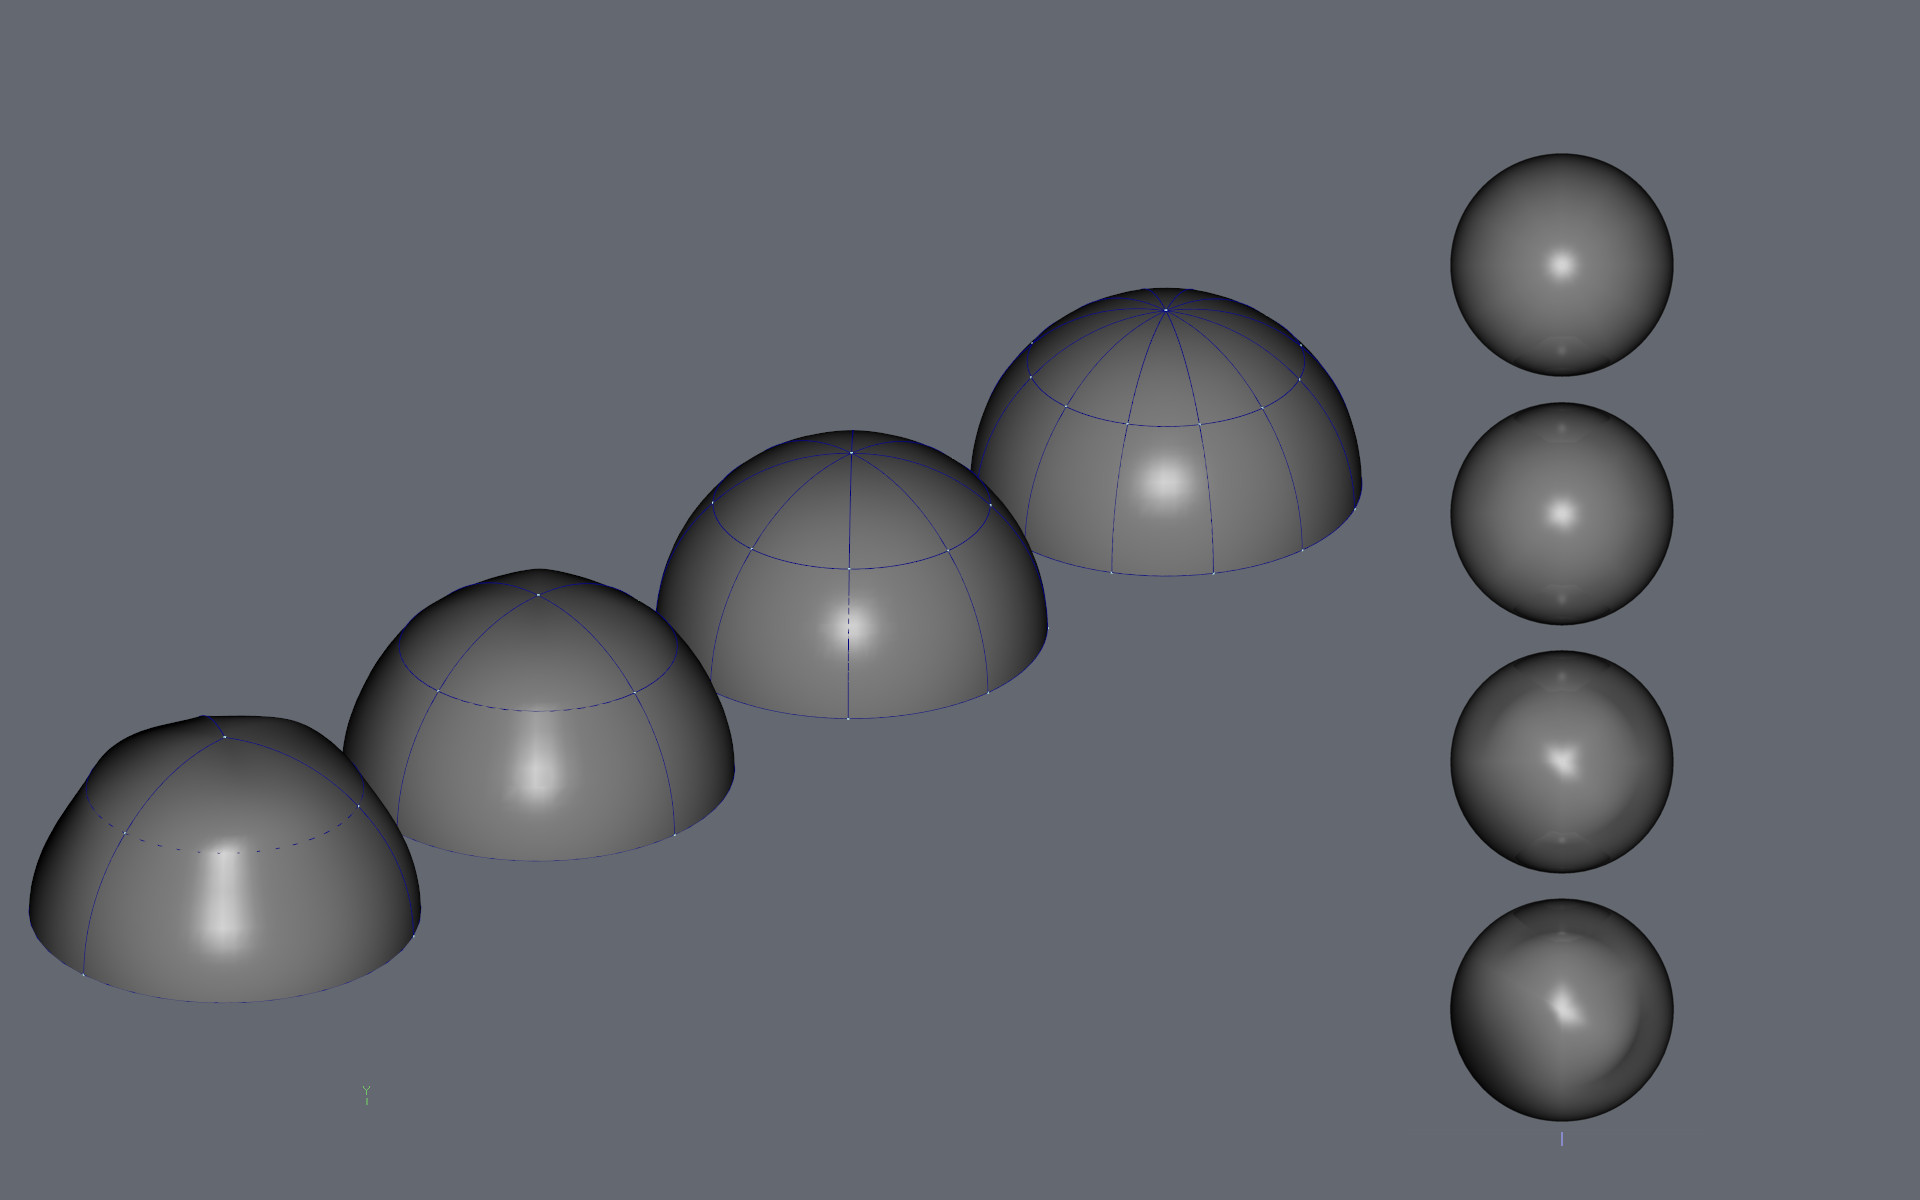
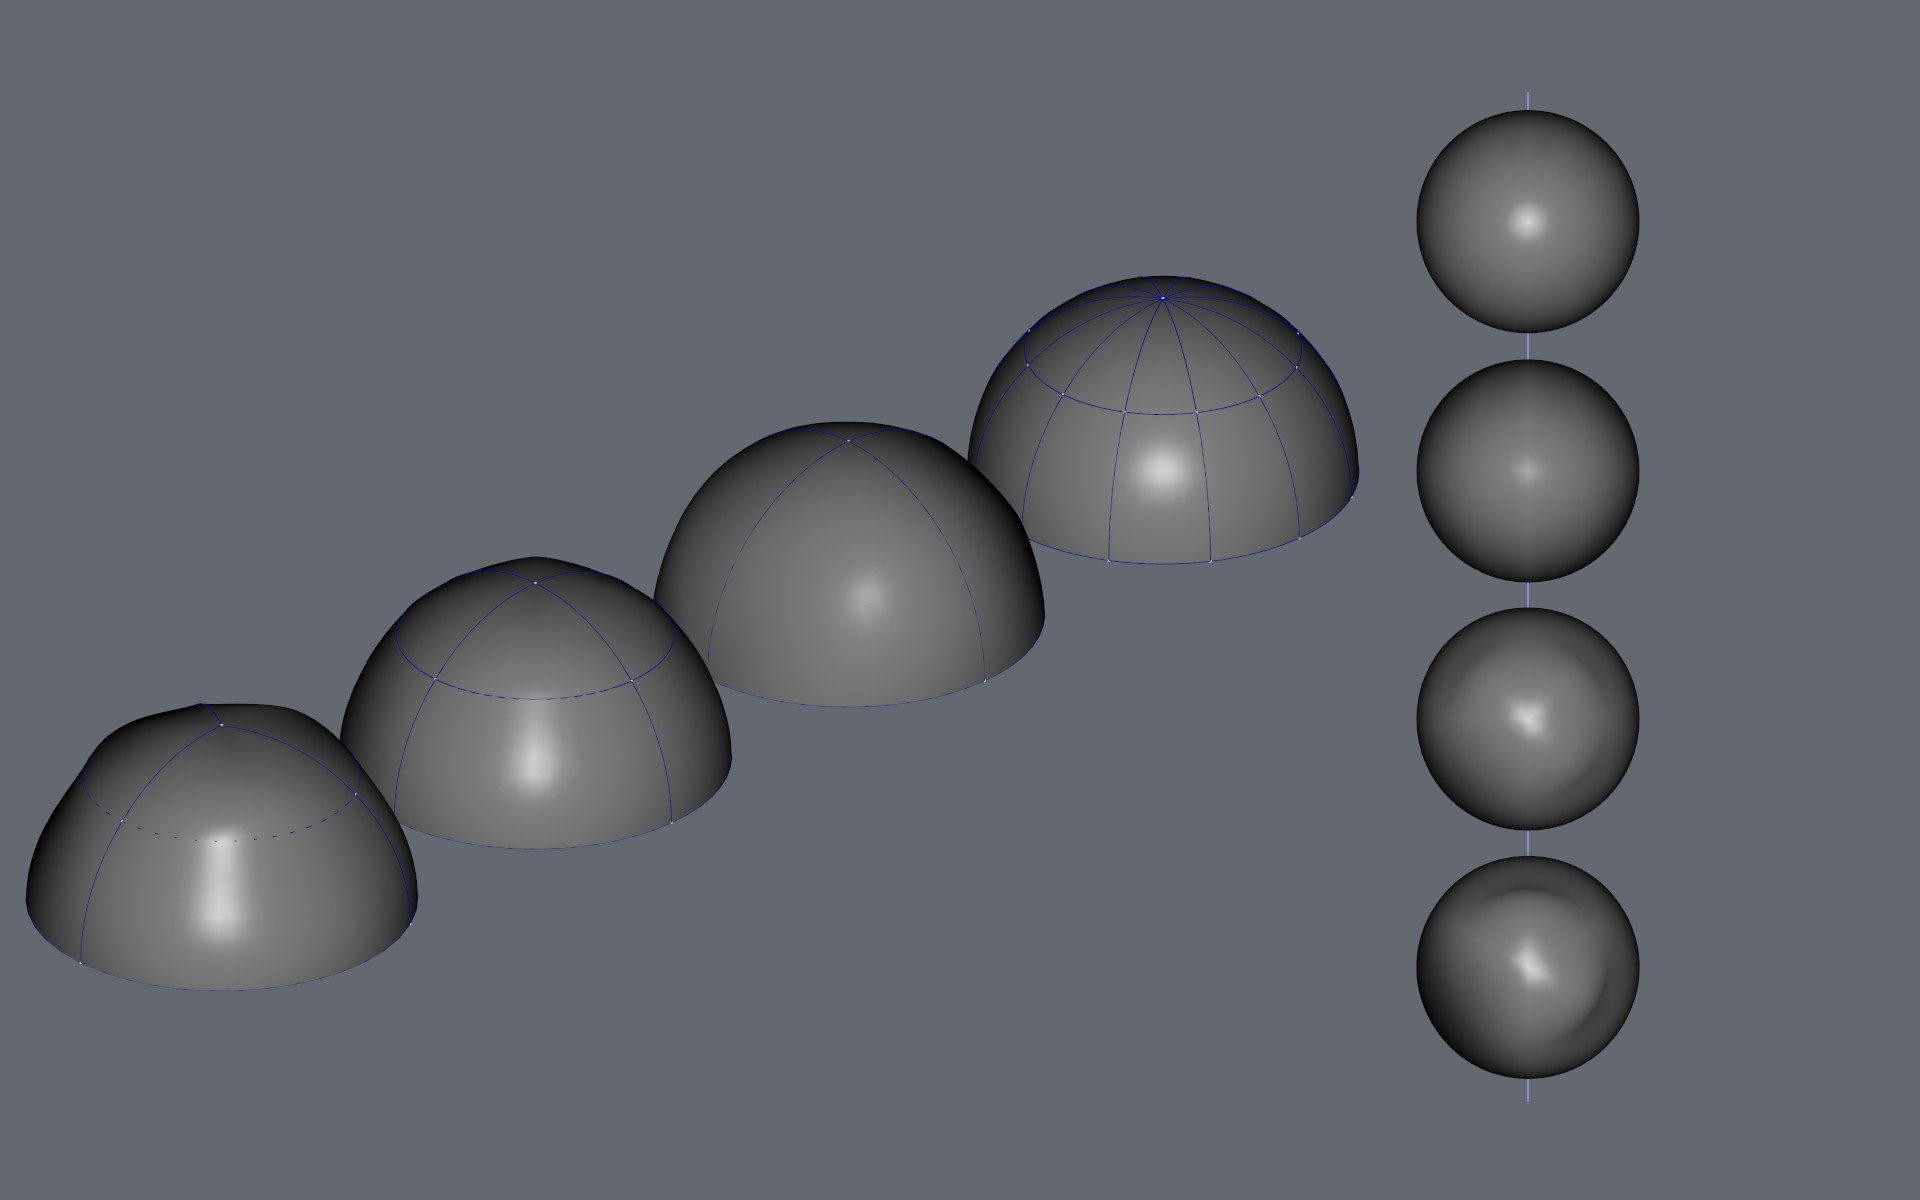
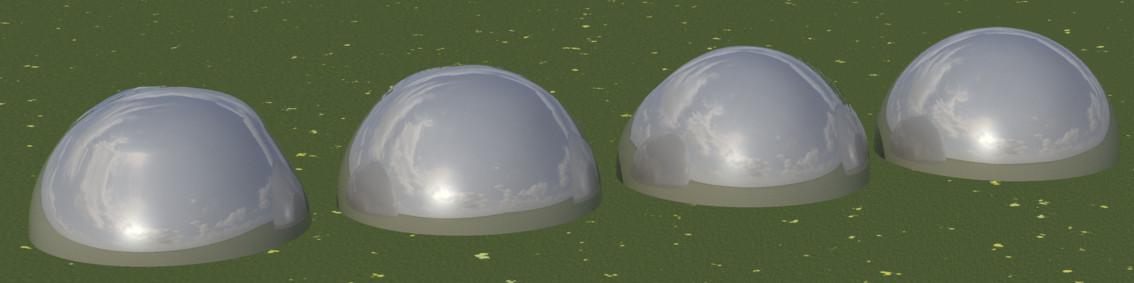
Absolutely. As with most things in A:M how you model depends on things like; 1) What's your personal tolerance to patch creases 2) How is the model to be used; a standalone "prop" or something whose shape is going to be animated - a billiard ball versus Mike Wazowski 3) Does the camera get close enough to the model to see any patch creases Speaking as someone who mostly models inorganic hardware from the middle of the last century (i.e. things that are assembled using many, many rivets) I want a rivet head (essentially a demi-sphere) that uses as few patches as possible but still looks good at arms length. Here's a screen render of four medium grey (33% reflective) demi-spheres using the same 3cp cross-section spline, lathed 3X, 4X, 8X and 12X. The surface creases in the 3X and 4X are especially obvious in the top views. In my opinion 8X is the acceptable minimum while 12X is a waste of patches. Here are the same models rendered "outside". Once again the 3X and 4X would be fine if they were in the background of the scene. Not so much if a main character uses them to gaze at their reflection. However there are more tools at your disposal; manually adjusting spline magnitudes and the groups "normal weight" which is a material property you can apply to control how patch normals are averaged. Here's four demi-spheres again but the third model now has only four, 3pt patches. All its' magnitudes have been tweaked for circularity and a material has been applied to it whose only attribute is a normal weight of 67%. Here are the same models "outside". If you import this image and the previous, similar one into an image viewer and switch back and forth between them, it's clear the 16 patch model is more accurate. But for use as a rivet head, being able to replace a 16 patch model with a more than adequate 4 patch model really reduces patch counts.
-
I have a suggestion for making the grid line display more useful (IMHO) if Steffen can manage it. Here is a typical grid setup for me; grid lines every 1/16" with a highlight line at each inch. Another typical grid for me is lines every inch with a highlight every foot. If I zoom out from this screen mag, at some point AM decides that the smaller grid squares can't be resolved on my monitor and whole grid is turned off. It would be useful if only the small grid was turned off while the highlighted lines remained. If you continue to zoom out, eventually the large grid also turns off.
-
see attached v19e is the oldest I have and it does not perform any better. rear_hinge_hub.tga
-
I'm having issues in v19o with rendering normal maps on non-rectilinear patches using anything thing other than a final camera render in a chor. At the top of the attached image are shown five flat surfaces. The left-most four patcher is similar to the surface that I was modelling when I discovered this. The next three surfaces have the same outline but each is built with a different patch layout to see its effect. The right-most surface is a reference square 4x4 patch plane. All patch normals are aligned. The same normal map image is decaled to each plane. Isometric views of these five surfaces are rendered as 5 pass progressive or 16 pass final in a modelling window, in a chor window (not thru the camera) and with the chor camera view. In all cases, the decal renders properly only on the 4x4 square surface or when it's a final render thru the camera. Naturally since everything renders properly in a final render it's not a show-stopper but it would be nice if a normal map decal always rendered properly. I've attached the project used to generate the illustrative images. nrml_map_test_embed.prj
-
This is the first time I've ever seen this (v19.0o). Attached is a model of what will ultimately be the hinge on the back door of a 1950's vintage truck trailer. The attached image shows that it has one strange patch that doesn't respond well to "refind normals" which has the effect of pointing its normal opposite to all its neighbours and messing up the smoothness of the surface. The only way to correct it is to select just the patch and flip it's normal. It's not much of a bug but can Steffen fix it? Fruehauf_hinge.mdl
-
v19n render issues [solved: fixed in v19o]
R Reynolds replied to R Reynolds's topic in Animation:Master
You're correct Robert. Everything seems to render as expected in all modes in v19o and as a bonus I get to play with the new aim bias tool. Wheee! -
v19n render issues [solved: fixed in v19o]
R Reynolds replied to R Reynolds's topic in Animation:Master
Same result with or without multi-pass. See attached project with all components embedded. avg_normals_test_embed.prj -
I've found something strange about v19n progressive and final renders. When you model old railroad vehicles you use a lot of rivet heads. The most efficient way to model a rivet head is a four patch circular quadrant bent into the right shape using bias. Sometimes to get the right look for such a simple shape I add a material to the rivet group with just the Normal Weight parameters set to less than 100. v19n doesn't play well with this parameter. The attached image show examples of rivet head renders. The first two image columns show the models rendered three ways in v19m with the default normal weight and normal weight = 1. These are the renders I've been getting at least since v19e. The next two image columns are the same models rendered in v19n. Progressive renders are fine for both models. In real-time there are black smudges on each patch. These smudges are also faintly visible on the final render. And when you set normal weights to 1 the patches break up in real-time and final. The last two image columns compare the original model with a version where the added material has normal weight = 100. I also turned normals on which show the black smudges located at the normal whiskers (if that's a clue).
-
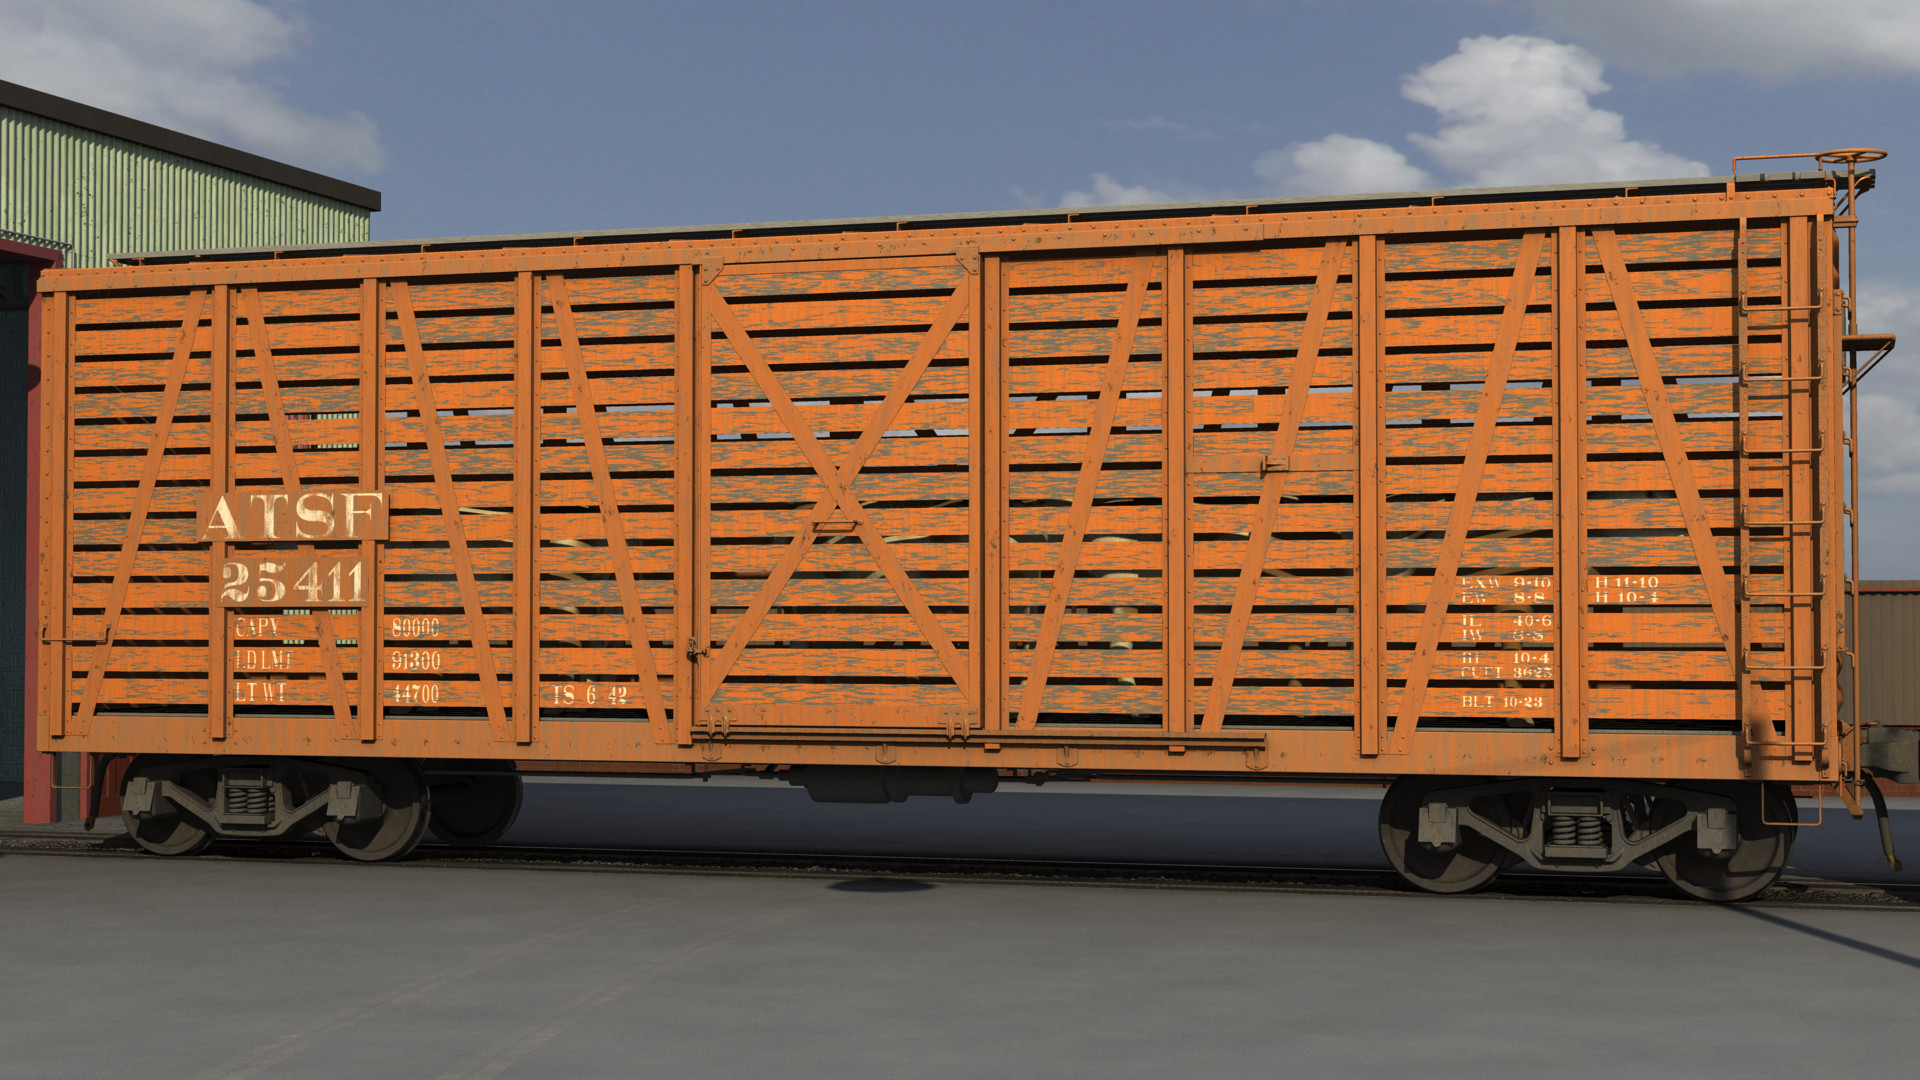
Livestock used to be shipped via railcar using stock (or cattle) cars. They were essentially box cars whose walls were replaced with wooden louvers. The wooden louvers did less damage to their hides for better quality leather. They also provided ventilation but if you were nearby a stock car as it went by (even if it was empty) the odour was unmistakable. stock_car_walkby_02.mp4
-
I totally agree but I thought it was worth asking. Believe me, I'll gladly use whatever Steffen can manage.
-
I'm hesitant to request a new feature (I think Martin once said "add a feature and add five new bugs") for a "problem" I've been living with for almost 30 years. If a plug-in is the safest way to go, by all means, use a plug-in. I have no problem with your first thought Robert. I admire your approach to minimize key clicks but having spent who knows how many man-hours aligning bias handles, a few extra key clicks would be a small price to pay. My first thought was something like this. With the desired bias handle already selected LMB File>Plugins>Wizards>Bias Aim and you get to choose whether the alignment is a One Time (or if possible) Movable, meaning the bias aim maintains even as you move the target CP. This would allow you to grab the entire part edge, slide it in and out and still maintain flat surfaces. Once you've chosen the type off alignment, you select the target CP and click OK.
-
Is there a defined process for making such a request?
-
I didn't know you could do this. So you can teach an old dog new tricks! I'm not yet sure how this makes modeling easier but if I could have a switch for "aim selected bias handle at selected CP" that would be a great time saver when building orthogonal filleted corners. None the less, the ruler related notchiness is still proportional to window zoom.
-
That can't be because the "notchiness" also occurs while adjusting bias handles. I suppose that depends upon your definition of "extreme". 😉 (See attached images.) I agree it's most noticeable when zoomed in (zoom = 43000) but on my machine even zoomed out (zoom = 3200) it's still there. And when I'm trying to align all splines in a flat surface using a ruler line as a reference, zooms of 100,000 are not out of the question. At those zooms, aligning a notchy bias handle becomes a bit of a chore. Thanks, Steffen.
-
I think I've discovered the cause of the cp's moving in large discreet increments in v19m; turning the rulers on. Turn them off and moving cp's or adjusting bias is smooth as ever. Turn them back on and movements gets very "notchy".
-
GeForce GTX 560 Ti performed as expected. BTW Why the seriously nasty splinage?
-
My standard outdoor sunlight chor has white/blue klieg suns with AO on and a circular array of eight, inward aimed, no-shadow sunlights (6% intensity), each aimed 20 deg. up from horizontal to simulate bounce light from the ground. But the factory interior was just too dark so, as shown in the attached image, most of the large factory windows are filled with three large kliegs casting low intensity light that's a bit greyer than the blue sun. Original renders were 1280 x 720 with 9 passes. Render times on my i7-2600K 3.4Ghz CPU varied depending upon the camera's location. starting inside the factory >2 hr./frame near the door, close to the tank cars >3 hr./frame near the end with lots of sky in view <1 hr./frame frame 0 rendered Oct.19, frame 1200 rendered Nov. 22 Well, I think it looks authentic but searching for "vintage metal work benches" (see inset picture) didn't present me with many choices that: 1) looked like what I had in mind 2) would be useful as a rotoscope 3) would be a quick model Your right about the shin hazard but it was too tempting to model the top and then do a copy/flip to make the shelf. Someday if that table takes on a more important role, I may replace the shelf with angled struts mounted higher.
-
Walking from the factory out into the parking lot. tank_car_walk_around.mp4
-
Here's four, 8026 gal. tank cars all made in the same factory but painted with the logos of various vendors. I also tried to make each car to have a different level of surface dirt and rust.
-
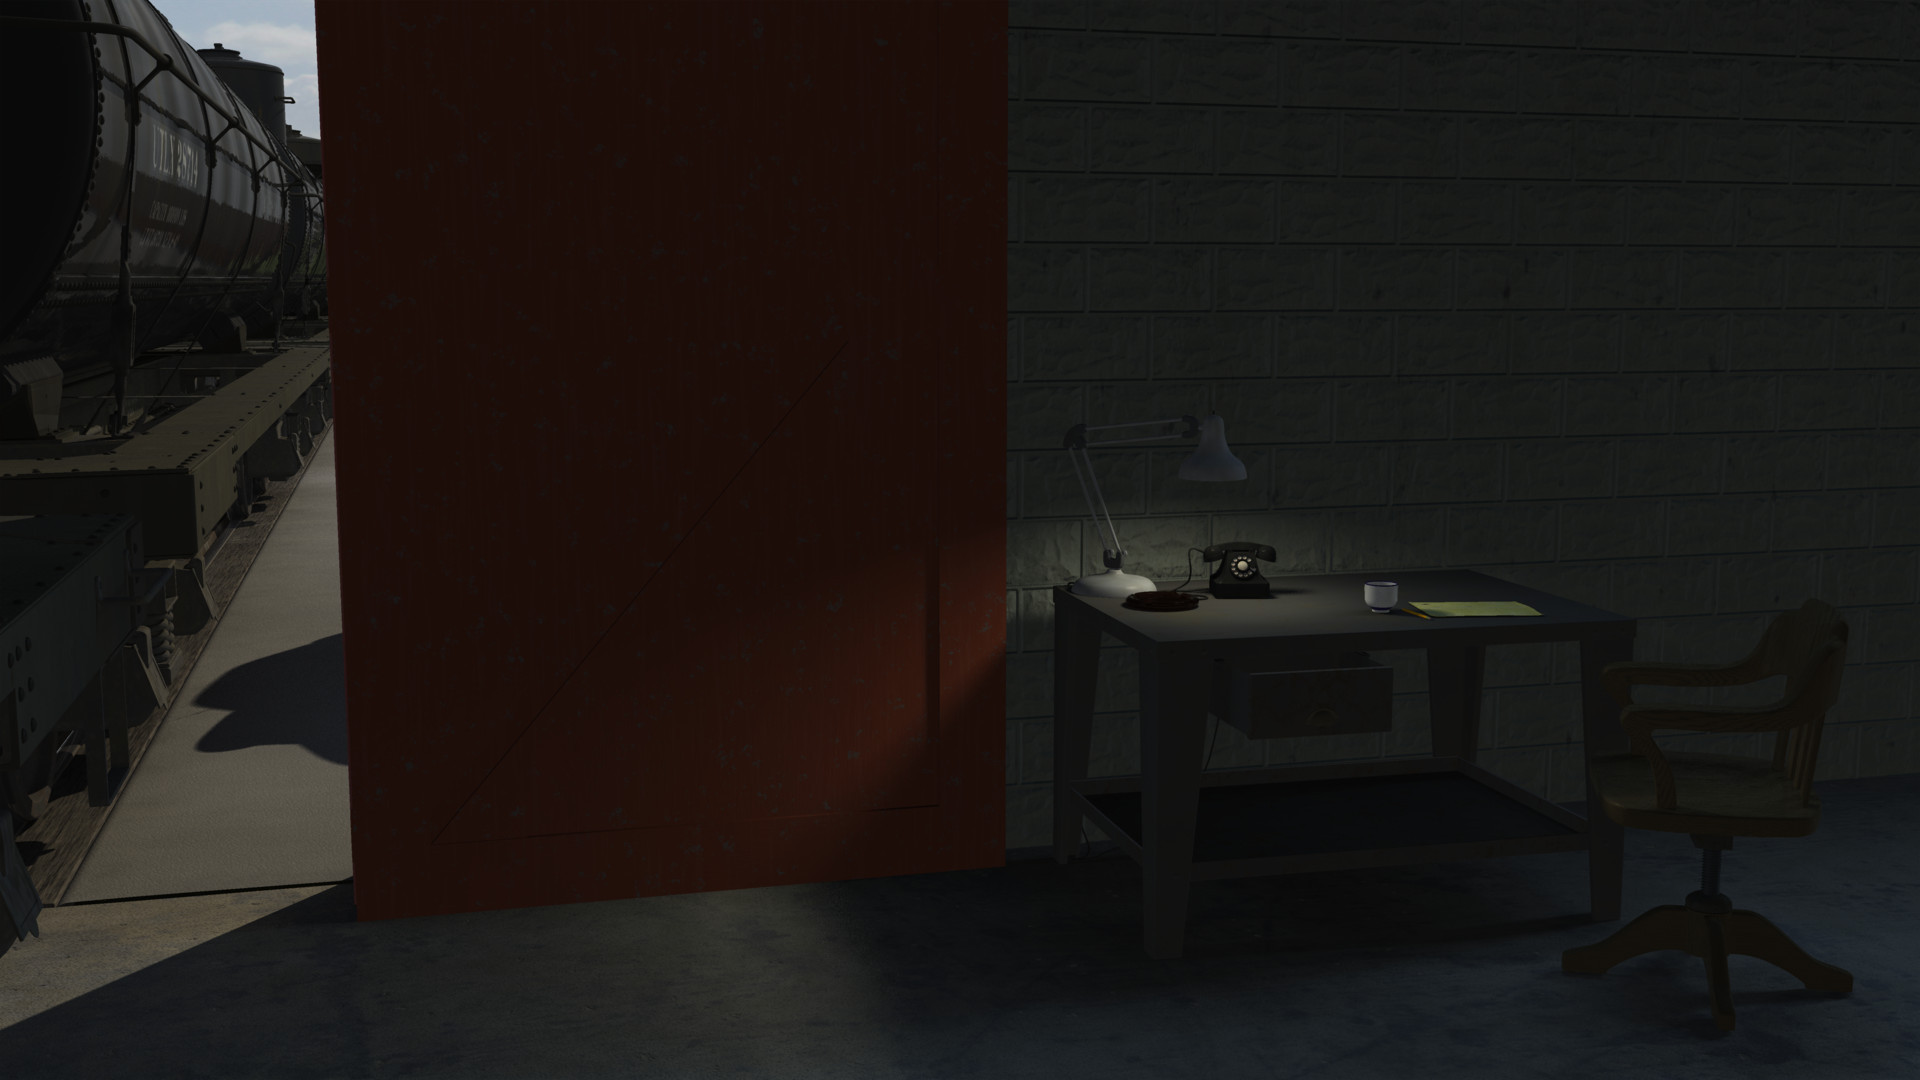
Before showing off my tank cars, I moved the desk and table back up against the wall.
-
It's possible you might disguise some of that noise if you gave the various surfaces a subtle texture similar to this black and white Fractal Sum applied as a 5% bump.
-
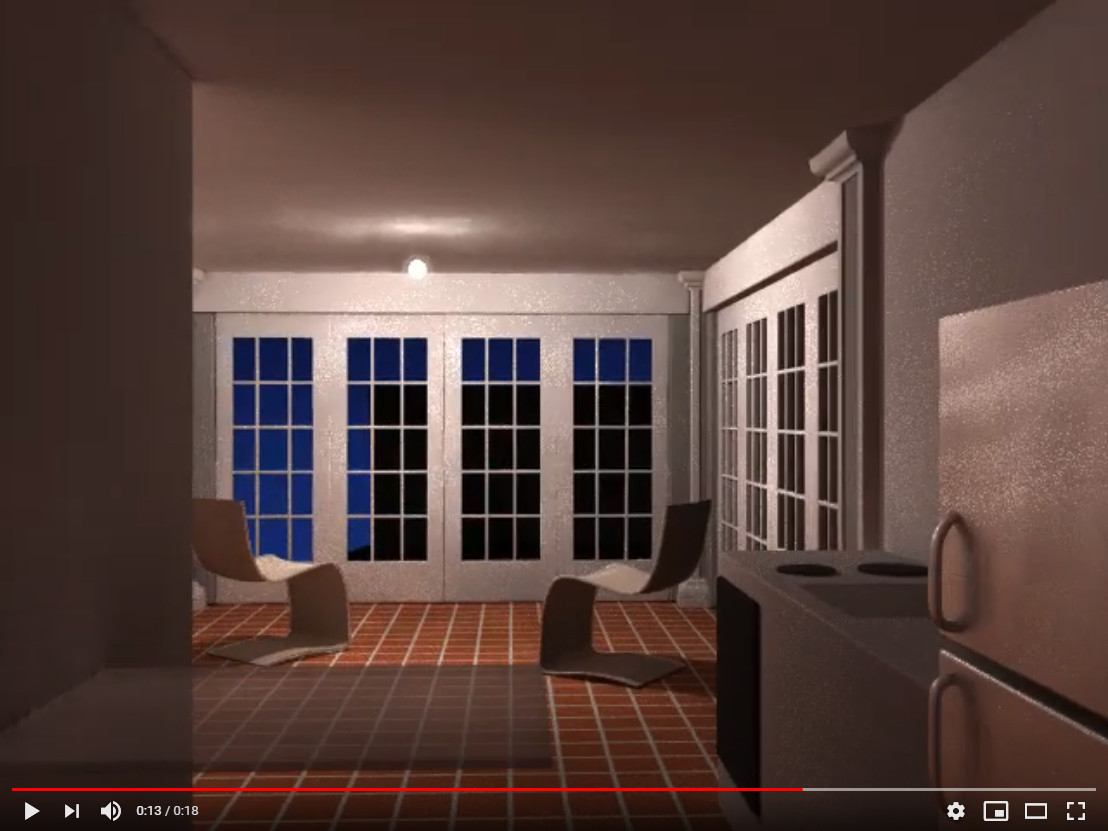
The ceiling lamp in this room seems to "cast" a speckle-like noise that is fixed within the frame (i.e. doesn't move with the surfaces) and is most noticeable in the door of the refrigerator. I assume this can be reduced if you're willing to accept longer renders?
-
Thanks Robert, "Reset Settings" appears to have corrected the response. I also noticed there's now a "Reset Dialogs" command. What dialogs does this reset?