R Reynolds
-
Posts
176 -
Joined
-
Last visited
-
Days Won
47
Content Type
Profiles
Forums
Events
Everything posted by R Reynolds
-
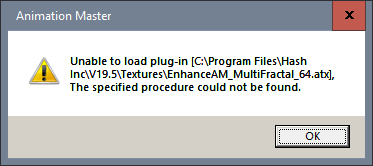
Loaded v19.5 for the first time and got this error for every EnhanceAM ATX file. The EnhanceAM TRB files loaded correctly. These same ATX files load correctly in v19p. I can make any or all of these files available for debug.

-
My very first walk cycle used FK. It was time consuming but I had access to the motion curves of all the bones and it was easy to see where a kink in a curve needed key framing. In fact it was smoothing the motion curves that convinced me that I needed more resolution than 24 frames for the whole cycle. I was hoping to treat this rig like a black box but before I try to smooth out the pops by trial and error I'm going to look under the hood of the rig to see if I'm allowed to see all motion curves of all bones.
-
I believe I'm using IK by only moving the foot controls to position the calf and thigh bones. Unfortunately it doesn't appear that the motion curves of those bones are made available to me for correction. I can only modify the curves for the foot and toe.
-
I've made some progress with my first walk cycle using the Saucy Rig (or any other rig for that matter). Everything below the knees looks OK but both upper legs have noticeable tremors (see video). Have I messed up the rig installation or do my bones need re-positioning? walk_cycle_saucy.mp4
-
Thanks for the comfort. I assume only a skilled artist could do a believable human walk without rotoscope references. I started with this Pixar mannequin. Its walk is a bit aggressive for my taste but it highlights the torso movement in a graphical way and it gave me the broad strokes. Its biggest downside was that it made me think that 24 frames was a sufficient cycle length. Once I got a quasi-workable left leg cycle I realized how wrong that was. walk_cycle_pixar.mp4
-
I'm working on my very first human walk cycle. (My hat's off to anyone who gets a believable cycle without days (weeks?!) worth of tweaking.) I have a vague memory that there used to be switch that compensated for the fact that the first and last frames of the cycle are identical. I don't remember what its name was and can't find a reference to anything like it. Is this still a thing?
-
WIP - Pennsylvania Station (sort of)
R Reynolds replied to R Reynolds's topic in Work In Progress / Sweatbox
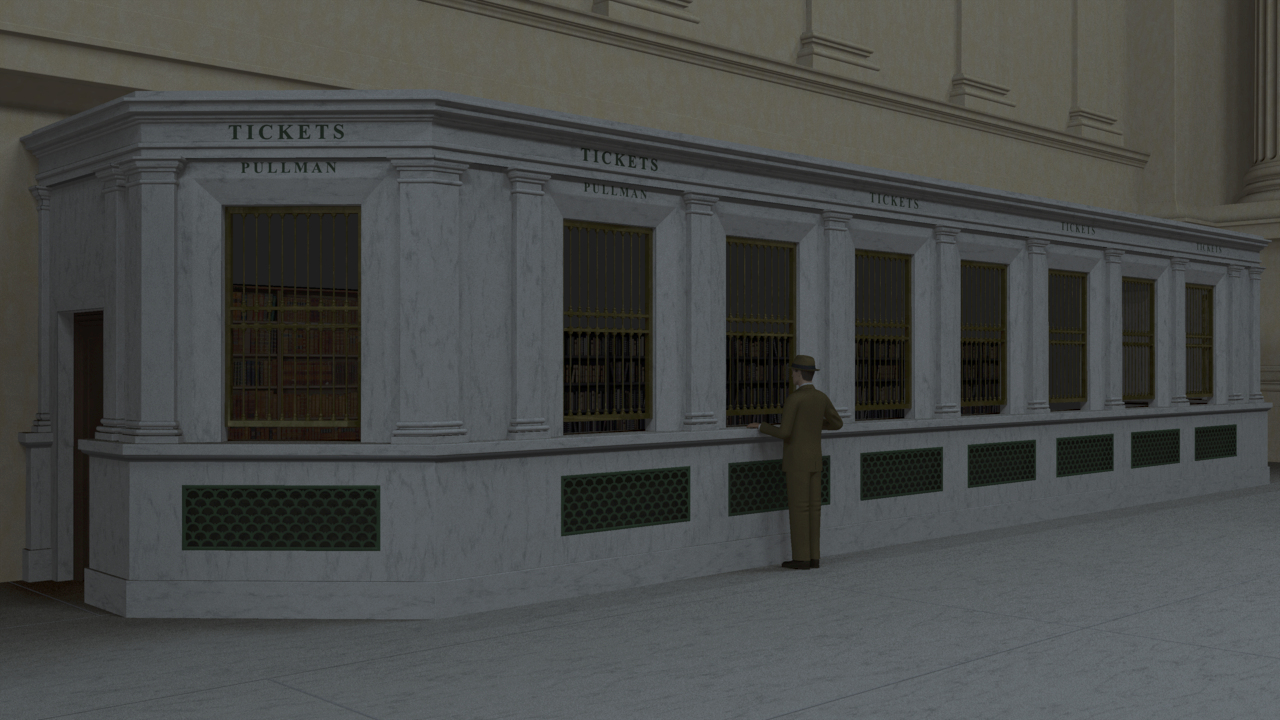
After finally settling on a reasonable facsimile of white marble material, I installed the waiting room floor and the first of four ticket window kiosks.
-
Nicely done! And thanks for sending me down the internet rabbit hole to find images of the various guesses modelers have made for a rear view of the Maria robot; something Metropolis never showed.
-
I was able to install old AMD drivers from last October (when I'm fairly sure this wasn't happening) and it still had the issue. I'm guessing "...don't throw out old images until they have to make room for new ones..." is a Windows (I'm still Win10) feature. I've found another work around; precede each window selection with a quick Move and everything is displayed as expected. Also, for the sake of completeness, I tried re-installing v19p...no joy.
-
Something new is happening when I try to Zoom-RMB around an area. As shown in the screen capture, each time I hit Z and then depress the the screen reverts to the previous view but does result in zooming to the selected area. My current work around is to hold down the space bar (Refresh) before RMB. This issue seems to have started after AMD upgraded my drivers for the Radeon RXT 6700 XT. buggy_zoom.mp4
-
WIP - Pennsylvania Station (sort of)
R Reynolds replied to R Reynolds's topic in Work In Progress / Sweatbox
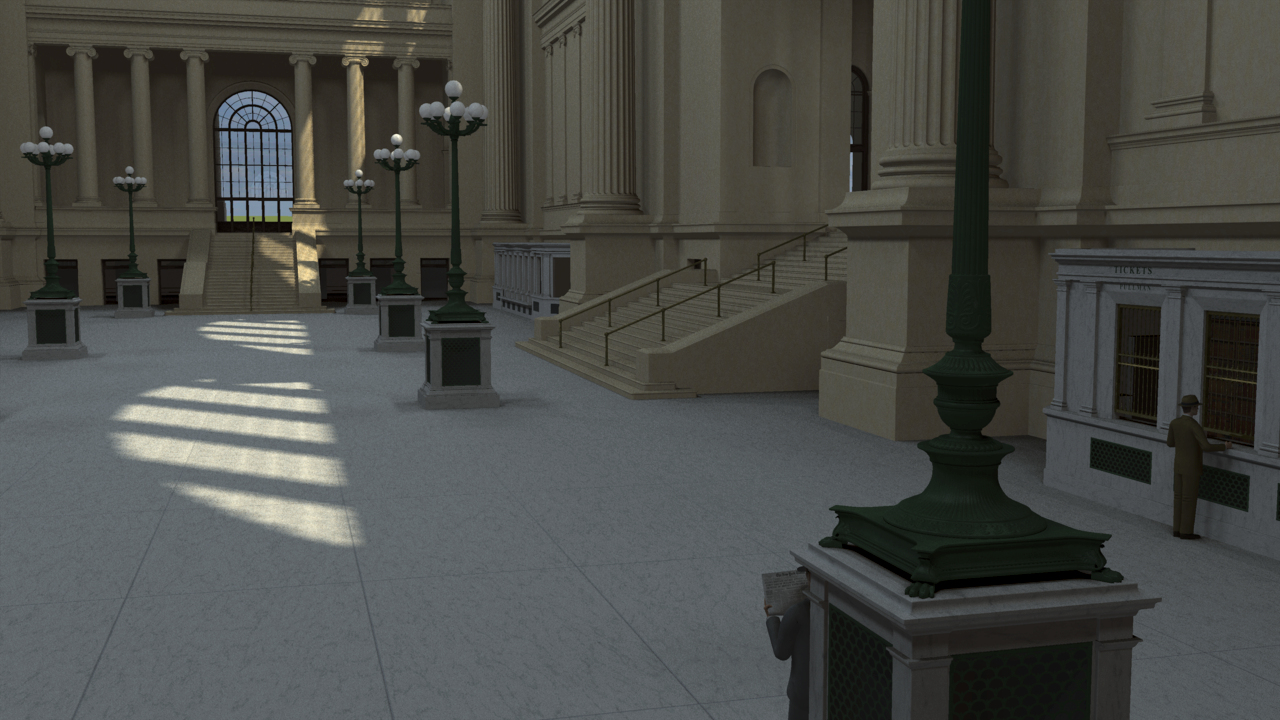
Installed the lamps in the waiting room and composed a 50 sec. crane down/dolly right shot that seems to ask the question "Why is there only one person waiting in this huge room?". waiting_room_lamps_00.mp4 -
Thanks Robert. PaintshopPro can make proper alphas and I use them regularly. I guess I shouldn't have said from luminance since that just distracted from my issue with the cookie-cut map not automatically handling specularity. Using one more decal for specularity is an easy fix.
-
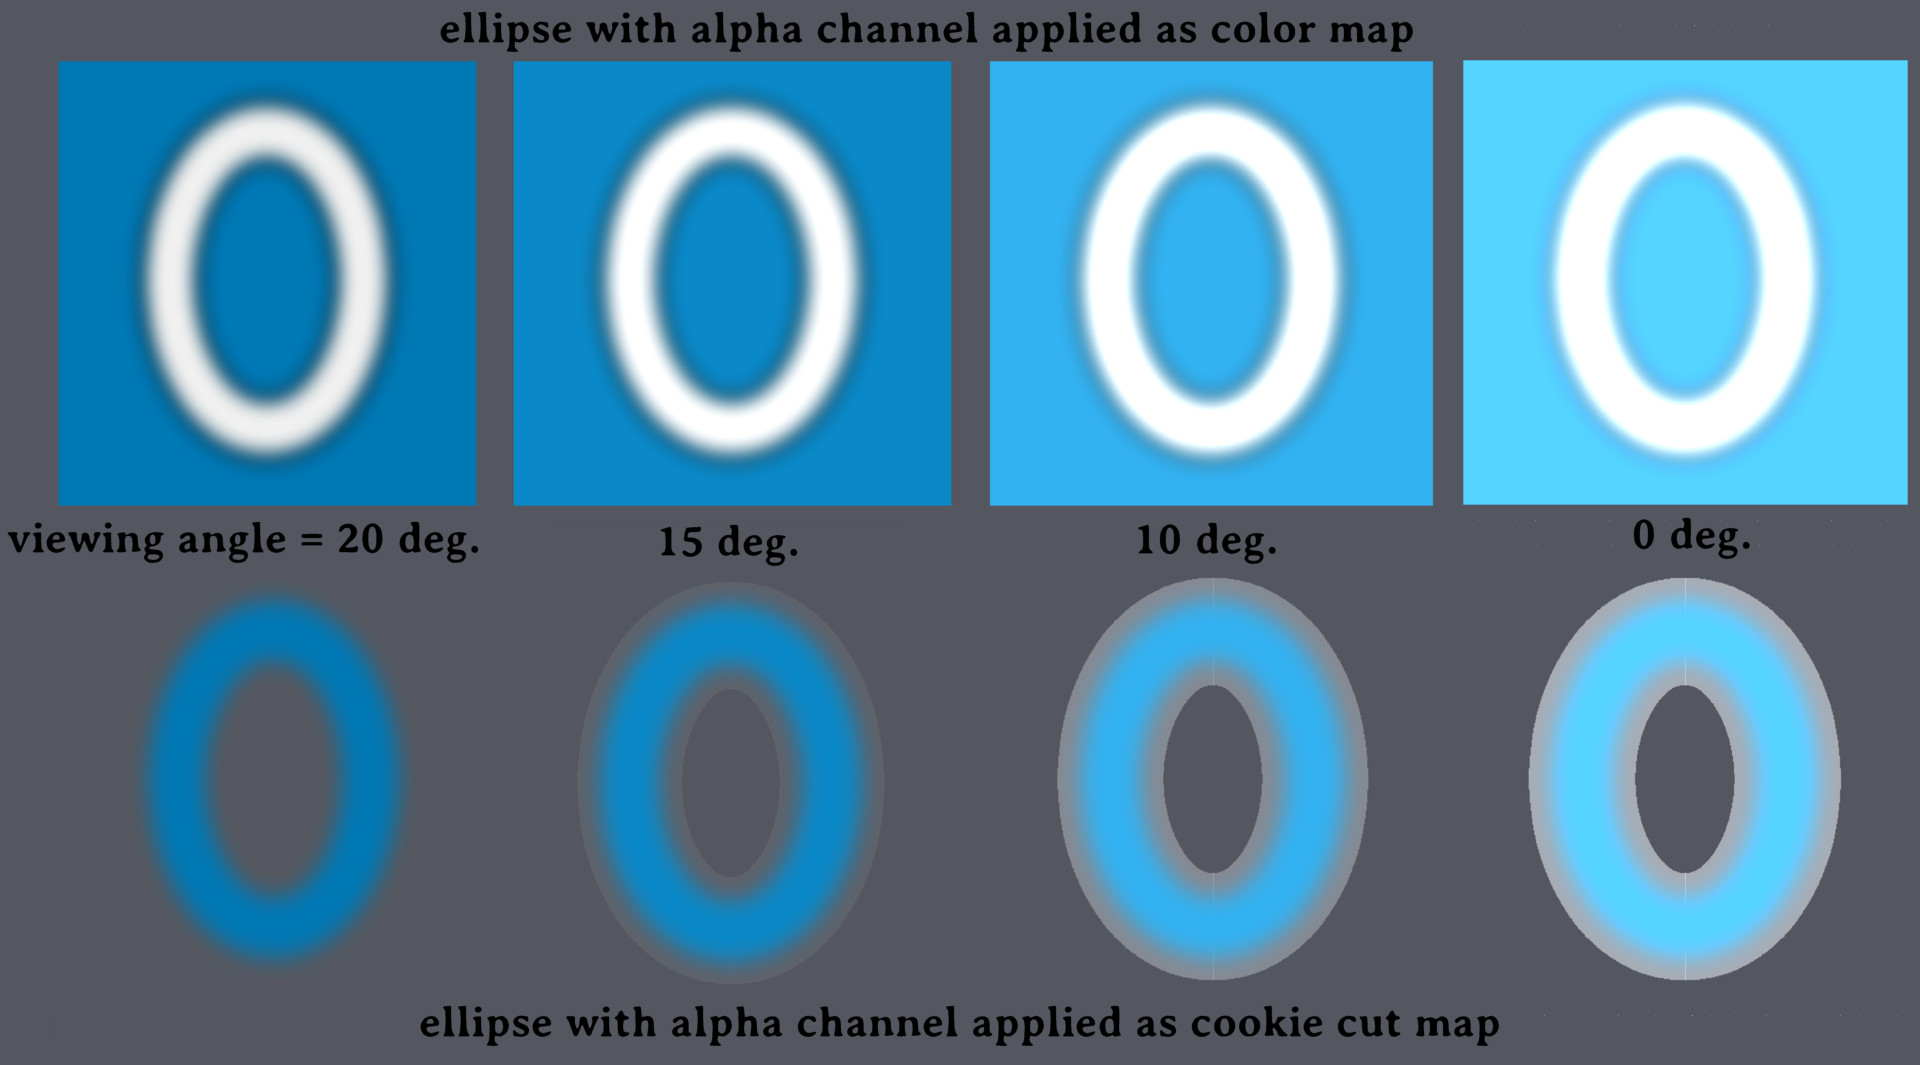
I think I've found an anomaly in the way cookie cut maps with alpha channels (which is the only way I use them) render specular highlights. My test map is shown below, an out of focus ellipse. I applied this as a color decal to a blue, four patch plane as a TGA file with an alpha map based on luminance so it should appear as a fuzzy white oval. The blue plane had a white specular color with size and intensity equal to 33%. In the top half of the following image are screen renders (9 pass) of the plane as seen from four different viewing angles; 20 deg. off perpendicular, 15 deg., 10 deg. and 0 deg. or normal to the plane. As expected, both the fuzzy oval and blue background are lightened by the specular. The bottom row is a similar sequence but now the decal is set to cookie cut. At a 20 deg. viewing angle, the fuzzy, blue ellipse cut out from the plane is what you'd expect. But as the angle decreases and specular starts to contribute, there does not appear to be any effect from the alpha channel. If there is a non-zero value in the alpha channel it gets full specular. Right now the work around is to add a specular map to force a correct alpha effect but it would be nice if it would do it automatically.
-
WIP - Pennsylvania Station (sort of)
R Reynolds replied to R Reynolds's topic in Work In Progress / Sweatbox
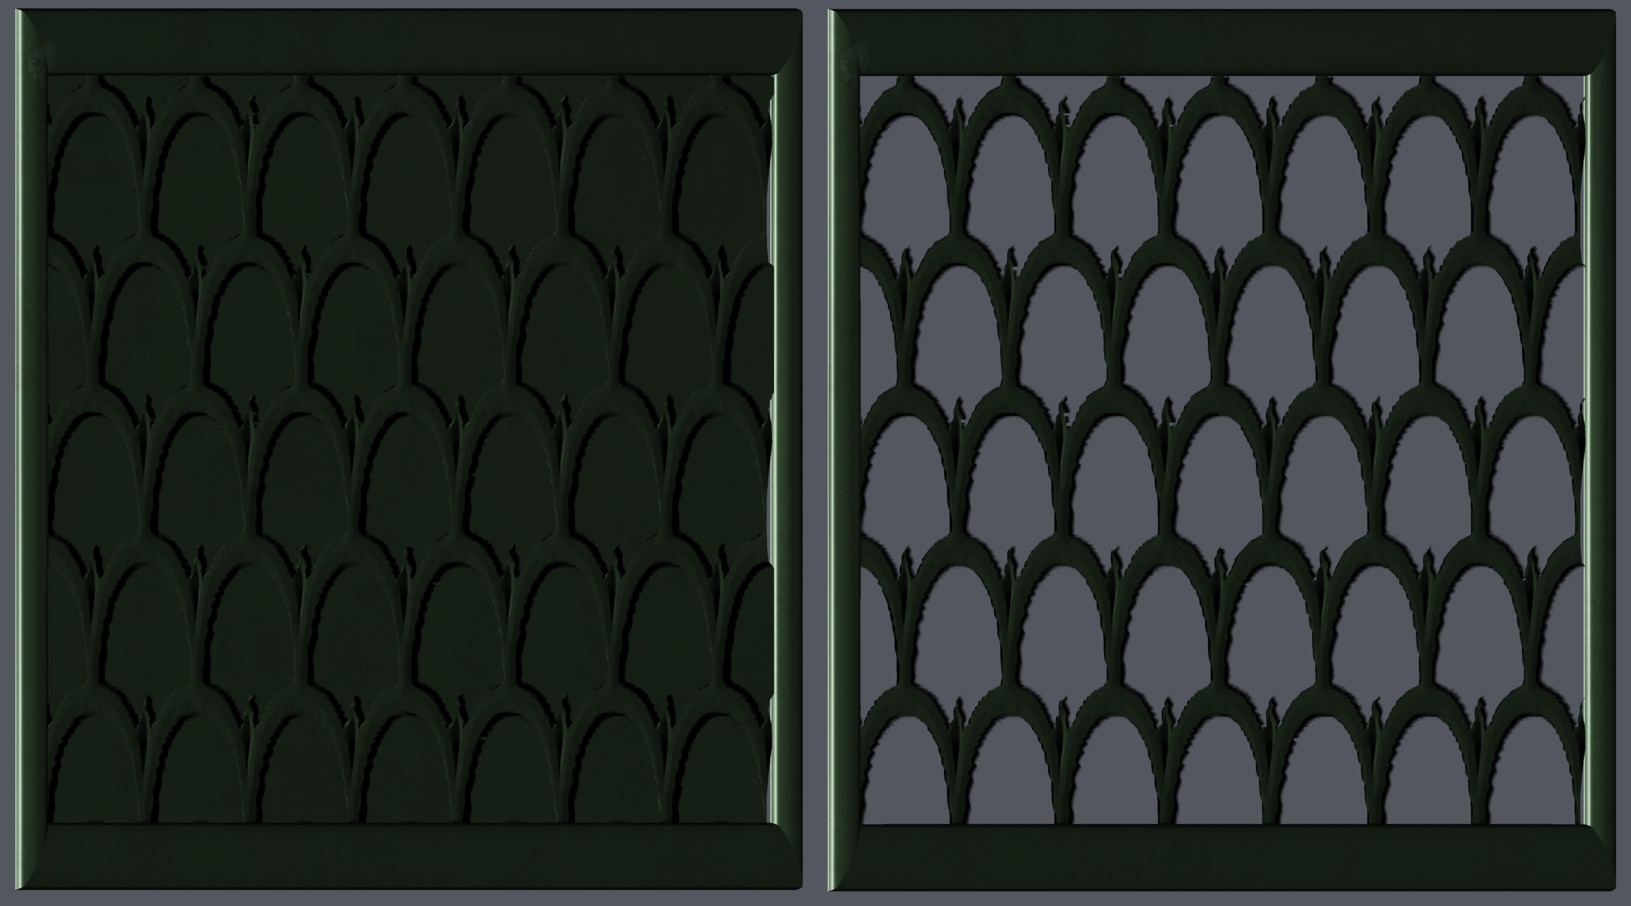
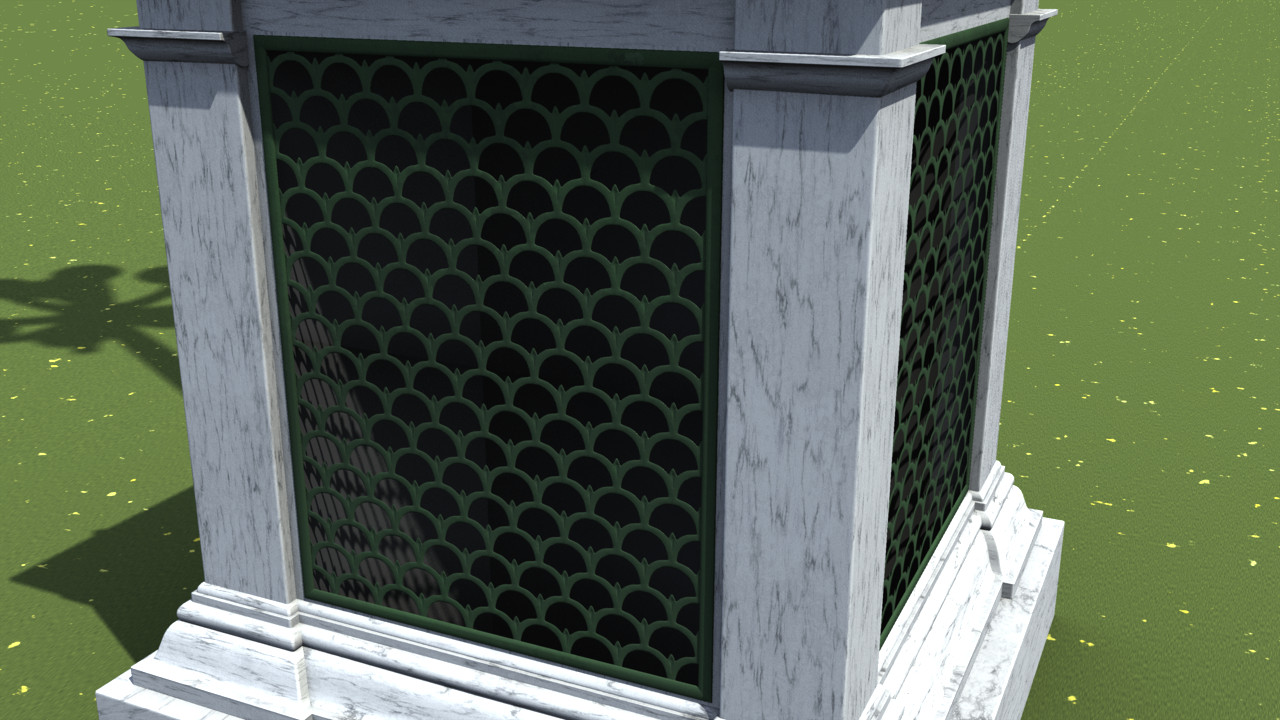
So I did a head to head comparison of a displacement map (top grate) and a normal map (bottom) grate. Both models used the identical cookie cut decal. I'll grant you that the displacement map does look more 3D but the problems occurring near the top of the arches and the distortions at low camera angles (and this is with it applied at 30%) make normal maps the obvious winner for this application. I might have gotten away with it if it hadn't been for the cookie cut to form the grate. Here's a comparison 9 pass screen render of the grate at a 67 deg. viewing angle with the cookie cut turned off on the left. The cut out edge really accentuate the antialiasing problems at the edges.
-
WIP - Pennsylvania Station (sort of)
R Reynolds replied to R Reynolds's topic in Work In Progress / Sweatbox
His paper is now a bit more floppy and crushable. And I tried to imply multiple pages with a simple stair-step bump decal applied to the edges.
-
WIP - Pennsylvania Station (sort of)
R Reynolds replied to R Reynolds's topic in Work In Progress / Sweatbox
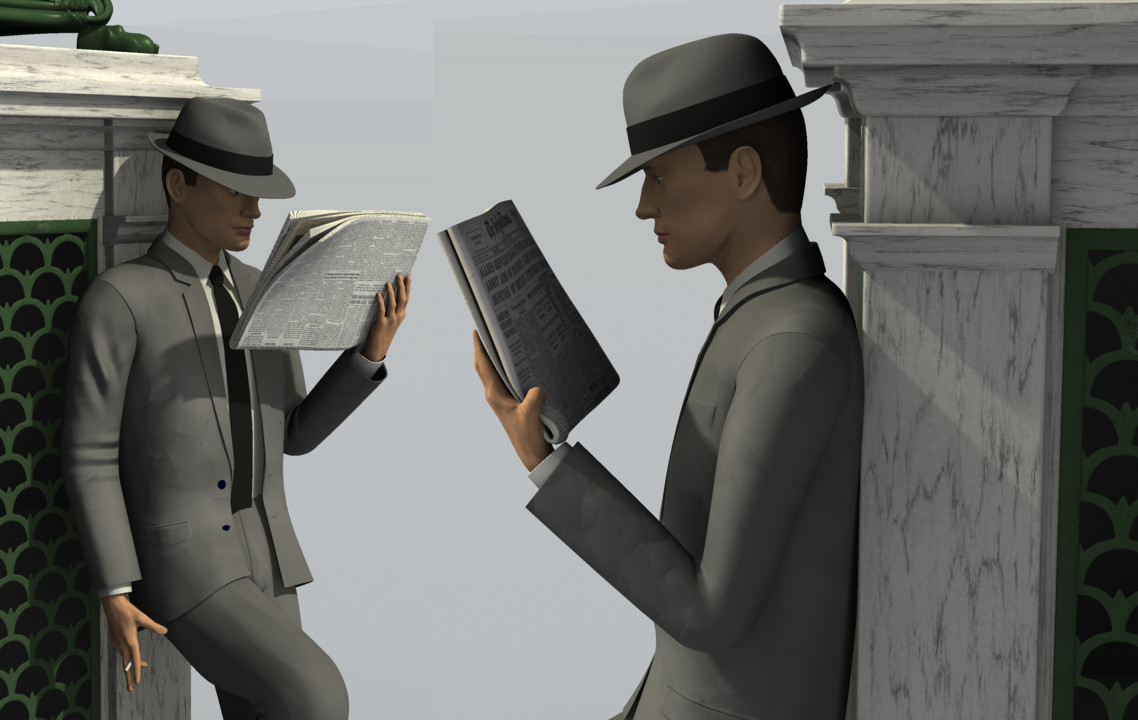
Here's my first pass at the business man reading a newspaper. I'm going to have to make the newspaper much more patch heavy so it can crush more convincingly in his hand and not pass through his wrist.
-
WIP - Pennsylvania Station (sort of)
R Reynolds replied to R Reynolds's topic in Work In Progress / Sweatbox
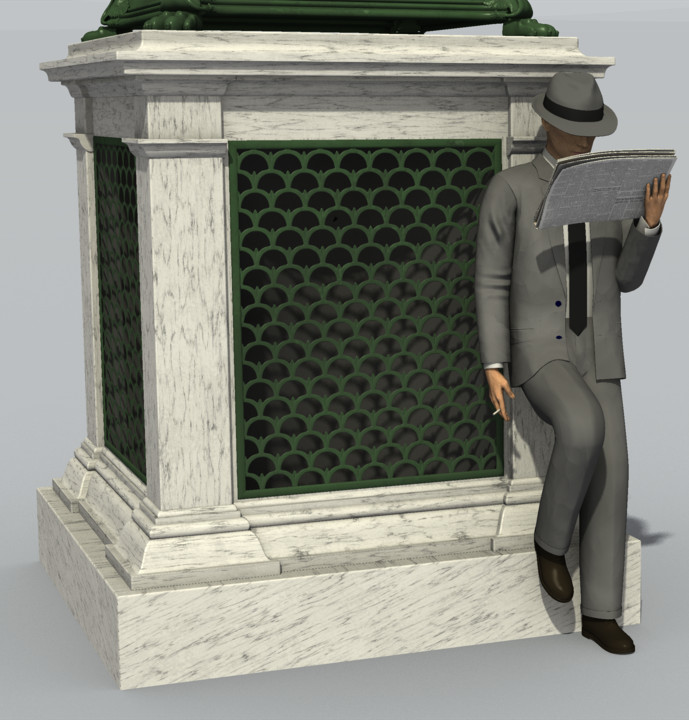
I gave it a thought but as I understand displacement maps, their depth resolution is dependent on the patch resolution so to get sufficient detail I'd still need way, way more than just four patches (times four) for each side. Great suggestion, Robert! Thanks. I'm currently rendering a different camera move showcasing the lamps. I'll work on the pose of him leaning against the marble base for the end of the shot. Here's a still of the lamps installed in the waiting room.
-
WIP - Pennsylvania Station (sort of)
R Reynolds replied to R Reynolds's topic in Work In Progress / Sweatbox
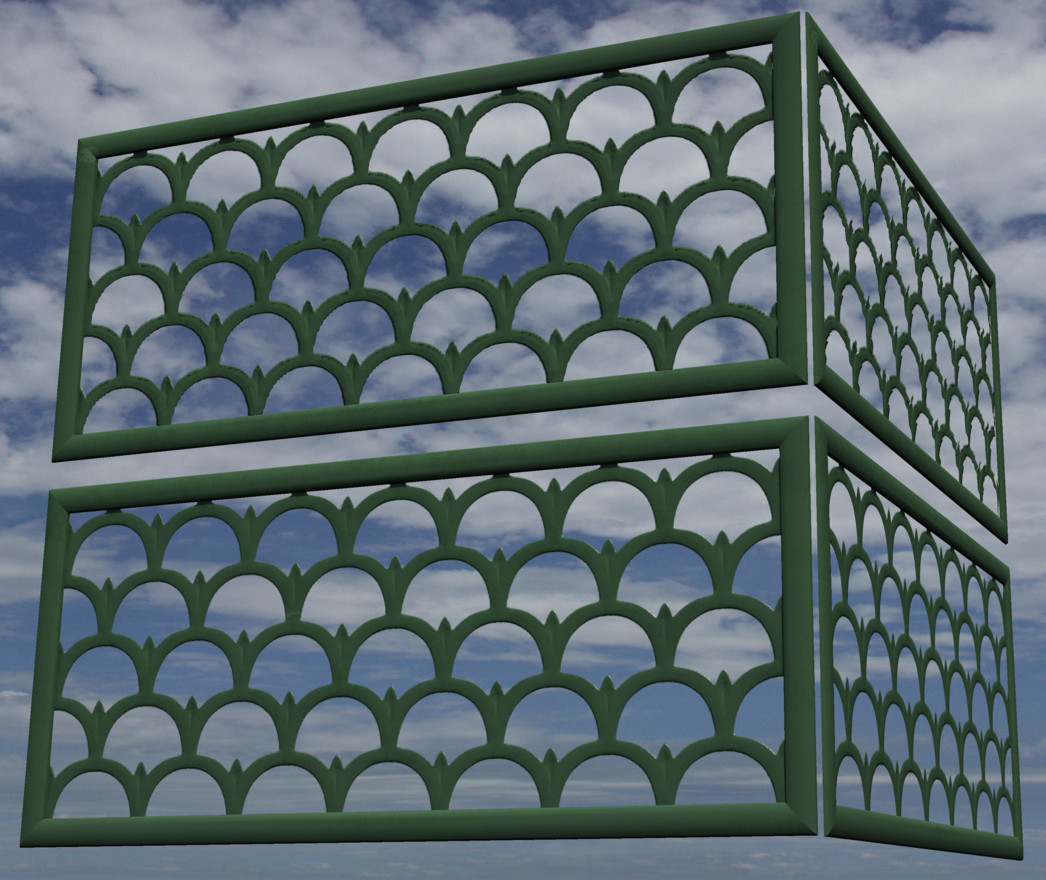
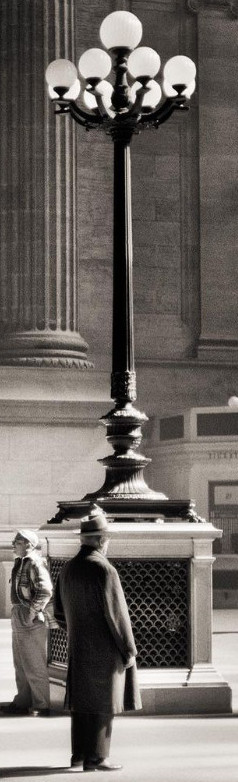
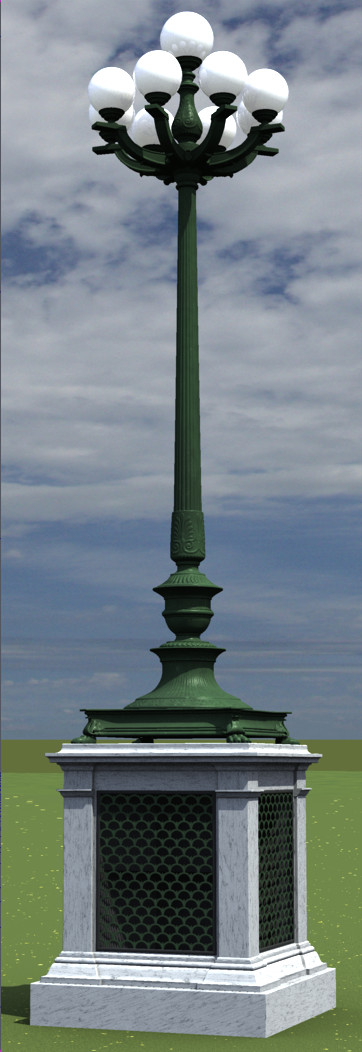
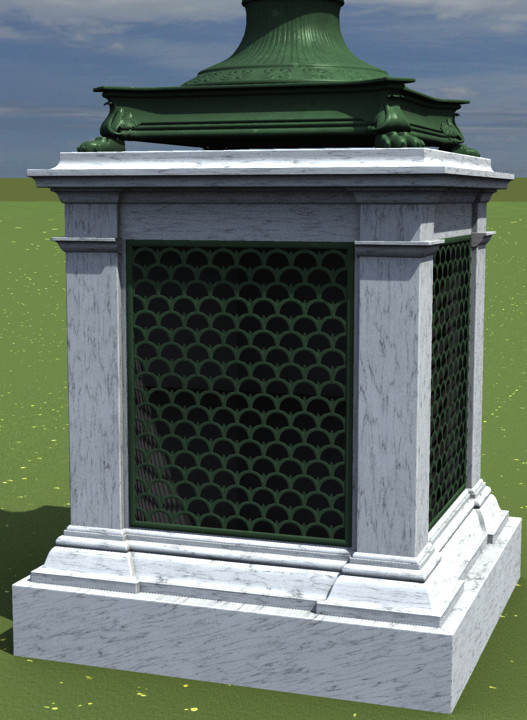
I've finally finished the waiting room's large floor lamps, shown here. I didn't have good reference photos for the details in the cast iron base and columns so I had to get creative with the normal decals. The large marble bases doubled as heating vents with an interesting cover grate design that I wanted to use but I didn't want that many patches (times four) in the model. So I took a chance and built the grate but only used it to generate a normal and cookie cut decal. It turned out far better than I expected. It's believable when you get quite close, even at an angle. The frame is modeled but the grate itself is just four patches.
-
WIP - Pennsylvania Station (sort of)
R Reynolds replied to R Reynolds's topic in Work In Progress / Sweatbox
Here we walk from the main waiting room, through the arch between the men's and women's waiting rooms and enter the concourse/train shed where an unfinished observation car is magically arriving on its own. Penn_station_concourse_WIP_insta00.mp4 -
WIP - Pennsylvania Station (sort of)
R Reynolds replied to R Reynolds's topic in Work In Progress / Sweatbox
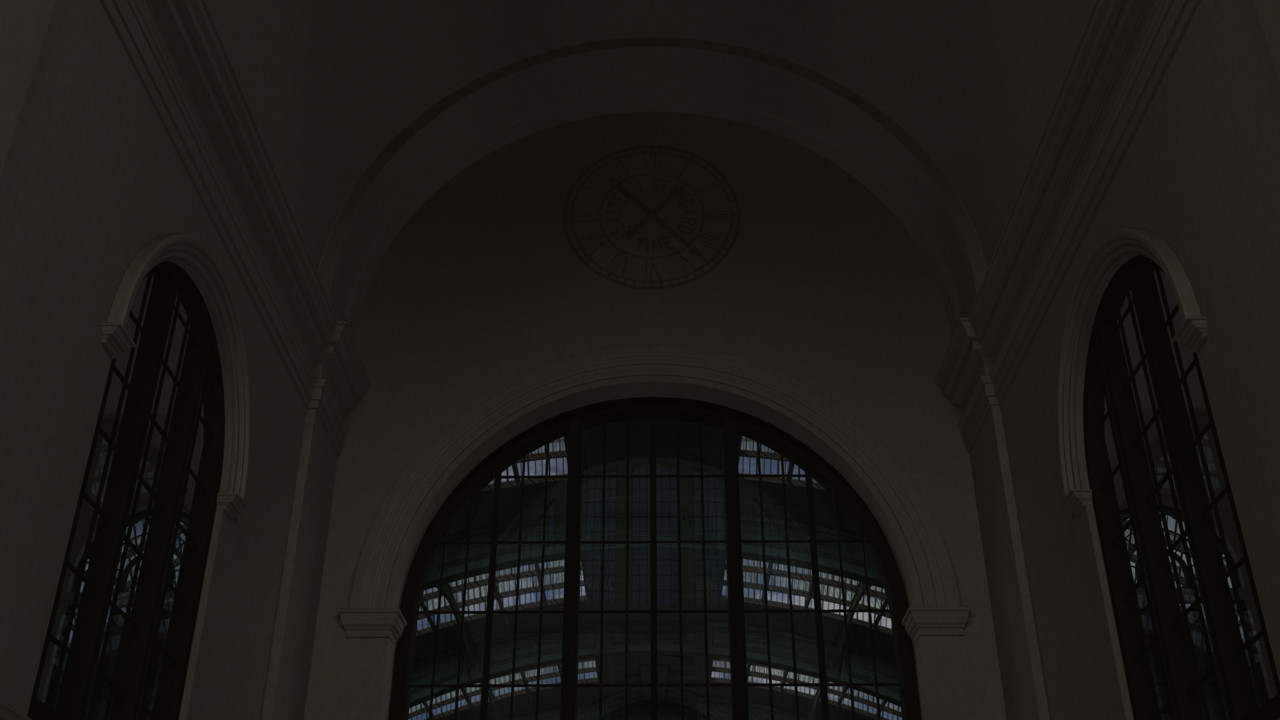
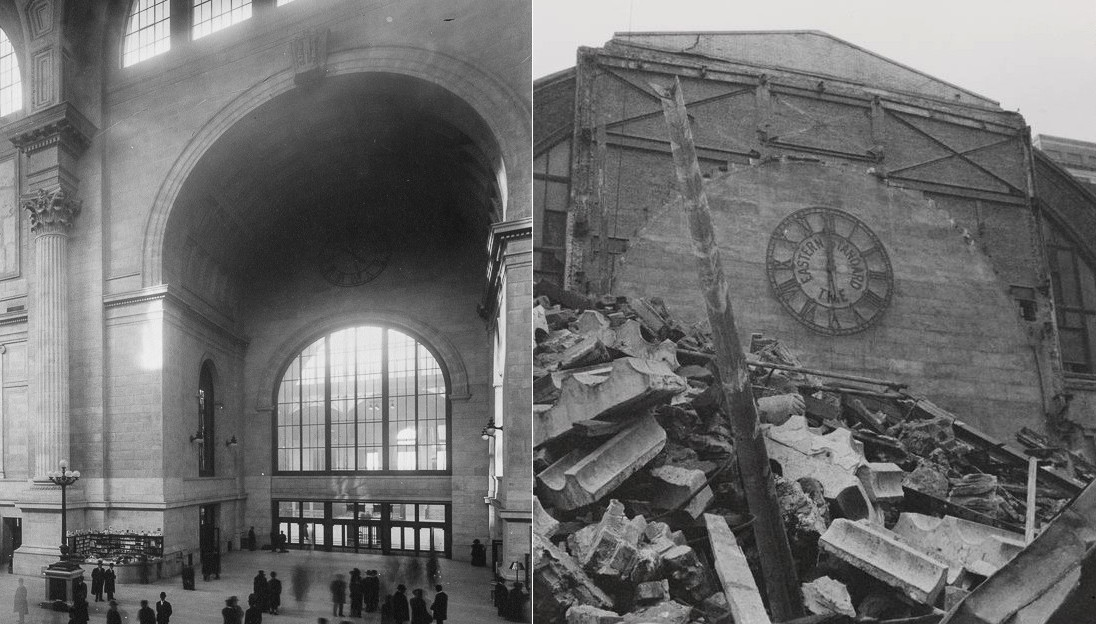
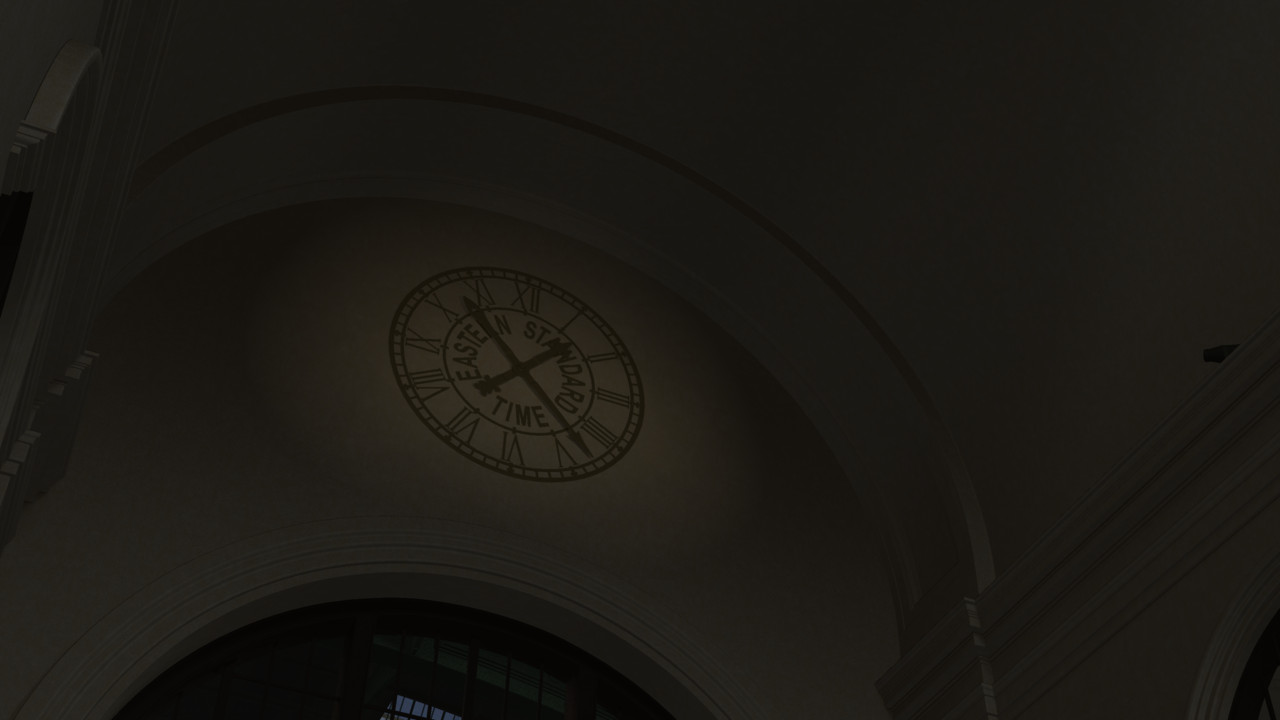
In my post from Feb. 6, I noted that I had more believable interior light levels, but this resulted in the 16 ft. (4.9 m) diameter, brass clock over the concourse entrance to be poorly lit. This is fairly prototypical because, as can be seen by the photo on the left, the only way the photographer could get any light within the arch was by seriously overexposing the skylight coming through the windows. As such, for rotoscoping purposes, I found the best photo of the clock was taken during demolition of the station, as seen at right. Since I didn't want to lose this detail in the dark and this is a "Hollywood set" version of the station, I installed a pair of 1950's vintage theatrical spotlights on the nearby ledges. It may not be prototypical, but it is believable. Now I can do a crane down shot starting on a close-up of the clock with the light reflecting from the brass.
-
While wandering around the website of a company that sells handheld 3D scanners, I stumbled across a free, promotional STL of a male forearm and hand. I downloaded and converted it to MDL format to use it as a template to improve my existing actor's hands. I thought someone else might find it useful. forearm and hand.mdl
- 1 reply
-
- 1
-

-
WIP - Pennsylvania Station (sort of)
R Reynolds replied to R Reynolds's topic in Work In Progress / Sweatbox
Well I could say that it's only a WIP so the door has no hinge bones. But I also didn't I think of it.😄 I'm still on the learning curve of PowerDirector. Every time I convert a new AVI, I sometimes test a different compression setting just to see what happens. Thanks for the info. -
Most images I post here are of a model in broad daylight. But since I'm building a railroad observation car I wanted to see if the internal lighting rig would be believable from the outside. The only way to check it would be to put the model in subdued light, so here it is just after sundown. obsv_car_walk_around_01.mp4
-
WIP - Pennsylvania Station (sort of)
R Reynolds replied to R Reynolds's topic in Work In Progress / Sweatbox
Here's my observation car entering the concourse at too high a speed with a too abrupt stop. I have a low opinion of moving your virtual camera through a glass window but the reason for this test shot was to check that the car's interior ambient light rig balanced well with that of the concourse. obsv_car_entrance_01.mp4 -
Shadow darkness shouldn't pass specular
R Reynolds replied to R Reynolds's topic in Animation:Master
True, but intensity tests I made showed that a global ambience bright enough to get a good exposure inside the car totally over exposes the outside surroundings as seen through the windows. What I'm going for is a universal lighting setup so the camera can show a character sitting inside the car looking out as the train pulls into the station. Then, in a continuous move, the camera can follow that character as he gets off and walks along the platform with all intensities being believable. You've mentioned this before concerning images of my large train station model. I seem to remember Yves writing that radiosity only works in small enclosed spaces. Once a character walks into the giant rooms of the station or for that matter "outside" under a 1 mile (1.6 km) diameter sky dome, I assumed all bets were off.