-
Posts
635 -
Joined
-
Last visited
-
Days Won
3
Content Type
Profiles
Forums
Events
Everything posted by markw
-
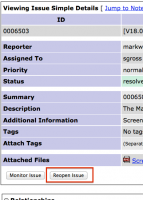
Well I thought it was just us Mac users with NVIDIA cards suffering here. Tore you have my complete understanding about how frustrating this is getting. Like you Tore, A:M is my only app having NVIDIA graphics problems. Though it has been a problem for some time now on Macs, the v18 run of A:Ms are the worst for these graphics issues and crashing. I must say here though that Steffen is still trying to fix this but, at least on the Mac side, he is having to bug hunt "blind" as it were because his Mac doesn't use an NVIDIA card. Sadly all iMacs and MacBookPros do use them . Yes you can reopen threads marked as "Solved" in AM Reports. I've had to do this myself for similar reasons to you. Just give him as much info as you can, I've made some screen recordings as well for him to help him see what's happening. Hopefully he will get to the bottom of it soon and be able to fix it.
-
First impressions here is that there are a lot of spline continuity/direction errors in the body and clothes as well as unintended internal patches in the head/hair area. I think it's these that are giving A:M a hard time knowing how to C/F/A the model! The pants and shirt (surprisingly!) work when done separately but the body geometry is just a step to far for A:M to cope with.
-
First thought is this set if you have the Extras DVD; Extras DVD > ExtrasData > Unsorted > Other source > TeethAndTongue.zip Also the Dex and Lambrina models have quite realistic teeth. You could try terms like, "teeth", "mouth" etc... in Spotlight and see what that throws up on your Hard Drive
-
Same here! Still so much to learn
-
Thanks for the "heads up" on these last two videos from Aaron, Rodney. I nearly missed them! For some reason they're not showing on his website where I normally look for new postings
-
Thank you very much for that Robert. It just turned a light bulb on above my head! This seems to be an issue not so much with Neternder but how Mac OSX works. It sees one or more messengers still running so won't allow the RenderMessenger app to be launched again by the user. A simple fix! I made an AppleScript App to instruct RenderMessenger to launch, so it now thinks the command has come from the OS, not the user and so create a replacement messenger. Works a treat! Here are both the script and the app made from it for any other Mac users who might want it. Just place them in the A:M folder along with Netrender. The launcher will create 1 messenger each time you use it. Note this app is only intended for bringing back online render messengers that are showing as "Off Line" or have been otherwise deleted from the RenderServer list of available messengers. RenderMessengerLauncher.zip
-
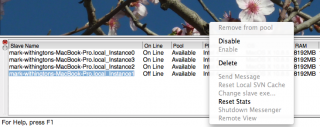
Hi Adam and welome I'm glad my short intro to Netrender was useful, as far as it went. Sadly I still only have the one computer so expanding that PDF into the area of networked computers isn't an option for me as yet. As to getting back a messenger that is "Off Line" or indeed has been deleted from the list at the bottom of the Render Server window, there unfortunately dose not seem to be a built in method to do this. (that I know of) On the rare occasions I've needed to do it I've just shut down Netrender completely, re launched and started again. I admit not a particularly elegant solution! @ Robert; Where exactly are you looking to get that option of relaunching an "Off Line" messenger? Here's a screenshot of options available on the Mac when right clicking.
-
I'm sure it's absence from 18d is just an oversight by Steffen. As you found you can just run the script "as is" but if you want to have the App, which is quicker to launch, then all you have to do is; Open the MultipleMaster script. In the AppleScript Editor menubar, go to: File > Export…' or 'Save As…' In the drop down window that opens; under 'File Format:' choose "Application". The rest you can leave as is. (Unless you want to change the save destination and the app name) Click 'Save' You have now made your own MultipleMaster App!
-
Thank you all, I see what you are saying, I think So this is normal then and at times we need to pay attention to the size of large images, in terms of dimensions and whether it really need an alpha channel or not and compression, before importing them. They may look small outside of A:M but A:M will show them for what they really are. Some more experimenting is in order then I think... On a side note; I'm always amazed at how small a part of the whole actual animating can be when making an animation!
-
Recently started a new Sports Day project which is using a .tga image as a decal for the pitch markings, which according to my OS, is 2,554 x 410 pixels @72dpi and a file size of 95kb. If I look at the information for the same image as it appears in the Images folder in A:M it agrees on the dimensions but says it is 3.99MB!? That's but a big leap from 95kb! And it also seems to be enough to keep making A:M freeze and have to be forced quit if I try and pan over it with the camera. Turning OFF Show Decals and the camera moves freely and no freeze. On the plus side this decal, so far & touch wood, has always displayed correctly and not fallen foul of the usual mess up I get with images in A:M
-
OK swapped to OpenGL I don't get a freeze after clicking the Bones Mode button but the screen doesn't change automatically into the Bones Mode display, I have to click again on the background before it will change.
-
Just to note that the Mac version you can now download fixes the see-through patch issue. Thank you Steffen
-
-
Yes that's right. As far as I am aware all Macs have NVidia cards except the Mac Pro work station type. The old Mac Pro had ATI cards I think and the new one has AMD FirePros. Past A:Ms all have different bugs to contend with, I don't think there is a perfect version! But v17g at least displays geometry correctly.
-
Sadly I had already tried your suggestions too Robert. No dice I see Tore is using an Nvidia graphics card and I have a horrible feeling this is going to turn out to be another Nvidia related problem.
-
Sorry posting this reply here as I'm unable to make a post in the v18d thread So thanks for the sample model Robert. Closer inspection shows that v18d is NOT randomly flipping normals, but it IS making things see-through?! In the screenshot here of your test model you can clearly see that the yellow pointers are all still facing outward as they should. Note, this screenshot was taken with 'Show back facing ploys' ON, so even if there were any flipped normals the model still should have looked solid. Incidentally whilst trying to get that screenshot A:M crash yet again. v17g is starting to look to me like the most stable Mac version.
-
So hate to have to post this so soon but first thing I see in v18d is all the normal directions are messed up. Open the same files in other versions and they are back to how they should be. Screen shots are the exact same project with show back facing ploys OFF, which is why the v18d one looks kind of see-through. And as I found in v18b trying to do a screen render very often results in a crash. Because the Mac version of A:M more often than not messes up the realtime onscreen display of decals (and rotoscopes for that matter) I find myself needing to do a lot more screen renders just to see how things are looking. This is fast approaching unworkable now. But trying to find an up side before bed, the CP freeze is fixed in v18d!
-
Not a tutorial as such this but to get you started; Turn ON SSAO in the render options. Expand the options triangle for SSAO and turn On the first setting 'SSAO Effect Only'. Leave everything else at their defaults so you have a known starting point for further experimenting. Open a Chor and pop some things into it and render out 1 frame. What you will get is a white image with just the SSAO effect. This makes assessing the effects any changes you then go on to make to the other SSAO settings much easier to see and asses. Having MultiPass On can also affect the reaults. Here's some I made earlier; FinalRender_Only0.tga FinalRender_SSAO0.tga SSAO0_Only.tga SSAO_Only_No_MultiPass.tga
-
Ah, I'm glad you mention this Rodney. I've been seeing this too I think, not all the time, but often enough to start thinking something is up with v18b. I have two possible theories at the moment; 1: It happens when not quite clicking exactly on a CP. 2: The direction the spline is running in is a factor. Problem is so far though I can't make a repeatable set of actions that initiate the freeze every time! Whilst on the subject odd behavior, v18b crashed on me 9 times yesterday! Each time during a screen render but not always. Four out of five would work fine.
-
Ah, I think I see what you are saying there now. Just had a play with the different render settings windows and what I think you are trying to do dose work. Example: Tools > Options > Render Tab; set to, 'Use Settings From This Dialog' And to follow your example set Multi-Pass ON Save and close window Then: In the 'Render To File' window when it opens; Options Tab > Multi-Pass is as expected also showing ON. So set it to OFF and click 'Apply'. Nothing visible happens. But now click 'Cancel' to exit the Render To File window. Open it up again and you will see that Multi-Pass is still OFF. I grant you having to click the Cancel button after Apply is rather unintuitive but I like to think such things lend our digital tools some charter!
-
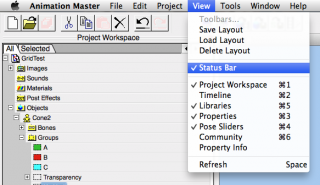
Hi Simon I'm back on line! See screen shot to get your status/progress bar back again. Not sure I follow your next comment entirely. But in Tools > Options, in the Render section I have it set to 'Advanced' and 'Use Settings From this Dialog' checked. The render to file window then takes it's starting point from what you have previously set in that other render options window. I must confess I've never found myself wanting to use the traffic light buttons in the render to file window. Have they not always been greyed out? I really can't recall.
-
And a "Feliz Cumpleaños" from Spain
-
Hi Simon Sorry since my last post I've not able to follow your hair adventures to well I'm afraid. Having major internet problems at the moment (I'm posting this from a cafe with WiFi!) But that fur looks really good now, I like it What method did you finally go with to get that look? Decal or patch images? Will look in again when I can.
-
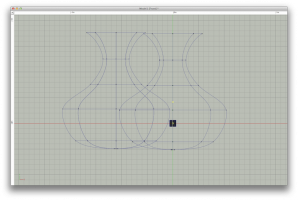
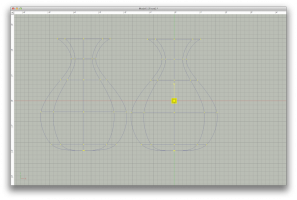
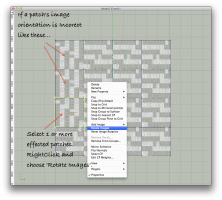
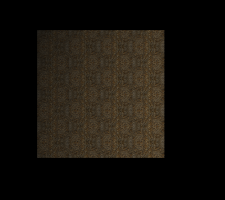
He's looking good Simon! My first thought looking at your Mapping .prj are: Do you need that Bump image/group? The Displacement image/group is already giving the surface the illusion of a 3D texture. In that test project I didn't get any of those small square artifacts you show on the actual model? However I did see that not all the patch images were on the same rotation. This dose often happen with them, not sure why?, but easy to fix. See first screenshot. The second screenshot is after rotating the left hand row of patch images and removing the Bump image/group. And the Displacement image is at the default 100%. (Note to you lucky Windows users, yes that first screenshot is how images often display themselves in real time to us Mac owners )
-
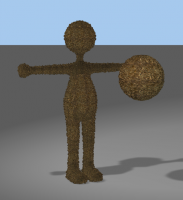
Hi Simon Ouch 74 stamps! Have a look at this test .prj. The ball was 1 spherical applied decal with the second stamp set to Displacement. Thom is using patch images. Basically select everything that needs the fur image in the model, right click and choose add image, thats it. Once for Colour and again for Displacement. On a side note, I've taken to resisting the temptation to see my models all textured up and looking their finest until the very last thing before final rendering. Sometimes, even the set lighting can necessitate a rethink about a texture. FurTest.zip


