DJBREIT
-
Posts
359 -
Joined
-
Last visited
Content Type
Profiles
Forums
Events
Everything posted by DJBREIT
-
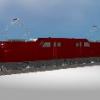
For a week I thought my eyes where going bad or my computer. Since all my models where showing in an odd shade of color. Until I made this model with out adding color groups. Then I noticed the odd spot light on the model. “This is in model mode” in 15i vers. So I opened it in 15d vers. How do I turn it off?

-
I already know of this problem If you have three files with three container in them and bring them in to a project as soon as you save them each file will have nine container each. It dose not do a good job of cleaning them out. And the purge plug-in dose not work ether. If you think you have got them all and open the project and get the same problem then you missed some files so don't save. Close it down and start looking for any file you may have missed. Also you can start a new project and add the files one by one. To check witch files you have missed. And to help you speed thing up you may want to use notepad++ http://sourceforge.net/projects/notepad-plus/ I tried to find an INI's editor but the only one I have found was a old one set up for a game. to bad we don't have one set up for A::M files it would make it a lot easyer to fix and clean up the files.
-
Should have used a picture. It would have saved me 15 minutes and a headache from banging my head ageist the monitor. I could not figure out where the {Model Mode} was until I looked up and saw the little guy and remember him being called that. thanks
-
If you have a the web version/upgrade you can also use a three ring binder. Down load the web help files, print them out (double sided if you can) get a hold of a three ring binder and a three ring hole punch. And there you have a manual that dose the samething. But you can replace pages or add your own note pages as you see fit.
-
I ran across the same problem a short time after I upgraded. In this case I was in choreograph I think but I have not seen it happen since. Right now Im just keeping an eye out if it happen again.
-
Thanks guys I was hoping to see something I had not found or tried yet but thanks anyway. Also I have add the trick I found to the AM report as a new feature Shelton You may also want to look at this if you have not found it yet. http://www.hash.com/forums/index.php?showtopic=33630
-
I will be needing to make some neon signs. I have figured out how to make one using render as line and adding glow to it in notepad but if you save the file it deletes the glow entre. I wanted to see what other options there are to make them?
-
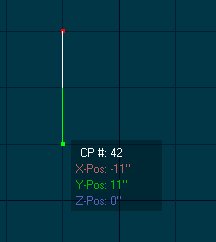
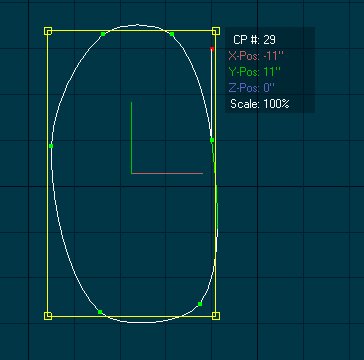
Turn on "Show Manipulator Properties" button in the toolbar. Get the pivot point of the snap grid or use 0,0,0 Group-select the CPs. move the group near the grid point. Because as you enter each of the coordinates the group will jump. [sHIFT]-Click on the CP (within the group) for which you want to define coordinates. Enter your values for X, Y and Z. The [shift] selected CP will move to that location and the rest of the group will follow along. Hope this will help. This is HomeSlice I just cleaned it up.
-
[ Thank that answered the question. I will have to give it a try
-
I am setting up a complicated stage. It to be a city. In the choreography I can have multiple copies of the same building or prop. I was wondering if this can be done in the model window. So you can build a complex building with relatively few parts. And low CP count. Before you drop them in the choreography. Or is this only possible in choreography Also is there a place to change the model file defaults so the “Toon Shading (Method)” can be set to standard when I make a new model?
-
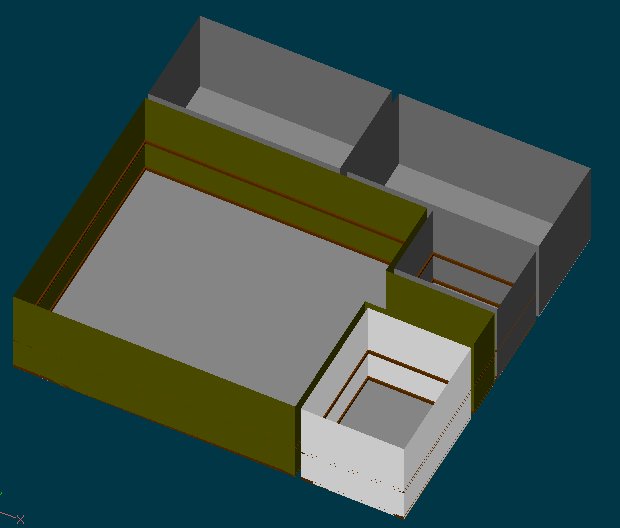
apartment.mdl Try and make all elements as separate simple pieces . Like I did with chair rail. I made a box then stretched it along the room. This allows you to put them in the different group easier. If you don’t, you will be pissing and moaning if you hit the select all button. Also it makes changes allot easier. Always make the ceiling and floor separate pieces. This is so you can hide them during modeling and choreograph as needed. Keep the rooms separate so when you are done with the model you can separate the rooms into there own stages if needed.
-
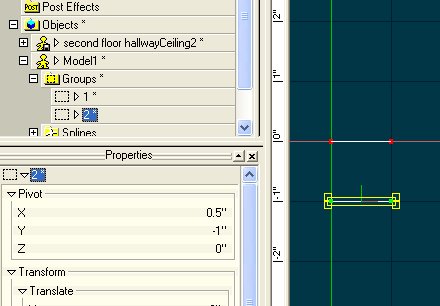
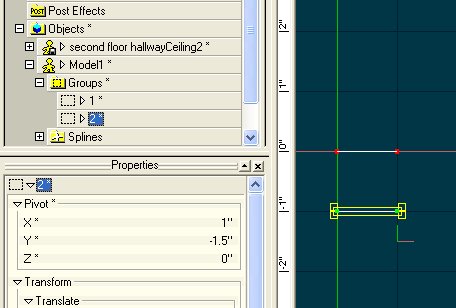
That is the workaround. I was hoping to find something that I can do this faster That was already done. I did find this problem a little while ago and A:M is working on it. But until they fix it and release it. I still need to work on my project. But I have found a faster work around. (See bottom) When you said that It reminded me of something I saw when I was looking in the model file. THANK GOD FOR NOTEPAD!!! First there are multiple problems going on. In the model file there is two sources for the pivots Pivot=2.50334 2.54 0.000264883 (this shows the groups true pivot) but this dose get a little wonky when you groups select.. It will also be missing if you copy and paste. Matrix=1 0 0 2.50334 0 1 0 2.54 0 0 1 0.000264883 ( this contains the pivot for the translation point ) If this is present it will override and show its pivot point instead of the groups pivot point. This also gets a little wonky when you groups select. It also is added when coped and pasted so you don’t get the groups pivot point And there is no option to select which to see or to reset back to the groups pivot point. All this and the wonkyness I will leave up to A:M to fix. Solution But you can get the groups pivot point back to the groups. (use note pad) If you get the name of the groups that has the problem and look in the model file.(Name=XXXX) Delete the Matrix under the group name if it is present. And to be on the safe side Delete the Pivot under the group name. If you coped and pasted the group the Pivot will be missing. Then save in notepad and then open in A:M then re-save the Pivot’s should restore. Warning if something is relying on the Matrix, or the translate pivot point don’t do this.
-
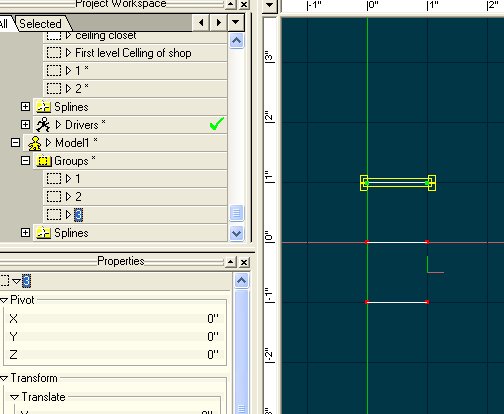
I'm running 15 .0f on windows Just in case this is relevant. First I make to lines then put them in two groups (1,2) Then I select both. That changes the pivots That happens ever time I try to move more then one group at a time. When I copy and paste them ether in a model or to another model the pivots changes to 0,0,0 This is a copy of group (1)=(3) Also any material (user set) Transfom, translates resets to 0,0,0
-
I think I know the answer on this one But I will ask any way and see if you guys have a quick fix. If you copy/paste a part of your model or in the case if you selected a couple of groups and lose the pivots. Is there a way to reset the pivots on a groups without redoing them. So I can use them to update material. Or in the case if you selected a couple of groups and lose the pivots.
-
You should always start your animation a few seconds or more .before the action starts. And add a few seconds at the end of the scene. The reasons are, To allow A:M time to setup before your scene begins. To give you some editing room. You can always trim down the scene. But it maybe more difficult or not possible to extend the scene without redoing it. It allows you some room to adjust for sound files and time frames. As a director you know what is to be anticipated in the next scene. This can cause you to rush a scene. Your audience can and will get confused if your scenes jump around to quickly. Making the scene start a little longer will give you some room to adjust for this. And in this case you will have the room to add your credit. I would give 30 seconds to a minute worth of time. You can always cut it down Note if the beginning scene is static you can copy the frames to add the time you need.
-
Some thing thought of. Check if there multiple CP occupying the same place. This can occur if you have the Tool/Options/ Unit “Paste/extrude offset” "CP Spacing" unselected and accidently hit the extrude instead of the lock. To check this go around and randomly move CP (Select one at a time) and see if there are other CP’s in the same place.
-
To add to this. When the patch count gets high make sure you use wire mode when you do any thing. If you have any of the others modes on it will slow you system done a lot.
-
Yes I remember something about programing stuff being obsoleted in 15.0f I guess this was over look. In that case I will stick to the decal stamp until it is fix. Thanks guys
-
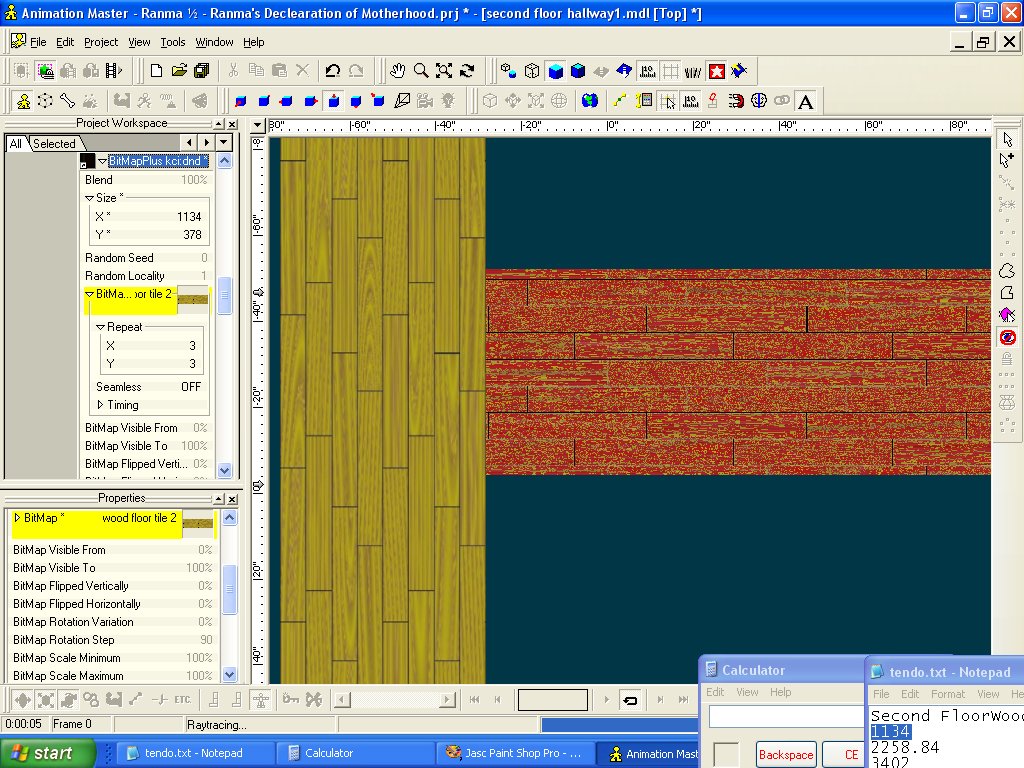
I will be using the stamp just to move thing along. But I still want to know what is casing this problem. I made sure every thing was set to defalt exepet the repeat. And it looks like this. I have also add the three Wood Floor images. Two jpg and one tga file. See if its the file or something on my end for the rest of you if you like the image go ahead an use them. Wood_Floors.zip
-
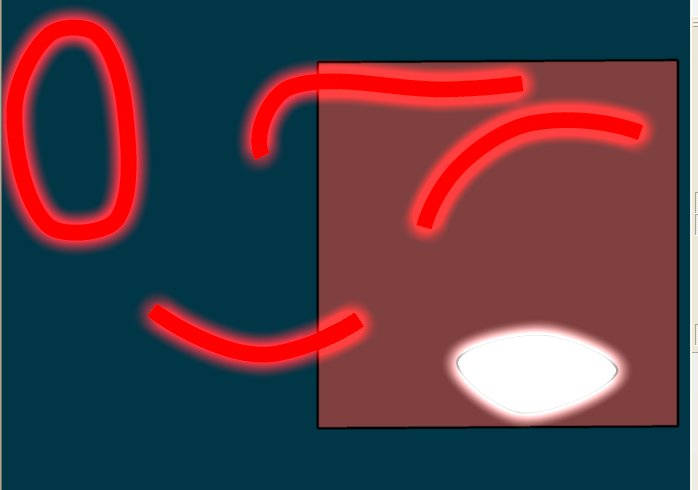
Do to a mistake on my part I gave the BitMapPlus kcidnd a try. But when I loaded up an placed the image, it came in blotchy red. The left image is a stamped decal. Any suggestions? Yes I checked the image it is O.K.
-
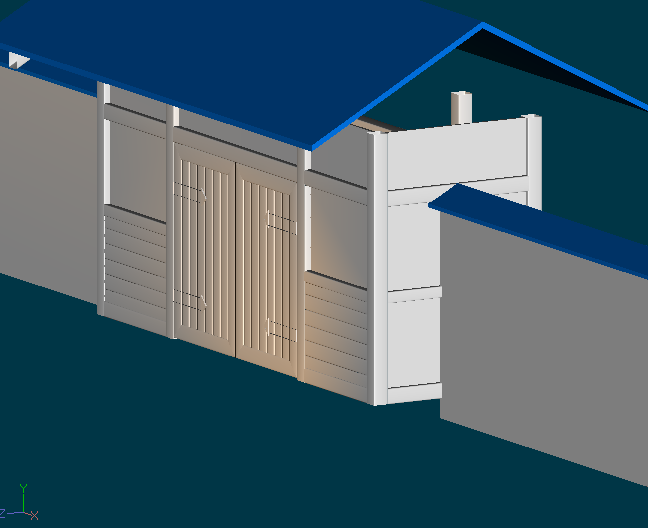
Here is a quick shot in model window.
-
The normals are fine. 'DJBREIT, could it be that the Jpeg you're working with, is not sharp enough in their coloring.? if this is the case take it back into photo-shop,were you can brighten sharp the jpeg hopes this helps The image is fine. As you can see the same image was used for both sections Apply it as a stamp, THEN change the repeat. And use TGA, not JPG. I did change to TGA but the image came in a little funny so for this floor I went back to the JPG. I don’t plain on any thing fancy with this. But if you know of a problem I may encounter later on post it. I could not find the "Start Positioning" and "Stop Positioning" command so I looked up how to stamp images in the tech manual. And I managed from there. [ I made the board wide. Since the house was shown with wider boards. A miner mistake on my part. But I was able to do the hole hallway. I did solved the first problem after I had posted. Then ran into all sorts of other problem. Your not kidding it’s a little wonky. At least I know now to use the stamp method instead.
-
I have made a decal for my wood floors. But some of the groups I have add it to come in hazy. I am using a jpg file. Also add any other tips I may need to know about the decals