DJBREIT
-
Posts
359 -
Joined
-
Last visited
Content Type
Profiles
Forums
Events
Everything posted by DJBREIT
-
I think I know the answer on this one But I will ask any way and see if you guys have a quick fix. If you copy/paste a part of your model or in the case if you selected a couple of groups and lose the pivots. Is there a way to reset the pivots on a groups without redoing them. So I can use them to update material. Or in the case if you selected a couple of groups and lose the pivots.
-
You should always start your animation a few seconds or more .before the action starts. And add a few seconds at the end of the scene. The reasons are, To allow A:M time to setup before your scene begins. To give you some editing room. You can always trim down the scene. But it maybe more difficult or not possible to extend the scene without redoing it. It allows you some room to adjust for sound files and time frames. As a director you know what is to be anticipated in the next scene. This can cause you to rush a scene. Your audience can and will get confused if your scenes jump around to quickly. Making the scene start a little longer will give you some room to adjust for this. And in this case you will have the room to add your credit. I would give 30 seconds to a minute worth of time. You can always cut it down Note if the beginning scene is static you can copy the frames to add the time you need.
-
Some thing thought of. Check if there multiple CP occupying the same place. This can occur if you have the Tool/Options/ Unit “Paste/extrude offset” "CP Spacing" unselected and accidently hit the extrude instead of the lock. To check this go around and randomly move CP (Select one at a time) and see if there are other CP’s in the same place.
-
To add to this. When the patch count gets high make sure you use wire mode when you do any thing. If you have any of the others modes on it will slow you system done a lot.
-
Yes I remember something about programing stuff being obsoleted in 15.0f I guess this was over look. In that case I will stick to the decal stamp until it is fix. Thanks guys
-
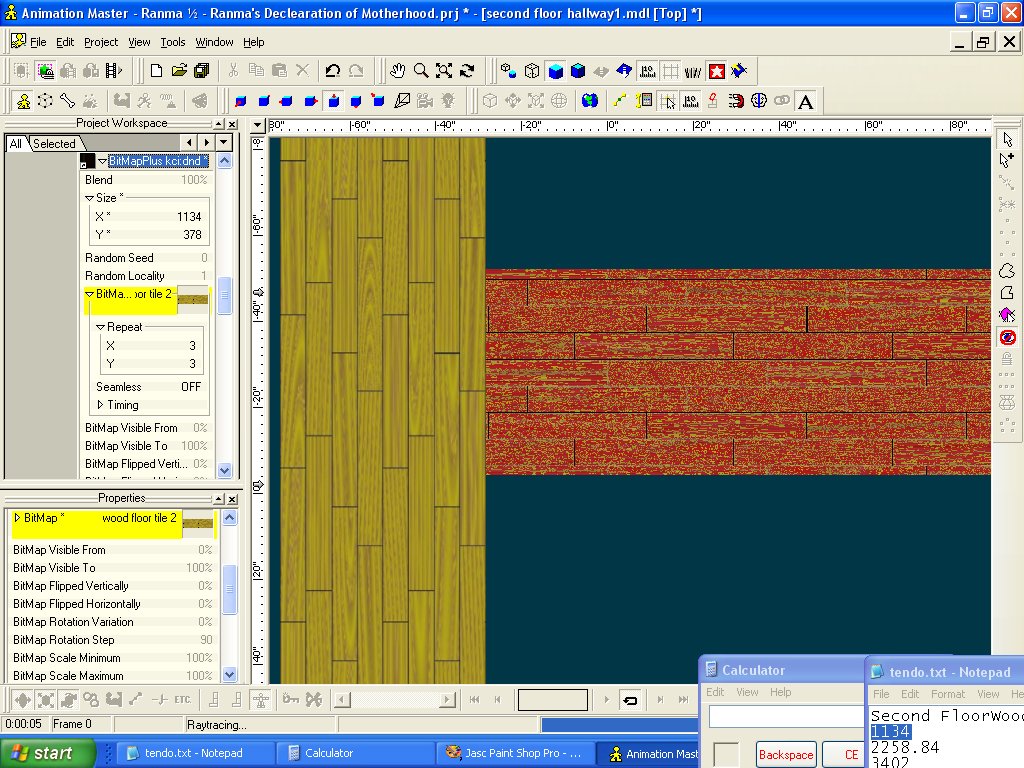
I will be using the stamp just to move thing along. But I still want to know what is casing this problem. I made sure every thing was set to defalt exepet the repeat. And it looks like this. I have also add the three Wood Floor images. Two jpg and one tga file. See if its the file or something on my end for the rest of you if you like the image go ahead an use them. Wood_Floors.zip

-
Do to a mistake on my part I gave the BitMapPlus kcidnd a try. But when I loaded up an placed the image, it came in blotchy red. The left image is a stamped decal. Any suggestions? Yes I checked the image it is O.K.
-
Here is a quick shot in model window.
-
The normals are fine. 'DJBREIT, could it be that the Jpeg you're working with, is not sharp enough in their coloring.? if this is the case take it back into photo-shop,were you can brighten sharp the jpeg hopes this helps The image is fine. As you can see the same image was used for both sections Apply it as a stamp, THEN change the repeat. And use TGA, not JPG. I did change to TGA but the image came in a little funny so for this floor I went back to the JPG. I don’t plain on any thing fancy with this. But if you know of a problem I may encounter later on post it. I could not find the "Start Positioning" and "Stop Positioning" command so I looked up how to stamp images in the tech manual. And I managed from there. [ I made the board wide. Since the house was shown with wider boards. A miner mistake on my part. But I was able to do the hole hallway. I did solved the first problem after I had posted. Then ran into all sorts of other problem. Your not kidding it’s a little wonky. At least I know now to use the stamp method instead.
-
I have made a decal for my wood floors. But some of the groups I have add it to come in hazy. I am using a jpg file. Also add any other tips I may need to know about the decals
-
Lets make it simple for him. Export your model in every version that A:M supports and then load them into Acad and see which one looks best then you can export it in a DXF format from Acad. Why make life hard.
-
Yes there still in business. There up to 15.0f. For converting from Auto Cad to A:M with DXF file I have tried with no success. So if you can I would love to know how. ( see note at bottom) Converting from A:M to Auto Cad I think is duable in DXF but you may want to test it with simple shapes to confirm this and to see its limitations. Do keep in mined that you will lose some or allot of detail from your model when you convert it over. A:M has allot of stuff that Acad dose not use or support. If you only need to show clients or other people the final work an image file would do. If you need to have clients or other people to send feed back and modifications in DXF on the work you may need to open up Acad and A:M and just rework it in A:M . Even if you can import the change with the DXF converter. In most cases it would be faster to just rework it in A:M instead of importing it. If you have not started yet on the project. Make it in Acad then get your feed back from the clients. Then make it in A:M. In this way you can update the DXF file as you move along with the project. Acad can load any version of DXF out there. It can also use OBJ and other file types but you will need to check your Auto Cad version and “import/export” list see which ones. Or get a list from the client. Note There maybe a way to get the DXF importer in A:M to work. I’m betting the DXF importer was made for a specific version of DXF instead of being made upwardly compatible. If this is true and you can find what version of DXF it works with you maybe able to find an old version of Acad and grab the DXF exporter for the DXF version you need. And put it in your current Acad program. (Note you will need to do a little menu set up to get to the exporter but the converter should still work.). But I have not tried this so there is no guarantee it will work.
-
DWG and DXF are both 3D files. The only difference between 3D and 2D in theses formats is all of the depth info is zero.
-
These were simple files with just some lines for a test. I also found a post that mentions it has to be V12 or earlier. So I will need to test it tomorrow.
-
I have been trying to import a dxf file from AutoCad. Non of them seem to work..Is there a trick to it or do I need an older dxf format or plug-in?
-
I think for this one you can get away with a very simple rig. but it depends on how much you want you robot to bend.
-
Thank's
-
Dose anyone know if there is a plug-in to purge out un-used stuff. like groups, material and more.
-
I've solved the problem............. I hit the render button
-
I need to make a collar bone line on my model. But as you can see it picks up other lines I don't need.. I have figured out how to remove the hooks line but I am at a lost on how to remove the other unwanted lines. Any suggestion?
-
Give it a shot If it dose not work contact hash
-
I am not sure on this but you key is keyed to you computer so if you re-install it on the same computer it should work.
-
The eye do have a shin to them but it hard to see from this angle. But I have to admit I grabbed the eye off of Squetchy Sam. I had decal eyes before but they are very limited on how they can be adjusted for expression. Squetchy Sam eyes with the Squetch Rigis already setup to adjust the pupils and I only need to add a second set of bone to do the retina. This was done in toon render since the bow was hard to see in a normal shot. Since this is for a set of shows I did her hole body. The other shots are for fitting her clothes. If you like I can post a set of spline shots to show her line work.
-
I do have the face where I want it but I'll see if I can get it a little more rounded. Yes . I will be simulation the lower half of the dress.
-
No need. I rebuild half of the model last night. And in the next day or so I should be back to where I was. Luckily I did not get in to the point of adding the rig and beyond. I am just surprised A:M did not have a simple back up system already installed as standard. Since there are constantly up dating the program every few months.