Rodney
-
Posts
21,649 -
Joined
-
Last visited
-
Days Won
119
Content Type
Profiles
Forums
Events
Everything posted by Rodney
-
Sure does.

-
For those of you that like to composite imagery rendered out of Animation:Master... BlackMagic Fusion 8.0 is out of Beta and available for Mac and PC. (The Linux release is still in development) https://www.blackmagicdesign.com/products/fusion The program is free for commercial and non-commercial use. The full studio version ($995) adds stereoscopic rendering, project management etc. and has also been released. The manuals are well suited to get you up and running quickly as are the quickstart and introductory tutorials. And of note, many of the features in Fusion are available in Animation:Master but are optimized from the standpoint of an image and effects compositor. As such a workflow generated in Fusion can often be replicated in A:M for those that prefer to keep their projects inside A:M from start to finish. The list of features that the standard (free) release of Fusion brings to the table is a long one but some highlights include: - 2D and 3D environments, texturing and lighting - 2D and 3D text - Vector Paint - Particles (to include linking 3D Models as particles) - Color Management/Color Correction - Tracking and Rotoscoping - Volumetric Effects - Node based workflow - Filters and Effects - Keyframe Spline Editor - UV Mapping - Macros, Expressions and Scripting - GPU Accelerated Compositing - Render Manager - Chroma Key/Mattes/Masking These capabilities may be useful for preparing resources for use with A:M or for extending the use of A:M.
-
For a second there I thought Jason was making an announcement about a new A:M Films! I got all excited even. I think the inner workings of the A:M Films upload were gutted when some servers got exchanged. Jason may need to manually load the films (assuming other folks who have previously registered can't still do that on your behalf. Jason at hash dot com is his email.
-
You make an excellent point Darrin. What exactly is 'real time' rendering. I don't think any of us believe that the short film at the link is actually playing in realtime... only that in some way it was pre-rendered in realtime. Still, I'm going to guess there is some optimized code that makes the most out of the latest and greatest in graphics technology (real time or otherwise). I haven't seen a behind-the-scenes yet although I expect just such a thing should show up on FXGuide shortly. At a guess I'd say the performances were motion captured and stored, tweaked and readied for playback and rendering. Materials and lighting then tweaked to optimize every possible calculation and the the real time renderer was turned on. How did the imagery get from display to harddrive? Not sure. I assume they didn't just screencapture the whole thing so what we are seeing probably can't be called realtime rendering. I must assume that an equivalent is playing back on computers somewhere for demo purposes.
-
Their 'realtime' render hardware is surely more advanced than mine but... Here's the latest and greatest from Unity 3D who is demo'ing their latest beta via a short video titled 'Adam': http://unity3d.com/pages/adam
-
Perhaps I should have underlined the word 'offset'. (In the illustration you provided the user would simply move the COG to its desired location and run the plugin) Think of your torus as if the majority of it's mass is at concentrated near 'the point that would work'. This would be the object's 'true' COG. The COG you indicated is the center of the object (not necessarily the COG). Not that I have a thing for COGs but... Centers of Gravity are in themselves useful constructs... manually offsetting a COG merely creates an status of imbalance visually*. Although importantly, with regard to mass/weight the object is actually balanced. The COG can be either inside or outside of an object BUT could be constrained to the inside or the surface or wherever required. Like a light, null, cog or any other such construct it's still a just a point in space to measure from. Yet another thing to consider when plotting out new plugins is how they interact and complement other features/plugins as well as paradigms of user interaction. Robert mentions retooling the AI plugin for use with SVG and this is an example of a logical progression based on code that exists now. I like the general idea of lighting the inside of a mostly airtight object because I get a good sense of what the result might be (light escaping from holes in said object) but the remainder of the process I'm still trying to figure out. BUT an important part of any new feature/plugin is addressing the question that arise in how to get somethng to work. I can see the scenario now, new user asks; "How do I get my normals to all point in the right direction?" Answer: "First you create a light..." This is where I begin to get lost. Of course the same might be said for COGs but keep in mind that COGs are already an intrinsic part of any object. The full effect of COGs might not be completely implemented but that doesn't negate the fact that every 'real' object has one. *This thought of imbalance leads me to consider an additonal approach that could be added to an algorithm designed to 'repair' normals and that is to consider whether an object is structurally symmetrical/balanced or asymmetrical;/unbalanced. If the former then half of the calculations can be discarded at the outset and the results simply mirrored at the end of the calculation. This might be yet another reason to consider some level of COG in the operation. Another question this discussion makes me curious about is how an Object's pivot point is determined. It should be easy enough to check but I'll guess that the object's pivot is placed in the direct center of an object. I sense this could be considered the initial COG without respect to the objects true Mass. Likewise, when using Mass in A:M do the calculations use the Pivot point as a start? Added: It's interesting to note that each Named Group can have it's own Pivot. So a Named Group could be the source for a Plugin to initiate processes Normal refactoring from. And somewhat off topic: This makes me wonder if swarms of Named Groups couldn't attached themselves to an object in interesting ways and be the point(s) of interest for other plugins to use.
-
Most keyboard shortcuts haven't changed although there are surely a few but most of those that changed were undocumented in the first place so shouldn't cause too much confusion. You can generate a list of your current Keyboard Shortcuts by going to Tools/Customize and opening the Keyboard tab. Location the button that says Export and upon pushing it an HTML file will be generated with all of the current shortcuts, including any you might have set up yourself. Most browsers will allow you to right click and Save the document. I'm attaching a copy of the HTML file (converted to PDF) generated from me pushing the Export button on my end but keep in mind that it could potentially include shortcuts that I've added (although I doubt this as I haven't recently added any). Animation_Master Keyboard Shortcuts.pdf
-
I think I"d best give up on this one as I'm not seeing how a COG differs from a point of light, Null, etc.I'm obviously missing an important part of the equation. The same thing applies to all cases... at least from the approach of the proprosed plugin... all must be inside the mesh/geometry. With lights I assume manual placement as would be the case with an manually offset (unbalanced) COG. The COG is just a way to automate an initial placement of that point from which measurement/raycasting originates. That point would then be offset to the desired location from which to run the New Normal plugin. I'm mostly interest for my own understanding of the problem and potential approaches to solutions though so am confident that whomever is going to program this plugin will eventually figure it out. Still given any given problem there are approaches that can be tagged for exploration while others (at least temporarily) ruled out. Of course this is the underlying problem with wishes. Wishes are easily formed but the realization of those wishes inevitably harder. This does beg a few question however, such as: How does such a process as 'Show back face polygons' work? Could those features that use normals in their equations be enhanced to ignore those normals that don't point in the same direction as a given percentage or the average direction of the other normals? Thereby bypassing the problem altogether. Could an option be given to allow particles to emit from both sides of a surface regardless of direction of the normals? The entire concept of normals suggests closed systems that have outer and inner surfaces and yet we more commonly interact with open systems where technically speaking all surfaces can be simultaneously internal and external. How can we make better sense of these and other related underlying paradigms? One solution would appear to be suggested in the name itself; normals. How often do adjacent patches flip their normals 180 degrees from each other? Surely not often. So any patch with neighbors that are abnormal (approaching 180 degrees away from what is deemed normative) can safely be flipped. This process can then iterate until all patches are normed. Then the entire model is then either right sided or inside out ready for a final flip if necessary. (Note that I assume this is basically how the present 'Refind Normals' plugin likely works)
-
Yes, I understand the issues with normals facing the wrong direction. The problem I'm having is seeing how the proposed solution resolves the issue. I -think- what is under consideration is why Pixar and others have gone to bi-directional raytracing as the rays can more easily spot orientations of surfaces when they keep track of orientations, reading surfaces in all directons. If placing an object inside the object under consideration for normal correction is a viable starting point I can't help but wonder why something like determining the Center of Gravity (COG) or Center of Mass (COM) wouldn't just as easily accomplish the same thing. And if the response is that an external object can be placed anywhere... the same thing could be accomplished through COG/COM with an offset. Another similar option might be to automatically use the Models pivot point and adjust that as desired. Now originally, when Gerald mentioned the same thing in another topic, I thought the idea of a light inside the model was an interesting one because as a light inside a closed/airtight object no light would escape except where the object was in fact not airtight. Surfaces that faced inward might then be considered 'open' and let the light out. But all of this seems to me to be extra steps. I'm not sure how the current 'Refind Normals' plugin works (i.e. what specific process it goes through) but I'd imagine it might compare each normal with it's neighbors and if outside of a specific tolerance will tag it to be inverted. This seems logical to me. The underlying issue is that during modeling an external surface can very quickly become an internal surface and A:M isn't always able to resolve what is what. So the first and best resolution is good modeling practice. Of course this is complicated when external models are imported into A:M as they often may have no optimal normal data attached. At any rate, my purpose here isn't to sound like I'm against the proposed plugin but rather to better understand the underlying process the plugin proposes to address. Especially if there is a simpler methodology that can be implemented to achieve the same (or at least satisfactory) results.
-
Gerald, I'm curious about the reason for running such a plugin. I must assume that it isn't just to make sure every normal points outward (on the true surface of a model). Would it be to create position based normal maps or something like that? At a guess I'm imagining that the bounces would have to be a magnitude of 2 because you wouldn't want to flip a normal once and then have it flipped back to it's original state upon being hit the second time. And I'm not sure how biased normals might factor into the equation. I don't know enough to consider but am guessing there are 4 (although I sense a theoretical 9) possible positions based on A:M's current ability to rotate images/normals. If we were to delve into the idea of two sided patches that number might be what... 54 possible angles? I guess what I'm trying to envision is the underlying purpose/usage for the process of flipping based on a specific origin. I can imagine some uses but am not sure of the specific purpose of your proposed plugin.
-
Can you provide a little more detail on what that entails? What the end result might look like in A:M as a plugin? Links to research, development or code examples?
-
If you would have asked this a year or so ago I would have had a long list. As it is right now I'm drawing a blank. But... I'll remember some soon and post those. Practically speaking,and mainly for the learning experience, I'd like to see a public project that expands the Font Wizard. It might move forward in phases like this: Phase 1: Add ability to input the text from an external text file. Phase 2: Expand the capability of the text file input to include special characters (carriage returns, font styles, etc.) Phase 3: Expand the capability of the text file syntax to allow for placement of the text in 3D space. Phase 4: Mirror the -new- Font Wizard capability in a new Model Import Wizard that allows A:M to import and place Models in 3D space at specific coordinates designated in a referenced text file. Note that the format might mirror that of A:M Libraries shortcuts with the addition of XYZ coordinates tacked on to the end. Phase 5: Explore ability to save out 'scripts' for reimport at later time with options to change elements of the script in the Wizard. At this point we've almost come full circle to simply importing a Chor or opening a Project file with the resources specified in detail. R&D phase (With the knowledge/experience gained by programming those enhancements to the Font Wizard identify obstacles to overcome in order to create a full scripting environment for A:M) Note that similar plugins could be created by swapping out the target format (i.e. SVG instead of AI. etc.) I'm not sure if the code is freely available but plugins such as the Terrain Wizard might demonstrate excellent areas of plugin capability that are not often explored (The Terrain Wizard is one of the few areas where users can paint directly in A:M)
-
Glad to see others are exploring too. I haven't been able to get the scanner process (a program called GTS) to work yet. (I probably need to read the instructions) Here's a shot at what a test sequence looks like going the longer route to getting the images in after scanning outside of OpenToonz and drag/dropping the images into he Xsheet:
-
I'm pretty sure Steph Greenberg used Toonz with A:M for his "The Physics of Cartoons". That was way... way... way back in the day. xhttps://www.youtube.com/watch?v=K_QAeicX-Rw
-
There are a lot of things to get sorted out but I already anticipate adding OpenToonz to my workflow. I need to get busy and put together some useful animation sequences in A:M that can demonstrate the benefits of using OpenToonz. In a way OpenToonz is a bit like Blender (but more user friendly), a bit like Fusion (but with a very useful Xsheet premise) and certainly compatible with imagery rendered out of A:M. If OpenToonz gets a bit more streamlined I can see it moving onto the Top 10 list of software I use and (potentially) replacing Fusion at the Number 2 spot. This is saying something (IMO) because Fusion is an impressive piece of software that I wouldn't want to give up. Rather than spam the forum with OpenToonz postings I've started adding some basic information and resources related to it on my blog. I have a vision for what might be done relative to matching A:M with OpenToonz but it's too early to tell whether any of that will pan out. The potential is certainly there.
-
Very interesting. xhttps://www.youtube.com/watch?v=7d59O6cfaM0 Kudos to the demo team at Microsoft research who thought of excellent ways to show off the potential while adding new 'features' all the way to the end of the video. I can think of several downsides to such technology but it's hard to deny the potential.
-
I've been brushing up on my Japanese language skills and see just how easy it is to lose what you don't use. Not that I was ever skilled at reading kanji! I can see why the companies involved felt the need to open source. There is much work to be done. I've noticed several names that make this project well worth watching. The interest in getting Toonz ramped up and where it needs to be (largely documentation and workflow related) is certainly there.
-
I haven't yet seen the official release announcement but went a'lookin' for the OpenToonz software and looks like I found it. Downloading now... For the brave and adventurous, here's the link: https://opentoonz.github.io/e/index.html The announcement is/was to be 26 March but that is in Japan so... should have already happened. And of course the big question: how to best integrate OpenToonz with A:M! The scanning interface alone with Xsheet should prove valuable.
-

Tell me all you know about Normal and Displacement Maps and A:M
Rodney replied to Heiner's topic in Open Forum
That looks to me like a classic example of inverted normals. If you turn 'Display Normals' on (in Tools/Options) you'll be able to see if that is the case. If it is then use the Group Select tool to grab those patches and then Right Click and select 'Flip Normals'. In your case there are two indicators that inverted normals might be the cause. The first is the black discoloring. The second is that the models appears to be displaced in the wrong direction at those areas. -
Playing with patches getting weird effect at the end
Rodney replied to johnl3d's topic in Tinkering Gnome's Workshop
Nice sleuthing Robert! Maybe Steffen can implement a 'Find Problematics' filter to make finding those things easier. -
Playing with patches getting weird effect at the end
Rodney replied to johnl3d's topic in Tinkering Gnome's Workshop
While I didn't find what it was there is something animated/keyframed that appears to be making the change. The reason I believe this to be so is that if you delete all the keyframes from the end of the sequence the problem goes away. But then again so does everything else that was animated too! For tweaking/troubleshooting purposes this is why I would generally suggest that cyclic motion/animation be made in an Action and then dropped onto the Model's instance in the Choreography. Then it's a lot easier to ferret out where the problem is. And it's easier to change the animation in all instances because you've got only one place to edit it. -
Looking forward to it! This is the part I'm interested in the most. I've often thought of doing such things but outside of the occasional test haven't done anything significant with that approach. The closest I came to success with those tests was with two characters (one imported into the other for the purposes of fighting each other. The jury is still out on how well that turned out.
-
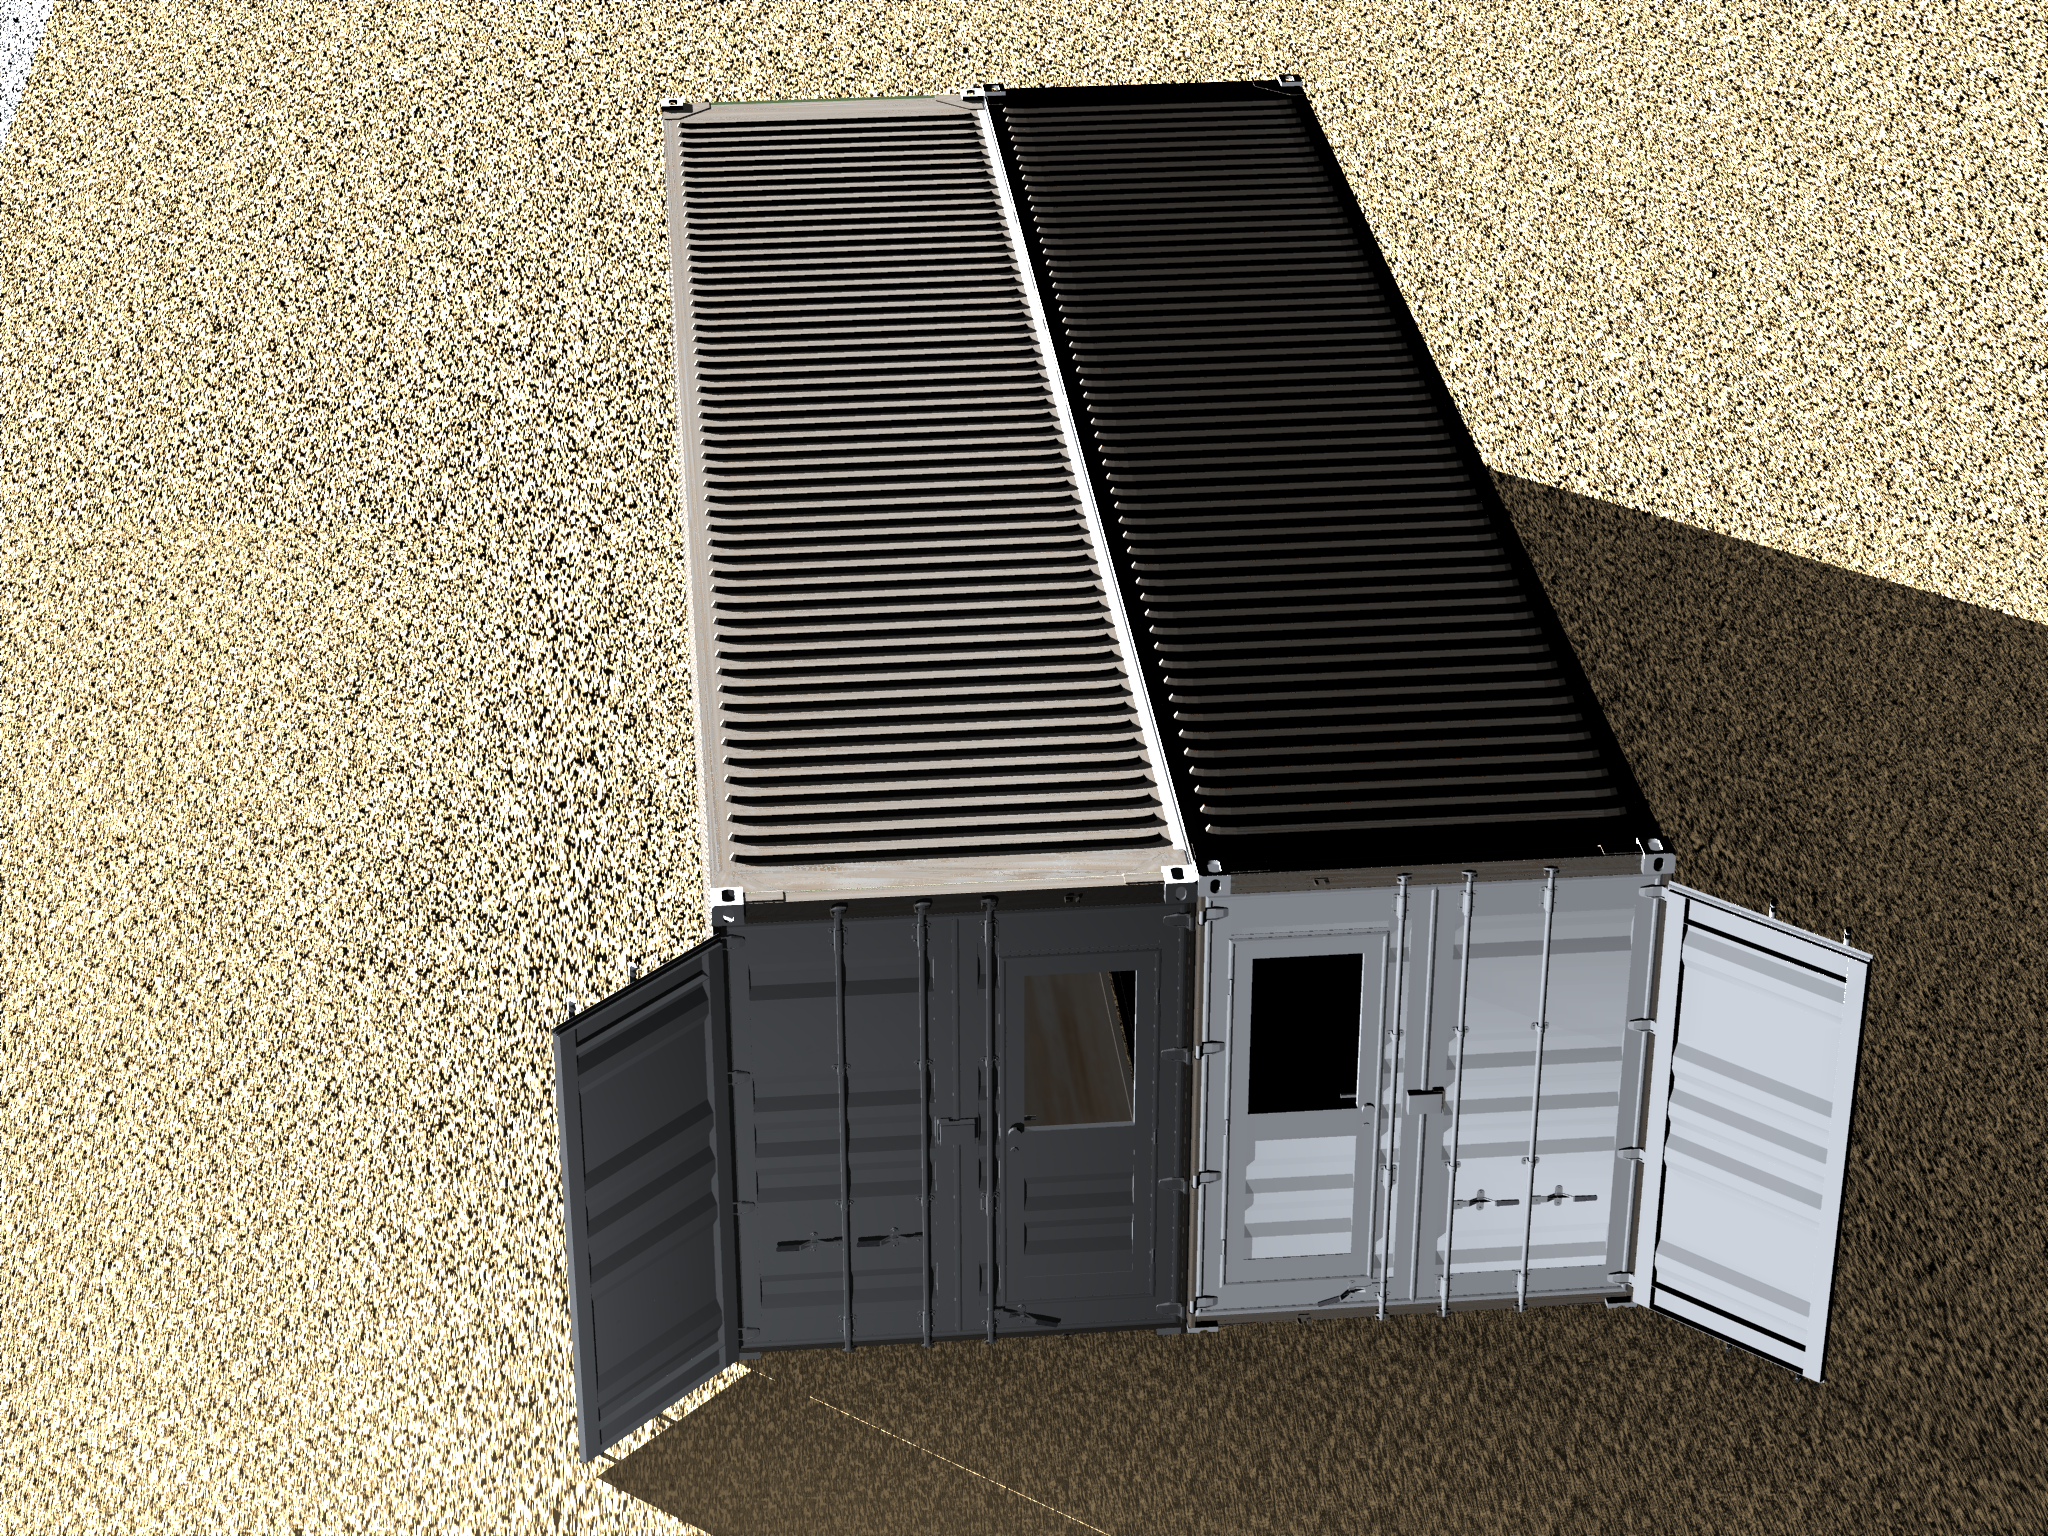
Not sure how to get a DAE file into A:M? Howzabout import it as an OBJ via SW3D. Same trailer scaled -100% on X axis to make a mirror image to butt up against the trailer's open side. I'll have to check to see why most of the color on the trailers turned to white... probably the intensity of the sun.
-
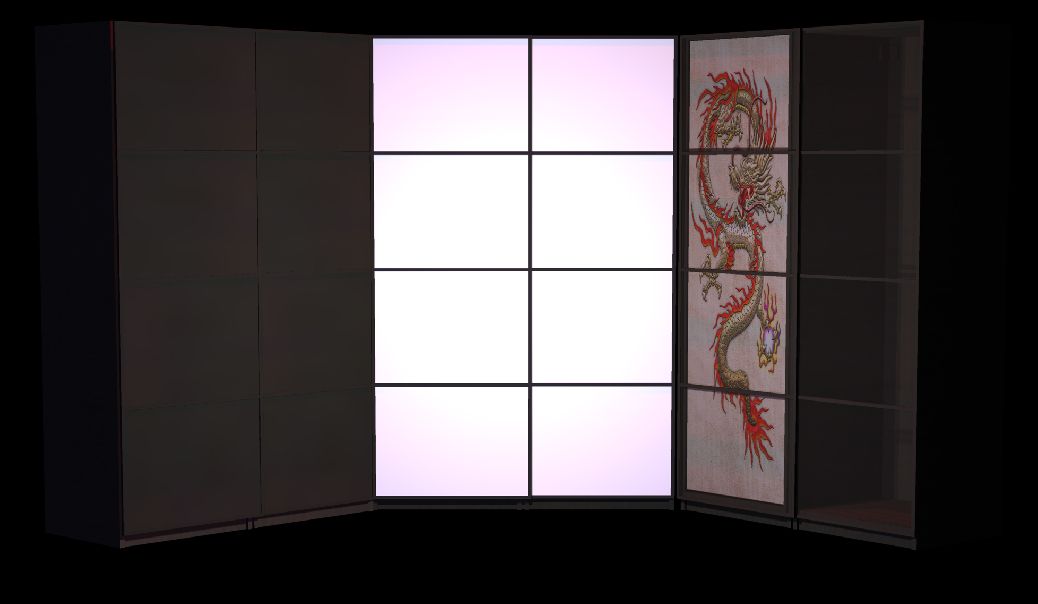
I've got a few more random tests of various file formats and modifications. Here's one of a basic cabinet out of the SW3D library recolored and adapted in A:M.
-
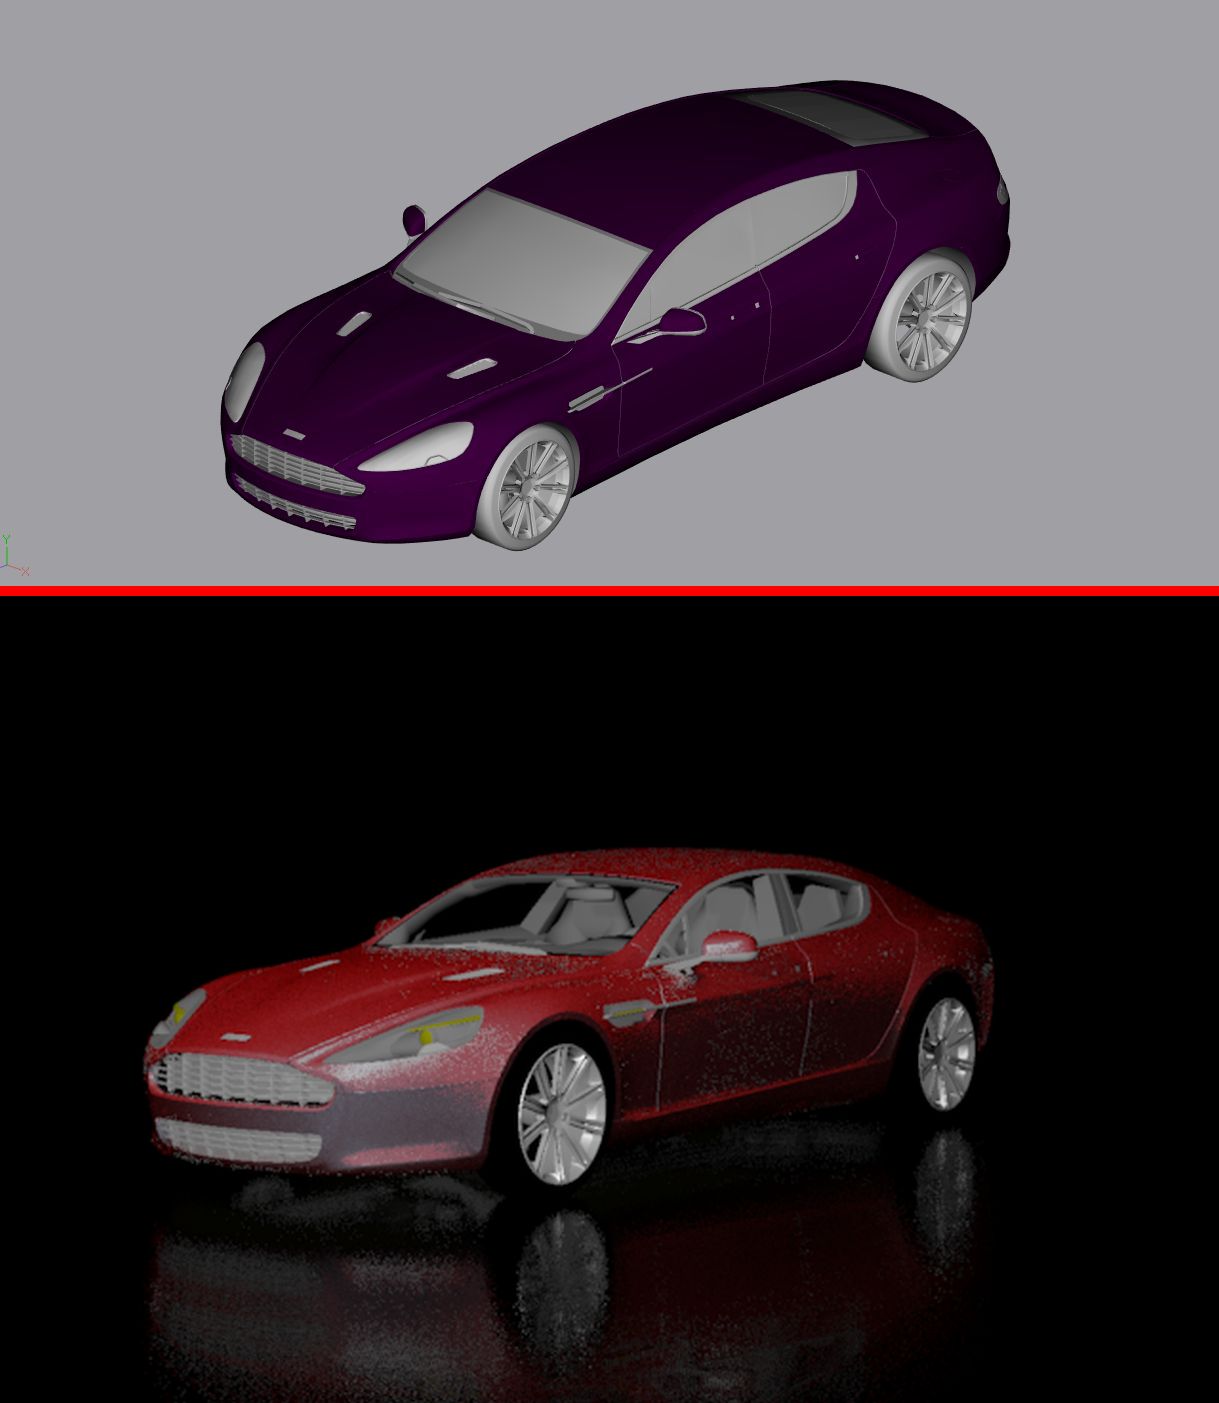
Here's a quick recolor test of a car downloaded from http://tf3dm.com While fairly detailed the original car came into A:M with limited coloring, texturing and no transparency. A few tweaks in the Chor's shortcut to the Prop resulted in the bottom image rendered out of A:M. Not bad for someone that doesn't know what the heck he's doing. Someone that has a clue could achieve much better results. Point being is that surfaces are highly modifiable in A:M as Props. Top image is of what the car looked like upon import into A:M as a Prop. Note the transparent windows in the render on the bottom. That is the result of simply adjusting our standard surface transparency property.