Rodney
-
Posts
21,630 -
Joined
-
Last visited
-
Days Won
114
Content Type
Profiles
Forums
Events
Everything posted by Rodney
-
Blur can help you create much smoother terrain.

-
A very handy method of adjustig your height map is to use a filter. Blur works really well. If you want to repeat the application of the filter several more times select the Apply button.
-
Remember that the smaller the mesh the less detail your terrain will have. Its usually a good idea to keep paint colors smoothly transitioning in your height map. Painting white next to black will cause major changes in your terrain.
-
When painting on the screen adjust the slider on the left up or down to paint your height map in grayscale colors. White/lighter colors create elevated terrain. Black/darker colors create depressions. Try several different options. Experiment and see what you get.
-
For others looking in that may not know... the Terrain Wizard is a little paint tool built into A:M that lets you A) Paint a terrain B ) Import an image as a terrain. With it you can transform a spline mesh grid into an environment for them for your animated adventures to take place in. To start the Terrain Wizard: - Create a new Model - Right Click in the Model window - Select > Plugins > Wizards > Terrain - Adjust the settings or paint on the provided screen to create a terrain. Note: The reason many first attempts fail with the Terrain Wizard is due to the Magnitude not being set high enough.
-
I step away from the computer for a day and look what shows up while I'm out! I guess I know what I'll be doing this weekend. Thanks Mark!
-
Two words... Gradient Material Example from Brian Prince More examples from Brian Prince
-
Very nice Gerry. I was looking forward to hearing the music!
-
The last image... just a quickly lathed cylinder with patch images applied. The change in color on the filmstrip is created by adjusting the Ambiance Color and Intensity on a second set of patch groups. This time changing settings on Groups with no image applied. The underlying images are still effected by the changes in ambiance/intensity on the Groups where no image is applied.
-
...and of course... we haven't even started animating anything yet!
-
...and with the change of even one or two settings you've created variations on your theme.
-
Of course images aren't the only thing that can be added to your titles. A few subtle changes in Coloring and Lighting can help produce just about any effect or mood you want.
-
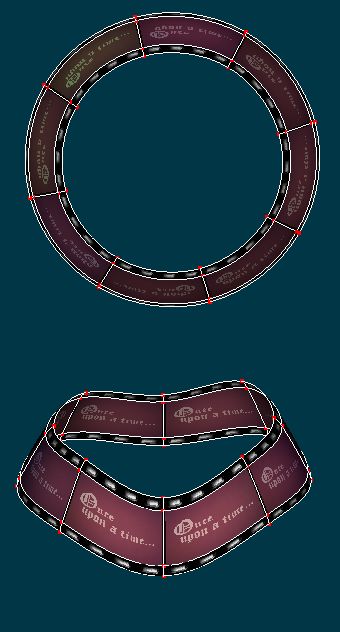
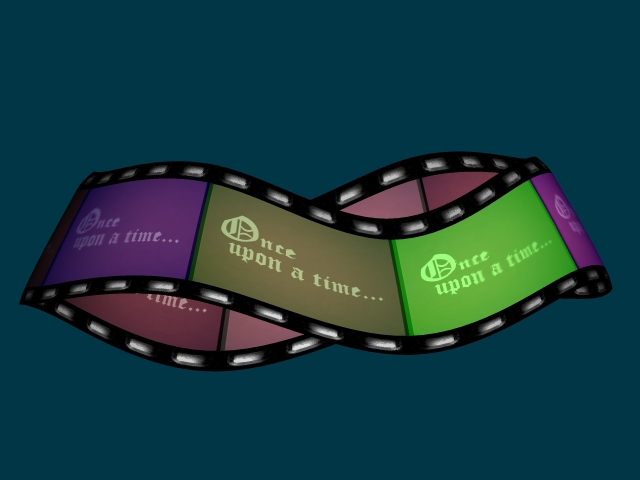
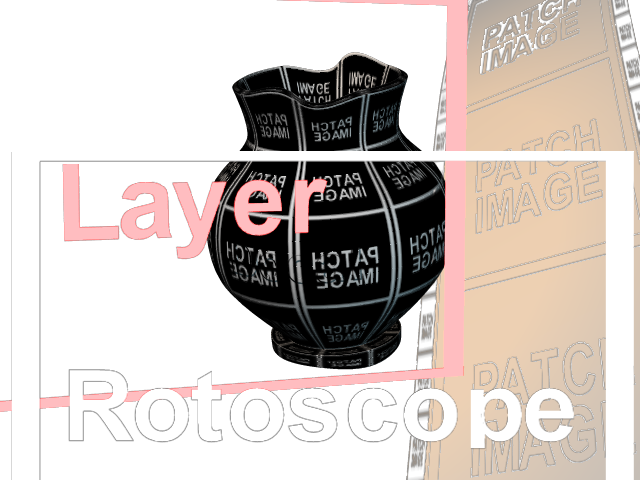
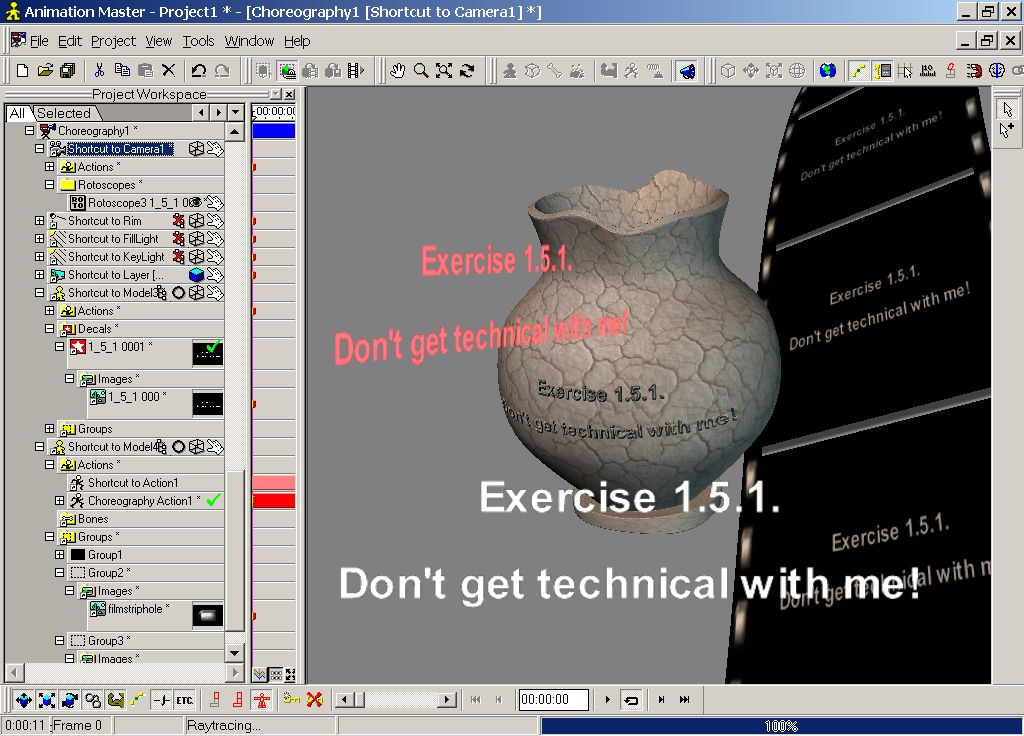
Here is a render of the image types revealed. Its a bit hard to see the word decal on the vase but its there on top of the patch images. Likewise the film strip holes are hard to see. They consist of a patch image of one hole set to repeat 3 times in the Y axis for each patch. In the original project three images were used. The original title card (used variously as patch images, layer image, rotoscope and decal), the dirt image (applied to the whole vase as a patch images) and the filmstrip hole (applied as patch images to both sides of the filmstrip but not the middle). Patch count was 146 give or take a few. Most patches can be found in the vase model which is extremely dense for its simple role (104 patches) with both the inside and outside of the vase modeled. The filmstip (39 patches) is not seen in its entirety). Only 10 patches in view. ...and changing the color of the text was accomplished by changing the properties of the Layer's ambience color (red) and intensity. Various settings were used with each image property (bump, transparency, color, displacement, etc. to vary the image effect)
-
You can definitely see the jaggies in that screenshot. My monitor resolution is set really low for screencapture at the moment. For better quality screen capture results resolution settings can be turned up. Here is a render directly to JPEG with the quality setting set to high quality. (Hopefully I grabbed the right image!) Also attached is where you access the image quality settings via A:M's advanced render panel.
-
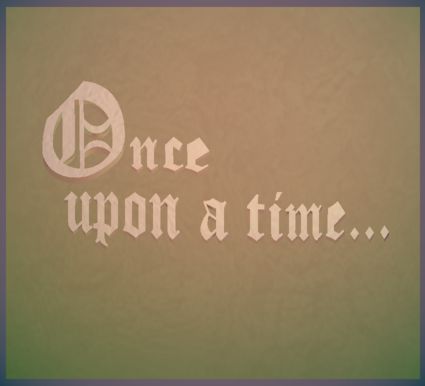
Okay... not sure how well it illustrates the objective but... test yourself to see how savy you are on the usage of images in A:M via this (drumroll please)... Image usage test! In the attached screen capture from my Choreography all text is from the PNG title attached in my last post. Can you identify the three Objects? Can you explain how the text was converted in color from white to red? Where is the image applied as a Decal? Where is the image imported as a Layer? Where are the Patch Images? What images are they? Where is the Rotoscope? How were each of these applied and composited together? ...and um... did I forget anything else? For the tie-breaker... try to guess the number of patches. (Project file will be posted later)
-
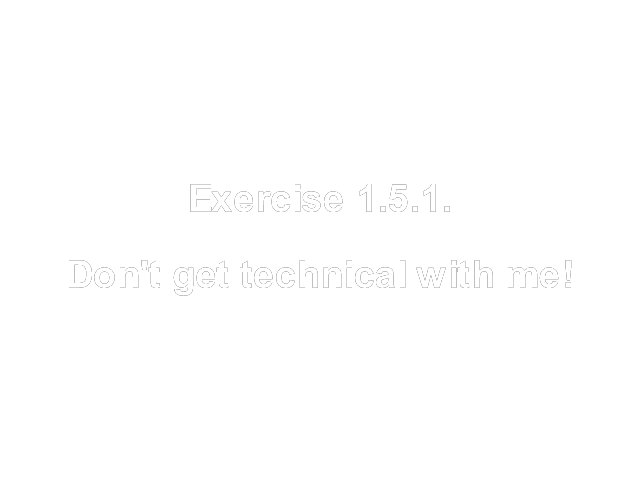
Thanks for that update Vern. After rereading my response I think my stance was a bit too biased in favor of accepting a lower level of quality. I suggest this intentially but should clarify it better. If you can avoid degradation in quality of your image thats is certainly the way to go. With web graphics that may be difficult. Many factors will influence the level of quality that is 'acceptable' in your images. Fortunately, we have a good choice of image formats to choose from and where one format doesn't meet our requirements another usually will. Case in point my Exercise 1 title card above. It was crystal clear when rendered to Targa format but degraded tremendously as the size and resolution changed and the format converted to JPEG. JPEG holds quality pretty well but some color changes don't work as well. The PNG format has one important feature that JPEG doesn't when it comes to posting on the internet... PNG images have the ability to maintain transparency channel... JPEG images don't. I'm fighting myself to keep from getting distracted and discussing image formats. Image formats are important to consider. As rendering formats are discussed between Exercise 1 and 2 I'd say they are fair play. I have high hopes for the Font Wizard. It works great now but I think in time it will be even better. The ultimate Font/Scripting Wizard would access and interpret the contents of a text file... automating the task of placing text or objects where you specify them in 3D from the script. (This is not a feature request... its what I hope to program myself some day) Here is an image rendered straight to PNG format at VGA resolution. Lets see how it looks... If you save and import the attache file in A:M the transparency should still be there.
-
Thanks for the clarification Mark. I do recall your earlier dilemma now. I knew there had to be something else I was missing! Thats a tough one. Stian's suggestion of Booleans might work but I suspect there might be some problems if the hull of the ship isn't a fully enclosed object. As you describe, short of creating a transparency map to cut into an image of the ship I'd guess you have arrived at the simplest solution. Of course that's exactly what you've done via the green screen technique. I think I've extended beyond my level of competence here but... I wonder. There must be another method that'd work just as well for you that would give you more control. I seem to recall a similar dilemma with a rowboat in 'Scarecrow of Oz'. My memory says one solution was to model the intersecting part of the ocean as if it were part of the boat. Perhaps even better... The Newton Dynamics Solution. (Scroll down and look for the Fluids). Steffen also describes how to stablize a boat in a simulation to keep it from tipping over. Apologies again if this was discussed already and ruled out.
-
I love The Wannabe Pirates too much to critique... Ah... what the heck. I think you could work that camera angle better to give a greater sense of scale. There. I said it. You know I love your work Mark. I'll enjoy any Wannabe thing you send our way. Now this I do have comment on as I'm convinced you are adding an unnecessary step. Um... Is there a particular reason you are adding the green? After effects should be fully capable of recognizing the Alpha Channels created in A:M. No green screen required as its already built in as a layer of transparency in the image (assuming your render with th Alpha Channel on of course). (If that is a part of the story... the characters are being filmed against a green screen... or you are just playing... or prefer to work this way... PLEASE DISREGARD!) I feel like a fool for suggesting all this. Its your show. I'm just a fan. More Wannabe Pirates please!
-
Nicely done Robert. It might be rough around the edges but your storytelling ability is already shining through.
-
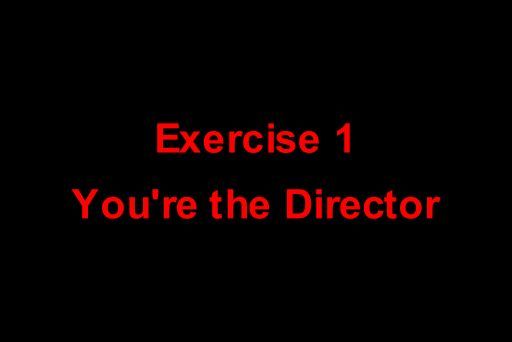
Boy are you hard up for entertainment! So... by way of getting started lets look at our basic objective; "Create a Title". In general, a title is a word or group of words used to identify an object or person. When applied to a person it signifies a relationship to a creative work or authority. A title is most effective when clear and concise and the relationship is understood or known. Should the exact meaning of a title not be known at the outset the expectation is that it will eventually become known. For our purposes we'll confine titles identified with people to areas where credit is implied. In film it should surprise no one that this aspect is referred to as 'the credits'. Case in point; 'Exercise 1: You're the Director'. The title and implication is clear. Its the direction you take that dictates the stories you'll tell.
-
I will certainly give it my best shot.
-
Hmmm... I haven't seen the effect you mention but there is another approach that doesn't require keyframing (Disclaimer: You actually keyframe A:M's renderer) The idea is to use A:M's custom render settings to render out the frames you want visible (Say frames 1, 2, 5,6, etc.). Then insert/replace the other frames with invisible/transparent/altered images (3, 4, 7, 8 etc). Note: You could just as easily adjust these images in some way to get a fade out/color change... whatever effect you need. I'll explain the process later if interested. Its pretty simple so if all files made it through you should be able to see via the project file attached. CutInOutProject.zip
-
You must consider the target audience here Vern. For testing and learning purposes low resolutions will work best. As the process is mastered the artist can move to higher quality resolutions. As an introduction to the concepts, features and options available... the more simple the better. (Keeping this simple is the hardest part!) Understanding the image formats and options for rendering to different resolutions will help. For many in our target audience 'soft and fuzzy' is going to be more than adequate. Personally, I like soft and fuzzy over most crisp renderings that give evidence that the image was produced with a computer. Similar to your experience, I've found that to get a crisp image for use in compositing requires rendering out to a higher resolution. Rendering out to the Vistavision setting works well I've found. Resolutions less than that won't be adequate in every instance but will work well for our purposes. As far as credits go... most of us make our own movies with little help from large groups of assistants (this great forum notwithstanding). We aren't talking Star Wars length credits here! We are talking 'Joe Smith did everything'. Its more likely that the majority of time spend on credits might be in creating animation or graphics to be included with the credits which might further inform or entertain the viewers. As you seem to suggest, one of the issues that causes soft and fuzzy images is that of using low rez images grabbed from someplace else (internet, low rez cameras, other programs, etc.). Its difficult to suggest to others that this is not the best way to do this but... if you can help it... don't do it. Create and maintain a Library of images for use with A:M that you know will work well. You know they will... because you've made them yourself. This whole issue is compounded all the more when people try to mask out transparencies on images not created in A:M. Those are the famous 'jaggies' you and others have written about (you Vern... Tincan... Yyves... and others have all created classic tutorials on the subject of Alpha Channels and how to deal with the artifacts found in image masking. Great stuff! There is however a very unfortunate aspect to these classic tutorials... they don't take enough advantage of A:M itself to fix the problem. They approach the problem of fixing jaggies from images that are already 'broke'. If anyone is fighting fuzzysoft images or jaggies thats even more reason to create the Title cards and credits in A:M. Let A:M do the work by masking the images for you. They'll composite into your film even better. (...and of course... Save those models and projects you used to make the images in your Library too in case you need to revisit them later!) Ultimately, what is learned in A:M about Alpha Channels, title cards and credits can be directly applied to other programs too. This knowledge will enhance the quality of images brought into A:M from other sources.
-
Ever the opportunist I'm going to hijack your topic a bit Robert. My apologies... If you object I'll move these posts elsewhere. For those looking in, I think you'll agree that most Titles/Credits need text to go with them. To learn more about creating text (animated or otherwise) I highly recommend reviewing the Font Wizard tutorial by Holmes Bryant!
-
Ah... my timing is lousy again. Sorry about that Robert. My title card for 'The Legend of Stingy Jack' is to be my jumping off point for a new exercise/tutorial on Titles. That might have addressed your question even before you had it. Expect to see some basic info on Titles and Non-Linear Animation in A:M as I can find the time to devote to it. Hopefully I can collect some good information on image formats too. More and more people know what the various image formats can be used for these days but there are still a few that don't. If you've already been mastering these things on your own so much the better. Movies have all manner of things in their middles but as a minimum, almost all have a Title and Credits.