Leaderboard


Popular Content
Showing content with the highest reputation on 07/05/2021 in all areas
-
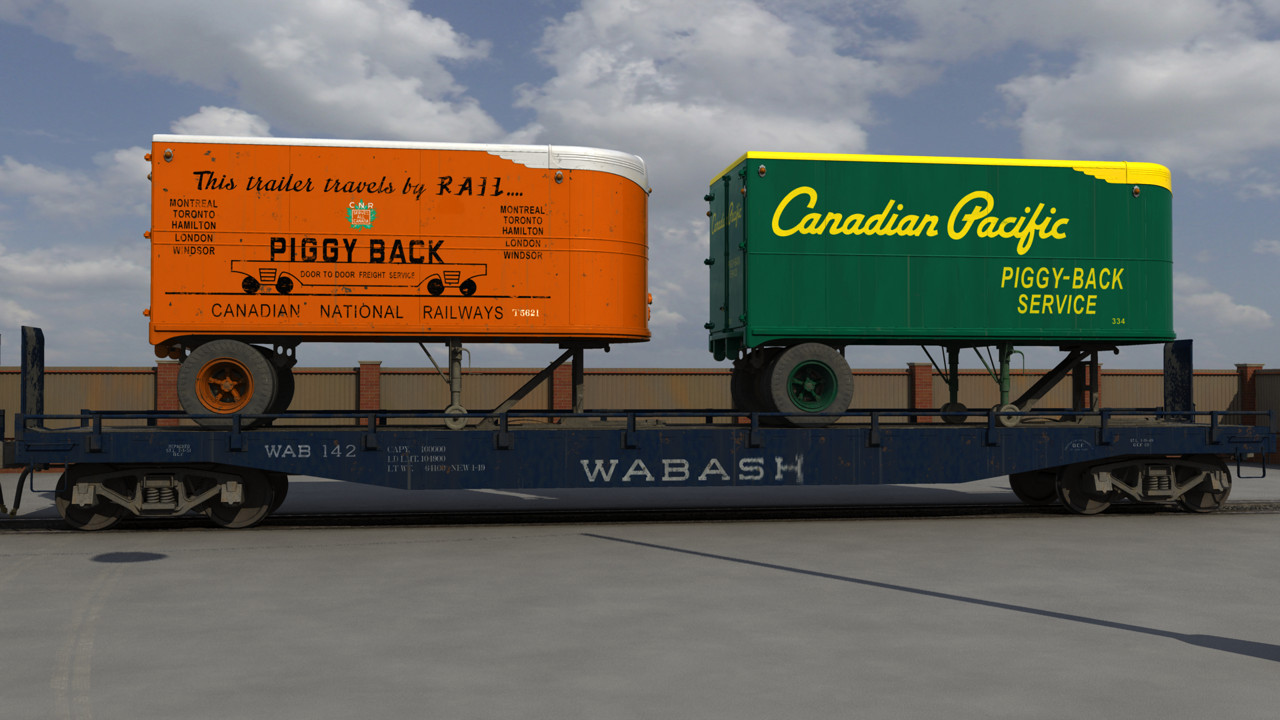
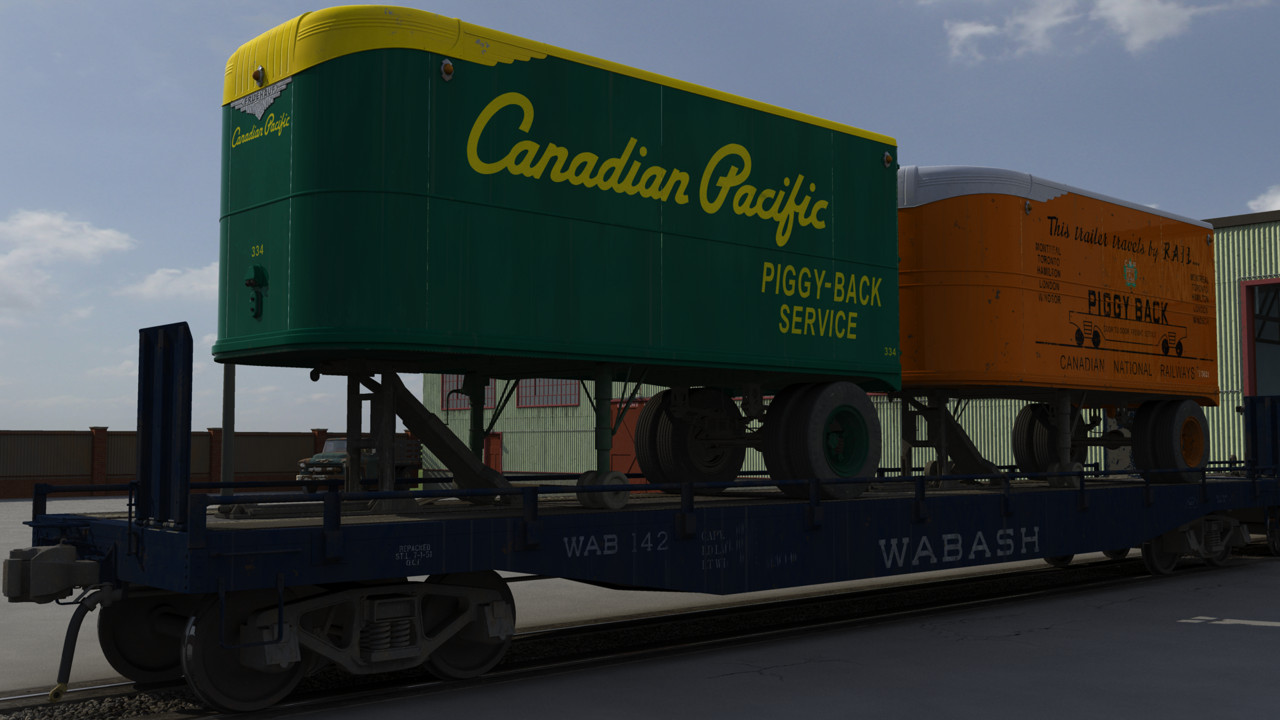
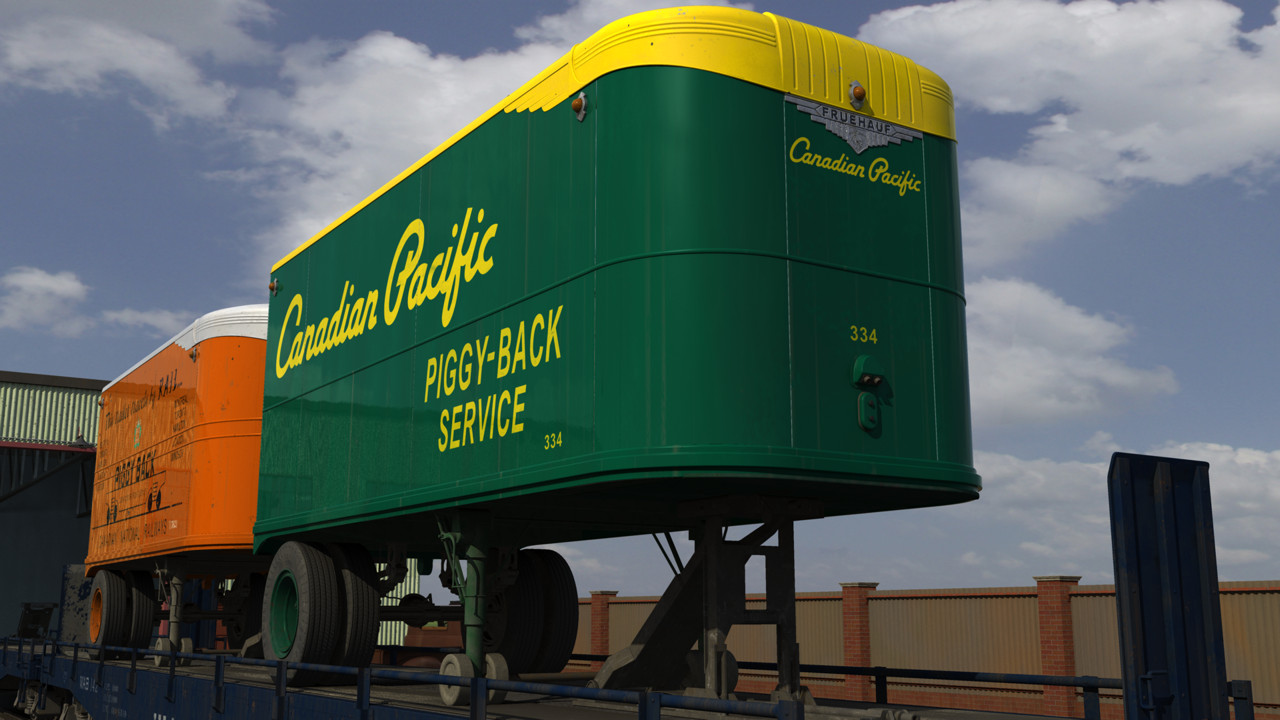
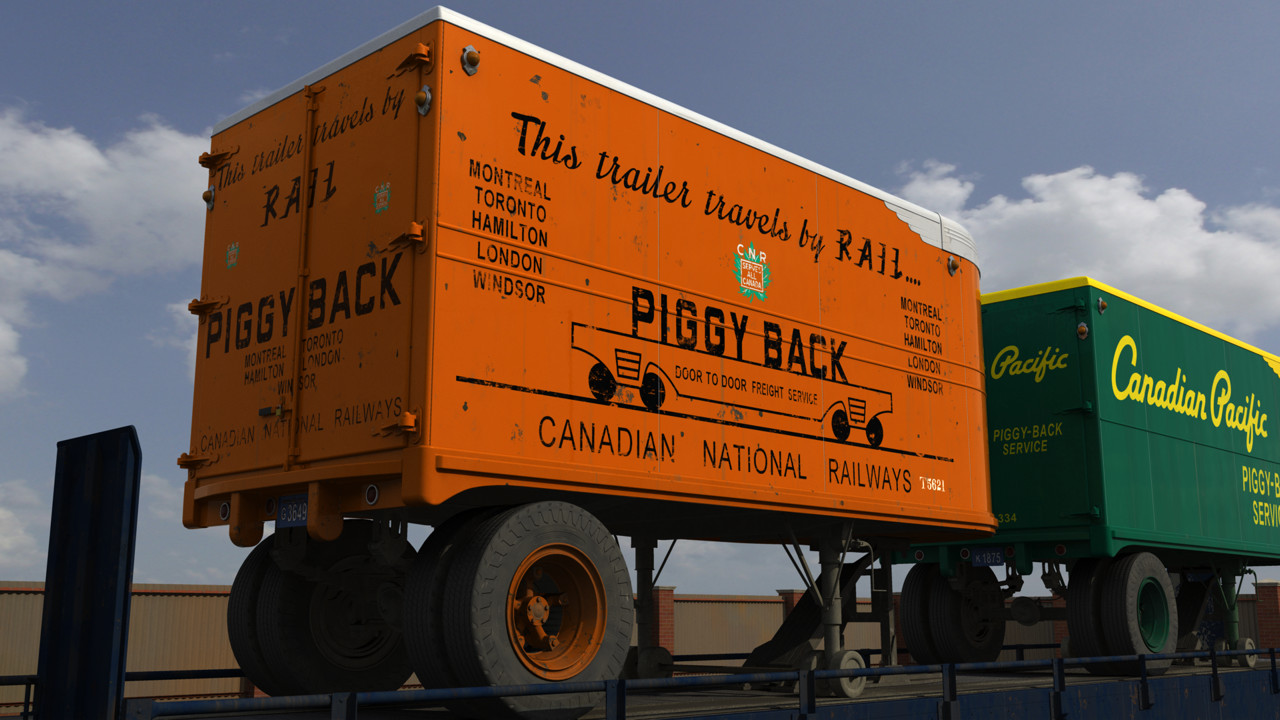
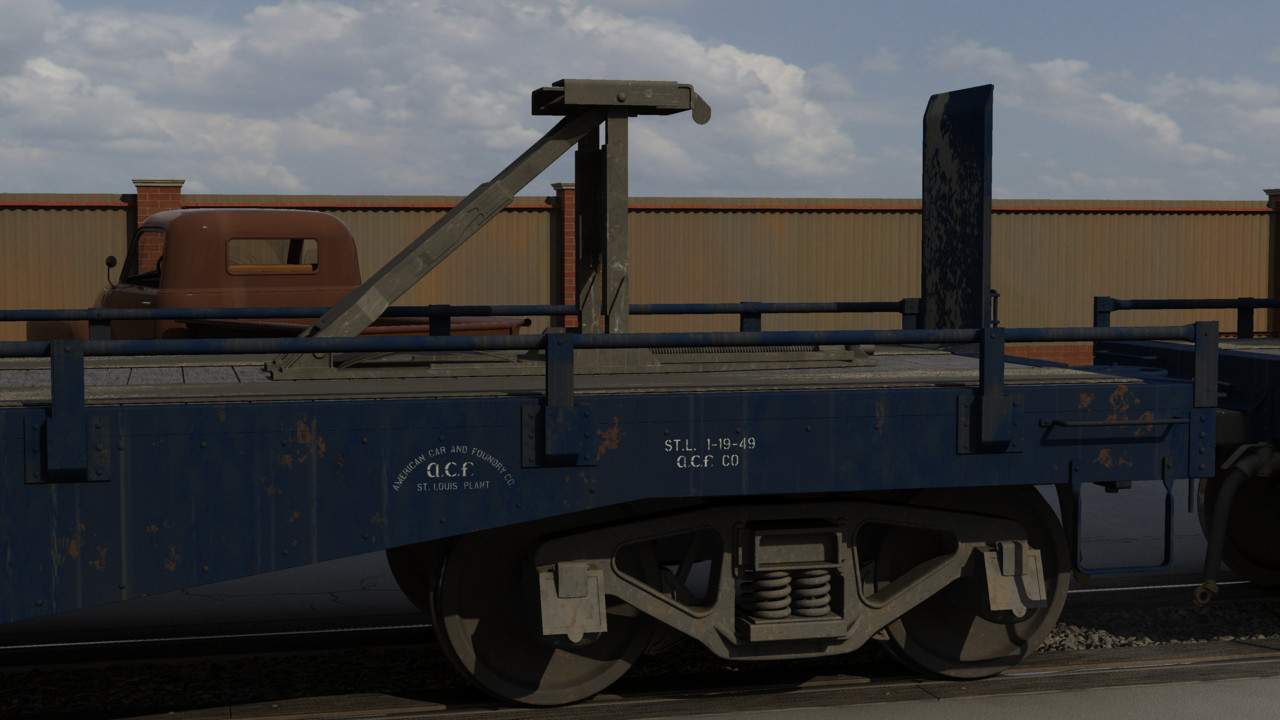
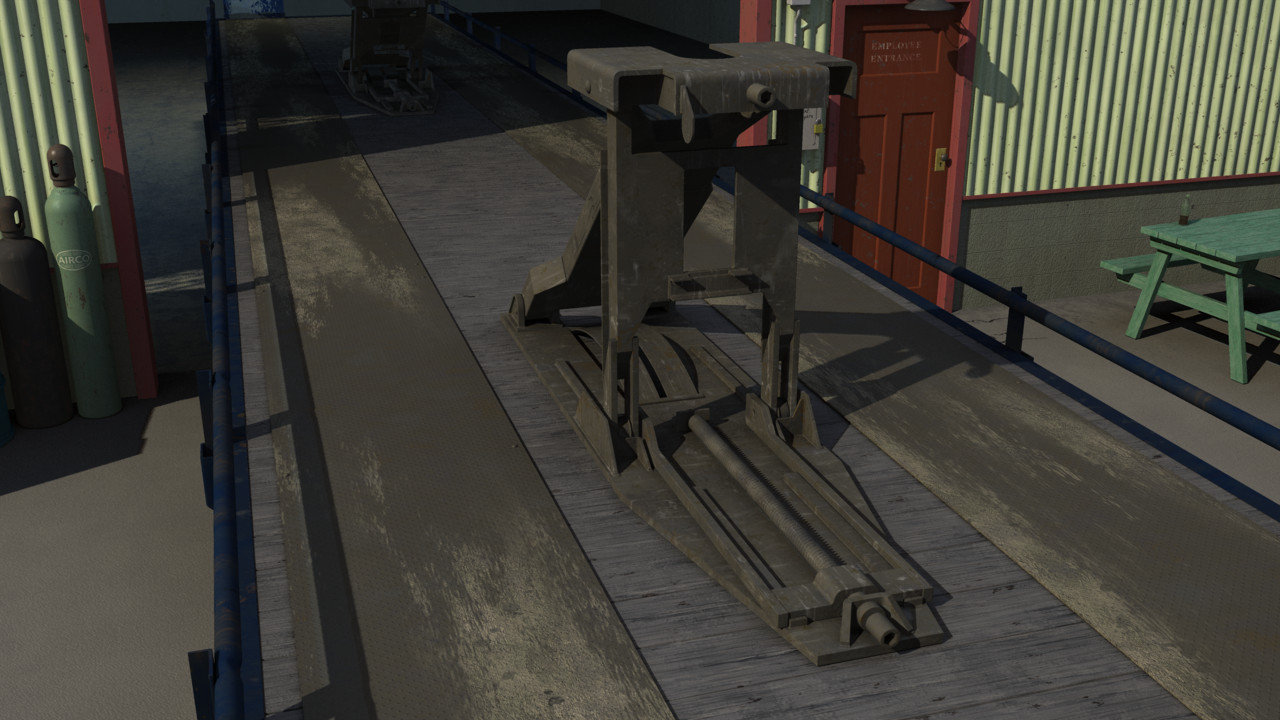
Well my latest rolling stock release has taken more time than usual since the cargo required way more work than the railroad car. Before interstate highways and stackable containers, rail "intermodal" transportation was defined as driving transport trailers onto railroad flatcars to "piggy-back" their loads from city to city. Railroads started by towing the trailers up long ramps onto a slightly modified standard flatcar and anchoring the trailers with chains. Soon modified flatcars were given integral fold down ramps so multiple trailers could be driven onto a long series of coupled cars. Before trailers started to grow in length, they could fit one standard or two shorter trailers per typical flatcar. I justified the creation of two trailers since they could also be used to tow around my backlot once I get around to building the tractor truck. Since trucks didn't have as much horsepower as today, trailers were much shorter. Fortunately short trailers are easier to model because they don't need side doors. But all that painted on signage meant that creating the decals took almost as long as the modeling. To make the anchoring process faster and more secure, one flatcar manufacturer invented a retractable trailer hitch. One man with a pneumatic wrench could lower or raise the hitch and lock the trailer in place. This was one of the more difficult models I've tackled as there were very few reference photographs of them available on the net. And what was available were lo-res, isometric views. I basically had one good hi-res image that had a human close-by for dimensional reference but only showed about 75% of the hitch. So some of it is guess work. I may have over-compensated with the beat-up materials and dirt decals. However, I think the old, dirty diamond pattern steel plating that I showed off a few weeks ago looks even better installed.
 2 points
 -
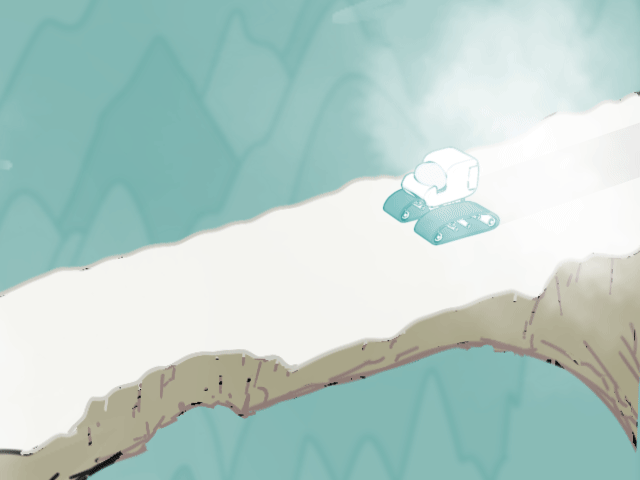
My previous doodling topic was titled 'Tuckertown and other Stories' for reasons I believe I mention in that topic but... Here I'm not so interested in Tuckertown as I am in other tales that might be told... or explored. Recently I was doodling and came up with a character I just call 'Adventure Cat'. This topic will try to focus on him and his world mostly to give my doodling in 2D and 3D a little focus. At any rate, I thought I would try to create a vehicle I had drawn for Adventure Cat in 3D with the latest release of Animation:Master. Here is the result:
1 point
-
Installers: Windows: Windows 32Bit Windows 64Bit Mac OS X 10.13.6 or earlier: Intel Mac v19.0 Intel Mac SSE4.2 SDK: v19.0 SDK UpDate Change Log: Fixed All 7081 PNG transparency not working Fixed All 7074 Chain of bones scales erratically Fixed All 7077 Bone color not displayed only OpenGL affected, not OpenGL3 (recommended to use this driver) Fixed All 7057 Crash during A:M Backup it should have now a better error message for this (both as messagebox and in the logfile), let me know if the crash still occur. Fixed All 7073 OBJ export or Prop import not working 5 point / hook export fixed Repeated decal export not fixable, due obj file format doesn't know anything about repeatable decals Fixed All 7075 5 point patches render with gaps Fixed All 6976 crash on Paste Mirror on a Pose Fixed All 7072 Progressive renders are blank Fixed All 7070 Shift-cursor key doesn't move rotoscope. Shift + Cursor moves now the rotoscope/bitmap 10 pixel Ctrl + Cursor scales around center Fixed All 7071 CFA creates unnecessary copies of Materials Fixed All 7062 Copying patches dosen't copy decals on patches Fixed All 7060 Copying a patch (only 1) with a decal does not copy the decal Fixed All 7054 Decal exporting A new menu entry for single stamps / a opened stamp view is added. "Render Stamp to File" This renders the actual stampview to file with a user defined resolution. If You start from the stamp entry in the PWS and the stampview isn't open, a new stamp view is opened. In the dialog , which opend after hit the menu entry, You can change the Path and Filename (the button on the right side) fileformat is selected trough the filename extension (supported OpenEXR, TGA, PNG and PSD) the "Width" and "Height" for the newly created file limited to 16384 x 16384 for Win64 version, 8192 x 8192 for the others the limitation is the result size, means a resolution from 32768 x 8192 is also possible. Warning: On the highest resolution around 14 Gigabyte is needed at the creation process. The width and height are always changed to a even size. (1025 becomes 1028 , always modulo 2) "Save layered" If this checkbox is checked, two layers are created, one for the decal self and one for the splines. For all formats ,excluding OpenEXR, in this case two files are created with the naming scheme "Filename"_Decal".Extension" and "Filename"_Splines".Extension" OpenExr is saved as one file with two layers. "Render with CP's" rendering also the CP's on the spline layer Fixed All 7061 Snap Group to Surface snaps to wrong surface. Fixed All 7068 Rename Bone renames wrong bone Fixed All 7066 Crash on Radiosity render Fixed All 7052 Environment Map materials not working Fixed All 7059 Tooltips only show for keyboard-shortcutted buttons Fixed All 7058 Progressive Render of shag crashes1 point
-
Just wanted to say a quick "thank you" to Rob for going to the trouble of running the image contests. It's always interesting to see the different themes and see what everyone comes up with. Thank you again, Rob, for your efforts.1 point
-
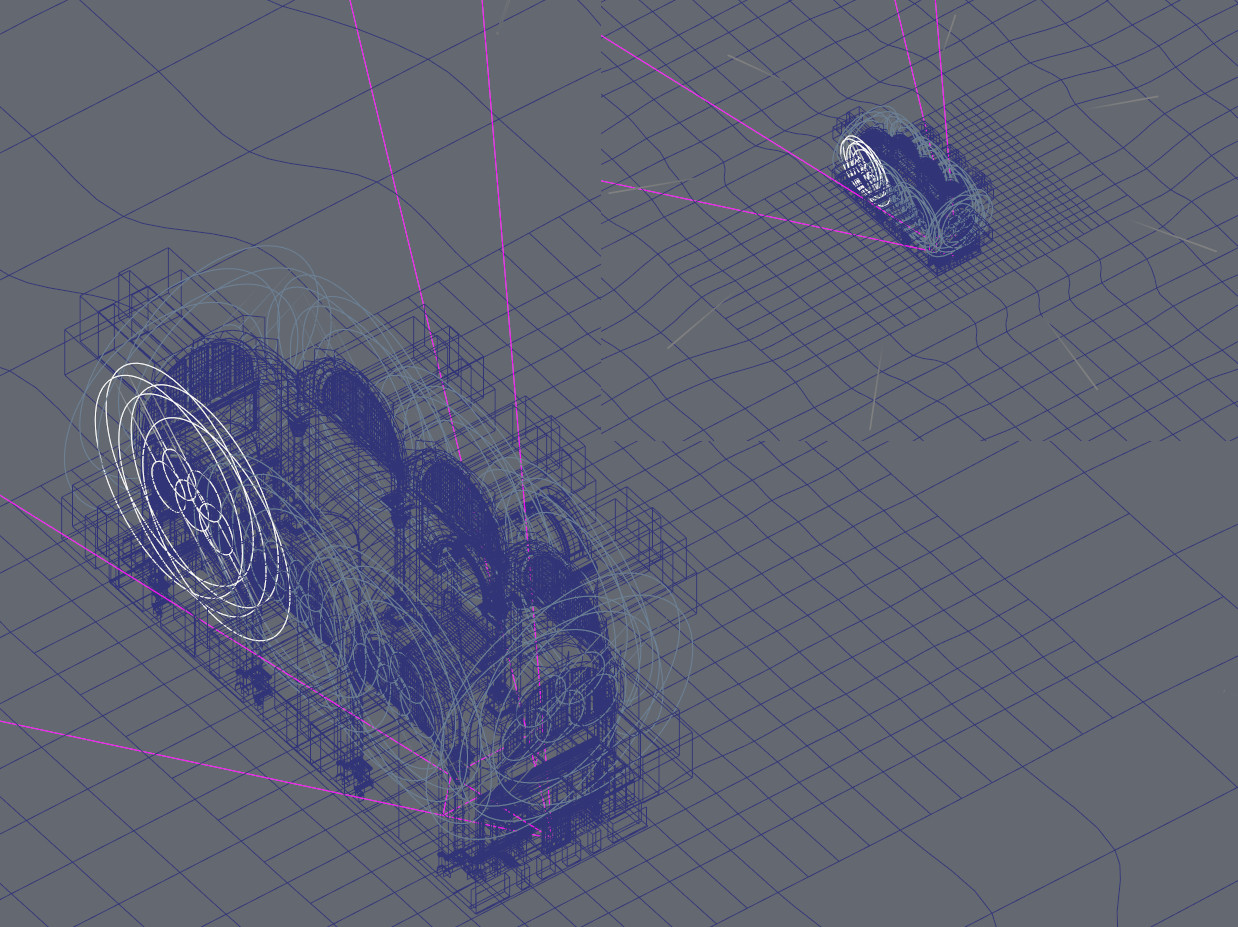
Its almost entirely kliegs. The sunshine is my typical sun klieg plus negative blue sun klieg combo about four miles away to give the window frame shadows the right blur. Each semi-circular window gets "filled" with five overlapping kliegs that are just outside of the window frames, so forty in all. They're all greyish blue but I highlighted one set in white for illustration. Each klieg is about 360 in. in diameter and has a cone angle of 179.9 deg. I still have to play with number of rays and how they're distributed because you can see grey banding in each arch close to the windows. I may need to go with more lights per window but this is a reasonable place to start. Maybe the banding will become less noticeable once I start adding materials? The upper right inset is a more distant shot showing the circular array of eight, tilted up, inward pointing, low intensity, no shadow suns that I trying to use as reflected floor fill light. This trick works quite well to fill in shadows under full sun outside. But inside, the floor and similar horizontal surfaces are unacceptably darker than the floors and ceiling. I should give radiosity a try but I have yet to look for any tutorials.
1 point