Search the Community
Showing results for 'project'.
-
I just checked the zip archive, its in there.. project file is called modelshopb.prj and turns out there is a second copy of itself in there... you can just ignore that :-D Here's the link again (5.5 mb zip file)
-
Here's the link to the ball project. http://www.hash.com/forums/index.php?showtopic=5959&st=0 http://www.hash.com/forums/index.php?showtopic=7303 P.S. The lightening looks good. I like it.
-
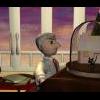
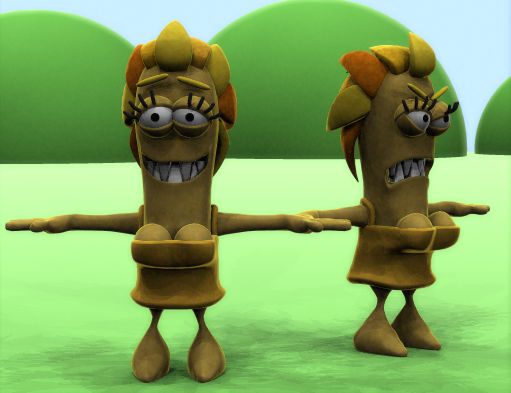
Great characters. I really like how different each are from the other. It'll be very interesting when you have an enviroment to drop them into. If the crew's ship is any indication, it should be fun. The expressions of the green guy are very nice, should be able to get some good acting from the character. I like the colors of the uniforms, could lend itself to some pretty neat visuals. Such as in a dark, very dark place, you could use the 'typical' eyeball white (like in comics and 2d 'toons) and add the white of the uniforms to this fx and have a totally black scene with only the whites of the eye(s) and the white of the uniform visible. This could be a good back-ground info, as the whites of the uniforms would make it easier to pick out the crew in the blackness of space if an accident happens. Too bad the acronymn (or OrangeWorld Legion) for the crew is "OL" instead of "OWL" -- that could add a bit of word-play and visuals that OL just doesn't have for moi. IMHO, having a symbol for them makes it seem a bit 'super-hero-ish." Some kind of graphic logo would serve the job better. Or if you look at military dress uniforms, the actual branches of the services distinquish themselves apart by the overall look of the whole uniform. If done right, you can have a look for the uniforms and give some visual indicators of the crew's status (rank) and job by tweaking the uniforms a titch. I feel that little things like this may not be overtly noticed by viewers, but add to a sense of 'realism' when the overall scene/series is taken as a whole. And you could take the visual look of the uniforms and extend it to the way the ships/interiors and such look. This could be really good if there's some kinda dog fight in space. Good luck with this project, I'll be looking forward to seeing how it develops.
-
Adjustable spherical constraint
itsjustme replied to itsjustme's topic in Work In Progress / Sweatbox
Rodney, Here's a two eye setup of the cartoon eye for people to mess with. You can dilate each eye individually or together and you can manipulate both eyes at the same time or individually...there's an on/off pose for manipulating them at the same time in the model's (tooneye) "User Properties". I also applied the porcelain material this time and re-sized them. When you first open the project the "botheyesmanipulator" is set to "on". In "Action1" grab the center null to move the eyes around. If you turn the "botheyesmanipulator" property off then you can use the right and left eye manipulators independently....it could be done better, I'll mess with it again tomorrow. -
David, I gave your project file a looksee... I like! I was going to post a pic or two so others can see what is going on. I attempted to place two eyes in a chor with one constrained to the other. I failed to take baby steps though and managed to come up with a circular contraint problem when I attempted to get the two pupils to react together... In short, I went a little to far beyond the simplicity of the setup and got myself in a corner. I'll try again when I have a little more time to play. I still think the setup would work great with a solar system of planets too!
-
I have just finished building a facial rig for Niomi. It consist of a series of poses that some what mimic the muscles of the face Which was inspired by this article @ http://www.gamasutra.com/features/20000414/lander_01.htm among others. These poses are driven by a "funky user interface" as seen in other software packages. The core of the interface is made up bones and nulls whose translation and rotation drives the poses.This I learnt from Bill Young's visime project. (Thanks Bill).These are arranged to make animation as intuitive as possible. An outline of the model is used as a guide for animating on the fly. I intend to use this in conjunction with the traditional phonemes and expression. Here is an image that should make things clearer A tutorial version of the rig is also attached below.Please give it a try and tell me how it can be improved. I will do a full blown tutorial for newbies when I have the time but I am preoccupied with finishing Niomi right now. LUV Pat FaceRig.prj
-
Do you have an overall "look" to your design for your project? I'm not familiar with your stuff- is there another thread?
-
Adjustable spherical constraint
itsjustme replied to itsjustme's topic in Work In Progress / Sweatbox
Well, after posting the eye tutorial I made I was asked about a cartoony eye and thought about applying the spherical constraint in this thread to the problem. It demonstrates a possible use for the constraint, so I thought I'd post it here. It's just a "proof of concept" type of thing, so don't expect it to be perfect...there are plenty of things about it that could be better. In the project, open "Action1" if it's not already open and move the visible Null named "eyemanipulator". That moves the pupil around and deforms the eyeball. To adjust the size of the pupil, there is a "pupildilation" slider in the "User Properties" section of the "tooneye" model. -
Well, heres the begining of my project... Now the madness starts

-
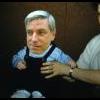
Thanks for the complements! I actually modeled him on Geri so I'm chuffed you recognised him(I guess you didn't see the previous modeling thread). Unfortunately no body to go with him. I'm working on another project which will make use of all Geri taught me though.
-
DL, Glad to see you back in action in the forum again! When I need inspiration and a reason to carry a project through with a critical eye on composition and detail I always think of you! Look forward to seeing more of those fish!
-
I'm working on a project and on a particular bone, I get two sets of lines(RGB) and when I copy and past them, they get confused and cris cross. Anyone know how to fix this?

-
Great scene! I agree that the beam of light could use a little work, it jumps out and steals a lot of your attention. But still, well done. I'm casting another vote for seeing that gorgeous Balrog (if that's possible) in these mines. What a fun team project -- and the work is basically done.
-
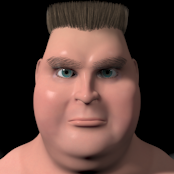
Nice face! What I discovered when I first started using A:M to model (and I'm not a pro yet) is that the more I model with it, the better I understand how splines work as a 'group.' There's a bunch of tutes on the ARM (in the modeling head and body section) that I found helpful. There's the SAY head, that you can d/l a project and see how Young did the head. The best thing about that tute is using the "wrinkles" that happen for you. I found that by hitting a CP and then the comma key allows me to see the whole spline and how it is placed and connected. With the models that I felt was going to be trashed, I kept working with them and learned how to delete a spline in a few steps (select a CP on the splne you want to get rid of, hit the comma to select the entire spline, then the period to 'reverse' [complement] the selection twice. The first comeplement will invert the selection, the second re-selects the orginal spline -- my mind uses the paradigm that the second time selects the spline's CP's in "both directions." Then you can hit the delete key and viola! the spline is totally gone. I found that by deleting and then adding CP's and splines really got me thinking about splines and patches and when to hook, use 5-pointers and such. Good Luck and I'm looking forward to seeing what you come up with!
-
Redo on the female giant...I like the varied hair colours. Christina: SkyCast is something we use all the time professionally so we'll keep updating it. Although it 'should' stay compatible . There are a couple of tutorials on the website, and I'm reasonably active on the forum if you have any questions. Skycast will scale any image you load as a base to 512 x 256 before running. The action is dropped onto a SkyCast light model in the choreography. These images are rendered in version 11. Xtaz: Yes, because the clouds have very little colour variation, I'll be trying to add more colour/richness with lighting. Frank: This is my 'simple' project. Expressions can wait for another day
-
Thanks. I'll definitely have to work on those camera angles. I was aware of that looking kinda screwy. Not to be repeated though. And finishing it was the achievement. I started the project way back (so far I can't remember). Just to finish something is good. Usually I've got dozens of unfinished projects.
-
This is somewhat of a trial and error process. I'm not happy with the density of branches near the trunk. I'm going to reduce the number of main branches and add more of the short secondary branches. This should give me a much better looking tree form. I'm also not happy with the uniformity of the arrangement. Doesn't have the aesthetic appeal I want. I'm going to arrange the branches less uniformly to give it a more natural look. More of a bunching of branches and leaves here and there, with some more space between "bunches". One reason this project is taking so long is the number of "rehearsals" it's taking to optimize the look vs. performance. The number of things to tweak each time is pretty huge. Definitely not an efficient workflow sort of thing at this point. That would take a software utility to build it for you, with some nice features to allow you to tweak it efficiently. I think I'm really pushing AM's limits in terms of the sheer number of constraints and relationships involved. Some of the branches are loosing their texturing during the camera rendering. And this is only one tree... May have to send another sample to Hash to figure out what's happening and fix it. Bill Gaylord
-
Vernon Zehr's Basic Boolean Tutorial with project file and animation
-
I apologize gents. I should have checked to see if the tutorial/demo was still online. While waiting for the experts to chime in I'll post some additional information. I'll even check to see if the links work! Boolean Globe project description
-
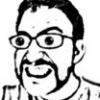
Mike. after looking through the thread again I remembered I had this image of Tony from an old project, like many characters there are a stack of different evolutions to choose from

-
Hey, I'm trying to download the sample project but all I get is a browser window with text in it. What am I doing wrong? I guess I don't know how to use this internet thing...
-
okay tweaked the colors and added a light (volumetric with turbulence) now have to get habitat better action(now action controls turbulence the rest is hand postioning in chor) and maybe some force oh and not sure if the eyes on front and back look okay will post project when finished robot1.mov
-
Anywhere those of us late to the party can check this out? I went to the site and got the 3D Farmington, MI slide show (now where are my 3D glasses when I need them?). Also, can you post the project?
-
Anywhere those of us late to the party can check this out? I went to the site and got the 3D Farmington, MI slide show (now where are my 3D glasses when I need them?). Also, can you post the project?
-
Sorry this is a bit rough but I spent 20 minutes on it render as line thread and a pose slider..very rough watch the last few stitches I can post the project later sew.mov