Search the Community
Showing results for 'project'.
-

I return to the basics....
Ernesto Esteso replied to Ernesto Esteso's topic in Work In Progress / Sweatbox
Sorry guys!. My intention was make some modifications to the animation, like you critic me before,and post here, but.................what a surprise, when I start the program and select the project.................Taraaaaaannnnnnn!!!!!!!!!.................I LOST IT!!!!!!!............ . But at least I wrote all your critics in my notebook, and I'll try to apply them in my nexts animations .................I'm a "bad lucky guy" ............... -
Just trying out an idea with a tree and leaves and trying to seee if the controls get saved. All but the last frame .. saved fine... the last frame highlights a leaf and I noticed that after saving and looking at the frame it shifted slightly but I did have a random factor checked in the sprite window so that would explain it. If Vern says its okay I'l posted the project since he inspired part of the leaf Tinkering Gnome moneytree.mov
-
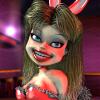
Just looking at this image and what I remember of Fay's dress, I believe the clothes are different enough to keep people from confusing the two -- especially if the color schemes are different. All the same, if you intend to do a re-design, you can easily avoid great similarities. I'm glad to hear you're putting more time into this project. It's always hard, scraping together enough time to dedicate to work like this, but it's always a pleasure to see your updates. Nice image, also. You're really pushing the envelope on toon rendering in Hash.
-

Against The Author, the War of the Worlds
PlJack replied to guernseyfreak's topic in Work In Progress / Sweatbox
I feel bad saying this, but I also feel it needs to be said. Back off on the flashies on your web site. I could not hang around long enough to read the web site content because the buttons and flashing images were driving me crazy. A complete distraction. The moving spheres on the first page do not warrant a Java load. From what content I did read the project it looks great. The models seemed very nice. Wish I could say more. Hope your endeavor goes as planed. -
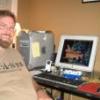
I've been playing with the Osprey tutorial from JohnArtbox and am pretty happy with my progress. I still am driving myself batty with getting the lighting that I want (trust me, it's more difficult than lighting a real set!). Of course, the requisite checkered floor has to make an appearance, although I'd like to have a better handle on materials to generate a grungier texture for the floor. I'm experimenting with decals as I can whip up terriffic textures in photoshop, but as for my ability to get them into A:M, well, I'm still in the embryonic stage there. This attached picture is about the 15th generation of the project (thanks to John for some of the models, as well as the Hash libraries).

-
Which part are you interested in? A:M->GBA palleted sprites? Coding for the ARM7? The hell that its sound to GBA? We basically searched for resource straight from google. The official NOA documentation is a big no no but there are some good groups out there that have basically reverse engineered the whole platform and opened it up to amateurs. First stop will probably be the HAM SDK which include an gcc arm compiler and some neato tools. I must warn you though, you either need to be a C++ coder or working VERY closely with one, this stuff isn't cake. There is no file system, which means all images/sounds/scripts must be converted to headers to be compiled directly into the flash. I love developing for it though, in fact the only reason we stopped in the first place is my buddy Guy took a job at Backbone Entertainment in Emeryville to do GBA programming (hence he can't do it outside of work). So if you are interested in doing a project, let me know! delaney@gsddevelopment.com. P.S. Love your work man! I'm a big pinup fan.
-
Folks, I'm working on a side project using this practice chanter. I wanted to dress it up and add a bump map to the chrome collar. But the tga image doesn't seem to create the definition I wanted. The decal was applied with as a cylindrical decal, type bump. Any ideas on how to best set up a bump map to get this decal to show as etched in the chrome?
-

Practice Chanter Needs a Bump(map)
fae_alba replied to fae_alba's topic in Work In Progress / Sweatbox
Here's a quick test. Close project...bring in bump map, set key color to not set, import chanter, apply image, increase percentage to 300%. -
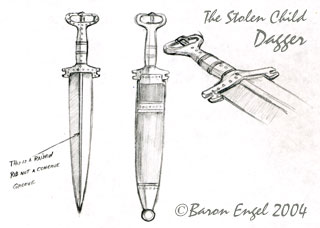
 Hey Raf, Looking great! The sword flip might feel off because it seems to spin around the center of the sword, and most swords center of balance is much closer to the heavy handle, meaning the center of the spin is not the center of the sword. The rope on the second one passes throught the column. How big of a project will this be? Can't wait to see more, how soon will you finish it? -Alonso
 -
Hi all I have been trying to create a model of niomi as a pet project to see if I can create a believable model of someone. Here is the untextured face. any comments are welcomed luv pat niomi2.jpg_
-
Hello all, it is with Great Pride and Joy that I announce the final version of Duck Sauce ("A Mystery that Squeaks") is now available on A:M Films. http://amfilms.hash.com/search/entry.php?entry=895 If you don't know the background already, Duck Sauce was produced as part of the 48 Hour Film Project, in which filmmakers, given a genre, prop, character, and line of dialogue, produce a complete short film, from writing to post-production, over one weekend. This version, though the writing and voices remain the same, contains revisions in some animation, new music, and was completely re-rendered. These things did not, of course, happen within the 48 hour time period. The original film was shown to thunderous applause at the AFI Silver Theater in Silver Spring, MD, and this version (well, almost) was shown to an as-yet-unknown amount of applause at the Portland Indy Animation Festival in Portland, Oregon. If you like it, please tell your friends. If you don't like it, tell your friends anyway and let them get screwed the same way you did! Thanks, Zach (on behalf of Godfrey, robcat2075, pugless, and zacktaich)
-
I really like the directors cut. I need to go back and compare the two to really understand what was changed though. As it stands, your project seems to have been a great success. I can only guess that you might convince yourself to do it again next year after the memory of those sleepless days fade. Very nice work and efforts from all! - Rodney
-

Duck Sauce: The Director's Cut!
Bruce Del Porte replied to ZachBG's topic in Work In Progress / Sweatbox
What a fun project! The DC turned out great. -

Swashbuckler animation tests (flat color rendering
HeadlessBill replied to Raf Anzovin's topic in Work In Progress / Sweatbox
Looks really, really good. Movement is nice and fluid. I hope the animation in my project is even half as good. Only one nitpick though. In the first clip the pirate's left hand goes through the cube beside him when he is landing on the ground. -
Alas- NO. I can NOT get my dynamic restraint to render. I can see it working in the choreography but it WILL NOT RENDER. I just tried it 20 different ways and all were for naught. I wrote hash support. The only thing I can figure is there's a conflict between the dynamics of the hair and the dynamics of the dynamic support. When I send my project file to Hash do I need to send all the models, decals, matierials etc. separately? Yeesh!
-
Your animation is very floaty. You might want to read up on some animation principles like anticipation and creating a sense of weight, particularly in the woman's jump off the mountain. If she anticipates the jump by crouching down before jumping up off the mountain it will look much better. Right now it looks like she flies off the mountain. Looks like a very ambitious project. Kudos to you for taking it on.
-
I had some of this information up on my WIP page, back when I started this thing, but I deleted it last time I updated my website... I modeled it in a couple of days, the head taking the majority of the time. Before modeling I watched the behind the scenes a few times, and I also did a number of pencil studies of from photos of Weta's maquette. I probably have a whole day of sketching and researching (which would be typical). I did all of my UV mapping (and wrote the tutorial webpage)in a day. And I spent another day (if I remember correctly) painting the textures. I uploaded them as I worked on them. I spent a few hours working on the sprites for the first image that I posted. But after rendering an animation, I realized that they needed a lot of work to look realistic. So I totally redid my fire and smoke for this last example, tweaking it over and over, rendering a shaded mode version as a .mov to get a look at the motion of the particles, then reworking the settings. I spent all day before I got what I wanted.... The rigging took a while, even though I used the TSM. And the wings I had to do from scratch...Probably a good part of a day. I did the wings the same day I tweaked my fire settings, somy timeline is a little screwed up... (sorry I didn't take notes) I didn't work on this model full-time, since I had other projects plus a full-time job. but it would be about a week long project done all at once, I guess. So that would make it a $3,000 model, if it were a contract job (just in case someone wants a custom model of similar complexity). The good news is that I've told Martin that he can distribute this model on the next Hash CD--so everyone will get a chance to play with it
-
Thank you. My next project may be a PSA for the Young Marines. I'm thinking a lot of volumetrics around the disiplined recruits. I think it will be statement driven, not story driven, which I think is going to be difficult to edit/choreograph it all together well. This one was just a whole lot of fun to take from concept to execution. Now if only I could start a career with this.... Rob Milliken
-
This project is no longer a WIP, it is finished. See the entry, "Laugh Pack Attack" in AM:FILMS for the final results that could not have happened without the people in this forum who offered their assistance. Rob Milliken.
-
tried the idea om a simple test project and it worked quite well. Thanks johnl3d
-
Oh, yeah, tottaly. Seriously, the first time I saw the first pic, I thought it was drawn. Then I realized it wasn't. Kik-arse dagger, BTW. Go Baron! So, wether I missed it, forgot it, or skiped it altogether, what is this going to be, anyway? Movie? Short? Somethin' else? Just curious, and lazy. (Actually I'm not lazy...well, yeah, I am... but I'm also working on a project, so I have an excuse. )
-
QUOTE=SHADOWMASTER]I've seen a number of toon rendered things, but this is the first 3D model I've seen that actually looks drawn. Thanks for the complement, SHADOWMASTER. Now you know why I don't want to deal with a modified toon renderer at this point for this project. I know how to get the effect I want, I don't need to spend time to try and re-learn it. Well in weekly progress, I've got 'Father' done. I ended up ripping out the automated skirt rig leaving only enough boning to hand animate it. Will be doing the same for the 'Son' and probably 'Fay' as well. Also, went and animated 'Father' to have his own character walk. Next up, I'm gonna be modeling the dagger since the 'Father' needs to wear it in the first shot. Baron, my fiancée came up with a totally cool design for it. Yeah, Baron!
-
Thanks for the comments. I had planned on doing that as well, but only had about 30 minutes to set it up and render the pic (already had the robot model). Still had to make the wine glasses (love the new refraction), cheese, and toothpicks, then make the card for approval. Plus this was kind of a freebie project as a favor to them.
-
Windows versions can be found here: 2004 CDROM (Orangutan) dongle (HASP) Version Multi-User Dongle Version FTP area V11.0 Features V11.0 Online Technical Reference V11.0 requires dongles to be programmed for year 2004. If you receive a hasp or "No Authorization" error you will need to have your dongle upgraded for the 2004 subscription. Contact upgrades@hash.com for more info. Run the RUS Utility to get your HASP ID#. After receiving an update code from support@hash.com you can use this utility to flash the HASP. ----- Fixes since last version. Fixed problems right clicking in tools options rendering advanced with no project open Fixed problems with multiple hair systems and object collisions {Jack West} Fixed problems with shader plugins {Jeff Lee} Fixed problems with loading embedded objects before a linked object saved with an older version {Weg} Fixed rotated model bones making bounds incorrect fixes clipping problems {Silvio Terra} Fixed problems with reflections and environment map materials {Zak Taich} Fixed specular color not set on model, but set on group. {Hiromoto Akinori, Maruyama Akinori} Fixed problems turning off maniputlator properties while editing one of its properties {Silvio Terra} Highly curved 5 point patches no longer obscure the hair. {Jeffrey Bolle} Surface constraint targets will include the chosen bone and all child bones. {David Rogers} Muscle motion on patches with hair does not affect how many or where hairs are emitted. {John Keates} Grouping masses in dynamics mode, and no model chosen no longer crashes. {Kalle-Samuli Riihikoski, Dick Johnson} When the dynamic options of hair are set, channels are no longer created. {Silvio Terra} Copy/Paste Bone rotation not working properly. Compensate mode not working properly when adding constraint. Can't see NULL Objects when in shaded view in Skeletal mode. Can't see TVSafe in shaded mode. Timeline expanded state remembered Changed snap to frame to be default in timeline (No longer need Snap Grid on), to snap to sub frames hold down CTRL key. Turn will turn around last selected object in chor if nothing is selected. Added Hide in Timeline list for sounds Sounds can be dragged into folders under a chor Timeline remembers composite or channel state Selecting children of choractions makes choraction the current action Fixed crash when you render to file of a file that is open in another program like an AVI or Quicktime Deleting a chor will delete folders within it. Fixed switching between actions not keep last frame in the frame edit ctrl for that action. All objects from the objects folder drag properly into a chor in the pws.
-
Thanks John for gettin in. I was overbusy with some paperwork. But I need a break so here are my explanations: The shading model is based on Oren-Nayar. So the roughness attribute controls the diffuse falloff in the Oren-Nayar way. The Diffuse-Falloff attribute is actually not used. It is a remnent of an old way I tried to control the diffuse falloff but the Oren-Nayar method gives way better results. The fact that it is still there is an oversight. Saturation start and end control when the raises in saturation will start and end in the shade calculation: 0% is where you get full light on the model and 100% is where is the terminator. If you set start at anything less than 0%, the saturation shift will already be affected at full light and if you set the end at anything more than 100%, the saturation shift will not be complete at the terminator. Hue shift from saturation controls the lag or the negative lag of the hue shift relative to the saturation shift. In real persons photograph, the two are realtively in sync. But some painters like to start the hue shift fefore the saturation shift (or is this the reverse? I'm not sure now. Anyway, you can experiment). One notable example of this are the Bisley paintings. So if you want the hue to start shifting before the saturation starts raising, you set to some negative percent value. The hue shift is an interpolation between the skin hue and the blood hue on the hue weel. It always take the shortest arc between the two hues. I think Saturation strength and Blood showthrough are self explaining and you can get some really weird gradient effect by pushing them high. Now, about controling the ambiance surface attribute: I've started working on this concept several years ago when Andy WHittock was gladly programing plugins and I never touched the SDK yet. At this time, I analysed skin photographs. First of real peoples photographed in different lighting setups and then of well recognized painters. From this I developped a model of how the skin react to light. Because of this method, I could not compute the effect of SSS and the shift in ambiance because ambiance is a CG concept that have no equivalence in reality and evem less in photographs. Even in CG, once the effect of ambiance is computed, the only information you are left with is the color which can be translated into hue, saturation and value or somethiung equivalent but not into ambiance. And even there, the available SDK didn't have any ways to control the ambiance attribute of a surface. So I implemented this model in an application that could output gradient specifications which could be used with the A:M gradient shader. But the gradient shader does not work with color mapped or materialled skins and that was a problem. The solution was to program a shader which would take any current skin color that is already there and proces it so that it produces the same shifts that are apparent in real skins. This brought me to devise en even more abstract model of how light interact with skin and the result is this plugin. Now that the SDK offers an ambiance shader, I may get back to this project and develop a skin shader v2 eventually. I actually haven't test if the ambiance shader API do gets called beyond the terminator. I would guess it does. Please don't hesitate to ask any further questions. Whatever comes out of this will likely gets posted on the plugin page as explanations.