pleavens
-
Posts
597 -
Joined
-
Last visited
pleavens's Achievements
Prolific (6/10)
0
Reputation
-
You may have looked into this already, but I thought that you may be interested in the results I got from a test of rendering trees imported as Props. This is a crude test with only basic diffuse color added to the Props. The same models can have image maps applied to UV's that should work in AM. (I have not tested this to be sure) [attachmentid=20421] There are 9 trees created from 3 Props in this image, yet AM rendered the frame in 45 sec (5pass with shadows 720*486) The process: 1. Create tree in Arbaro (export to OBJ) 2. Import OBJ in *lender (no fgons or materials) 3. Scale 500% 4. select trunk and apply material color. 5. select branches and apply material color. 6. select leaves and apply material color. 7. rotate 90 in "x" 8. export to OBJ with material groups Now in AM 1. Import OBJ tree as a PROP 2. Drag Prop objects into Chor and scale/position to liking. 3. Refine material colors in each Props shortcut. AM got somewhat sluggish as I added the models, but it was still reasonable working in wireframe mode. It sounds like a lot of work, but I did all this in 3 hrs starting from scratch. <edit> now the bad news.. AM (13h) looses the Props material when you re-open the project, so once again I have wasted my time trying to find a way to help. Sorry</edit> Phil

-
Several suggestions. Try a test render in ver 13 using image based lighting and ambient occlusion. The AO will handle the soft shadows, as well as giving the vehicle surfaces a non-cg surface look and the IBL will provide the enviroment color variation needed to make the vehicles look like they "belong" in the scene. I would guess that render times may be fairly reasonable if you use a low AO setting and smooth it with motion blur. (in comparison to using a light rig) The only light you would need would be a "shadow only" light. Careful to use a copy of the set if you do this, ver 13 projects will not load in 12. ------------------ Question, do you have an enviroment map material on these models? Phil
-
I usually have a camera setup that I like before doing the null, so using compensate keeps my camera aimed the way I want it. BTW, you can also use the same null to drive the lighting around with the camera. Phil
-
1. Put a null in the center of focus. 2. Scale it large for easy access. 3. Constrain the camera to "translate-to" and "aim at" the null. Turn ON "compensate mode" while setting each constraint. Now you can rotate the null around it's "y" axis and the camera will spin around the null at a fixed distance. (if you convert the nulls rotation type to "euler" you can just type in 360 in the "y" rotation property to set a keyframe for a complete turn. Be sure to key the "0" location first.) Sounds more complex then it is. Phil
-
Dynamic boolean?
-
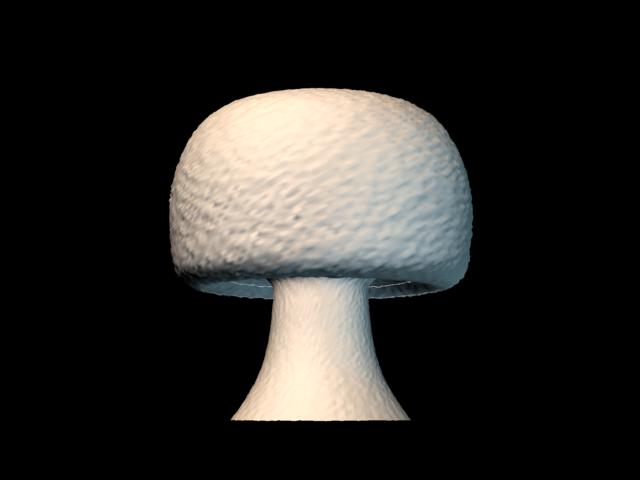
Looks like there were several things that might have contributed to the banding. 1. The scale of the "cloud" model was very different then the scale of the "profile" model. This caused the "cloud" to be very compressed to fit the action. 2. The density of the "cloud" model is probably much higher then needed for this usage of displacements, not to mention a greatly increased render time requirement. The attached project has the mods I made. As the cloud model was scaled down to match the profile, the materials gradient position no longer matches what you had and will have to be re-adjusted. Be careful with the material, adjust it at the model level as making adjustments at the material level does not override the drivers. If I were doing this from scratch, I would make everything at a much larger scale, as it is to keep your Shroom action working, it was necessary to scale the material and it's percentage of displacement down dramatically. [attachmentid=10536] [attachmentid=10535] JRJMushroomRep_mod.zip
-
I've done both. And I get the same banding in each case. I've sent this scenario to Hash; hopefully they'll turn up something. If you want, I'll be happy to look at the procedural version of the model. Phil
-
I'm confused, are you doing the displacement with an animated quicktime decal, or are you using an animated procedural material? Phil
-
I'm using A:M to render the displacement maps and the compression bands are in the .TGA's that it produces. Is there any way to get around that? You can try running a "threshold" image adjustment followed by a gaussian blur on the tga sequence. That should even out the surface yet provide the displacement you want. Phil
-
In the animated displacement tests I have done.. Animated displacement map stuff. I found it critical to use uncompressed video. The problem is that the compressed video will create slight variations of the grayscale value which will mess up your intended displacement. Phil
-
Nice job! Phil
-
Here's a stabilizer plugin for VirtualDub. http://www.guthspot.se/video/deshaker.htm Some of the plugins for VDub are pretty impressive. If we could get a plugin to import Voodoo camera capture text output to AM, the whole process would be covered. Phil
-
Sounds like a job for SynthEyes or other camera matching software. Have you tried processing it that way? Perhaps a two step process of image stabilization, followed by camera tracking. Phil