entity
-
Posts
895 -
Joined
-
Last visited
Content Type
Profiles
Forums
Events
Everything posted by entity
-
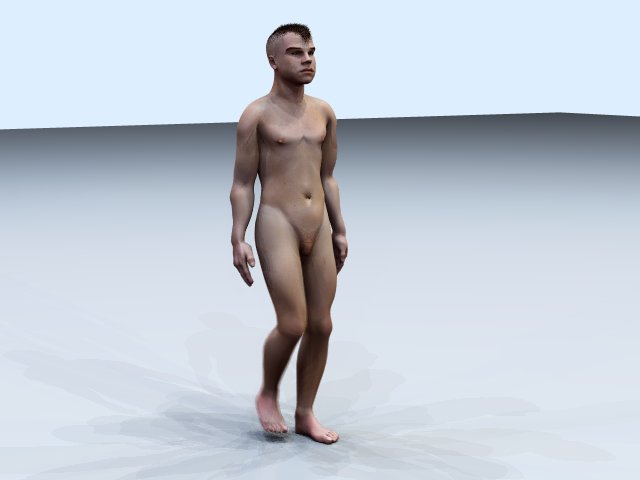
And a frame from the walkcycle I'm still working on...

-
Hi Hasher gang, I just did a little work on the character I'm working on. Lots of work ahead, just chuggin along. Doing some refining of the rig and poses and adding some new poses-- (Finger bending-spreading/mouth shapes/ facial muscle moves). I'm starting to get tired of looking at him with no clothing on... so I guess I should be working on that soon. I don't know if I want to do full cloth simulation or try to do partial with a unibody structure. Any tips? *edit: Thanks MAAM user group for the suggestions.
-
Well, my thought is that the large flaps under his arms are his back muscles (Deltoids I think?) All you would have to do is push them back a little so they connect behind the actual arms... this would keep your idea of way out deltoids and distinguish the shape of the arms where they are supposed to connect-- it's a back muscle so to show that it should be joining at the "back of the shoulder/arm".
-
John, you know I have great need of your render farm, et al, I will be done with all 15 of my characters around 2027 maybe in march or april of that year... will you still have the render farm then??? I did a fix on the shoulders of my rig and eliminated about 30 fan bones now the shoulders only use 12 fan bones... but I still crash because of the textures loading so, on a tip from Vern, I will reduce the textures just enough before the details "I want" dissapear or become to blurry. The meeting really did get me to understand that if I was working on a network or with other users on a project, I must consider the volume of my characters also... patchwise, texture-wise, and rig-wise. Thanks all you "incompetent super-heroes" (Verns next movie?).
-
I think you've come a long way... You do good texturing... use the textures you get. It's a lot faster then painting them yourself.
-
Found the solution: In the bone properties Boolean cutter was on off because I moved or changed something after the first time I turned it on... like dropped in the Chor.-- it reset itself to off... I'm an IDIOT for the second time today... you don't even want to know what I screwed up before this! EDIT: And it's only 8:46am here!
-
Hello, I've never used a boolean cutter before, but wanted to see how they could help me with an effect I wanted to try. I followed the instructions in the downloadable version of the 10.5 manual from hash.com, and according to the manual... I did waht I was supposed to do... so can someone help me on this? I may have missed a step. If you want to take a look at the proj file it's only 19KB in size... I've attached it below. Thanks! P.S. I'm also animating the boolean cutter to move along a path to "scan" across the object in the Chor. I see nothing when I render it all out. booleanslicel.prj
-
I hate one word comments, but "WOW"!
-
You definitly there, friend. Looks good. Can't wait to see the results with the stripes added.
-
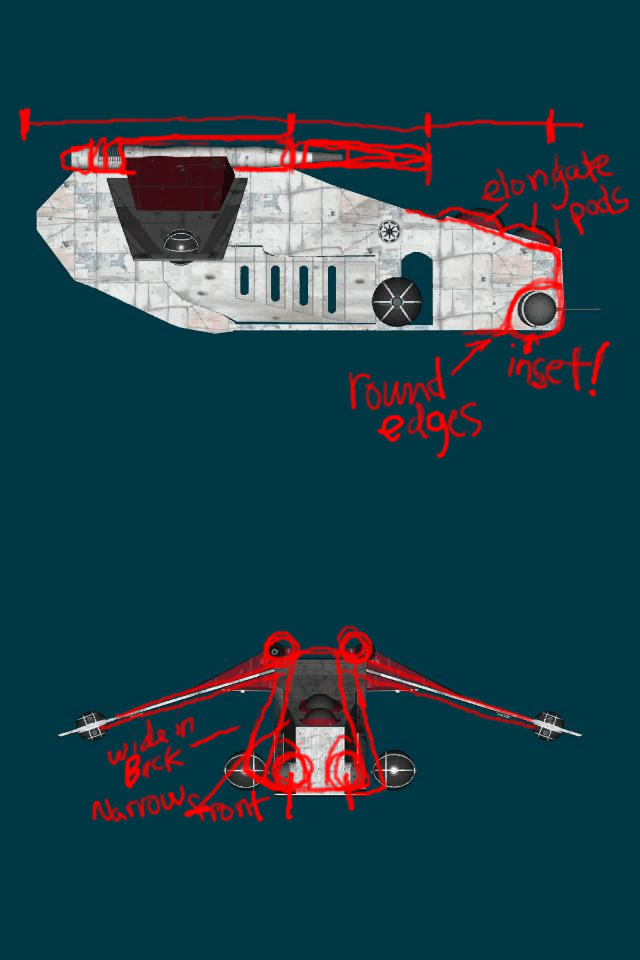
Excellent work!! Much more like the original! I love it even more. All I can see that is different from the actual one from the movie (I know you are using the GameArts version of it as your reference), is that it looks to me like the one in the movie version has rounder edges on the top of the body... I think it's acceptible as-is if your pressed for time... if not, round the top edges more, in my opinion. The Force Is With YOU!
-
Can't wait to see it... GOOD GOING!!!
-
Maps should be placed normaly except make one of the side by side maps overlap the other. Then the map that is overlapping should have a alpha map added so that you end up with a smooth fade into the overlapped map. To create an alpha in photoshop... make a new alpha channel...select this channel and deselect the RGB channels, but keep them visible (make sure the alpha map is also visible... choose a tool to paint with (airbrush gives you a soft edge) and draw the alpha (using black with a white background- black is transparency in alpha channel). Or you can simply use the mask tool to select an area and under channel options you can choose to use the selection to make an alpha from. I perfer the drawn method because I can see the faded area clearly... with a mask it gives you a line of "marching ants". That's how you get well blended textures from one into another.... there are tutorials out there on how to do all this in detail... check the Hash site to find them. If you mean by "seamless texture" one texture that will be repeated accross the entire mesh... I don't think that would be very defining on an animal... a tiger is not entirely striped. I'm interested to see what you come up with.
-
There is a tutorial (by Zandoria Studios) that I read to learn so I could texture my model. Decaling Using the UV editor THE best (AMv11) UV editor tut, I know of. Hope that helps.
-
I think you use color very well! I might add, that I always find it very moody. No matter what you model/render it seems to have this dream-like quality... and in some of your work even nightmare-ish. Looks like it's coming along GREAT.
-
HeadlessBill: You are the king of sarcasm. Thanks.
-
Sounds like it'll work... Good luck.
-
You may need to post a wireframe so we can see where your patches are... I couldn't even tell you without more info on what you did there.
-
P.S. Ken-- I still want the ear, so I can install in the female character next. I will credit you an ear... anything you would like in return for your ear?
-
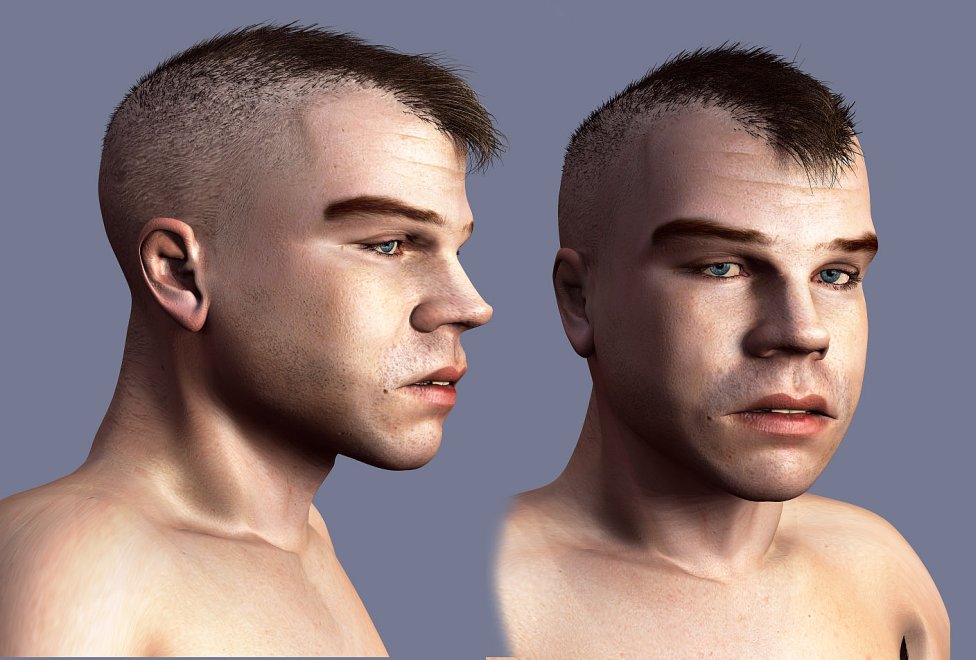
I don't think I could handle another ear transplant... I ended up with and error deletion... which is when you delete a part of a hook but not actualy the whole hook and A:M thinks it's still a hook there even though you deleted the other end of the hook... had to delete more than I wanted and replaced more than ears and ended up with about 4 more 5 point patches, modeling H*LL if you ask me! I'd have to be crazy to attempt another. But thank you, I think it gives him character to have incomplete ears...
-
OKAY! I worked on some of the problems with the model... The nostrils have more definition and the ear, well... I guess I'm just not good with ears at all, but I tried... Think I'll go to bed now...
-
I couldn't help the temptation to try this... it is very difficult to do... take a look at it and try it... I had a hard time with the indented parts... but I just wanted to show you what I meant about round corners... I attached the model I tried... tstsw.mdl
-
Confirmation from Yves... it breaks the illusion so MUST be fixed... Thanks. Details on the nostrals and ears... argggg! That means re-texture. To quote Dr.Smith: "Ohhhh, the pain!"
-
P.S. You don't have to take my advice, I'm no expert... But I love Star Wars and all of it's parts. You are close enough already to a likeness of the ship, but I would love to see an exacting duplicate. Thanks for sharing... I'm waiting to see it in motion!
-
the head on view (front view) shows that it's not narrow enough at the top and doesnt have the round corners associated with this vehicle. I hope you don't mind, but I had one more look at the movie to make sure I was seeing this right...
-
In Windows machines you can just hit Alt+Insert/PrntScrn buttons ( which copies an image of your screen to the clipboard) then just paste into a new document in a photo editor or paint program.