entity
-
Posts
895 -
Joined
-
Last visited
Content Type
Profiles
Forums
Events
Everything posted by entity
-
Thanks !!! I needed that. But I make much more use of the stamp tool in PS. But in this tutorial, I see why that can limit the choices on good skin tone. Overall, I like this method better than the one I was using. And I can't say enough about the great reference available at www.3d.sk. The texture maps are very highly detailed. Again, thanks.
-
Oops, you do have a reason to grumble... eek! I only have one character I WORKING on NOW. 13 more to go. Back to the grind. Check out my post in this WIP section under "ENCOURAGED!!!".
-
GREAT!!! It's a great walk cycle + your modeling skills defined what you designed! Looks smashing in toon render and wireframe. If it makes you feel better about how many characters you have to model, I've got to model 14, at my last count... I'd better get back to work! Your almost done creating your characters already? Love what your doing.. can't wait to see more. Is there a child you have to model, too? Haven't seen too many models of children... That'll be interesting.
-
OKay, I've been working on more rigging and now have the neck, wrists, hands done, but I got issues with my primary rig so I may change things in the base rig once again... but I did do some animation again to test the rigs. The results made me consider more changes to the rig because of some parts not responding the way I want them to. Mainly, the elbows point at a target controlled by the hand ancor/target. Everything else seems to be okay for animation, but I want more control over the elbows, so back to work . New animation (discr: jump backward, 3 sec, 640x480, 1.53 Mb, cinepak-avi) : Jump backward animation New updated project (Just the necessary parts: model + action; 1.81 Mb) : Project: KaractorKageB For this animation I worked a lot harder on using the tools AM gives us, so I tweeked a loooooot of movements in the timeline. It's so much eaisier to do it there rather than in the action window. You have to choose two views for the action window as opposed to using the time line, in which you just adjust one value and if you hold the "1" and/ or "2" keys you can shift the values without screwing things up. I love the fact that the timeline is intuitive. Depending on whether you want to add a point to the curve or move a group or another point. A:M has an EXCELLENT INTERFACE!! I've decided on a workflow: Block out Pelvis, Hand and Feet placement Elbow, Knee and Head then Shoulders and Hips and finaly, Fingers and Toes. Note: Of course the order would be based on the focus/object of the shot. Obviously, if it is a closeup of a character speaking, you won't be animating the feet, unless your character happens to be in front of a reflective object that the entire body shows up in, but that wouldn't be the case if your character happens to be a vampire. LOL Okay, I'll stop now. Thanks for your time. P.S.- Using v11a.
-
OKAY! That is it!! Now this is what I'm talking about! You know, after you release this animation to the public we probably won't hear from you again..... because Pixar or Disney or sombody will have snapped you up!!!! That animation is at the top of PRO... you PRO!!!! I hope you remember us when it happens. It made me LOL, and I basically had seen it before... something about the squinting gaze, at the end there, that did it. BRAVO!!!!!!!!!!!
-
Great work!!! The EYES have it. It is so hard to bring eyes to life... you noticed that! It really felt like she is talking to more than the camera, but a group of more than one person (ie... "ankle bitters"). I don't think the head should move so much though... but that may be personal taste. I think it's good for certain key words but it takes away from the emphasis of those key words when the head moves all the time. It is very brilliant of you to tilt the head while she is "scolding". It does give the sense that she means business. Okay... I'll put my fine tooth comb away now. Overall though, I definately could not have done anything so great! thanks.
-
really. I didn't think it was that dense.... My computer had no trouble and isn't even sluggish when I was testing the whole thing--- strange. The only time I ever froze or crshed was when I deleted some patches, but that was because the patches were still part of some new groups- reminds me, I got tons of groups in the model to-- so that later when I need to texture and bone the fingers and other hard to get to places I can select/hide things more rapidly. 1.78 mb is a rather large A:M file. Sorry. I still have even more bones to add. The neck and the wrists/hands. AND it would be worth it only to control those models so dense with patches that smartskin would be out of the question. would it be easier to move the bones once or move all those cps several times for smartskin. For cartoon like or not so dense patchwork fanbones/ cogs is a better solution. I only intended to use this for the joints, but it seems to work on the torso and waist pretty good also. If you do have to move theses bones the easy way would be to move the group's bone called "sizer(X)". Most of the bones can be moved with that and then the others. But your right it's still a lot of work. But the end product is more worth it if you have a high density of patches in your model.
-
It'll hit you again, later. It took me a while (six weeks) to get past a some things. I don't suspect it's a remedial problem. You probably have to be a bone/constraint type of person to really see it at first glance. Think of the possiblities. Drop this rig on another character and reposition the bones (not so easy though) then just right click in modeling window/ bones mode and assign wieghts --( have to fix the falloffs where the legs are close together ) -- and you have less smartskin headache. (I wonder if that would be less work than smartskinning) Of course if you added some smartskin in a few places it would increase the bends smoothness more, but I was not looking forward to that! I was looking for an easier/more efficient route. This is what happens when you think about things too hard.
-
Thanks a LOT!!! That would do the trick. I created the rig when I had version 8.5 and this was before the big "naming convention" call so that all rigs could be used with any action in A:M. I wish I had named them correctly the first time. I tried to add the secondary rig to the Anzovin rig(2001+), but some of the parts didn't work with the rig, and I don't understand enough about the rig to "add" a whole new bone setup. If it worked with that rig---- it would've been revolutionary! So I ended up using an old rig I made, because the constraints were already there and it is easier for ME to navigate the structure.
-
EXCELLENT!!!!!!! BRAVOOOOOOOOOOO!!! Just a few things I noticed (I used to routy for a band). The guitar player could use his knee up on some of those longer "wow" parts. Good work on the piano player's feet--- you must have been in a band--- his foot pedal movments are RIGHT ON! Now, he does a double "stide along the keys" it sounds like he's using two hands there instead of just one. His elbowcould turn outward while he does a quick jump from high keys to lower keys to be correct. Overall, the singer just floats there. I can't FEEL her getting to into it. Maybe, have her "jerk" slightly a few times. It's because the other members have active hands that draw your eye and match the music... her part seems to be very placid and so she falls out of the picture, unoticed almost. The jerky movements would cause youe eye to look at her, but they should be well placed between the other member's movements, so there is no conflict in visual tension. Hope that helps... it's only advice... It ROCKS without any changes!!!!!
-
Hi, I've been rigging a character for about six weeks now and finally got the hard part done. I used NO smartskin or expressions with these bones, only the constraints. I started with a simple idea... create a control rig for the mesh, what I'm saying is create a rig that reacts to the primary rig (i.e. the bicep/forearm control the bones that deform the elbow.). The first problem was to build a rig that could be placed around the primary bones- just like it was a mesh, contouring the mesh. I had to do a test using a tube to figure out the position and constraints that would make the bones move in reaction to the main bones. Then turning on the bone falloff and tweaking it til I can get a nice overlap to the bone next to that one. *It's sortof like the distortion mode tool--> it's a cage around your character that moves the cps that this segment is closest to, and while doing that the cps farther away(outside that region) are affected less and less the farther out of that region they are.* Understand? well heres the animation link (480kb- .mpg): AnimationRigTest I also have the project file with the model and action in it. Sorry, no chor setup. I'm not a person experienced in tut making--it would be a LOOOOOOOOOOOOONG tut. So I offer the actual digs to you to play with so you can see the result.... there are only constraints and bones driving the mesh, most of it is reputicious.*Note: if you want to try for yourself you have to turn off "HideRigBones" relationship. If you want to see the entire secondary rig (it's really heavy in bones and hard to see individual bones) turn off "HideCages" relationship. Also you'll notice that there are on/off poses for each section of the limbs and torso... beware: I haven't fully riggied the forarms or the neck and head, yet. It is HERE (1.78 Mb- .prj): ProjectFile:KaractorKage Disclaimer: 1.) Use the rig anywhere you want-- but if you use the mesh, at least change the head or the face... after all, it's the main character of my story. 2.) Don't tell anyone you got it from me. 3.) If you encounter any problems- it's just a test! The rigging technic is the reason for me giving you the prj... it's easier than making a tut. 4.) It was created with A:M, version 11 beta10.
-
If you just put the images in the windows, won't they appear flat if seen from an angle? ....unless your doing a tracking shot, with windows facing the camera.
-
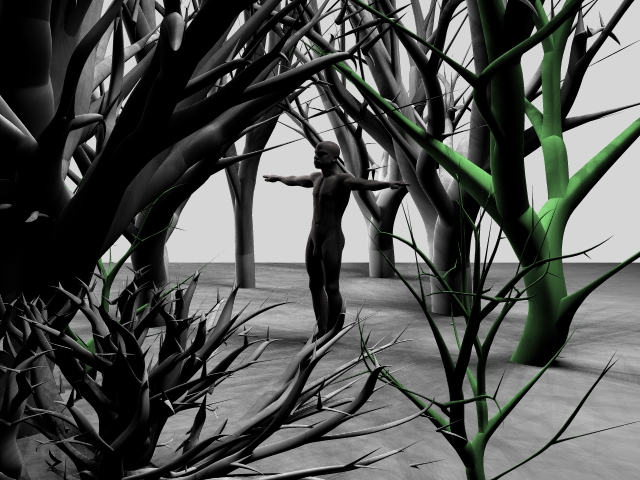
ThanxZ, ZPiDER! It's fast, simple to set up, it's so versatile,---no it's not the "set it and forget it" rotiserie thing-a-ma-bob! It's TreeeZ!!!!!!!!

-
The fish get stranger and creapier! Thanks for the scare, DarkLimit! They all have a personality that reads across, just looking at them you can tell what they might sound like, move like and smell like. Can fish smell?
-
Great!!! Looking good, but he still doesn't have a pelvis- but If that's the way you designed it to be that's alright, It's still good work to me!
-
Yeah, I get the idea.regular render with compositing the lines sound new to me. It sounds promising.... and you won't loose the 3d value that way. But your models seem to have a comic edge- so why not? It would suit your style, even though straight regular 3d shadow render also suits it. Just a thought.
-
WONDERFUL!, your really flowing with your work. You've gottn so much in a little time! I like your style. Is everything going to be toon in the final movie? Isn't it funny that no matter how much some one does the same subject matter-- in AM-- your style shows through. How we draw concepts... and it actually turns out looking like our style. I think AM is FOR artists.
-
The Torso looks great, I like the stylization of the arms and hands, but what happened to his pelvis. What I mean is if he is supposed to have a pelvis and it is up under the shirt- there is no indication. If this character is going to be a human- he needs a torso- and if it is going to be under the shirt indicate a pelvis by making ridges in the shirt or something to give the viewer a visual clue. The legs are good, but it's hard to see where they will bend... I know you are still in the process of modeling this one so maybe some very subtle or expressive wrinkles where the legs bend can help with that. It's just my opinion so it's up to you. Your character just needs some more dimension- after all we are working like with digital clay-- think of it like that, or maybe get some real clay and try it out there then try to do the same thing in the modeling window-( just to get used to the idea of modeling-- that's the way I did when I couldn't work something out in the modeling window, I would do it in the real world to SEE what it looks like) SEE= Select--Eliminate--Exagerate cartoon-like characters are more expressive the more you select a problem area and exagerate important charcter elements--eliminate unnessesary detail
-
You are being quite shy with specular on the skin, punch it up! Happy shinny people! A low intensity, high size specular map in those oily parts of the face will help. Tone the red down in her skin tone and increase the red in the base model color. The specular color of the base model should go towards blue more. Your modeling looks great! Richard