Tralfaz
-
Posts
899 -
Joined
-
Last visited
-
Days Won
1
Content Type
Profiles
Forums
Events
Everything posted by Tralfaz
-
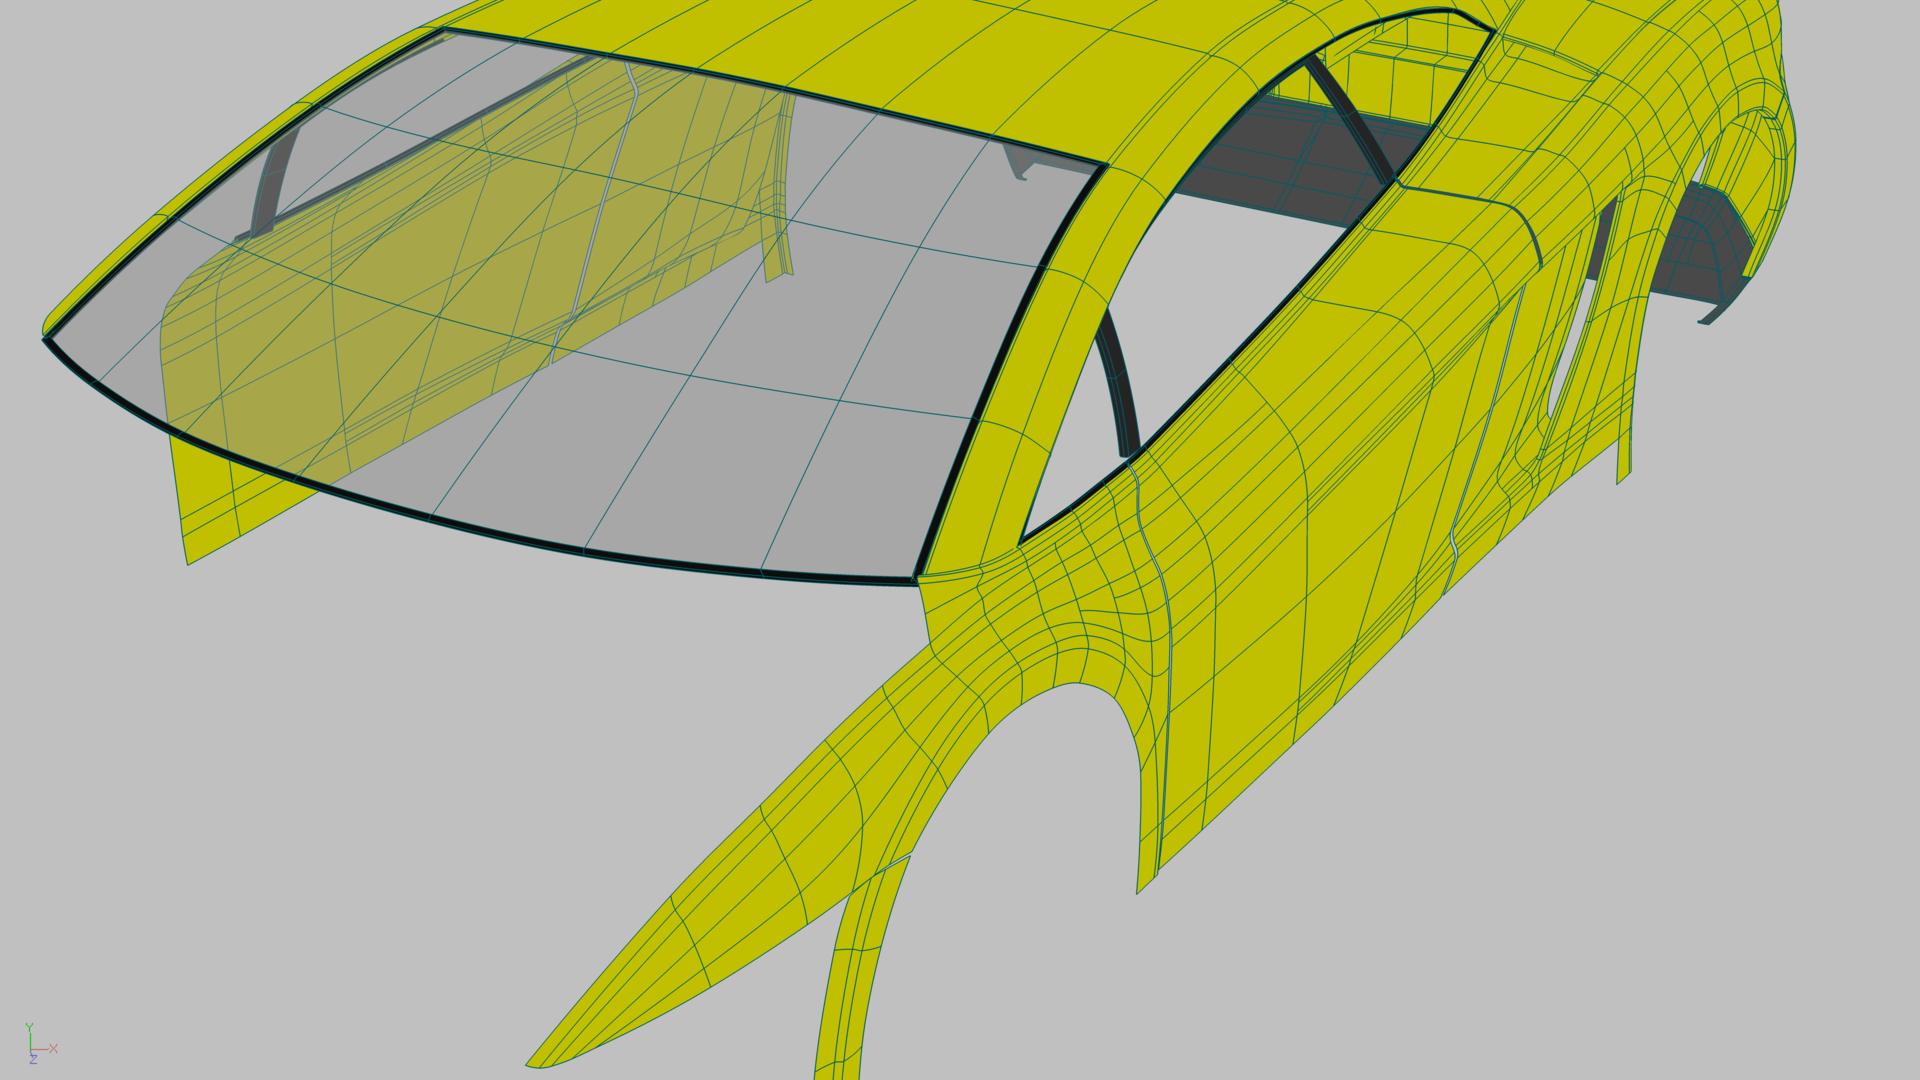
Thanks everyone! I wasn't able to find the 'Refind Normals' option. Do you right click on the Object in the Project Work Space or in the modelling window? I tried right clicking in the modelling window as well as individual groups in the PWS. Yes, I did remove the porcelain material before modelling again. The porcelain material is really good at identifying the problem areas with normals. Actually, I am using multipass in the renders that I post here (except for the first couple). I am usually rendering at 5 x 5 (25) passes. As I write this, I have a larger 1920 x 1080 - 25 pass render going at home (takes around 5 -6 hours). Will post this when I get home tonight. You're on! Lamborghini vs Saleen. That would be a great race to see, or better yet, drive in! I found your Saleen in the WIP threads and have read through it. Great looking car and model you did there Eric. Al
-
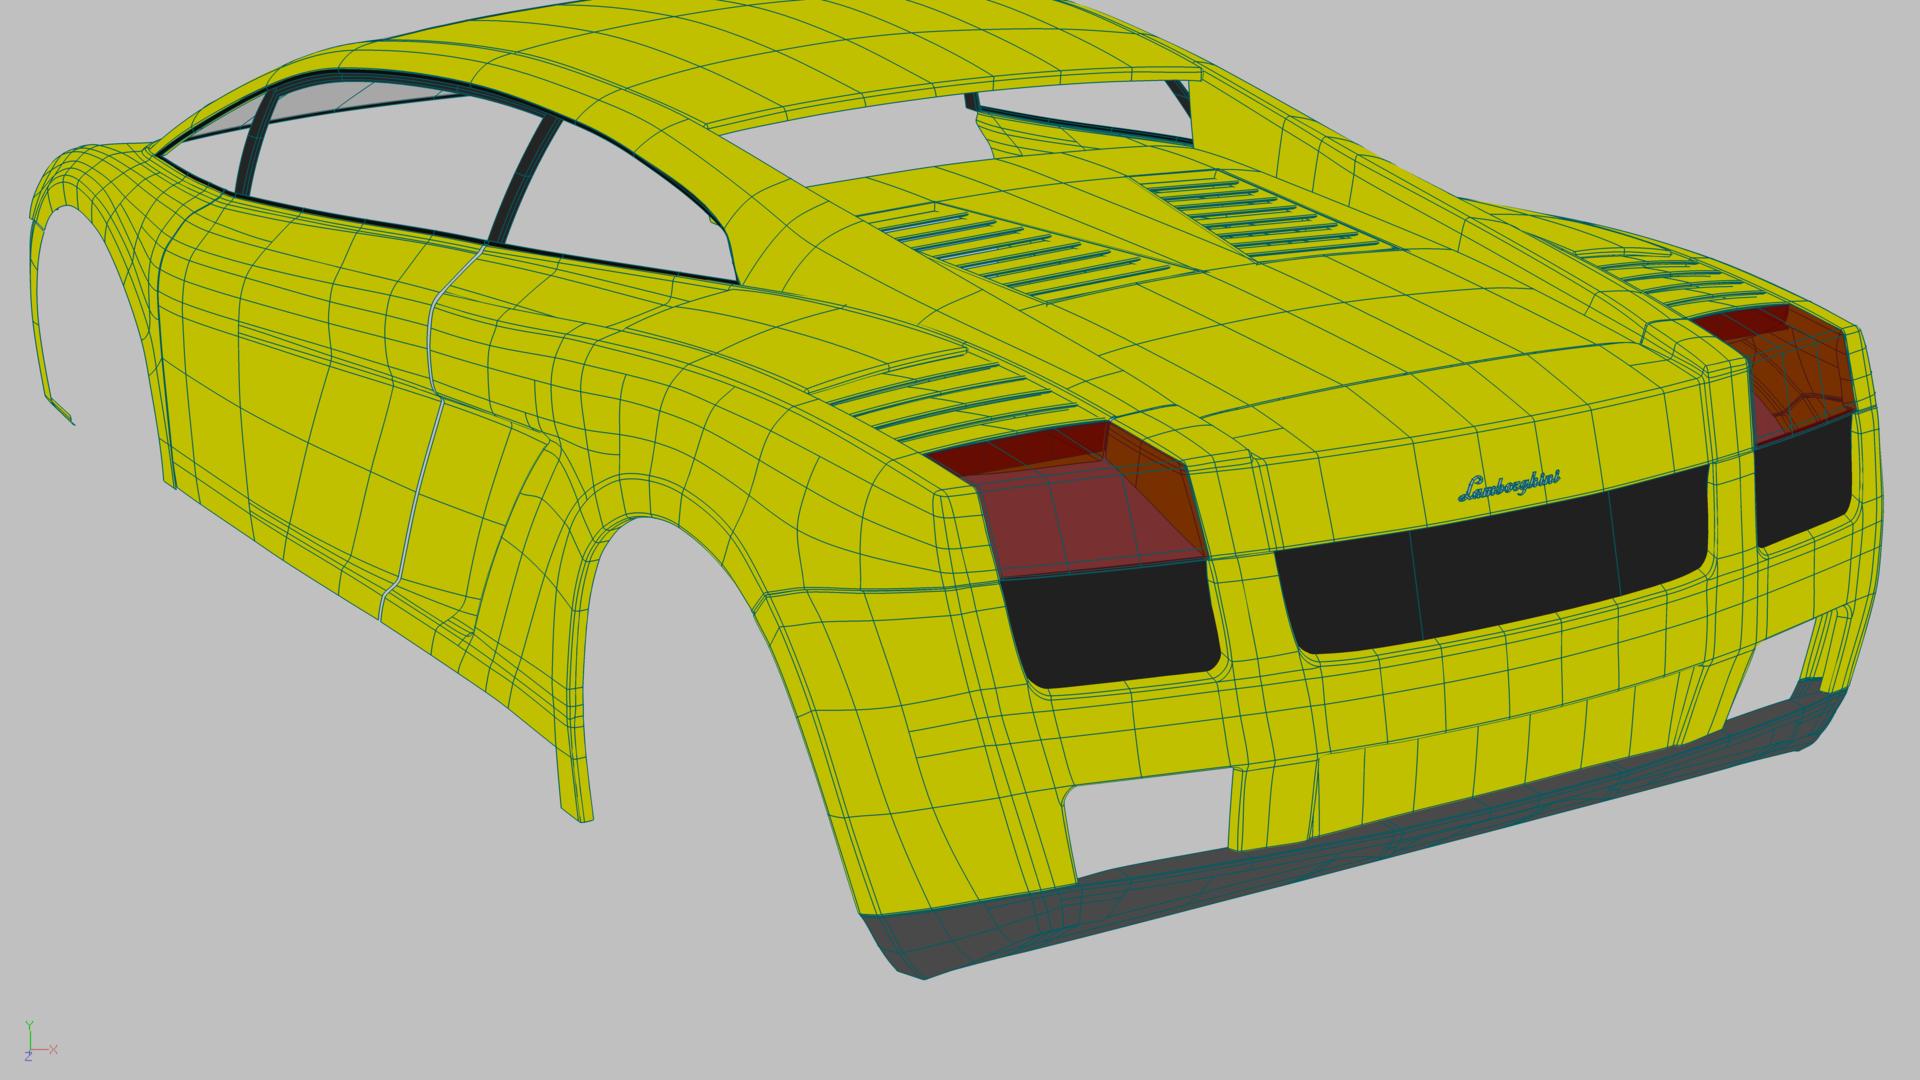
Thanks Mike and Eric for your tips on Normals. Sure enough, I had so many normals that were reversed, it wasn't funny. There should be a button you click on and have all the normals face the same direction. Then, if they were facing the wrong way, you could flip all the normals at once. Anyway, I fixed all the normals, applied the Porcelain material to the yellow body group and rendered out the car. The results are shown below. Just out of curiosity, what causes normals to go in different directions while modelling? Thanks... Al

-
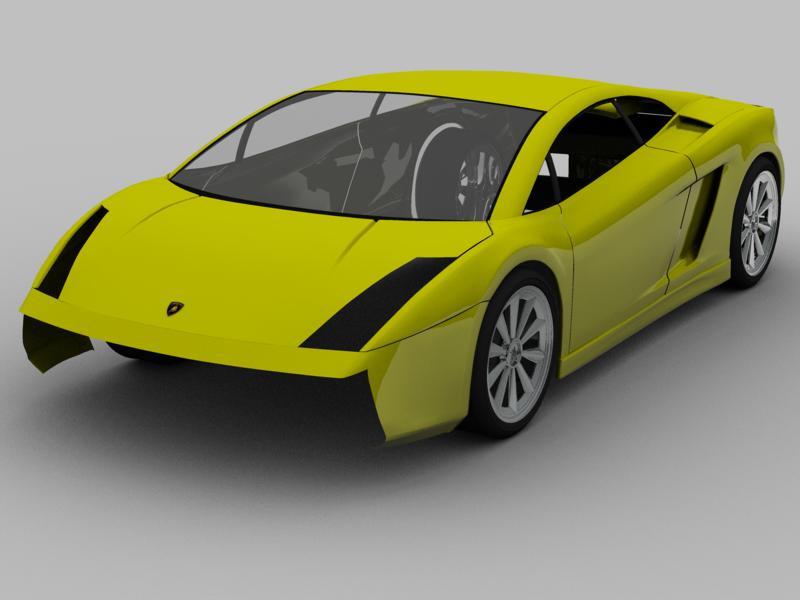
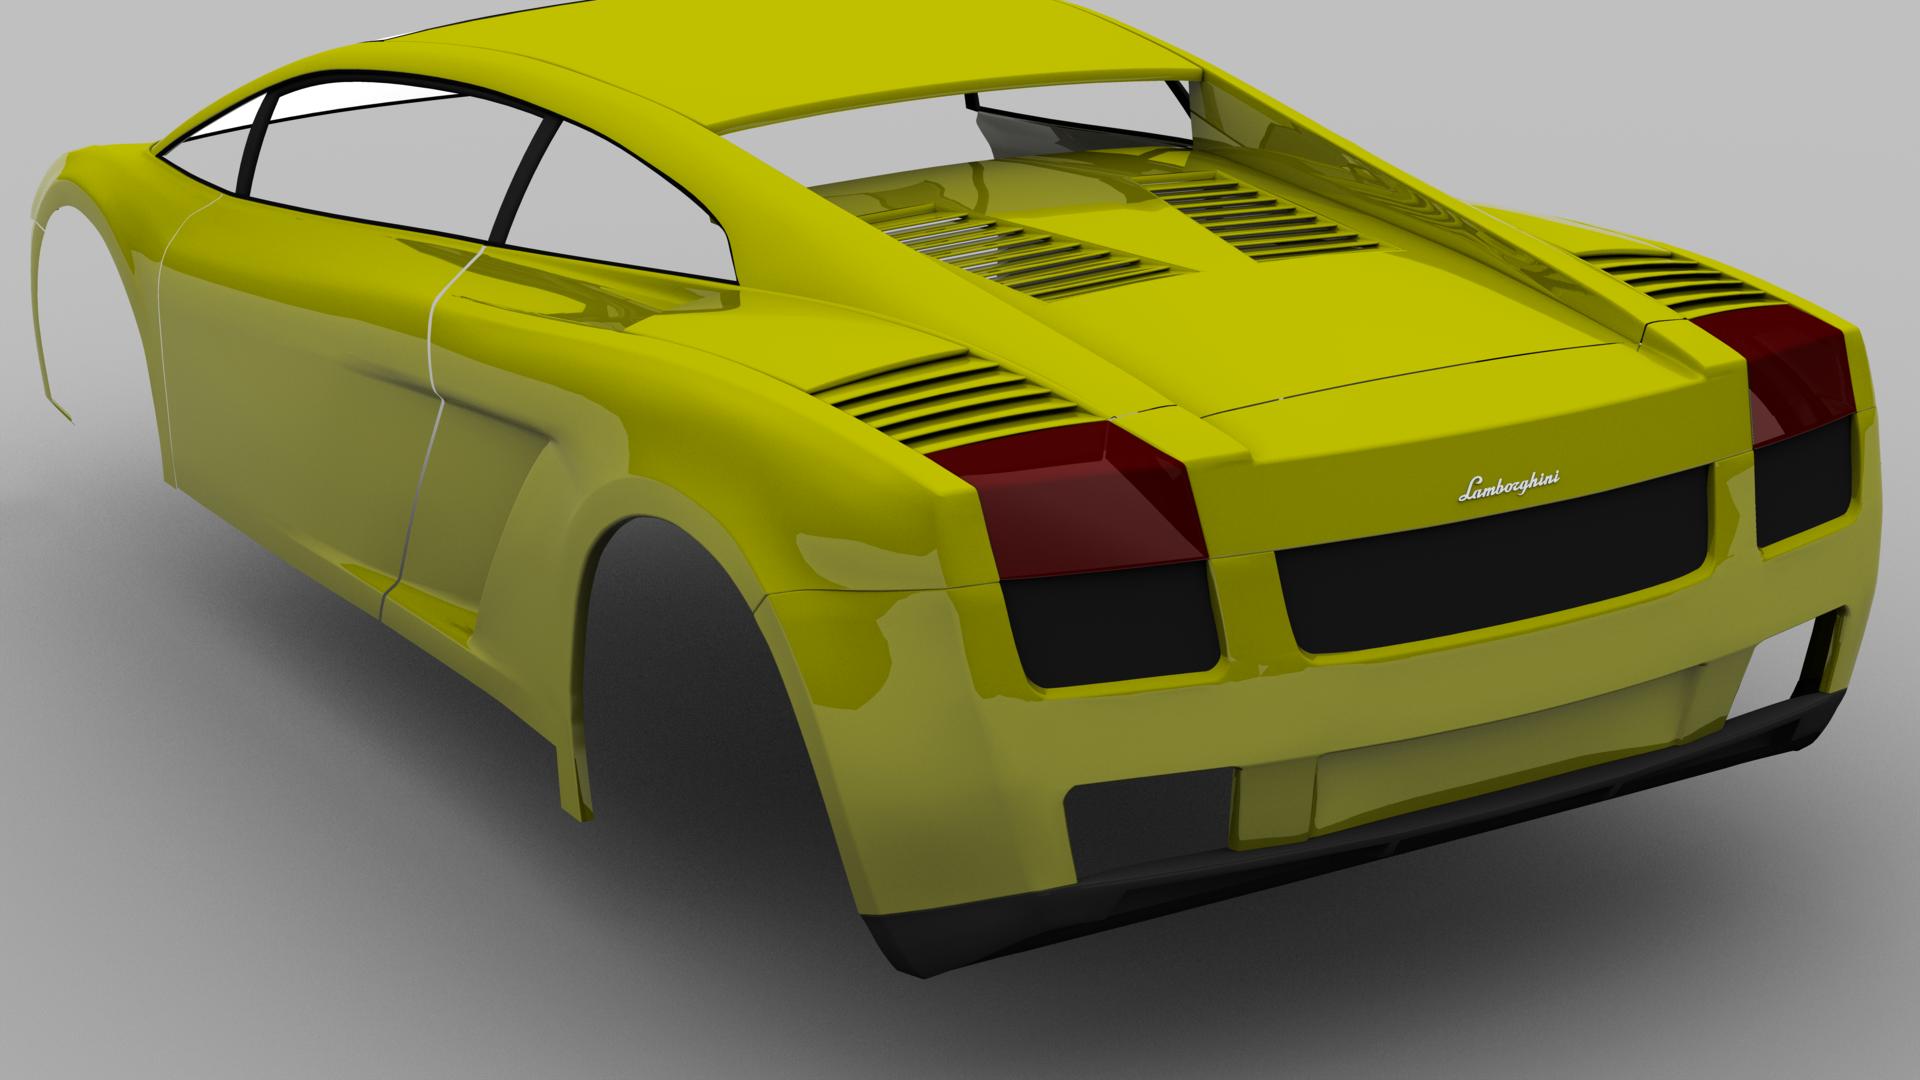
Hi Eric: I tried using Porcelain on the model, and when I rendered it, I started getting black areas showing up in the yellow body. Anyway, I removed the Procelain and wen't back to the way it was. I have been working on the front of the car now. Also added some quick and dirty tires and rims (not the final rims and tires). Now that the body is coming together, I wanted to see what it would look like with wheels. C&C always welcome... Al
-
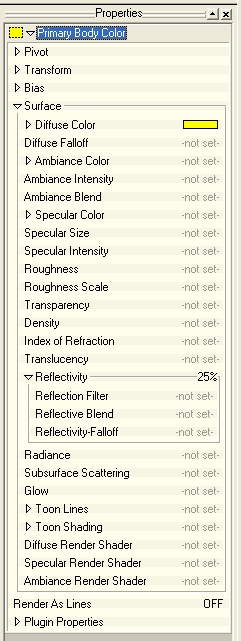
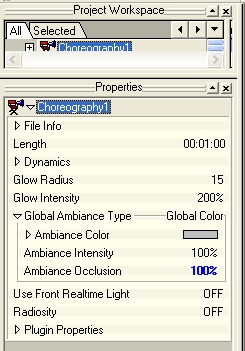
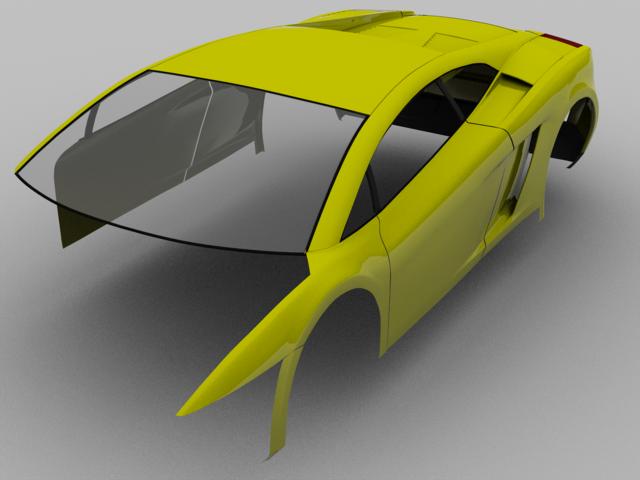
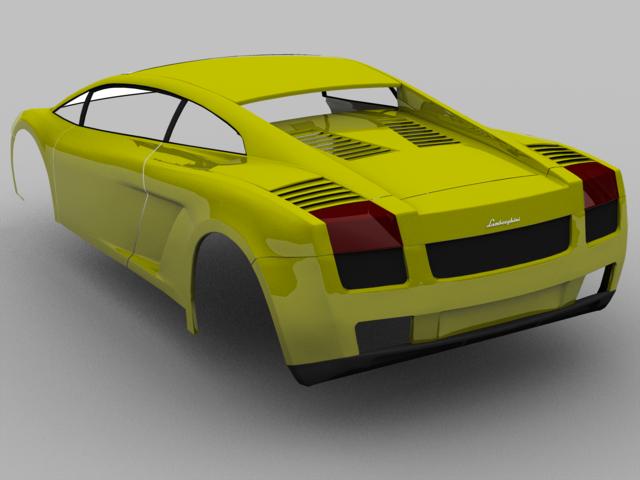
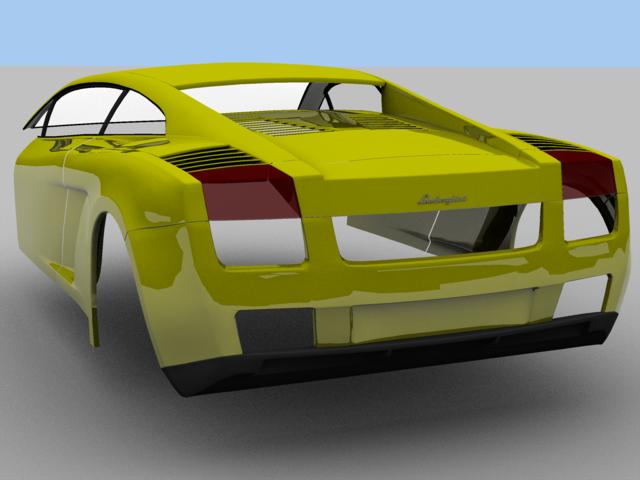
Hi Eric: No, I am not using Porcelain, not even sure what it is or how to use it. I think I read once that it helps with smoothing out the surface, but not sure. My son wanted to see what a high resolution render would look like, so I did these three renders overnight (around 5 hours for each render). They were done at 1920 x 1080 and 25 passes. I am also including a shaded wireframe of each render as well (they took only a few minutes each). I am glad I did the high-res renders as it has shown up some areas that still require more work. As for the body color, nothing fancy was done as is shown in the image below. As for the rendering part, I had found a thread on this forum (I think I was looking for clay renders), that indicated: All lights in the Choreography should be turned off In the Choreography properties, set Global Ambiance Type to 'Global Color' Set Ambience Intensity to 100% Set Ambience Occlusion to 100% In the Render File settings, I set things up as shown below. Hope this helps... Al
-
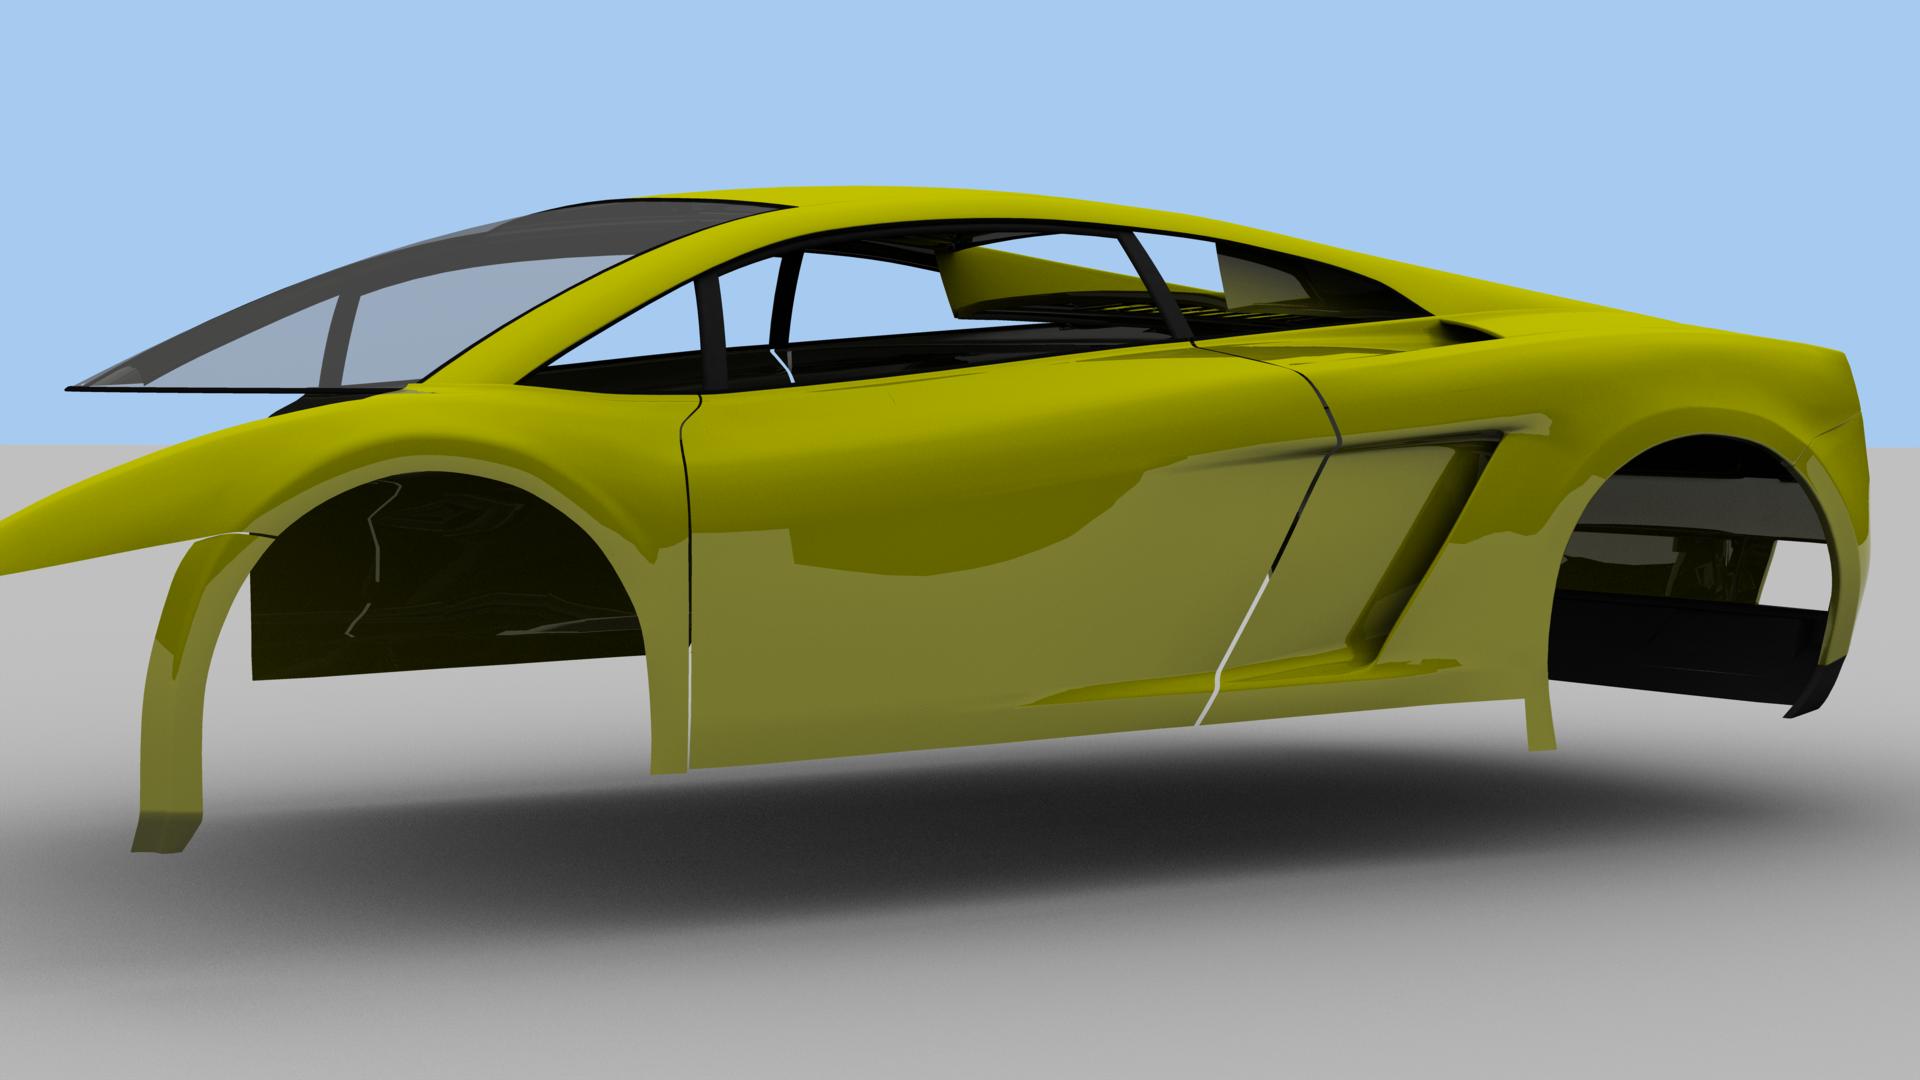
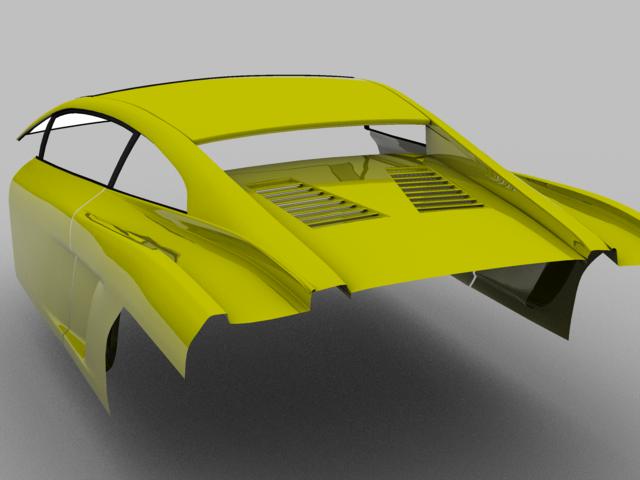
Latest update. Started working on the front end. C&C always welcome... Al
-
It sure would be cool! But I dont think I have the time to do such a project So, I guess making a Transformer out of the bulldozer (like your Mustang) is out of the question.... Al
-
I am sure this has been asked a million times, but how do you make chrome look like chrome? Thanks... Al
-
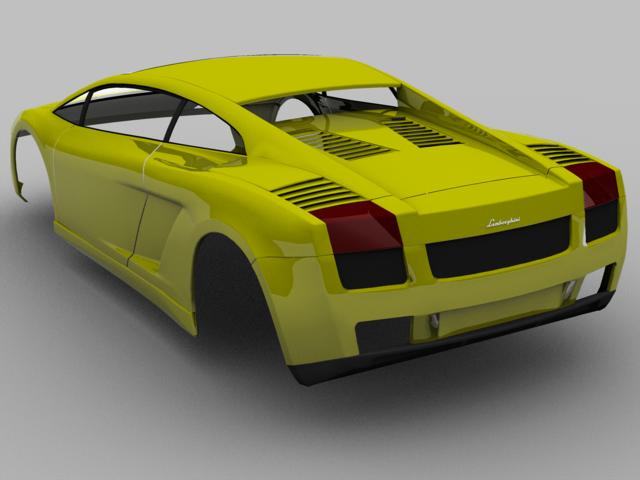
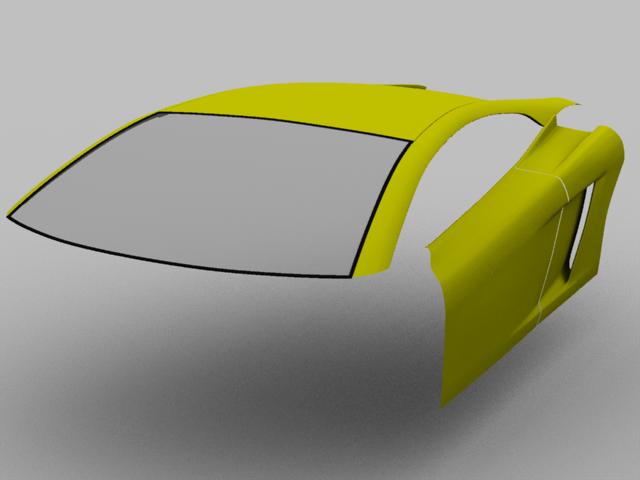
Here is a wire frame showing the completed quarter panel... ... and another quick update, this time with the rear valance and Lamborghini script. Thanks.... Al
-
Thanks for the tips Xtaz. What I ended up doing was modelling the quarter panel without the wheel well in an attempt to get the profile as correct and smooth as I could. Then I modelled the wheel well separately, keeping in mind where the splines for the quarter panel were. Once the wheel well was how I wanted it, I integrated it into the quarter panel. Any unneeded splines from the quarter panel were then removed. Only minor tweaking was needed after that. Reminds me of something I learned in my computer programming courses.... "Divide and Conquer". Break large projects down into many smaller ones and integrate as you go. Another update... Al
-
Great attention to detail Stian. When I look at your model against the real thing, the old Memorex commercial comes to mind... "Is it live or is it Memorex?" It is getting harder to tell the difference with each posting. Al
-
Another quick update, more work completed on the rear end. Al
-
I agree about the Saleen Eric. Very nice indeed and would love to see a finished render of it. Quick update. Worked on the rear engine cover today. The profile of the rear quarter still isn't right though, will have to work on that. Al
-
Holy crap! That is one sweet model Stian. The tracks look nicely weathered and your attention to detail is amazing. Would love to see a wire when you get the chance. Al
-
Thanks everyone for you tips and suggestions (both modelling and health ). Decided to back to square one on the rear quarter panel (will leave the wheel wells until later). Also worked on the drivers door. Al
-
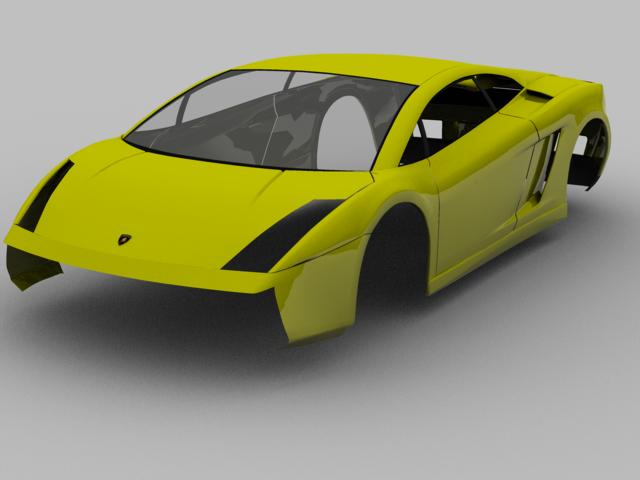
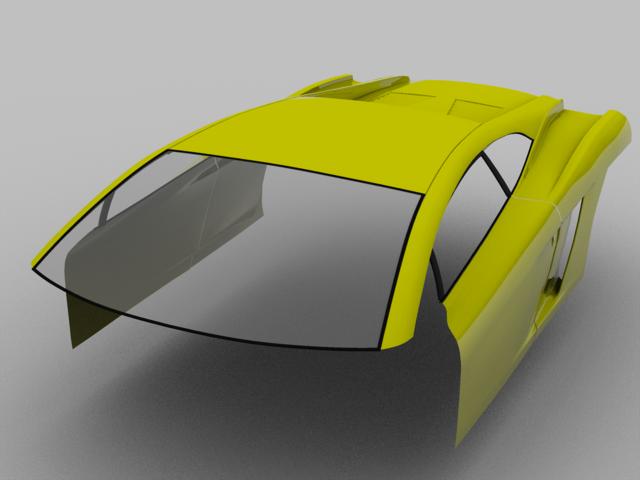
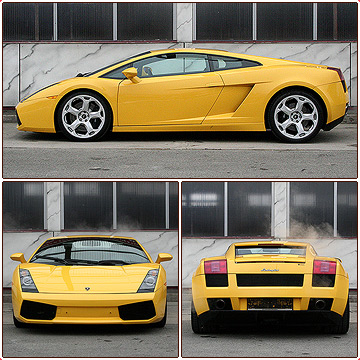
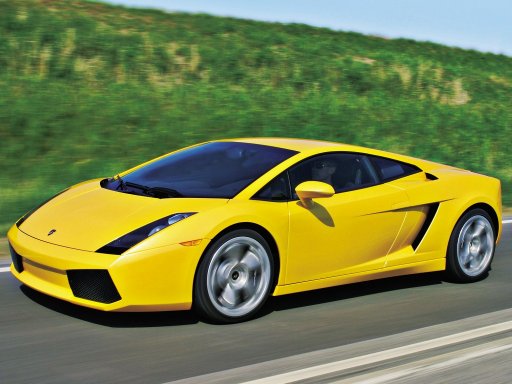
I've been off work the past couple of days with a nasty cold, so thought I would occupy my time with a bit of modelling. Started working on a Lamborghini Gallardo. Not the fastest modeller, but slowly getting there. Having a bit of trouble figuring out how to model the wheel wells without using 5 point patches at the corners (shown in red). Below is a wire frame showing what I have done so far and if anyone has any suggestions, they would be very appreciated. When I complete a 5 point patch at the wheel well, I get severe pinching, which doesn't look all that good on a smooth car body. And at some point, I hope the model will look like the images below. C&C always welcome... Al
-
Hi Stian: Looking good so far. Love the way you model and render. My guess is a steam shovel of some type, similar to the one shown below. Thanks... Al
-
Looks great once again Stian. I think what looks wrong here is the 9 ball should be a striped ball and looks like a solid color ball. Al
-
This seems to change from week to week. A while ago, I read on the CNN website where HD was going to win because the Porn industry was backing it and was going release their videos on HD only. Apparently, that is what mainly caused VHS to win out over Beta (that and Sony was keeping Beta proprietary, unlike JVC which pretty much handed out VHS licenses). My son said Blue-Ray is going to win because it comes in the PS3. Me? I am just going to wait and see. I have a Toshiba DVD player that upscales to 1080P and regular DVDs look great on our Toshiba 26" LCD TV. Actually, so do DivX videos. Al
-
Everything is looking fantastic! The ship looks great on the water as well. After watching TWO, your Trek and this project progress as well as others, Hollywood better watch out, cause A:M is coming on strong! I am curious as to how you did the water and if it is animatable (hmmm, is that a word)? Looking forward to seeing more... Al
-
Great job on this model. Glad to see you kept up with it... Al
-
Also, if you could also upload a reference photo, that would help as well. What you have looks okay so far. Al
-
Hey Stian, the crash looks pretty good. My wife and I are watching are watching season 1 of Lost. It was a Christmas gift and neither of had seen Lost before. In episode 19 (which we just finished watching), Locke has a dream in which Beechcraft aircraft crashes on the island. Below are a few screen grabs from the episode. Your crash is just as good if not better than the one in Lost. If I had any crits, it would be that the nose seems to dip just before impact where a pilot might try to raise the nose to help prevent digging into the ground. Also, some more ground damage would help sell the crash. The lighting and blending of the two elements looks fantastic. Excellent work and look forward to seeing more. Al
-
Not sure if this is what you are looking for, but check out this thread. Al
-
To learn how to create bevelled edges, try looking at Yves Poissant's Tutorials. As for the extra details, they can really help in selling the scale of your spaceship. As Paul mentioned, the Millenium Falcon (or any of the Star Wars ships) is a great example of detailing. There are a lot of good websites that have photos and blueprints of existing real and sci-fi spaceships. You could try modelling an existing ship first to develop your skills. Al
-
LOL! I knew the background was a photograph! You are right about integrating the two things together. Definately an art form, and Stian is truly an artist. Al