-
Posts
1,410 -
Joined
-
Last visited
Content Type
Profiles
Forums
Events
Everything posted by MattWBradbury
-

Woloshyniuk and dark jedi's project
MattWBradbury replied to Woloshyniuk's topic in Work In Progress / Sweatbox
You might want to set your lights to cast more than 1 ray. You could easily count the number of lights based off of the visible shadows. -

Woloshyniuk and dark jedi's project
MattWBradbury replied to Woloshyniuk's topic in Work In Progress / Sweatbox
Bascially you want to strip your model down to the bare bones so you get what the model would look like far away. This is so that you don't end up with a 100k polygon model when you rebuild the model. Once you've done that, use the ERebuild plug-in used for newton physics (I believe it's on SGross's plugin site, but I can't find the link at this moment) to create your model in chunks. Set the mode's plugin properties to use in Newton Simulations, set the simulation type to Dynamic Explode, go down to the bottom of the list and set an explosion veloctiy, and then set to use calculated COM. Go into your chore and find the time you want it to explode, set that time in the chore's newton settings, and then simulate the newton physics. Tweak the explosion until you get something you like. Once you've got the exploding model down, you'll want to put in the explosion particles. They can be fond on the A:M CD. Simply import the material and drop it onto a standard sphere model (make sure the model is 100% transparent). Throw it in the choreography where the center of the explosion was set, and let fly. Make sure that you have Draw Sprites turned on in the rendering options window. Adjust the starting time of the particle emitter to 1 frame after the exploding model is set to the explode. Adjust the initial velocity until it matches that of the exploding model. Make sure to turn drag to 0% (because there is no drag in space). Soon after the first explosion particles start coming out, you're going to want to turn the emission rate down to 0%. In mine, the emission rate went to zero around frame 10. This quick tut is kinda crappy, but I'm rushing it because it is Easter after all. -

Woloshyniuk and dark jedi's project
MattWBradbury replied to Woloshyniuk's topic in Work In Progress / Sweatbox
That all was A:M. Don't you see the x,y,z axis in the bottom right? -

Woloshyniuk and dark jedi's project
MattWBradbury replied to Woloshyniuk's topic in Work In Progress / Sweatbox
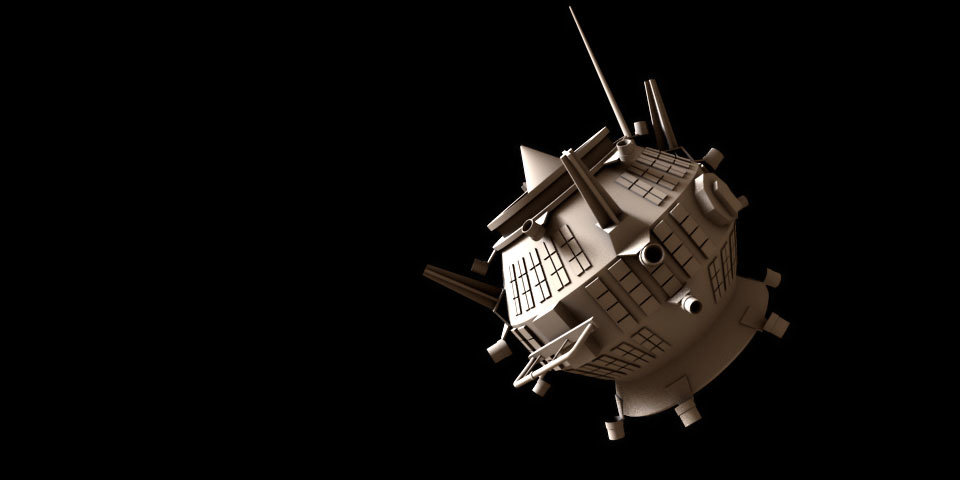
The explosion particle sprites are the ones from the A:M CD. I build a proxy model of the satilite and then used ERebuild with force extrusion and it made the entire model in lots of chunks. I gave it a dynamic explode newton physics tag and gave it some rotations and initial velocity. I think it came out quite well. -

Woloshyniuk and dark jedi's project
MattWBradbury replied to Woloshyniuk's topic in Work In Progress / Sweatbox
I hope to see some ships explode. I used the rebuild plug-in and it blew my satilite up quite nicely. [animation removed] ----- Sorry about that last animation. The size was huge and went really fast. This new one looks a lot better and is only 100 kb. explosion.mov -

Woloshyniuk and dark jedi's project
MattWBradbury replied to Woloshyniuk's topic in Work In Progress / Sweatbox
Here's what I was talking about before when I mentioned Yves's skylights. Basically, it's just using AO and a sun light, and you can see all of the details. I made the model quickly so I could just show you what I was refering to. -

Woloshyniuk and dark jedi's project
MattWBradbury replied to Woloshyniuk's topic in Work In Progress / Sweatbox
I never mentioned depth of field, but if you want to use it in your scenes, just know that any space stations or stars will be very blury. -

Woloshyniuk and dark jedi's project
MattWBradbury replied to Woloshyniuk's topic in Work In Progress / Sweatbox
About showing off the details of the ship: I would suggest using something like two of Yves's 8 sky lights at a low intensity in an entire sphere around your scene and then having one main light. The main light should always be shinning downwards, not upwards. I looked through quite a few space scenes in Star Wars and noticed that the bottoms of ships were never bleached in light. As far as giving depth, I would suggest using wider camera angles (shorter focal length). The greater foreshortening should give you the effect without adding fog. I didn't notice fog in any of the shots I observed. ------------------ Oh, I forgot to mention. That vent on the side of the ship, you can make a sprite emitter exhausting out some sort of gas. I think it would add a bit more realism to the ship. Those Red and Teal stripes along the side of the ship are really intense. You might want to darken and desaturate them a bit. -

Looking for an ancient model that was included in A:M
MattWBradbury replied to Vance's topic in Characters
There are newer female models, even with IK. Just take off their hair and make their skin 100% reflective. You should get roughly the same look. I remember making the standard male character 100% reflective and walking him through the 70's style house. It was awesome because before that, all I was dealing with was basic, basic CAD rendering which was basically 50% ambiance and shadows. -

Star Wars Characters WIP
MattWBradbury replied to LeeAnderson's topic in Work In Progress / Sweatbox
From what I can tell on this image, he's tail and his back is mostly green. Looking good. This is better than what I've seen in games. Even though the models might not be perfect, if you have a good story, it will work just fine. -

Star Wars Characters WIP
MattWBradbury replied to LeeAnderson's topic in Work In Progress / Sweatbox
Lee, Big Gizz needs a lot bigger hands. The first time I looked at him, I thought he had hooks for hands. -
Very nice!
-

STAR WARS: The Battle Of Mygeeto
MattWBradbury replied to Dark_Jedi's topic in Work In Progress / Sweatbox
Glad to hear it. -

STAR WARS: The Battle Of Mygeeto
MattWBradbury replied to Dark_Jedi's topic in Work In Progress / Sweatbox
LucasFilms doesn't really want serious fan films. They usually only want documentaries, mockumentaries, and parodies. The only serious Star Wars fan film that I've seen is Star Wars Revelations. Though I'm sure Lucas might turn a blind eye to smaller productions. -

STAR WARS: The Battle Of Mygeeto
MattWBradbury replied to Dark_Jedi's topic in Work In Progress / Sweatbox
Dark Jedi ran into copyright infringement and had to halt production. -
Yes, you can make bump maps in Photoshop. You can also make them in A:M by using depth maps or fog tricks. They are just black and white images. Check out this link to find out a bit more on normal maps, and the difference between them and bump maps.
-
I'm surprised that you can model this fantastically and have no experience with bump or normal maps. Basically they are maps which tell the light shader how to render a pixel on geometry. When made correctly, these maps can make a flat surface look very detailed. There are three main maps which do this: bump maps, normal maps, and displacement maps. All three have their own good uses. Bump maps are primarily for course surfaces like dirt, metal etchings, or cloth stitching. Normal maps are for details that should be a bit smoother like the armor components on your solider. Displacement maps are a little different in that they change the hight of the pixels on geometry. The surface will not be affected, but when you render, the map will make the surface appear to have been actually modeled. Bump maps and displacement maps are black and white hightmaps, while normal maps are colorful. They use different colors to give a greater amount of depth to details, but can be a less presice. You can use all of these maps ontop of eachother, and all on the same model. As far as materials, you are probably going to want to invest into Dark Tree. It would probably be your best choice for creating a fabric texture on the cloth parts of the model. It's great for a lot of textures, but you'll need someone with more experience to give you a description of how to use it.
-
For some of his gear, you can cut some patch count by using normal maps. Unless you'll be rendering images a foot away, I don't think it will be that noticeable. For folds you could use displacement mapping especially on the boots where you have them kind of doing some washboard geometry. I'm all for adding detail, but when it causes models to slow down to the point where it's a hassle to model, it's time to use some decals.
-
If you're going to use Radiosity, you will need a ceiling. Most rooms have a white cieling RGB(228, 226, 220). The colors are getting pretty dark, especially the floor. For your scene, you probably wont even need radiosity, because the changes wouldn't be that great. That's not to say there wouldn't be changes; they just wouldn't be as predominate as if you were using lighter colors.
-
Yeah, they are too stiff. Is the head motion supposed to be so slow? It seems too slow.
-
I'm pretty sure you could have made this in earlier versions. Try making the sprites go faster and give them glow so it's like some sort of futuristic energy storage unit.
-
Good start on the torso. It looks a lot like a battle suit or some sort of light armor.
-
Kerning is the space between characters.
-
That is a nice blend. Does the software automatically move the camera, or does it measure it's distances and interpolate into smooth movement?


