Gerry
-
Posts
3,775 -
Joined
-
Last visited
-
Days Won
1
Content Type
Profiles
Forums
Events
Everything posted by Gerry
-
In the default Mac setup nothing is docked, it's just a set of loose windows. As I mentioned above, I *think* that if you're rendering, and hit Cmd-H to hide the app, only the rendering window is hidden, but if not rendering, Cmd-H hides the whole app, but I'm not at the Mac at the moment, so not 100% sure.
-
Cmd-H will minimize it to the dock, but depending on whether you're rendering, it may or may not hide all the various windows (timeline, pws, etc.). Then Cmd-tab will restore it.
-
Yeah, nice tommy gun! this whole project is looking pretty good.
-
Just as a general comment to add to what Robert said, your mesh should as much as possible be like a grid, with relatively uniform-sized, square patches. The only exception is where it needs to bend or deform around joints or in the facial area (around eyes and mouth, e.g.) but the grid will mainly get finer, not less regular. Of course there are exceptions, like 5- and 3-point patches, and hooks, mainly. But these should be used only for "problem" areas like attaching shoulders, the crotch area, and when modeling hands. This isn't a hard and fast rule, but it's a good one to follow if you're modeling simple, cartoony shapes. the problems you're encountering are pretty normal beginner things. As you get used to how splines work, how they attach, etc, you'll be surprised how quickly you overcome them. your model is already a good start!
-
Gene, have you done the "Waving the flag" exercise in TaoAM? That should help you understand the basic settings.
-
Hey knipple, post a screen shot of the cp attaching problem. That's a common problem you're having but hard to troubleshoot it verbally (for me anyway!).
-
Have a good one!
-
Glad it worked out. hang in there and hang out here!
-
Same here, Spleen. I seem to recall behavior like this years ago when I was just starting but can't recall the cause, but it *seems* like it had to do with CP's on top of each other where I thought there was just one.
-
Another path might be to put this model aside, start a new one and see if the problem persists.
-
Welcome to the forum, knipple! I second Mark's opinion about Mirror Mode. post your model so we can take a look.
-
Jason, this is a terrific start. I would say that if you're going to discuss the Library panel (and I agree with Robert, I'm not sure that's all that important) but if you are, I think you might also discuss mapping to the libraries in the options panel, and also explain clearly where in the app folder the libraries reside. I think my libraries are in maybe 2, 3, or 4 different version folders, but I don't use it anyway! I've often thought about organizing/customizing my libraries, but as yet it's not something I need to enable me to get my work done, so it goes undone. But if you're going to discuss, I think more detail would be called for.
-
Hey Tides, welcome to the forum. Stick around, the startup sometimes can get bumpy but that's what the forum is here for.
-
Steve, this is looking very nice!
-
Hi Maka, I'm glad it's working out. I didn't do anything different from Rob, just downloaded the .mdl file, put all the decals in a folder and loaded the model. I was working on a Mac but that shouldn't make a difference for this kind of thing. The images I posted are both Shift-Q screen renders. There are probably better/easier ways to achieve what you're doing here but as with all 3D work, you learn as you go. Just come back here with questions *before* you start tearing your hair out. That's the second secret to doing 3D. Also, I'm not familiar with baking the surface; heard of it but never done it. Just do whatever Robert tells you! Another thing to check, as was mentioned above, is to check your normals, though on this model they're fine. In the modeling window, hit Shift-1 and you'll see little yellow hairs pointing out from the center of each patch. These show the "outside" of the patch as opposed to the "inside". That can sometimes cause problems with decals showing up. EDIT: btw you can flip the normals by selecting the patch with the patch selection tool, right clicking and selecting "flip normals" from the contextual menu.
-
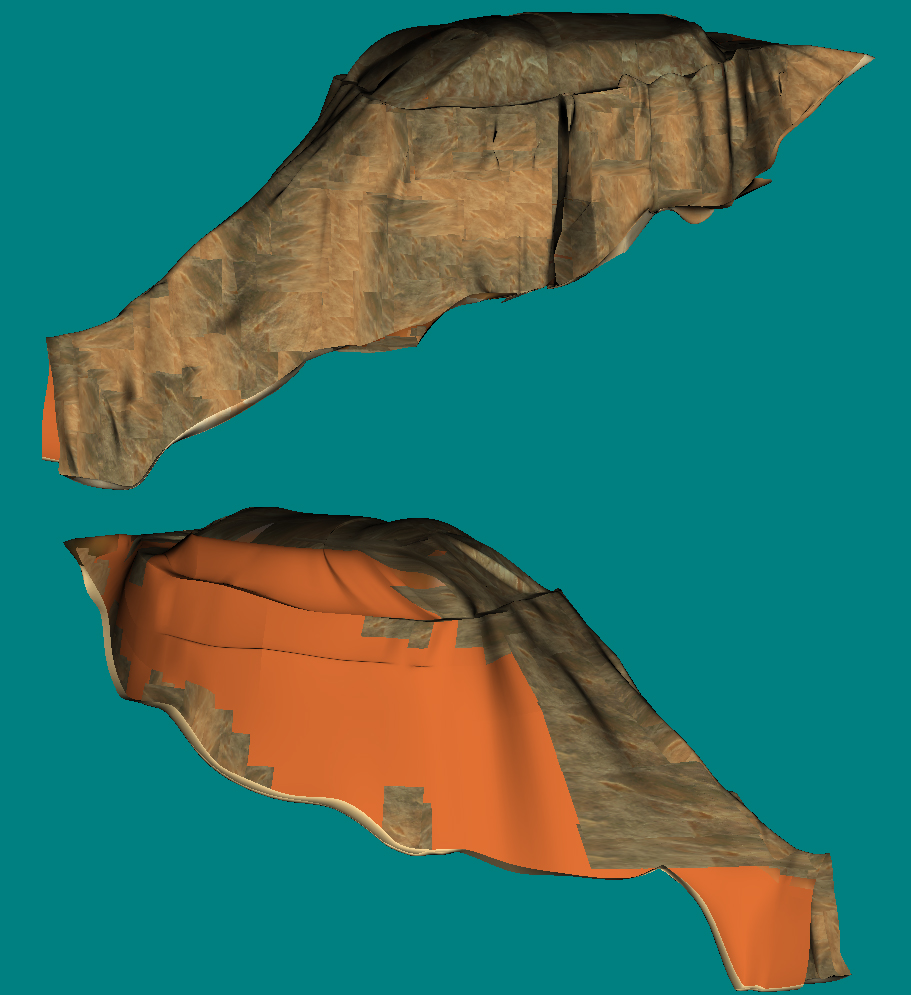
I got the front side to render okay, but lots of orange patches on the back. I was also missing a few decals from a "Hawaiian plants" directory and some bark textures I think. But the front side rendered just fine. Maka, does this line up with what you were seeing? I can't tell exactly what that earlier image you posted was.

-
I didn't download this Robert, but how are the normals?
-
I've got a pretty nice hair effect on the guy in my music video by modeling it as a solid, then doing a displacement map to indicate strands and texture. It's not perfect but it works for my project, and it can be refined ad infinitum. Also have a transparency map for the thin areas at the sideburns and nape. Likewise, not perfect but it's got potential for further development.
-
That was my first thought too. Seeing a render would help though.