Julian
-
Posts
779 -
Joined
-
Last visited
Content Type
Profiles
Forums
Events
Everything posted by Julian
-
So you think I should give up on including a sample project? Because I'm using 80 megs of texture files and I don't think it'd be worthwhile to ask people to download all of them. And what I really want to demonstrate are common mistakes that can be made when using Planet Glow -- like setting the transparency too high, or not using 100% shadow darkness, or the planet casting a sharp-edged shadow -- and how to work around them. I suppose the tutorial could be in two parts, first using the sample project and then giving a full explanation of all the techniques that went into the image. At the top of the page, there should be an "Upload File" button and an "Admin Mode" button (it'll say "User Mode" if you're already in Admin Mode.) Admin Mode is for creating and modifying galleries.
-
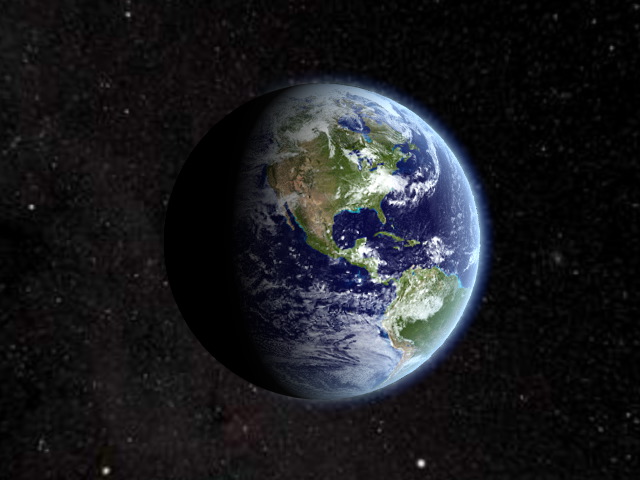
Well, now I've got a decision to make. Along with the tutorial, I was planning to include a sample project so that people can follow along with the steps. I want to make the project as simple as possible, so that anything that isn't relevant to using Planet Glow would be left out. That means I wouldn't want to include the star sphere, because I have enough difficulty explaining how to use it as it is. To minimize the size of the file I'm attaching to the tutorial posts, I also want to make the texture map files as small as possible. I can use the Earth as the example, but it isn't going to have bump mapping or the extra layer of geometry for the city lights, and the cloud and the surface color will be baked into the same texture. There's a low-res star map I can use as a backdrop, but it has a lot of JPEG artifacts. What I'd end up with is a tutorial with this as the image: I dunno, does that look okay to you? I want to have some kind of backdrop instead of a plain black background, because it would help illustrate the use of transparency with Planet Glow. I should also point out that the blue haze that covers the edge of the Earth is an edge threshold gradient material. This means that the technique I'll be demonstrating uses a projection map instead of a decal to apply the surface texture. It's my understanding that a lot of people who render planets want to use a decaled texture, but I can't apply a gradient material over a decaled surface because decals always override materials. With a projection map, you can't get a realtime display of the texture, so you don't know what part of the map you're looking at until you render it. Now, I've tried adding an extra transparent sphere over a decaled surface, with the gradient applied to that sphere, but that slows down the render a lot for some reason.

-
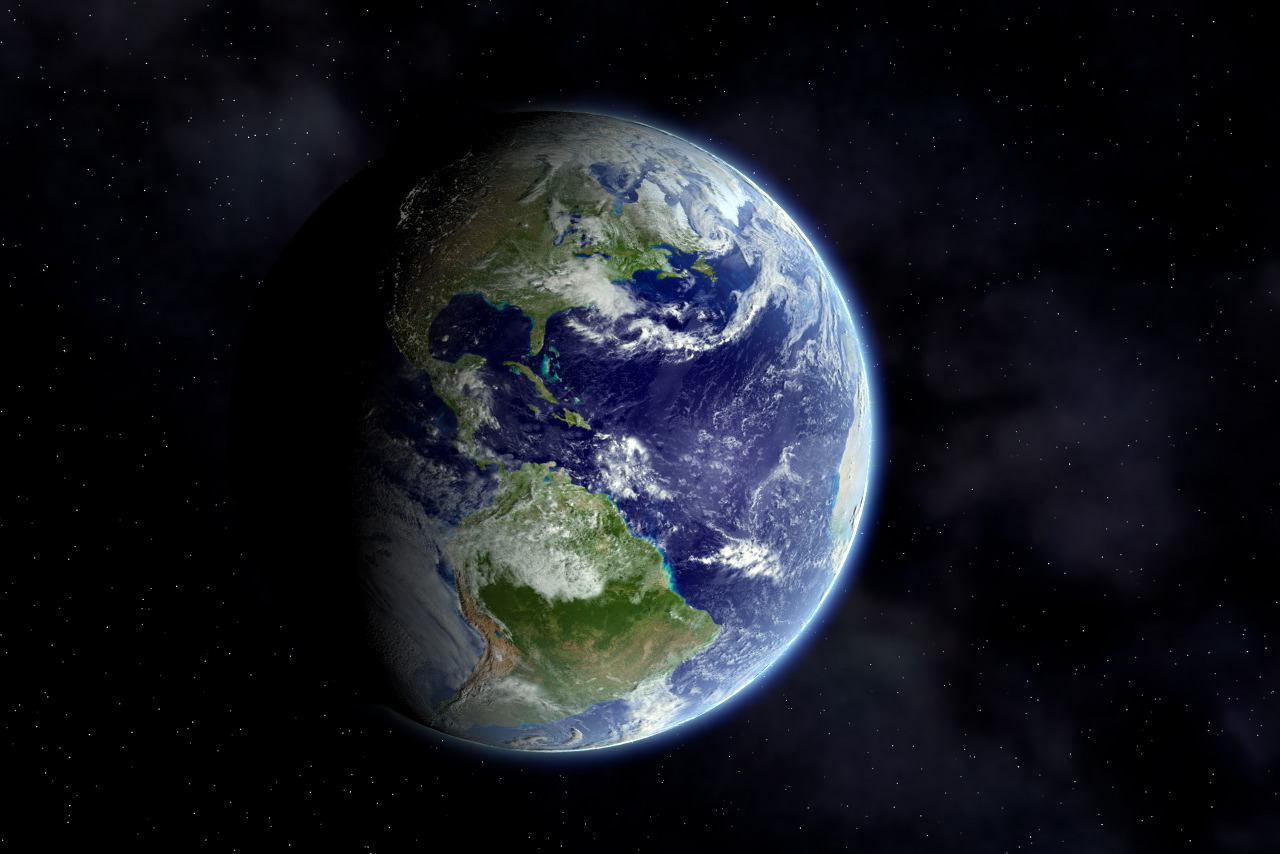
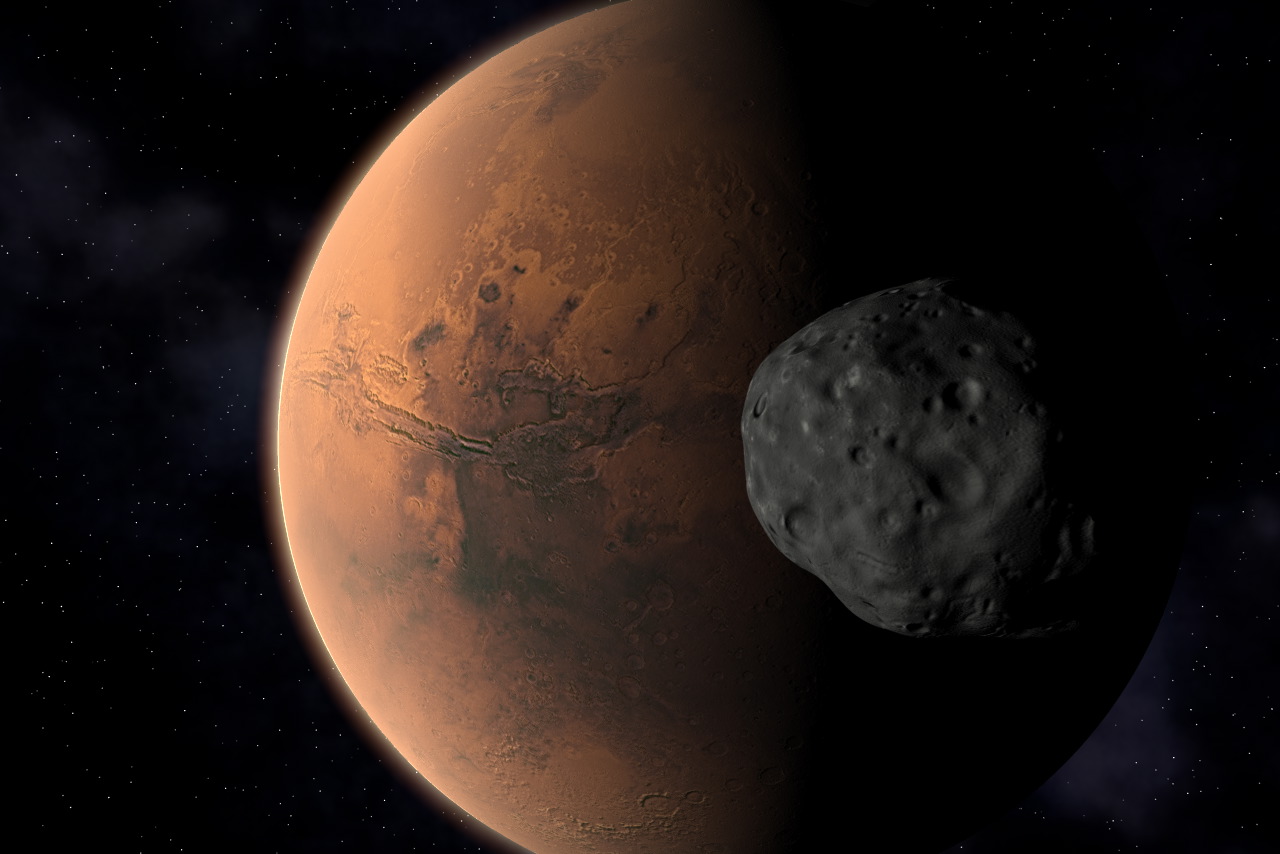
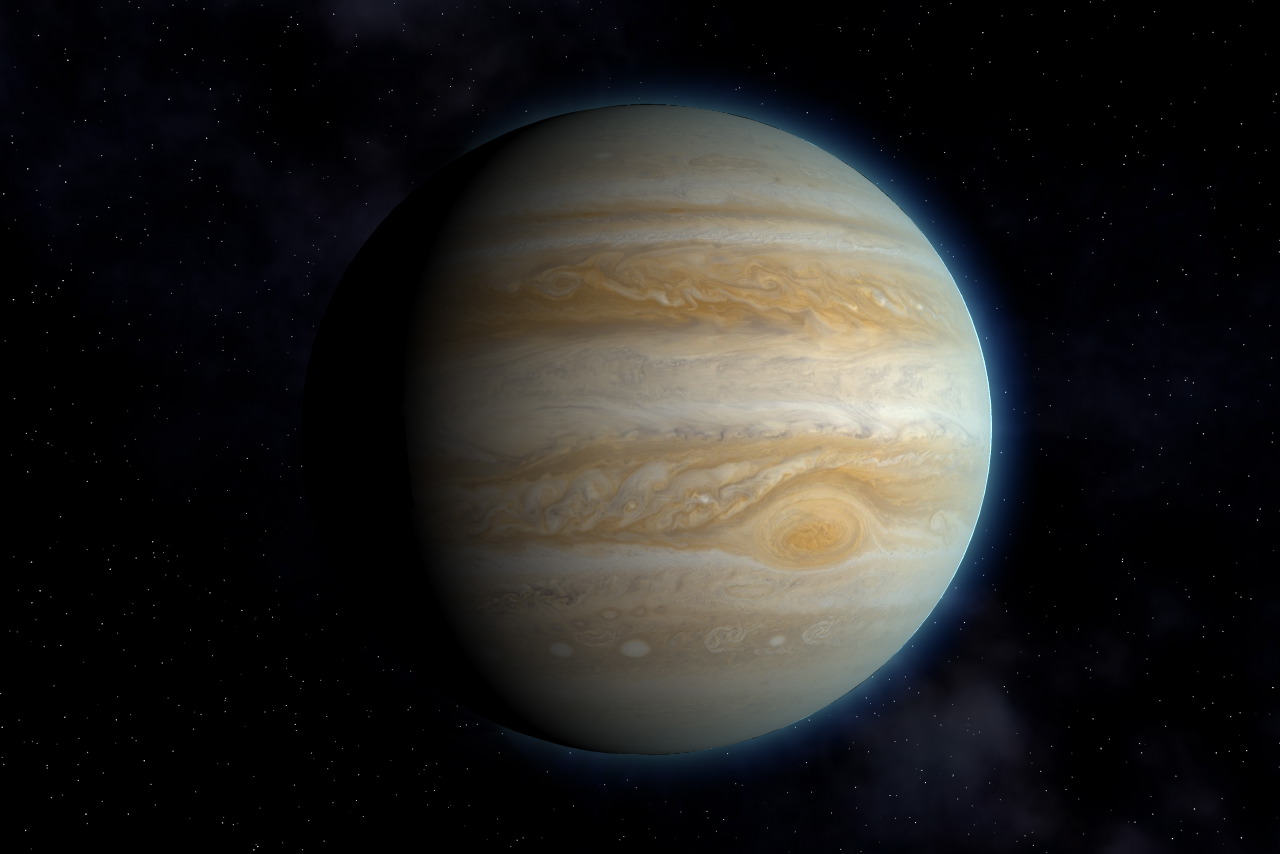
I've just created a new gallery of astronomical art on A:M Stills with renderings of all EIGHT planets. (I've been working on these for the last few years, before the whole Pluto debate got started. I didn't include Pluto because any textures would be fictional until New Horizons arrives there in nine years' time.) Since I'm not trying to make a scale model of the Solar System, each planet and its system of satellites is a separate choreography modeled at a scale of 1/1 million (1 meter = 1000 kilometers). Here are some samples: I'm putting these renders up now because I've recently figured out some methods for using the Planet Glow shader effectively. Searching through old forum posts, I haven't seen much discussion about Planet Glow, there doesn't seem to be any documentation about it, and I don't recall seeing anybody using it in the last few image contests. If there's any interest, I could post some text tutorials to the Tutorials forum when I have time. In the future, I'm planning to add renderings of the Earth's Moon (I had some, but I'm redoing them with higher-res textures), and eleven of the moons of Saturn.
-
Charon qualifies as a co-dwarf planet with Pluto, because Charon and Pluto orbit around a common barycenter which lies above Pluto's surface. "Clearing a planet's neighborhood" in this context refers to clearing all the other objects in the debris ring within the early solar system that condensed to form that planet. The Trojan asteroids don't apply because they were probably captured later. When the Earth's Moon was formed from a collision between the Earth and a Mars-sized object, that would probably have been Earth's last major neighborhood-clearing event.
-
When they say Pluto hasn't cleared its "neighborhood" of other objects, they're talking about Charon and the entire rest of the Kuiper Belt.
-
No, as I mentioned in the old thread, I'm still using the Spherize plugin from Emilio Le Roux. Oh, I thought of something else this can be used for: optics -- minimizing distortion in the image when the model is used as a spherical lens or mirror. I haven't tried this myself, though. Conceivably, this type of sphere can also be used as the cornea of an eyeball, but the "basketball" topology would probably be simpler.
-
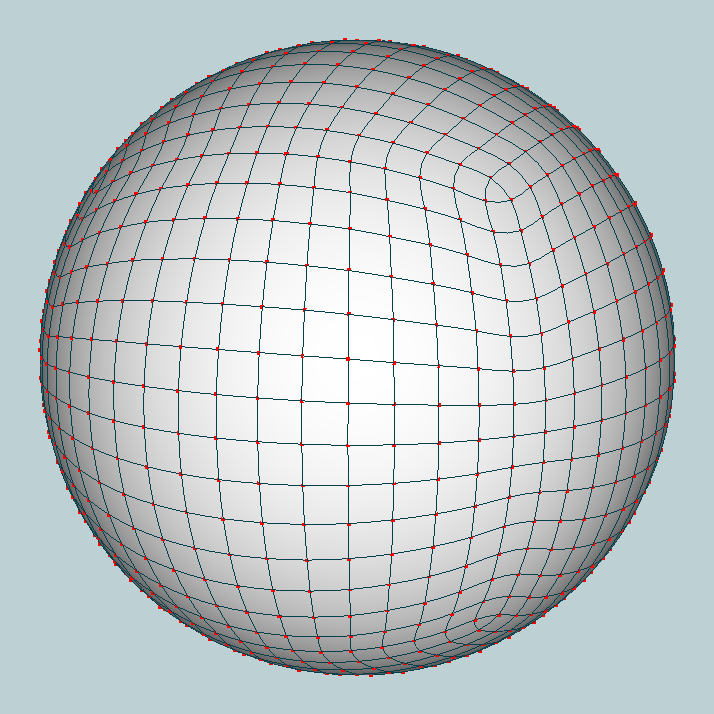
Last year, I posted in this thread about making a sphere with a uniform CP density. I've been able to improve upon the "volleyball" sphere by using beveled edges to eliminate the dead-end splines at the corners. Here's a more or less uniform sphere with 1,352 patches (i.e., 60 CPs around the equator): [attachmentid=20008] [attachmentid=20009] This primitive can be used in applications such as cloth simulation, or it can be used in conjunction with Marcel's Conform plugin (US$15.00) to simplify the geometry of an irregularly-shaped polygon model such as an asteroid or small moon. UniformSphere_1352patch.zip
-
Since this is a depiction of the Battle of Wolf 359, these ships are going to sustain massive battle damage. Would it be feasible to use Booleans to cut pieces out of their hulls?
-
You mean a lamprey?
-
Is the whole thing a single model, or are you assembling separate models in a choreography?
-
That's not too bad, but the Starfleet style of Aztecing is usually very regular and distinctive. Take a look at some of the decal patterns used by model builders, like Aztec Pattern and Other Markings Templates or Star Trek Model Resources. The Aztecing on the secondary hull and the nacelles should also follow the contours better; consider how the round nacelles on the NX-01 Enterprise were textured.
-
The "aztec" pattern on the hull really should be drawn by hand instead of relying on a procedural. On the saucer section of all Starfleet ships, the pattern is oriented radially, so the easiest way to pull that off would be to draw a vertically-oriented pattern for one sector of the saucer, repeat it for however many sectors you want to have, and run a rectangular to polar conversion on it.
-

Steampunk Samurai Saga (It's a working title...)
Julian replied to brainmuffin's topic in Work In Progress / Sweatbox
For what it's worth, the Meiji restoration was completed in 1868 in this universe. (Since this is a steampunk setting, it's going to be an alternate universe with more advanced technology.) -
Now, if you wanted to get really adventurous, you could make the monthly maps into an image sequence and use a smartskin to relate the frame number of the sequence to the tilt of the axis, but maybe that would be taking realism a little too far. BTW, I personally don't think there's any point in applying a displacement map to the Earth. The Earth is smoother than a billiard ball, after all....
-
I didn't realize there were two Earth Observatory pages with the monthly global images. This page has the complete global maps in 5K and 21K resolution, and if you scroll down to the bottom of the page, there's also a readymade grayscale topographic map. You can also get the bathymetric map and use the black regions as a specularity map for the oceans. Are you getting the ocean colors from the original 2002 Blue Marble map that includes sea ice? The disadvantage of the 2002 Blue Marble map is that it doesn't show any snow on land, but the Blue Marble Next Generation maps don't show sea ice and deep ocean colors. I prefer to take only the June Blue Marble Next Generation maps (because there's still a moderate amount of snow left in the Northern Hemisphere), use the black parts of the bathymetric map to mask out the land, combine it with the Blue Marble 2002 for sea ice and ocean color, and increase the brightness of the land in the Next Generation map to match the 2002 map.
-
Most of the image maps can be obtained from NASA. As works of the U.S. government, they're all in the public domain. Color map, 20K resolution, at various months of the year. Clouds, 8K resolution. City lights, up to 30K resolution.
-
Oz Map -- Another v13 Displacement Fun Thread
Julian replied to Zaryin's topic in Work In Progress / Sweatbox
If you've got something relatively flat, like a floor tile, and you're viewing it from above, why bother using displacement mapping anyway? The whole point of displacement mapping is to be able to see relief when you view the object from the side. -
After you delete the pose from User Properties, you may also want to open the model's Relationships folder in the Project Workspace and delete the empty folder associated with that pose.
-
The Animation:Master wiki is here: http://www.zack3d.com/wiki/index.php?title=Main_Page It just needs people to contribute to it.
-
So you also used muscle animation for this? Since this puzzle has only one axis of rotation, unlike the Rubik's Cube, I think this can be done entirely with bones. The bones for each sliding piece can be hidden in the center of the frame, vertically oriented and colinear with the axis, and they can have Orient Like constraints to each level of the frame that can be turned on and off.
-
I've found that the easiest way to maintain a constant size for the cubies as they rotate is to set keyframes every 45 degrees of rotation. In the attached movie and project, I also keyframed all the CPs in the model in the frame before and after every move in order to prevent the rotations from sliding backward as a result of spline interpolation. RubiksCube.mov RubiksCube.zip
-
More like Odo from Deep Space Nine, then. Actually, this could come in handy if we want to create general-purpose realistic human models whose age can be controlled with a pose slider.
-
How about posting the source code to the SDK forum and seeing if someone would be willing to take up the problem?
-
You should upload this to A:M Films!
-
From the render you posted, it looks like the bases still aren't paired correctly. I used complementary colors to make the base pairing easier to see: red to green, blue to yellow.