-
Posts
6,562 -
Joined
-
Last visited
-
Days Won
58
Content Type
Profiles
Forums
Events
Everything posted by John Bigboote
-
WORKS! thanks!
-
Thanks, Rob... We should all compare notes on our setups... Here's all the stuff I do after I reset my settings or do a clean install: -Introduction screen- unclick 'Show this on startup' -Tip of the Day... unclick 'show tips on StartUp'. This is very useful for newbies, but I am usually in a rush. -Libraries- close (sorry- never got the hang of it.) -Community- close -Property Info- close -Alt-1 opens Project Workspace -Alt-2 opens Timeline -Alt-3 opens Properties -Alt-4 opens Pose Sliders (all of these found under 'View' tab at top. -View- Workbook, puts A:M into 'tabbed' workbook mode. (essential!) -Tools/Customise- Commands tab, Draw Buttons... drag 'turn Decals' ON/Off' up to toolbar. -Tools/Customise- Commands tab, Draw Buttons... drag 'toggle normals' ON/Off' up to toolbar. -Tools/Customise- Commands tab, Draw Buttons... drag 'toggle particle/fur' ON/Off' up to toolbar. (it is great to have a button for these features at hand.) -Tools/Options- Global Tab- check 'particles hair always OFF' (a feature I requested that Steffan implemented! I don't know if it is working the way I envisioned it... when it is clicked, I want hair OFF when I open an existing hair project- but it is not doing that right now. It just makes for longer lag times while you wait for your hair pre-roll to compute, then you just turn hair off.) Hair can always be toggled by shift-8. -Tools/Options- Global Tab- check 'Show advanced properties' and 'Show property triangle'(what this does? idk.). -Render to File button... click advanced, apply.
-
Where do I find 'reset' in A:M and in NR? In NR the tab is adjustable... but it just slides the error over... you still only see '0:0'... and the other tab to the right will not expand the column any further... on my end at least.
-
I get a Vime-uh-oh dead link on that... -Debby Downer here!
-
Well, this is 'personal-preference' territory... I will leave all settings at default, altho I like to put the 3rd one '1 right/left arm regular FK' at 100%... mileage may vary.
- 27 replies
-
- Motion Capture
- MoCap
-
(and 1 more)
Tagged with:
-
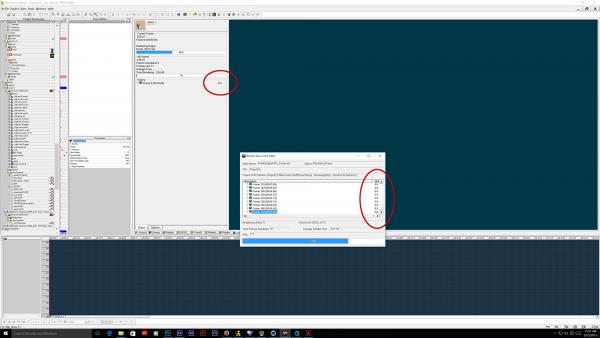
I am currently running A:M V18.0M (avx) on Windows 10, and everything seems GREAT except I notice my render time indicator is being 'cut-off' by the program... happens in A:M render and A:M NetRender as well. I have 2 montitors... one is a 4K and the other is a 1920 X1080 Dell... it happens on both. I have tried adjusting the little sliders that would make the column bigger, but with no luck. It's a very-very small issue- and if I hover over a frame or the current render frame it will show the time elapsed or total frame render time..., anyone else have this? If more people see it this way- I will submit as a bug.
-
Yes, either dig thru the model and make them visible(and later, invisible again...) or just know their name(s) and select them from the target list when applying the constraint.
- 27 replies
-
- Motion Capture
- MoCap
-
(and 1 more)
Tagged with:
-
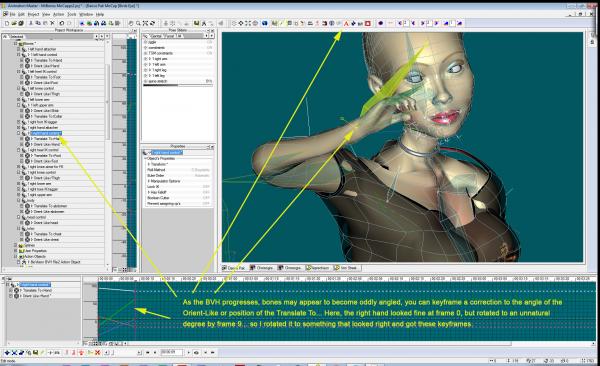
Another MoCap promo by Mr. Bones (Joe McPeek) https://youtu.be/BdR5byYz3xw I notice in his that the hands don't really bend too much... which is interesting because I was having trouble with his mocaps with the hands changing orientation(flipping) and thought it was me... another thing to remember with A:M's 'Orient Like' constraint is that you can set a percentage value from 0-100%... same with Translate To...
- 27 replies
-
- Motion Capture
- MoCap
-
(and 1 more)
Tagged with:
-
I see you gave the glass 'thickness', that's the way to do it! So then when you add refraction and density to it you will get nice caustic results- just double-check your normals so the outer glass is pointing out and the inner points in... You need to flatted the splines that make up the top and bottom of the table... grab a spline that heads inward from the edge and hit 'P' for 'peak'... then go around and do all of them. Maybe so on the base a little too. I would like to see you add a room... an animated little fishy or two... animated bubbles... and some seaweed and gravel.
-
Yeah- incredibly original! Are these characters based off the real-life Mr. and Mrs. Gormezano?
-
BVH is what it is... when it first became a viable animation form- and we could do it in A:M- I thought it was a real 'game changer'... meaning it would be the future of animation and would become more and more commonplace. It has not really done that... there is still 2 distinguishable animation methods, traditional animation where a person draws or generates motion into a drawing or 3D rigged character- and motion capture where a person's actions are captured and transferred onto a CGI character. It is great to know how to implement motion-capture into your character, but I think it is a greater skill to be able to straight-out animate your character as needed... adding emphasis, weight, squash-stretch, and character to the actions. Truebones is a great collection of motions, well prepared and sorted... but in real-life you will have a script or a need for a particular action, and finding JUST what you need in a robust library of motions can be akin to winning the lottery while finding a needle in a haystack. BVH is great for gamers... they need particular actions that are simple... "walk, run, stand still, shoot weapon, die(zzzzz)". Storytellers will need something more particular.... 'water flowers on ground level- stand up and stretch achy back, take 3 steps to left around floor object, put water can on top shelf, sit down in chair and cross legs while grabbing glass off table...'
- 27 replies
-
- Motion Capture
- MoCap
-
(and 1 more)
Tagged with:
-
Hey Rusty- THANKS! Typically- when I am 'straight ahead' animating, I will put the TSM's arms into an IK setup, so I just need to grab the hand and the arm will follow and I can adjust the angle of the elbow afterwards if it looks weird... when I use BVH's however- I prefer to leave the arms in full FK... for some reason (as you can see in the video) I struggle with upper arms and shoulders the most... I don't know if it is me, the rig, the BVH(some are better than others) or just the whole process in general. Using FK lets you put TT and OL constraints on each limb of the arm... which can be 4 in all... shoulder, upper arm, lower arm, hand. When you think about it, the human shoulder is quite a work of engineering(nice work, God!) it is a rolling, swiveling, ball joint underneath folds of musculature able to angle and bend quite pliably. The hips, in contrast, are also ball-in-socket joints but are locked-in-place and have a lesser range of motion.
- 27 replies
-
- Motion Capture
- MoCap
-
(and 1 more)
Tagged with:
-
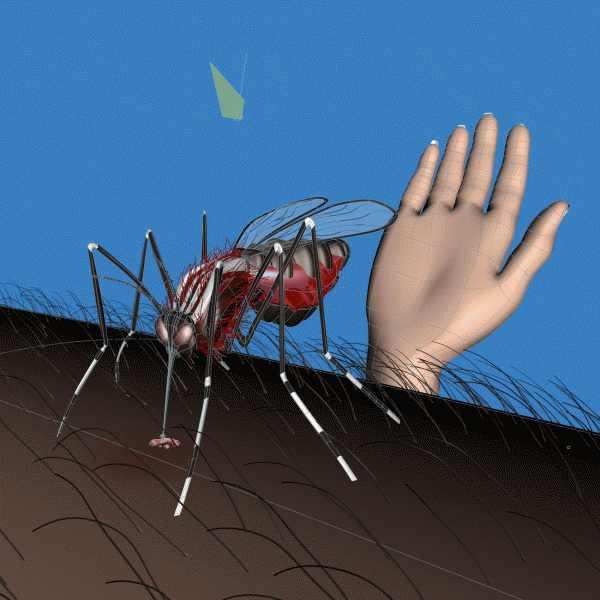
Here is a wireframe to final gif of my mosquito image contest entry. This image was 100% generated in A:M with NO Photoshopping at all... not even a levels or curves. Image took about 4 hours in all, 2 hours in 2 days... I like to 'come back' to a project with fresh eyes after sleeping on it overnight- that is when I decided to add the hand. A:M's hair was used on the CU arm and on the mosquito- with a little grooming on each to get it to bend in the right directions. Image was rendered with Depth-of-Field ON in multipass with 100 passes, taking about 32 minutes. The part that worked surprisingly well for me was the lines in the wings, I employed 'render as lines' feature and was very happy with the results. Light in the sky for the sun simply has Lens-Flares turned ON at 10% intensity. The texture for the mosquitos body is a Darktree material... TX Abstract/absCreepy with a bump setting pushed up. Rob asked me in the interview why I made him look menacing... and I was really just going for photorealism this time and the photo reference I had googled up looked menacing. Plus, when you think about it- mosquitos are something to be feared... they offer very little benefits like a bee does, they are flying parasites that can smell you from 20 yards away and are able to land on a vieny area to bite you. The bites leave swollen itchy red spots and can transmit lethal diseases such as typhoid, HIV, malaria and more. CLICK ON IMAGE TO SEE GIF ANIMATION
-

Insect Image Contest Results Announced!
John Bigboote replied to robcat2075's topic in Contests/Challenges
We had such a blast watching 'an Evening with Robcat'... my Dawn was enthralled and excited and we both loved the 'pomp'... great job on the production, Rob! And congratulations, Gerald! I want to see a picture of you wearing the Grand Prize! -
That would be a useful feature... a better 'identifier' to see what is facing in or out...
-
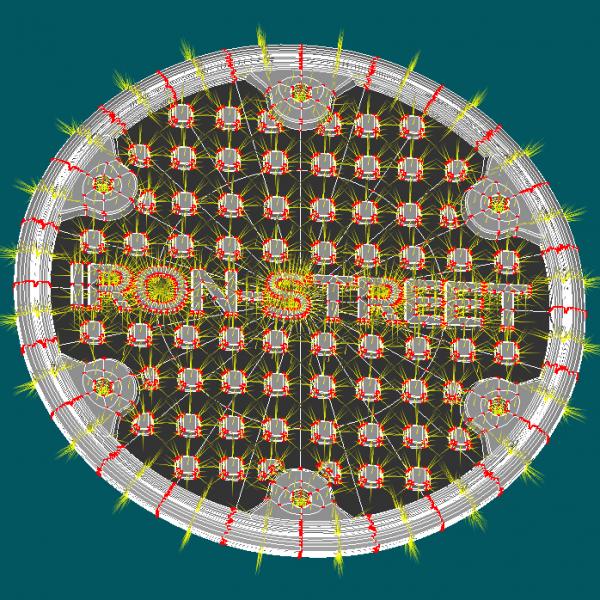
Another E3D sample: A 'quickie-logo' starting in A:M and exported via OBJ to E3D in After Effects for PBR materials, animation and... NO RENDERING! It is just another layer on the timeline and when I render my final movie file, the 3D renders... really quick! I liked in this sample how I was able to get really close with the camera to the model and the details just come alive. Just really important to have your normals facing right way in A:M E3D_RR2.mov
- 31 replies
-
- render
- alternate renderer
-
(and 3 more)
Tagged with:
-
Here is a screenshot with all of the constraints I used on my Outsquirts character... 19 in all(sometimes I'll use a 'Translate to' on the head as well- in this case it was causing some sudden subtle yet jerky motion which would cause the dynamic hair to 'fluff-out'...) In the image I show how I animate the offsets of the constraints. EDIT: I see in this instance I did NOT use any 'aim-at' constraints other than the eyeball bones to their aimer null.
- 27 replies
-
- Motion Capture
- MoCap
-
(and 1 more)
Tagged with:
-
That model (animation above link) is rigged via the TSM2 rig... ONLY constraints used in the action are: -Orient Like -Translate To -Aim At I've been thinking about a possible feature request, a NEW constraint that essentially would be an 'orient like' and 'constrain to' combined... specifically for BVH's.
- 27 replies
-
- Motion Capture
- MoCap
-
(and 1 more)
Tagged with:
-
No other way that I know of other than the tried and true... turn on normals, eyeball model for wrong facers, use the patch selection tool in conjunction with shift to select multiples... F key to flip... Your feature request sounds great with the red and green, however... the essence of a normal is that the program really does not know which side of the patch to point to as 'forward', therefore it could never discern which patches you are referring to to flip when you say 'flip all red'... all patches have red on ONE side of them... so all patches would flip. No?
-
Sometimes you may need to toggle the video card settings... Tools/Options/Global tab... change from OpenGL to the other, and then back...
-
Thanks Gerald- been working on it... it is okay- could be better. At least it is not 'jumpy-aroundy' and I am getting pretty good collision-detection out of it nowadays... it does stretch a bit tho under extreme dynamics.
- 27 replies
-
- Motion Capture
- MoCap
-
(and 1 more)
Tagged with:
-
BVH in animation Master is rather simple: -get yourself some BVH files to work with. -Make a new action for your rigged character. I like to make sure my characters arms and legs are in full FK. -Make sure you are in Animate mode for the loading of the BVH.(red 'A' in top toolbar.) -Right Click on the action and select New/Motion Capture/ Biovision BVH -Select a BVH file from your HD. You will see it loading. You will then see a 'bones' character in your action, and you can scrub to view the action-make sure it is a workable file. -Scale the BVH to relative size of your character, you can rotate the BVH to face the same direction as well. -Starting at the feet working upwards- apply 'Orient Like' and 'Translate To' constraints to each foot, the hips and chest, then the hands. 'Aim At' constraints can also be used, like for the upper legs- aim at knees... You will need to set the offsets for the bones as well... usually zero-out the values in the constraints offset X,Y,Zs. Do not worry about individual fingers, face, or toes info unless it is in the file and you want to. Once done... hit play and watch your character move with motion-captured nuances! Most BVH capture files have trouble with 'flipping hands' or 'feet thru floor' or 'jump frames'... you can correct these as you see them in the action by keyframing correction or deleting bad keyframes from the BVH. Many BVH files are captured during a 'session' and share similar orientation attributes, you can easily import a new BVH from a like session without the need for re-constraining everything. HERE is something I worked on for Mr.Bones recently- showcasing his actions on my character with A:M's dynamic hair. BVH's are fun and can be mixed with custom animation. Hope this helps!
- 27 replies
-
- Motion Capture
- MoCap
-
(and 1 more)
Tagged with:
-

Quicktime apparently for home use only... says the TOS
John Bigboote replied to robcat2075's topic in Open Forum
This is potentially huge. Apple now has a knife to every professional videographer's(and this very forum's) throat. Nice. -
COOL! Animated fist-bumps are all the rage this year- I did one too!


