heyvern
-
Posts
5,210 -
Joined
-
Last visited
-
Days Won
4
Content Type
Profiles
Forums
Events
Everything posted by heyvern
-
Hash added "jittering" to hair because in past versions someone came up with the idea to use sub frame jitter to "smooth" hair so it doesn't need to be so dense. Sub frame motion is cool. ---- I love these types of threads. It starts out all negative with no easy solutions and then very quickly the problem is solved. -vern
-
jpappas you are a genius! Ramón, this should do EXACTLY what you want. DANG! I should have thought of that! I did something very similar a while back using sub frame motion blur to create "vector" lines from moving 2D shapes. I can't believe it... this is such a simple solution and can be rendered all in AM. -vern
-
the problem with a "post effect" is that in AM a post effect is applied AFTER the render, thus the term "post effect". It would be difficult to apply a blur to an object that is in front of other objects. The object needs to be blurred, then some kind of "3D" mask to determine how the blurred object fits into the 3D space. Using a material to simulate a blur could work but it is going to be difficult to create this effect on say a character model with textures and surface properties. You won't be able to get a uniform blur on model details like face features or shapes. You would need to have two copies of the model if you wanted a "non blurred" version. Also you wouldn't be able to transition between the two smoothly. Don't be afraid of compositing. Try it with something really really simple. You may find it isn't that hard... and it might save you a ton of time. You could try another thing that would simplify the compositing. Let's say you have a moving character or model in a choreography that you want to "blur". Render out the blurred model in the scene by itself making sure you have an alpha channel. Use DOF to make the render blurred or if there is a blur post effect (is there one? Not sure) use that. Import this rendered animation as a camera rotoscope and set the properties to be on top or above the scene. Now turn off the model in the cho and render. This saves the trouble of actually doing any "complex" compositing. You are just using a camera rotoscope. ----- Side bar: A while back I tried a crazy idea based on camera rotoscopes over a chor. I used the OUTPUT rendered image sequence for several layered camera rotoscoped animations with an offset and transparency. When each frame rendered, it used those rendered frames as the rotoscope creating a bizarre... motion trail effect. I had to put that aside until Hash fixed an issue with image sequences. It was fixed recently so I may have to try fiddling with it again some day. -vern
-
That would work for very simple objects but wouldn't actually "blur" a complete model. I think Ramon is trying to achieve a "real" blur effect on an otherwise "normal" model. The only way to do that would be to use DOF or post processing with compositing. I think this is a very specific and unusual effect. It isn't something that would come up very often. It would be 10 times easier to create this effect in post then to create a feature in AM to do it. The return on investment of a feature like this would be small since it wouldn't be used very much. -vern
-
No way to know with out looking at the actual files. It could literally be any number of things. It could be not enough ram to load all of the models or it could be a problem with one or more of the models, it could be too many lights etc etc. Some things take up more ram in a model than others, like big gigantic textures, raytraced lights. Materials use a lot more processor power when rendering, which slows things down as well. So if you have a bunch of models in one choreography with big images and materials, a ton of lights and raytraced shadows... etc etc... and the machine can't handle it then it causes trouble. Do each of them render okay by themselves? Render speed is mostly based on the computer's processor. Having more ram means you can have "more stuff" in the project but as far as I know it won't speed up render times. I have a PC and a Mac. The PC has a much faster processor than the Mac but they both have the same ram. The PC will render projects much faster than the Mac but they both can open huge files without much trouble. I had a project once with several models that all used HAIR (lots of hair). Each model rendered fine by themselves but all together in one cho with lighting etc... the machine choked. -vern
-
Have not seen that. This effect would have to be done with some type of compositing. There is no way to do that to a specific model in AM. If you want this effect you will have to render your project in "layers" and blur them in post. For example: Render the object you want to blur all by itself with an alpha channel for compositing. You could render with the shadows or you could render the shadows as a separate "layer" for compositing. Turn off this object and render again. Now you can import those 2 or 3 layers back into AM or into another video editor and blur the object independently of the rest of the scene. This would be a good reason to have the objects shadow on a separate layer so it can be blurred more or less as needed. If using AM to composite you would use depth of field for blurring but this would be a "fake". I don't have the latest greatest version of AM so there might be "compositing" tools built in now that allow for "blurring" layers. I'm just guessing. I know the latest version has a built in NLE compositor. -vern
-
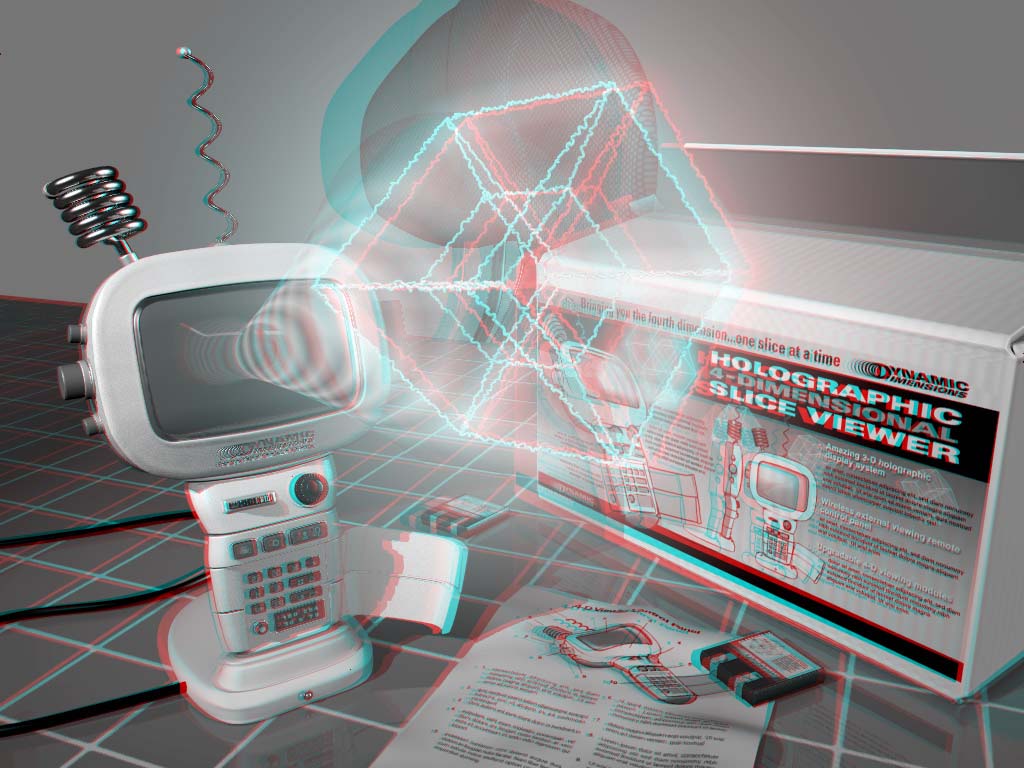
Keep in mind AM is a "3D" application. It simulates the "real world". If you want something "fuzzy" like a "furry ball" then you could use hair. If you want a fuzzy ball of light or energy you could use glow, or a volumetric light or a glowing spherical combiner with transparency fall off. The type of blur that exists in the "real" world is depth of field, or focus. AM doesn't have "painter" type effects like "blurring". You could render different "layers" of objects and import them back in to AM and composite them on layers and use DOF to "blur" one or the other. This would be a way to "fake" object blurring. Could you tell us exactly what kind of effect you are trying to achieve? A glowing ball? A fuzzy, hairy object? An out of focus object? Without know what you want to do it is hard to offer more specific suggestions. This stereo image used render as lines and glow for the "cube". I used a material with "blurred" edges for the glowing stripes coming out of the screen. -vern

-
Holy cow! Is that OUR Rich Jackson? Proud member of MAAM? The forum member better known as Entity? this guy: Rich have you been holding out on us? -vern
-
Reflections, bumps, massive patch count, movement, huge gigantic massive resolution.... did you use any materials on that? 200 hours sounds about right. It is only about... 8 days running non stop, 2 minutes at 30 fps would be about 430 frames each day.. about 18 frames per hour. it might go faster as time goes on. You could render a few frames at a time when you aren't using the computer. Seriously though if you dropped the resolution to only what you absolutely need... maybe a little less... you could cut that render time waaaaaay down.... it really DOES depend on the target audience, web, standard DVD, film, HD-DVD etc etc. -vern
-
I think the concept with this tool is not matching movements to an audio file. That is harder than doing lip sync animation by hand. If you ever listen to DVD commentaries "looping" dialog in a movie is a pain in the arse and the actors really hate it. You should record the actors voice while video taping and use that audio along with the tracking information to do the lip sync. -vern
-
Pricing for something like this is a tough one. One thing you have to look at is not how much AM costs by comparison but how much work this tool by itself will save you. Think about the hours and hours... and hours... of work that could be saved by using this tool. The value of this adds value to AM. The total perceived value of both might even be more than the actual price. I think the 3D painter tool for AM is around the same price isn't it? If you needed to do truckloads of lip syncing in a short time... this could save you bundles. It depends of course on what you put value on, time or money? If your time isn't worth so much then the price is a bigger factor. If however you are a hobbyist animator (with a wife and kids) with limited time to spend on your creations... then the cost might not seem like so much. As I get older... I find that my time is more valuable. This is really exciting. I don't think $150 is over the top... I would prefer $99 but that's splitting hairs. This tool opens up a world of possibilities for a lot of people who either don't have the time or skills or resources to do a lot of lip syncing. Another thing this can do is provide the ability to SHARE bvh lip sync files or just simple head and face expressions. (you could even stick those dots on other movie clips of actors). -vern
-
When using BVH for body motion that was a pain for me to set up. I forget who it was but someone did a really excellent tutorial on that a while back. I would think with this system setting up the "BVH rig" should be a bit easier. We won't have to deal with IK and differences in limb length etc. -vern
-
This is pretty cool. I want to get it just so I can forget to take the dots off my face when I go to the local WAWA for coffee. I know I would forget. I could see this turn into some new kind of fashion statement. People wearing white dots in public, in different colors. Seriously though if this turns out as kick arse as the potential demonstrated so far I can see low budget productions snapping up AM just to have access to it. I know that I bought AM originally for the features available at such a low price. Keep the price low and people will be all over it like flies on... uh... a glazed donut in the parking lot of the WAWA. On a side note... I always wondered about certain complaints regarding mo-capped facial movements, specifically "exaggeration". Every time I've seen this sort of thing done in big productions the main complain I and others have is how the "regular" motion of a "real" face is lacking in emotion and subdued and wondered if there wouldn't be a way to just "add" in exaggeration to the rig... like using a slider of some kind to increase the motion on extremes? Maybe you are already planning for this. As for the jittering... couldn't that be fixed in AM? Reducing channels by baking the action or something? -vern
-
I apologize Jentham2000. I shouldn't have been so antagonistic. You just have to realize that on forums like this we see so many "do something for a t-shirt or credit" posts that some of us get jaded and start to lump them all into the same category. As you may already realize even as a new user animation isn't easy. On another software forum I am a member of we are so much more harsh and sarcastic towards these types of posts I think we actually make some people cry (we hope so anyway). Keep in mind that "I am negative, apparently hate Apple and I talk too much." (See my post in "off topic"). -------- p.s. You may want to look at the construction of your web site. Several text areas and images overlap on the home page and interfere with reading. There are some spacing issues on sub pages but not as bad. This is a problem with FireFox, Netscape and Safari (those are the only ones I tested it with besides IE which looks perfectly okay). It is probably inconsistency in CSS display on different browsers. Or possibly some IE exclusive tags that comes from using Front Page. You set "leftmargin=60" (IE only) and "marginwidth=0" which is for everything else. So you aren't getting any margin spacing on other browsers besides IE. If you don't care about other browsers then I wouldn't worry about. Just an FYI. It's what I do so I notice these things. -vern
-
You say your web site has national exposure? Do you get money out of it? If you are "selling" something and you make money from a "purchase" and a "commercial" will help with that then there IS some money to be shared along WITH the "exposure" gained by the artist. You don't need any "tracking" to pay something. Actually, How many people interested in your site would need an animator? Someone wanting "exposure" would be better off putting their work on youtube or a similar site geared to promoting CONTENT. Much larger audience and a larger potential for feedback plus total control over what the artist is creating. I create banner ads using gifs or flash and even the tiny, short animations make me a few hundred bucks. And those clients CAN track the click throughs to determine if the ad is working. So the commercial you want only appears on your web site? You are advertising... for a site... on the same site you are advertising? You aren't going to advertise in other places? You may want to spend a little bit of money and create ads to be placed on other sites. Or offer another similar site a reciprocal link. Well... at least you got your web site listed here. -vern
-
Not quite... a cookie cut decal on a single patch is not "flexible". You couldn't "add" CPs to alter the shape. It would still have only 4 or 5 CPs to make a legal patch. I see what you mean though. Actually I did two versions of the same "flat" animated character once. One used cookie cut decals and the other used "filled" patches imported from AI. The "patch" version was harder to create but had much more flexibility in animating. The AI import works... okay for this technique... but there is a bit of clean up required. Anyway... don't want to hijack this thread too much. We should probably drop this discussion before someone drops it for us. ---- Back to the original discussion... DL, have you thought of using "long hair" splines to create custom strokes?? This idea just popped into my head. You could apply hair to a single spline around a shape to create a custom stroke with variable tapering widths (keyed hair properties) and all kinds of colors!!! This was the one thing I was stuck on. How to create "2D" strokes!!! This could even create a sort of "sketchy" look to the stroke. Holy cow... I may have to try this myself now. -vern
-
I too understand it would be quite unusual to have this feature in a 3D application like AM but I have some ideas that might make it "easier" to do (no feature is "easy" of course. ). For instance this would not apply if the mesh is not completely "flat". No 3D distortion so no need to account for any changes in the direction of normals. Each "surface" would have just "one" direction, one "face", one single "patch"... 90 degrees from the surface. This would be applied like a 5pt patch. Select a closed spline and apply. Anyway... it is a dream... just a dream... I have a dream. I think this feature would kick some freaking arse though. -vern
-
It definately sounds like you are using the "pure" option. You want the... er... other one... the gray option whatever it is called. The pure option is... icky. There is 3D stuff I've seen that has that look. I've never cared for that type. Side Note Years and years ago I shot photos at my sisters wedding in 3D. The actual photos were shot on slide film, developed, cut and put in special mounts with a battery powered stereo lighted viewer, but I also scanned and photoshopped some of these shots to be printed for the 3D wedding album I gave to them. I had to carefully tweak the colors in photoshop to get them to match the red blue glasses and to also adjust the "grayscale" so they had enough contrast. I generally like to render stereo from AM as two separate full color images so I have total control over the "depth" and contrast using photoshop. Sliding one "layer" in photoshop left or right changes how far out of the "frame" 3D objects stick out. You can do this in AM of course but it is faster and more flexible doing it "by hand" in my opinion. I even have a 3D template in Photoshop with the hue saturation and levels adjustment layers in place so I just drop them on to new images. I don't like full color anaglyph, I aways convert to "gray" and colorize. -vern
-
I have been trying to convince Martin that AM could be a kick arse 2D drawing/animation tool if only it had a "no patch" fill option for shapes that are never "3D"... like... a special fill option that didn't require legal patches of any kind just a closed shape. Like an "infinite" 5 pt patch tool. I often dream of this feature late at night when I'm lonely. I think how wonderful it would be. We could spend long hours staring longingly at each other over the computer, talking about new exciting projects while watching 30 Rock on the internet. I would tell this new feature how wonderful it is and ask where has it been all my life. Finally I cry myself to sleep when I realize it is only a dream. .... Uh... er... Oh crap! did I say that out loud? -vern
-
These are fantastic! What an inspiration. It's funny... a loooong time ago (2003? ) I did something sort of like this using imported Illlustrator files... of course I animated them like "2D" and never thought about doing this in AM specifically as 2D artwork. Would be very interested to see the wire frames to get a better idea of your technique. -vern
-
This is a long shot but... Is that image above a final render or a screen grab of the shaded preview? Another thing to try is to look at the stamps applied to the patches. Select the patches in that spot and use the "Remove Decals" thingy. Expand that list of decals and If you know which decal/stamp whatever, is the "orange" you could remove it just from that patch... if that is what is causing it. -vern
-
hatchet job on the splines: You only have that 5 point patch under the eye which could cause trouble. Probably a better way to do it. -vern
-
First off I would eliminate the hooks at the corner of the mouth. You have two hooks that could connect as a continuous spline eliminating some of the creasing. Another thing you could do is to extrude a row or two of splines off of that last spline of the mouth. Then you could move that spline row with the 3 point patch up even higher on the face so it isn't in an area that moves as much. You may even be able to remove some of the splines on the face above the mouth... since you are adding more splines from the mouth area. You might even find a better place to "hide" the 3 pointer. to be honest you could "start over" and use the continuous mouth spline extruded up and over to create the head. No 3 pointers and no 5 pointers since you could hide the "side holes" inside the huge eyes. -vern
-
I have done this with A:M a few times using Apple's QTVR development kit: (The link for the VR object is on the right side of the page) VR camera Monarch chrysalis Unfortunately I haven't been able to track down the project file I used for the "object". The camera object is the more complex version since it has X and Y rotation. Basically I followed the directions for Apples QTVR software which I purchased ages ago. I don't even know if it still exists. I set up a choreography with the model object in the center. I then keyed the object/model rotation so each 360 degree rotation on the Y rotated a specific amount on the X to create "rows" as dictated by the QTVR software. I then imported this into QTVR to create the object file. I set the AM project to 1 fps and all the key frames to linear interpolation. Then I set the key frames so I got the exact number of frames needed for QTVR. You could either save these frames as an image sequence (recommended) or a QT movie. My version of QTVR doesn't support the latest versions of QT so image sequence would be my choice. I suppose if there are any other tools for doing QTVR it would need a similar set up. Once you have this setup in an AM choreography it is a simple matter to swap out shortcuts for use with any other model. QTVR Panoramas are trickier actually. You need to account for camera focal length and distance for distortion etc etc. I only purchased QTVR for the object VR capabilities. I didn't do much with the panorama aspect. -vern
-
As John has pointed out there may be "issues" with the latest version and booleans. This may have something to do with it. I don't have the latest version so I can't verify this. Another option is to use more splines in the cutter. You have two gigantic 3 point patches right on the ends. Try adding a few more splines to see if that helps. Just a guess. Another option would be to make sure the normals are facing out on the boolean cutter shape. -vern