Gorf
-
Posts
383 -
Joined
-
Last visited
Content Type
Profiles
Forums
Events
Everything posted by Gorf
-
Did you spot the helmet in last month's contest?
-
Plus it's a breach of Anzovins copyright
-
Argh - replied to Eric without realising there were subsequent posts on another page. I can't find the category where a photoshop question should go, so I'll ask it now. It's not really off topic... Is there a way to gradient fill irregular shapes in photoshop? I want to apply a displacement map (I think that's what I need*) to a shield. The design is fiddly, and too small to be modelled so I think that making a greyscale image would be best. The design has five-point stars in it, like the brass ones you'd get on an Admiral's shoulder boards. These are surrounded by raised circles. The closest I can get is to draw the shapes, then select them with the magic wand selection tool with a "feather" of a few pixels. Invert the selection, then press "delete". The feathered part then becomes a gradient to the background colour. It's quite fiddly - is there an easier way? * Am I right in thinking that a displacement map is really a bump map on steroids, in that the raised surfaces really are raised and can be seen from the side?
-
I know she's very nice - more "unique" than "weird" . I'd already implied that Vern was weird, though, and didn't really want to single him out. (But he is, though - isn't he...) What is a "cowtaur"? edit: Never mind. Just found a pic... Boobs and udders- redundant backups in the mythological world, nice.
-
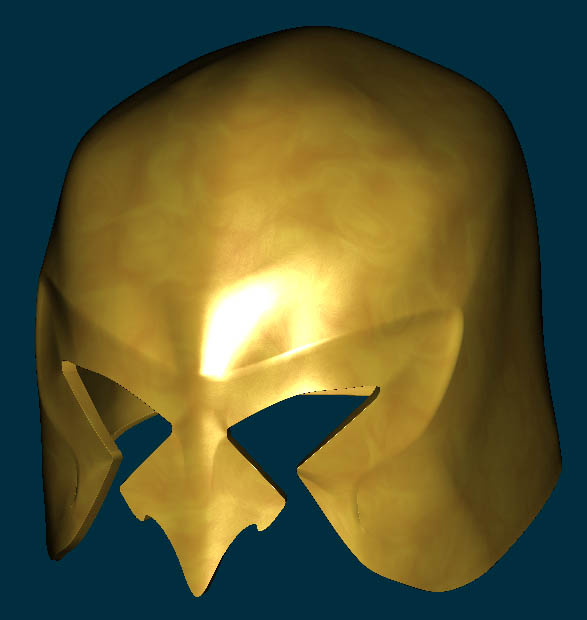
Wow, Vern - many thanks for such a comprehensive answer. So far, your explanations have made perfect sense, so either you're clearer than you think, or I'm as weird as you. Well, I've nailed it with the help of all you folks: The extra spline needed to go, and Vern's advice about using an oblique view and when moving CPs (plus doing them in one plane only) did the trick. The way I actually modelled the helmet was to start with the nose guard and eye holes in the front view, plus the outline of the head. Then, I made a single spline for the head shape in the side view, and joined everything up. That's why the horizontal splines sweep up from front to rear - it wasn't lathed, which was my first instinct for modelling it. The "shift key" tip is a useful one. I think I'll be using that one soon. It's OK for now, but there are far too many five point patches for it to be "good" modelling. I'm only getting away with it because it's a rigid object - it won't animate, as Vern says. There is also one last bulge that I didn't bother removing- everything else looks OK, so as this one will eventually be hidden by a crest on the helmet, it wasn't worth fixing it. As for thickness, I've done it exactly the way Vern said. There's a little bevelled edge courtesy of one of Yves' tutorials (I think it was Yves) then the surface goes into the helmet and then up. It might not be far enough for close inspection, but I'll deal with it later if need be. If I finish it in time, this will be an entry in the SciFi/ Fantasy comp. That's why I've not posted a pic just yet. The finished image will be very different to what you're expecting. I'm being deliberately vague to avoid prejudicing any results... Don't want to attract the sympathy vote, you see... Thanks again everyone. Now I need to go ask that weird wasabi woman a Photoshop question... I wonder if she reads the newbie section...
-
Thanks for all the advice, folks. I'll get chance to play with it later today. Vern, I agree that a bit of "weathering" would make it look better, but in this case it needs to be perfectly smooth. I can see how lathing the helmet would result in perfection, but then I'd need to use cookie cutters to get the nosepiece, right? Is that considered "cheating"? My A:M PC is now connected to the internet, so I can more easily post images of the work...
-
Thanks for the replies, everyone I always try to avoid bias tweaking. On the rare occasions I've tried it, it's been hard to keep them in situ. As soon as I move any CPs the bias resets... That's just me trying to be clever (and, evidently, failing). I've just superimposed a wireframe and used photoshop to erase the background so the render shows through. I should just have used shaded wireframe mode. Thanks - I'll try that today at work and report back tonight.
-
Is there an established technique for smoothing the surface of a model without each tweak of a CP affecting all the others that are linked through splines? I've made a helmet which could do with being perfectly smooth, but has ridges as a result of modelling the nosepiece and eye-holes.

-
Thanks for the compliment, but what Al & Jody said is right. You've obviously got the ability to do it well, but you appear to be trying to do it all in one. You need to make the components separately, and then put them together. The glass, seats, console, steering wheel, upright wing and engines are all separate shapes, which just overlap on the model at points which (mostly) won't be visible. The colour comes from sampling a JPEG of the actual landspeeder used in the film, the image I used as a stencil rotoscope provided the basis of the decal.
-
The ground is just a NASA animation of the Victoria Crater on Mars. The whole exercise was a testing ground for the various camera tracking programs available. SynthEyes won. The shadow was done by arbitrarily creating a mesh using features exported from SynthEyes to A:M. This was set to receive shadows, but not render. Some of the troughs were deliberately exaggerated to enhance the floaty feeling, and I guessed at the sun's position. I can only find early versions of the project, now - which leads me to believe I did it from a memory stick or similar (it was over a year ago). I'll find it and post a wireframe of the finished speeder. In the meantime, here's the latest version I have at home. Note that the finished version had the engine components (basically a bunch of pipes) visible under the missing cowl, and the engine housings were the right colour. I may do the Columbia Crater next - and perhaps document the process so I can refer back to it next year...
-
If all you need is the speeder, I've got this one lying on a disc, somewhere. It doesn't pass close inspection, but it doesn't sound like you're too bothered by that. speeder.mov
-
He doesn't need arms, as long as his feet work the same way. If it works for an "organic" entity like RayMan, then it will work for this chap. Let's face it - if you're being critical about the absence of supporting "arms" - why not go further and mention his lack of opposable thumbs, too?
-
Not really bad modelling: there's a button to do exactly what you want (extrude - shortcut [E])
-
First post after another long hiatus. I'm trying to achieve something along these lines, which is more akin to the (ignore the music) from War of the Worlds, but I believe that the two effects are similar in preparation, if not in final look. If I make any progress I'll add something to the thread
-
Is it a DV AVI/MOV? You might need to change it to one of the more friendly codecs...
-
Luuk, Have you considered using a kid in their mid teens? The cost benefit would be great - after all, you can't guarantee to get the dots in the same place every time, so you might as well use acne... It's free.
-
I'd pay $5 just to keep this thread going - If enough people do, perhaps it would fund a little PC for Kevin...
-
I haven't tried AVIs for a while, but when I did, it balked at a DV type 1 AVI, but the same movie uncompressed was fine. If you're using a file captured from a DV camera by firewire, try converting it to Type 2 using one of the many free converters out there (such as the one by Paul Glagla).
-
That's my feeling about all the grand plans I come up with, too. Virtually everything I try gets abandoned halfway through because I expect I can deliver more than I'm able. Still, look on the bright side - I'm 50% ready for next year's "Sci-Fi/Fantasy" comp...
-
I need not have done so much searching for feet: A good chunk of the original album artwork is included in the souvenir programme for the stage show (which was sitting on a bookshelf - "Internet? Pah! - we don' need no steekin internet..." etc). There's also a good close-up of the CGI one Jay linked to. The main image of the Thunder Child being sunk does not show the feet as they are under water, but the picture of Parson Nathaniel banishing the tripods (sixth image on this page) shows the feet to be mere stumps. Possibly OK for my "modern day" film as long as the martians stick to the roads, but not much good for the muddy countryside in the last years of the nineteenth century. He needs feet, that's for sure - but I'll probably end up making my own rather than copying the ones from the programme.
-
Thanks, Jay. I saw those feet from the new CGI for the live musical - I recall that the feet on the original vinyl album artwork were much simpler, but I could easily be mistaken. I've not been able to find any scans of that. At this stage, I may just stick some hinges on the toes as they are. Those feet are nicely modelled, but I think they are too stylised - more in keeping with Spielberg's version than the Mike Trim version from the musical.
-
Thanks, everyone, for your comments. I'll check out the gait on Spielberg's version - I'm sure I have it somewhere. Jay, the link you posted shows a slightly different flex to the one used in the stage play. In your link, the "supporting strut" telescopes, whereas in the final CGI, it's the lower section of the legs that telescope into the upper. Mark, the CGI has been done for a stage production of Jeff Wayne's musical. It's not being put on celluloid as far as I can tell. I do have the DVD of the production, but it was filmed in London and wasn't quite as tight as the one I actually saw, in Manchester. I need to find the album artwork from somewhere. As I recall, the feet were not quite as simple as the ones I've done, but they weren't as ornate as the ones in Jay's link. The rotoscopes I used for modelling were from Mike Trim's website. The martian has his materials applied and is rigged now - I just need to learn how to do a walk cycle for a regular model now, before continuing.
-
A martian tripod from "The War Of The Worlds". I was intending just to put together something like a proxy version, as I wanted to get the gait sorted out first, but I got a bit carried away.
-
Make the midline into one continuous spline, and you'll end up with a seven-point hole. Put a CP in the middle of the top spline. Extend the three unfinished CPs so they form hooks, with the middle of the three going through the new CP first. Sorry my description is so rubbish - I'm not terribly good at this. Here's a pic...
-
Same here a couple of hours ago, but I tried it just now and it worked fine.