Hutch
-
Posts
469 -
Joined
-
Last visited
Content Type
Profiles
Forums
Events
Everything posted by Hutch
-
I think that last one looks great too Mark!
-
That looks awesome Mark.
-
Here you go Steve. This is basically how I have done all my cloth 'skirts' so far. I still continue tweaking it here and there. The top spline ring of the cloth group does not move when you simulate so I have been smart skinning it to keep the cloth from intersecting the thigh when it raises. It may not be the best way to do it but it works ok for me for the most part. My cloaks use the same material with a bit less mesh density. The sleeves are the same material and required much more smart skinning. clothsetup.prj
-
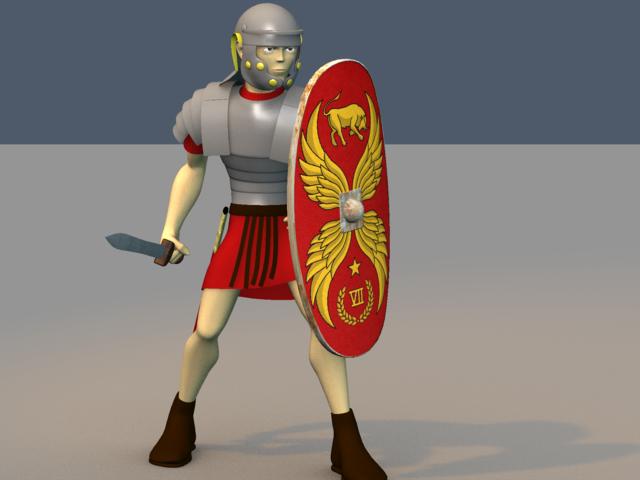
I have the final character rigged. He still needs a little work here and there and I will make a couple variations on him. Maybe one will have some stubble, slightly different faces etc. I am going to get rid of the rust on the shield. I made it a while back when I was thinking of going for a more realistic look. I may add some doodads to his armor like straps and hinges but I don't want him to look too detailed compared to the others.

-
Thanks Rodney! I had thought about doing something to get the composition away from totally centered but wasn't sure what to do with it. When there is a background I think I will have more options. I didn't want to focus in on the bird and lose anything to give it a sense of scale. The illusion might be a bit harder to pull off from an angle but when I get to the final shots I will probably have to work it out. This is just a personal project. I am shooting for something around 2 minutes with one more character (and a couple minor variations on him) that is in the rigging process right now. If it goes over well the short will be just the first bit of a piece about 10-12 minutes long.
-
I don't know much about star trek but I wonder how big those windows are supposed to be. Unless they are huge bay window sort of things, the plating seems too small. It looks like 4 foot wide windows surrounded by 1 foot square panels. Maybe this is accurate but I would think the panels would be bigger than the windows.
-
I forgot to mention it but that last one does have motion blur. It's only 4 passes so maybe more would bring it out or maybe I should up the percentage. I just left it at default.
-
Ok, I added a pose to the valkyrie to change her to solid black and shrink her legs and head. I also changed the shape of her cloak to look like wings. I haven't added the dissolve yet. Do you think it still needs it? AO is so awesome. It makes it look like she is a little miniature or something. Oh, I also went ahead and simulated the cloth and animated her braids by hand because the movement was too fast for dynamics. transformtestAO.mov
-
Thanks everyone for the feedback. I will add a short dissolve as you guys suggested. I think making the valkyrie start off black and shift into her normal colors sounds like a good idea too Darkwing. Paul, I will look into the transformation poses as well. Maybe I can make valkyrie's body and head start off smaller and her arms sort of flattened out like wings. I will send you an e-mail brainmuffin.
-
Thanks. How do you mean dissolve? Like the raven fades to transparent over a couple frames while the valkyrie fades in? I went ahead and added some to it. Trying to get her arms to mimic the flapping wings some. Does it give the impression that she is changing or just like the bird disappears and she appears? raventovalk.mov
-
This is pretty rough but I wanted to see if it is conveying what I want to others before I try and refine it. So, does this look like I am on the right track? Any feedback would be appreciated. raventovalk.mov
-
I think the second one looks more realistic but both look good.
-
Thanks Nancy. I tried using fog with no image (not quite sure what an image does on fog). I may not have understood your suggestion fully tho. The reason I was using a roto was I don't want tom's innards showing like what happens when you make the model transparent. On him it wouldn't be too bad. You would see his eyeball inside his skull for example. So, what I did was render the scene with the ghost inactive and used that as the roto with some transparency so you can see thru him. Here I tried dof on the roto render and also adjusted some lights. The fog one I tried might have been cool but it just didn't seem to work at all when I applied it to the camera. I have been experiencing wierdness with changing out the roto's and had to revert the project several times. Sometimes they just won't show up and sometimes it is like it is tiling it in a strange way. Maybe this has something to do with the empty roto folder issue? tomsghostroto.mov tomsghost2.mov
-
Experimenting with front projection roto to make a ghost. I am not sure why the sky came out white, this is default chor. It looks kind of cool tho. tomsghost.mov tomsghost.prj
-

Witch one has the best camera move?
Hutch replied to jason1025's topic in Work In Progress / Sweatbox
I completely agree, that is what I was going for. There is a term for that that was coined in the fifty's, I forget the term but it causes/triggers a primal uncomfortable felling in us human beings because what we are viewing is something that is not human or reality but is so closely imitating a human or reality. It can actually scare us when we see this in real life. The term that I cant remember has been brought up in resent years because of real life robots made in Japan that are so closely resembling actual human beings and our movements. I shot 4 takes with a real video camera at true 24fps as you can see below. So the Shots are mostly NOT hand animated at least not in AM/ CG land. The real life camera move is actually shakier so I smoothed the shot out in AM by just deleting every 2 key frames but as the shot gets towards the end I only delete every other key then not at all. I also modified the shot by "ADDING" an additional minor choreography action that modified the original move / action. Origional_shot_03.mov 'Uncanny valley' I believe is the term. -
Witch one has the best camera move?
Hutch replied to jason1025's topic in Work In Progress / Sweatbox
I remember thinking Battlestar Galactica was awesome when I was a kid. When they came out with a dvd box set shaped like cylon's head a few years back I thought it would be fun to watch again. I don't think I even finished 2 episodes. I guess cool robots and ships was all that held my attention as a kid. Anyway, I never had any interest in the new stuff. -
I have never seen these tutorials but if what MJL's picture shows is what is intended, it seems like there are more steps than necessary. I would just select any cp on the half circle, press the comma key to select the spline and delete it. Then attach the cp's.
-
Looks nice! Did you get sss working with AO? Or is that not AO?
-
► Alt Codes ◄ Nice mumu Gene
-
That monkey looks like a smooth operator
-
You may want to add a spline near the wrists to help keep the forearm shape when the wrist bends. Overall it looks good to me.
-
On my valkyrie I had to add a really dense mesh in front of her chest to keep her braids from going thru. I hid it after simulating because transparent stuff still occludes with AO but if you wont be using AO you can just make it transparent.
-
Perfect! Thanks.
-
Thanks! I sent it out. I am in no rush with it so take your time if you like.
-
I decided to re-rig a model with the 2008 rig. I am pretty sure I placed the 'Balance INSTALL' bone completely wrong but since I don't use the balance pose at all I don't think it will matter. Unless that has something to do with my IK leg trouble. When I turn on IK legs the thigh bones turn out about 20 degrees or so. If it can't be easily fixed I can deal with it but I was hoping someone could tell me how to fix it or take a look at my model (I will e-mail it if you want to look at it).