StormedFX
-
Posts
190 -
Joined
-
Last visited
Content Type
Profiles
Forums
Events
Everything posted by StormedFX
-
Enterprise under construction
StormedFX replied to Eric Camden's topic in Work In Progress / Sweatbox
Wow! What a great model? CHEERS! -
It is great but too sad for me.
-
Not sure whi IE doesnt work. Thank you for sharing, cheers!
-
Does not work for me neither. CHEERS!
-
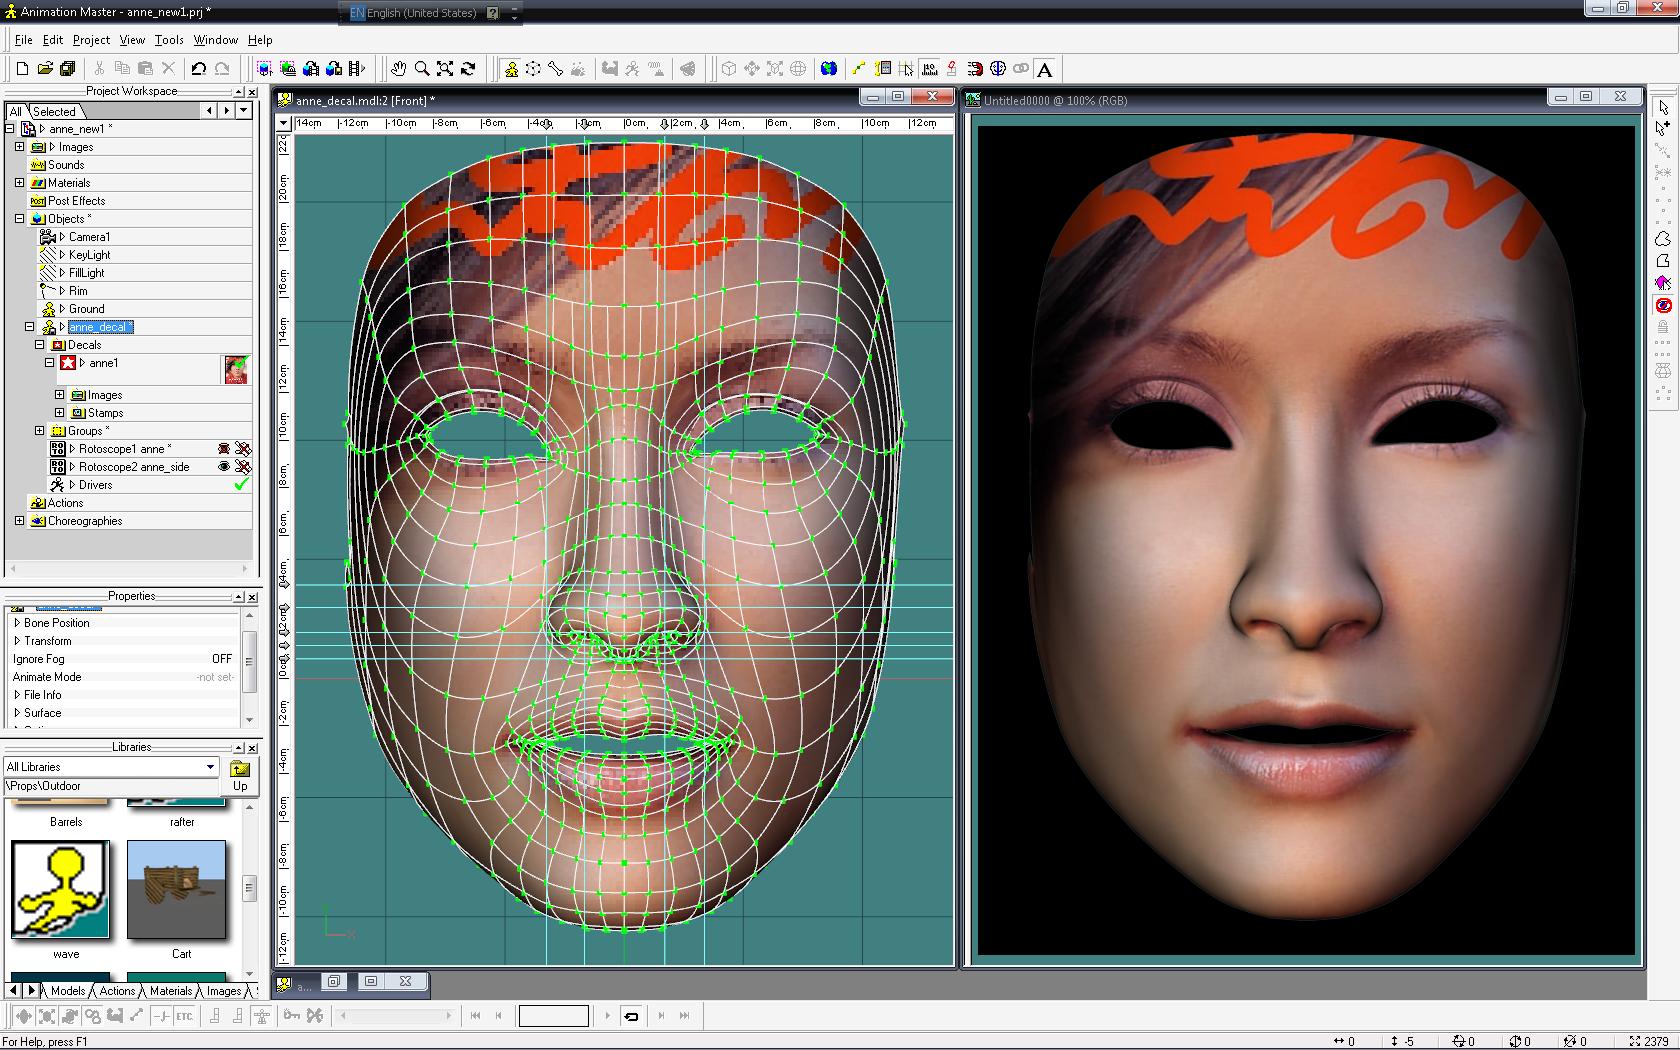
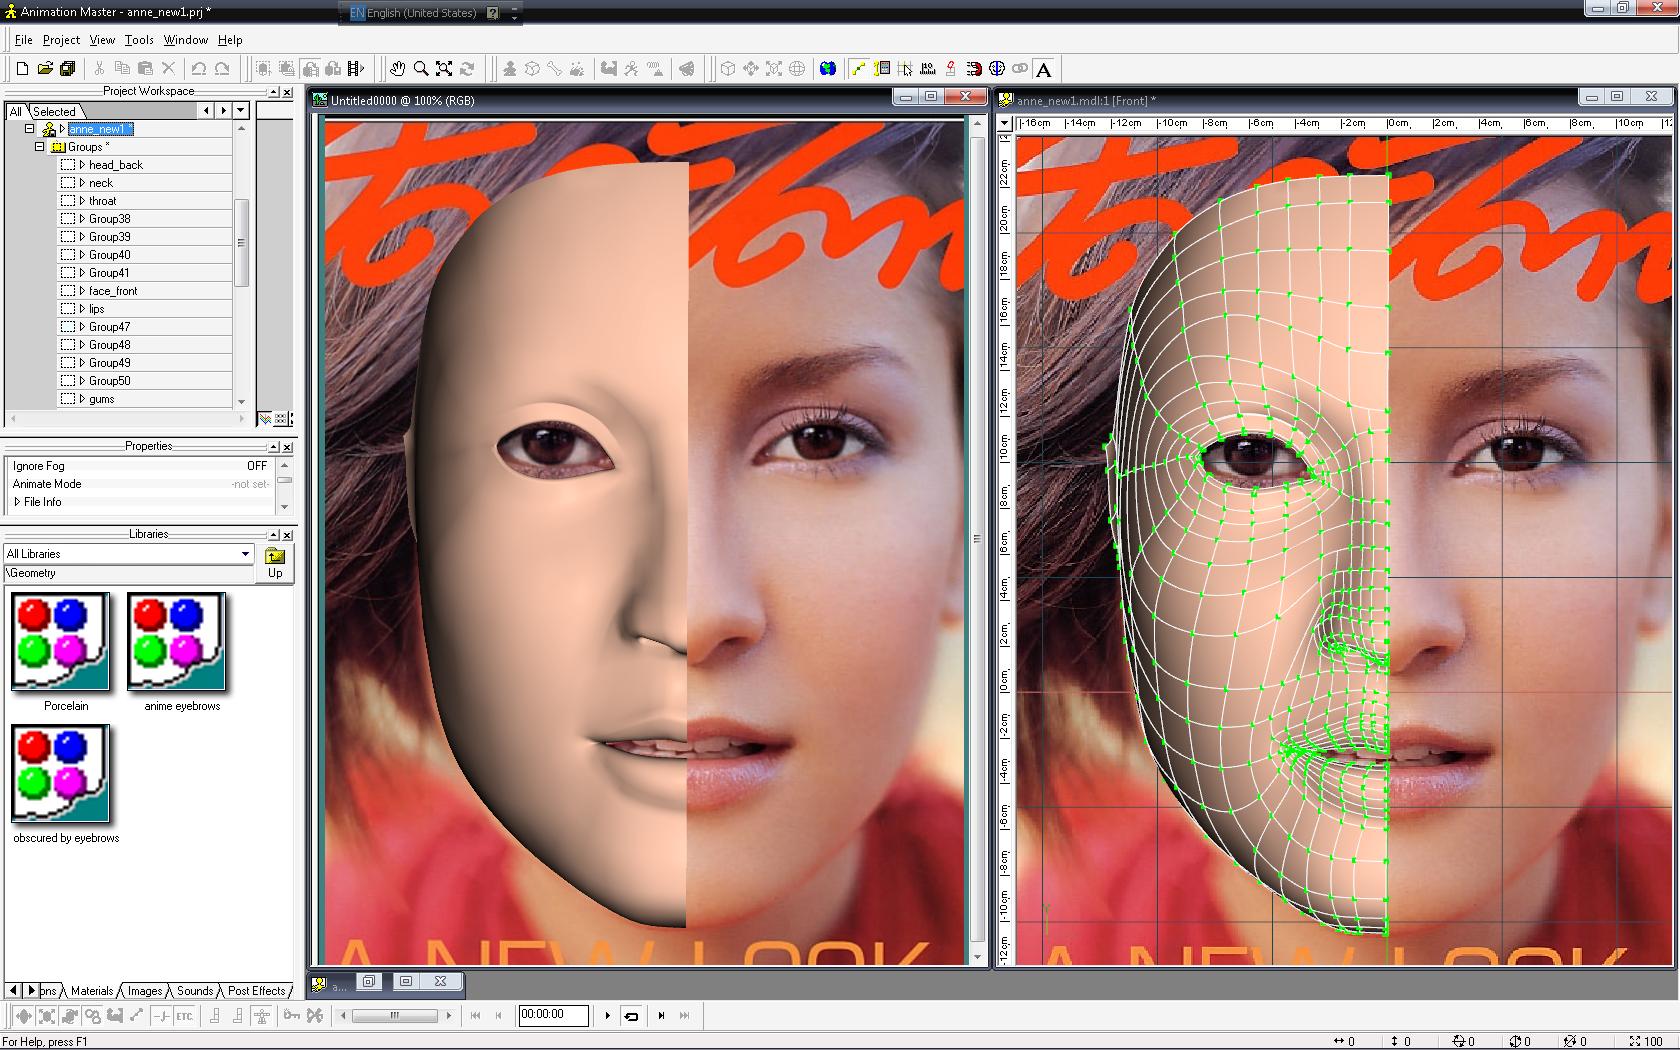
WIP... she is a beautiful Thai moview star.
StormedFX replied to StormedFX's topic in Work In Progress / Sweatbox
No, I have not yet make her eyes. What you see is just from the rotoscope from the background. I still might have to move those splines around in the area of her cheek bone in order for me to control the contour and shape. CHEERS!
-
WIP... she is a beautiful Thai moview star.
StormedFX replied to StormedFX's topic in Work In Progress / Sweatbox
Well!!! This is not good as I want, but this is the final version with a test decal. I will have to turn this into a long-term WIP, because there are lots of things I would like to improve with this model. The model has lost some details in certain area which are not what I would like to see, but I have tried my best to get as close as possible. I will have to say that I have learned alot from this WIP when it comes to modeling from a realistic photo, and there is no doubt that AM does handle it pretty well for me. This is still a everyday learning process for me which I am really enjoy. Comments and suggestions will be really apprecisted. There is one question though, How can I make the image after the decal look brighter or lighter, because it looks too dark to me? CHEERS!
-
A face I've been working on for a couple of days
StormedFX replied to jirard's topic in Work In Progress / Sweatbox
COOL! Thank you for sharing... Looking forward to your animation. CHEERS! -
A face I've been working on for a couple of days
StormedFX replied to jirard's topic in Work In Progress / Sweatbox
I like your model, and these should be an interesting animation. I have tried to render mine just like your second picture(SSS, I guess) but coannot get it to work. Any recommendation? I would love to see your animation. CHEERS! -
You can download from the link below, ftp://ftp.hash.com/pub/misc/Data.zip or go this link. http://www.hash.com/forums/index.php?showt...379&hl=data CHEERS!
-
WIP... she is a beautiful Thai moview star.
StormedFX replied to StormedFX's topic in Work In Progress / Sweatbox
Ahhhh!!! Thank you for your help... I am looking into it and notice that the spline loop causing the nose looks like a dent to me. CHEERS!
-
Having Problems with a material...
StormedFX replied to KnightHammer's topic in Work In Progress / Sweatbox
Glad that helps! That looks much better to me! Nince model you have here. CHEERS! -
WIP... she is a beautiful Thai moview star.
StormedFX replied to StormedFX's topic in Work In Progress / Sweatbox
I will try as you have recommended to see if that helps, and I might have to check the model again to see if the contour around her eye is in the shape that I thought it was. Thank you for your commend and your help. I have not gone that far yet, almost got her teeth done. I start little bit here and there to get a rough spline layout and to group them, since I now have learned that "Never start modelling without planning your splines layout". That ear and that thread will be really helpful. To me, ear is the hardest to model, especially with spline. You made a really nice ear model. Will keep update my progress. Would you mind if I will use it to attatch to her face? CHEERS! -
Having Problems with a material...
StormedFX replied to KnightHammer's topic in Work In Progress / Sweatbox
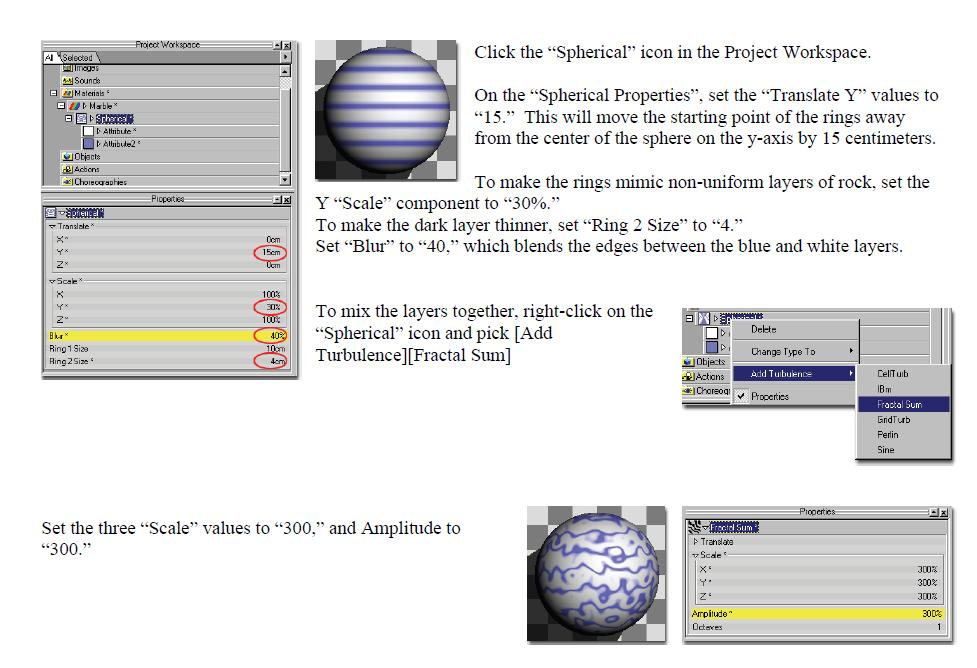
Have you tried to finish the TAOAM? There is an exercise to create your own marble material. Is this a material you created your own? If so, you migh want to check out that exercise. You need to add turbulence and choose "Fractal Sum" to get the swirling effect. CHEERS!
-
Help me step Uv flatten model krub! (totorial)
StormedFX replied to Klum3D's topic in Work In Progress / Sweatbox
Hehehe!!! I am Thai but live in US... That was why I asked about the word "KRUB", because that means "YES" in Thai, and also this word is always used by men at the end of a sentence to show a respect for others which depends the meaning of that sentence. Welcome to world of AM! Klum.... CHEERS! -
Help me step Uv flatten model krub! (totorial)
StormedFX replied to Klum3D's topic in Work In Progress / Sweatbox
Try the following links. They are great tutorials. Just a curiosity! What is "KRUB? Are you Thai? http://www.colins-loft.net/FaceTexture.html http://www.virtualmediastudios.com/tuts/mapping/Preface.html CHEERS! -
WIP... she is a beautiful Thai moview star.
StormedFX replied to StormedFX's topic in Work In Progress / Sweatbox
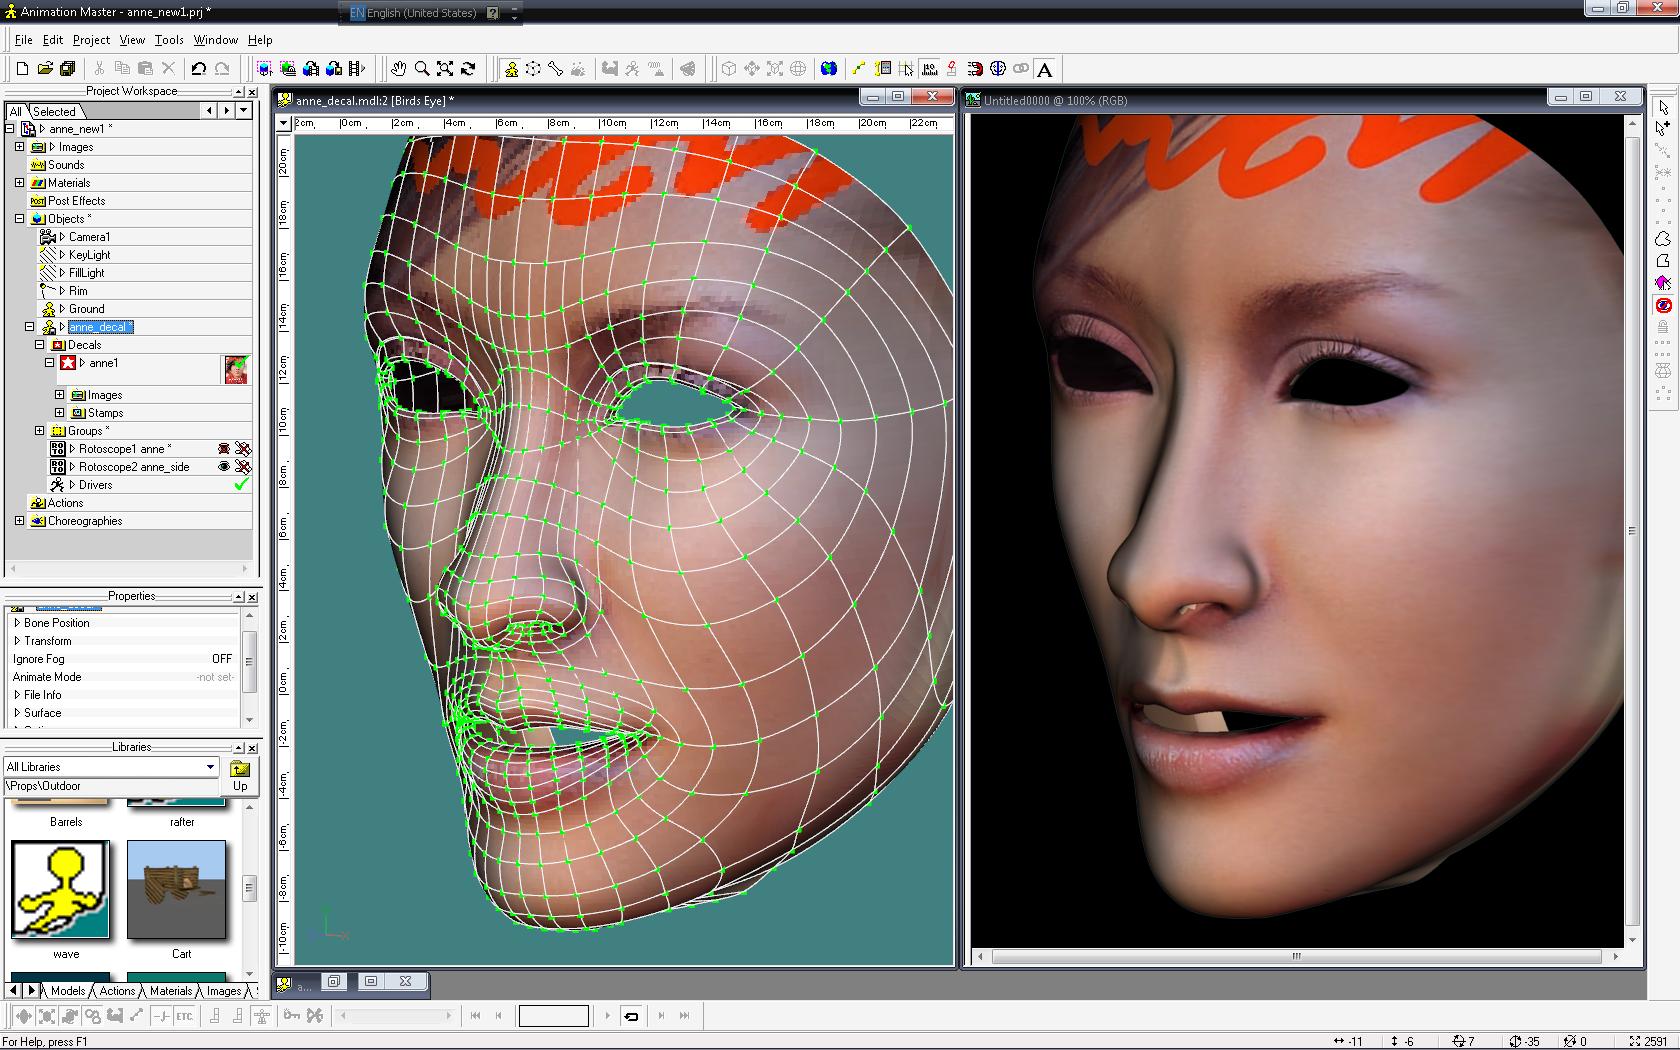
WELL! The bias does not help me fix the flat around her eye. I am really having a hard time in the eye area, and this will be my final splines reducting. How do you normally handle the eye area? Any tricks of trade? CHEERS!
-
WIP... she is a beautiful Thai moview star.
StormedFX replied to StormedFX's topic in Work In Progress / Sweatbox
This is the best I can do to reduce those splines, but as you can see I already lost details around her eyes which looks too flat to me. I hope this can be fixed by using the bias, but if not, I might have to add one more ring back. CHEERS!
-
I have been using the same as Vern mentioned and combine that with short key "4", "5" or "6", but the most important is that you have to get splines flown continuously in the first place. I then use bias to adjust the contour of a spline between two CPs which can only be adjusted by using the bias, because by adjusting one CP will effect those that connected to the one you adjust. These are what I have learned so far from my last two WIPs. CHEERS!
-
Excellent works! I love the way you add those details. CHEERS!
-
This will do the trick where I still have ways to control detail inside. Thank you and cheers!
-
That works pretty well. Thank you and cheers!
-
YEP! I tried it, and it looks nasty. Thank you and cheers!
-
WIP... she is a beautiful Thai moview star.
StormedFX replied to StormedFX's topic in Work In Progress / Sweatbox
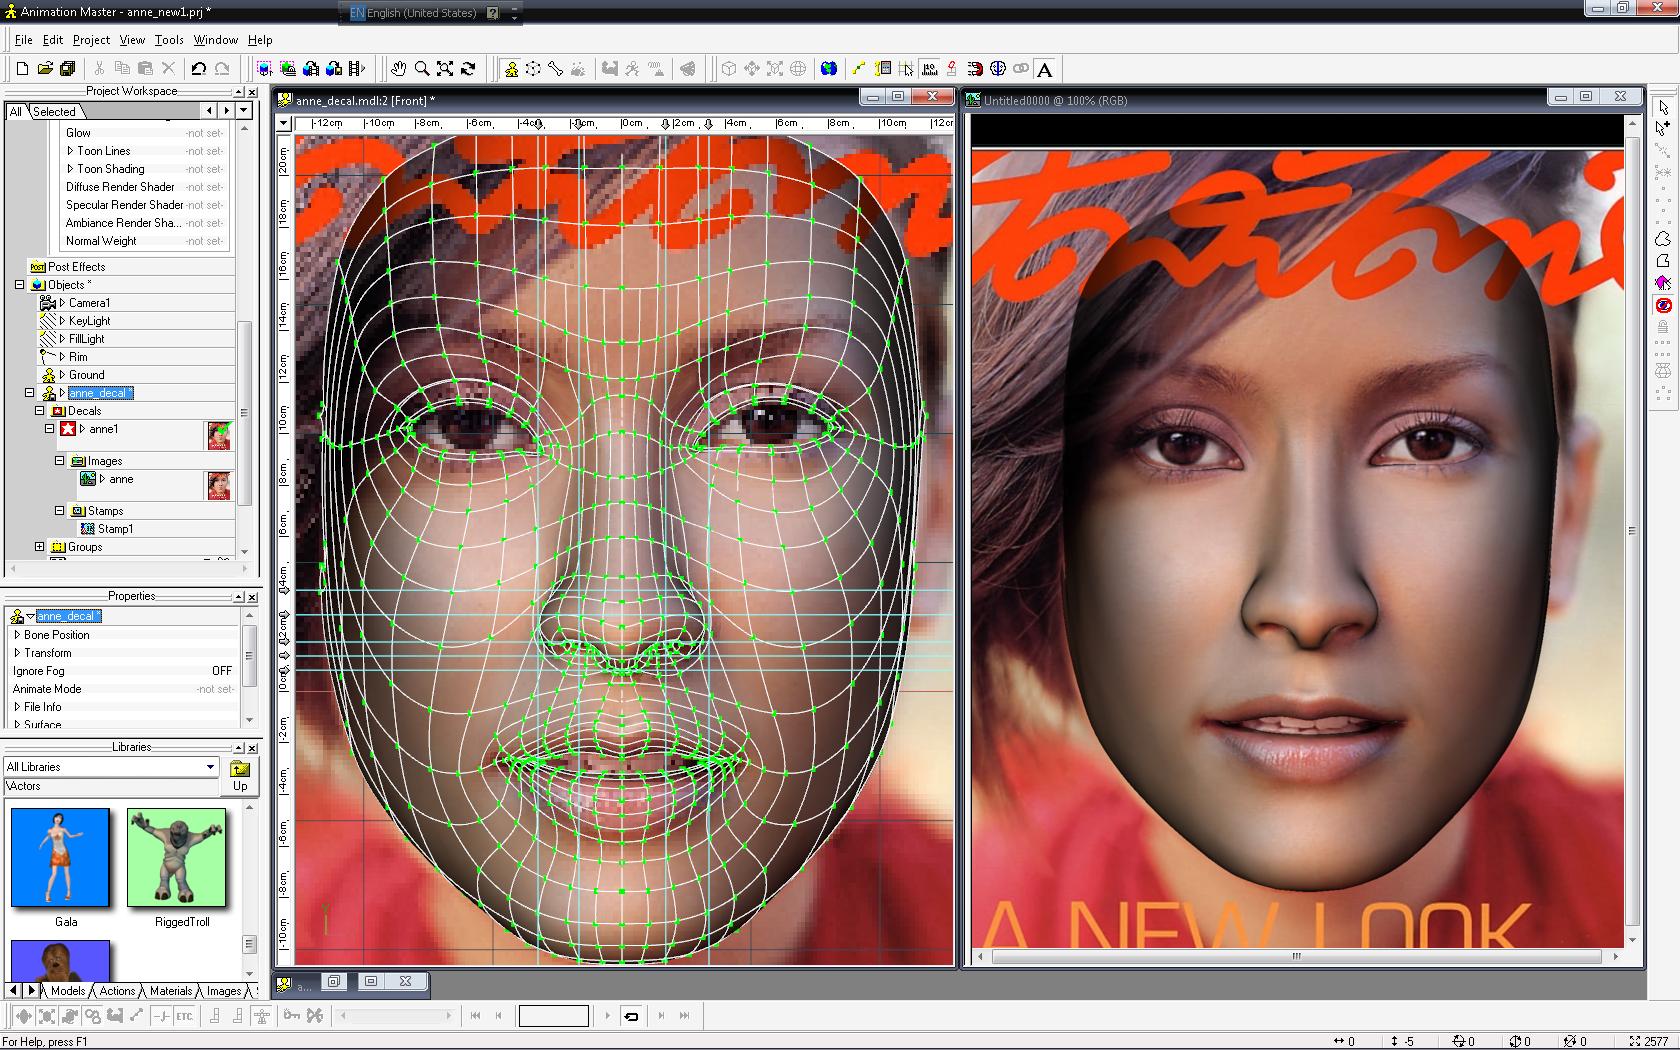
YESSSSS!!!! She is beautiful... I am still planning to reduce her splines to 60% which I think it can be done... Her face contour and shape will be lost If I have to reduce more than that... but will try my best... I will rig her face by following Caroline's rig thread... I learn a lot by just reading her rig thread... thank you again for all comments. Will keep update to the final... CHEERS! -
WIP... she is a beautiful Thai moview star.
StormedFX replied to StormedFX's topic in Work In Progress / Sweatbox
Thank you! I need to see those splines in the render so I can see which splines can be removed without affecting the contour and the shape of her face too much. Also, I can see which CPs to fine tune. This is my second spline model which I have work with AM. The first one is just something simple for me to learn how splines and CPs work together. Thank you for your comment. CHEERS! -
WIP... she is a beautiful Thai moview star.
StormedFX replied to StormedFX's topic in Work In Progress / Sweatbox
Thank you, Caroline. I will leave her texture the last and will work on reducing her splines to 60%, and I will work on the rest of her head. I have been reading your rig thread and that will help me a lot to rig her face. Thank you for your comment. Will keep update. CHEERS!