StormedFX
-
Posts
190 -
Joined
-
Last visited
Content Type
Profiles
Forums
Events
Everything posted by StormedFX
-
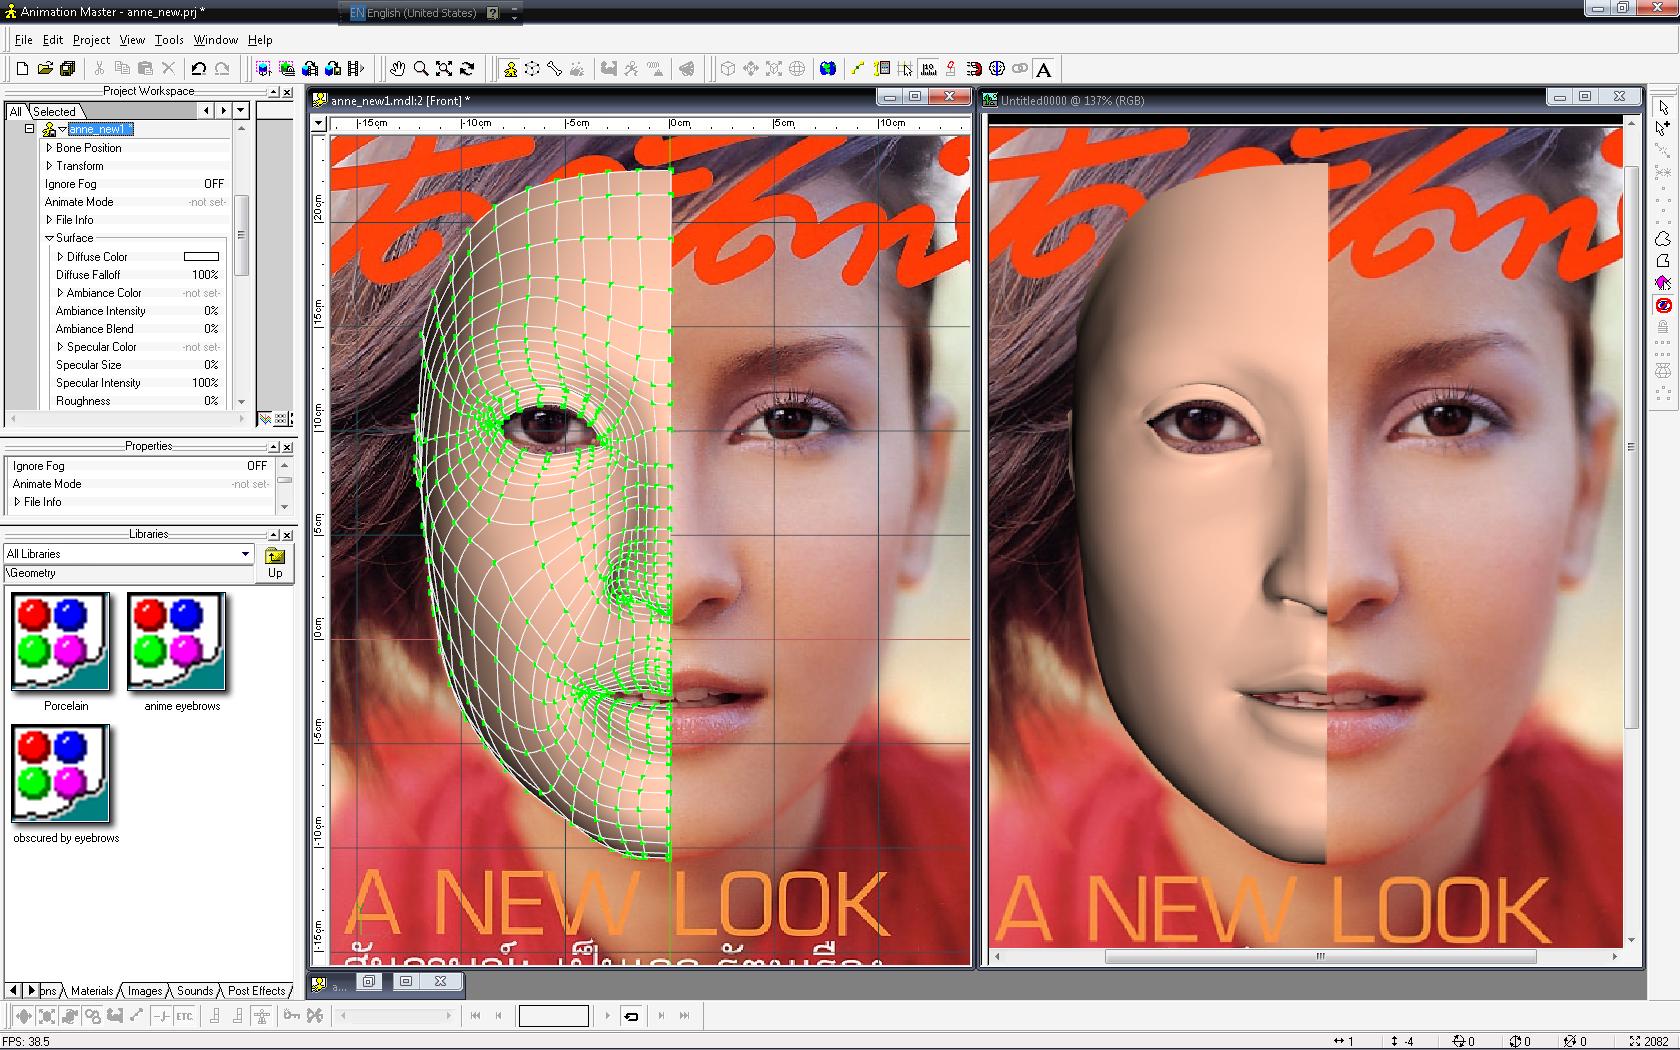
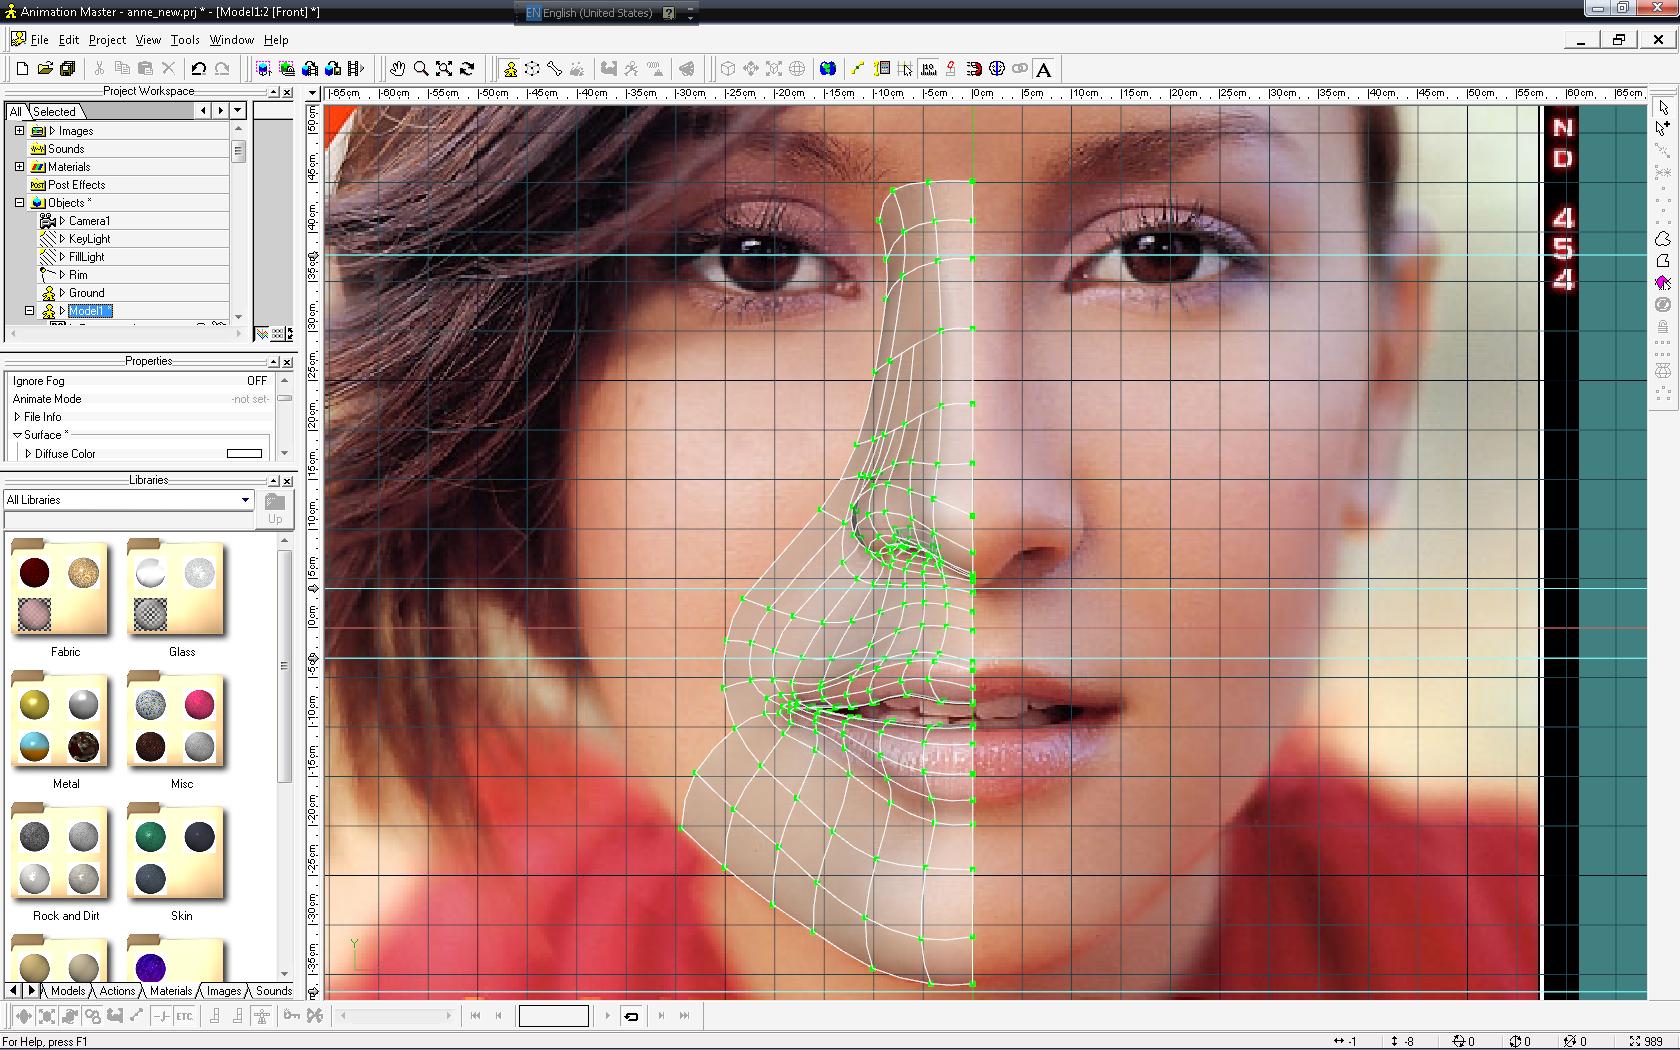
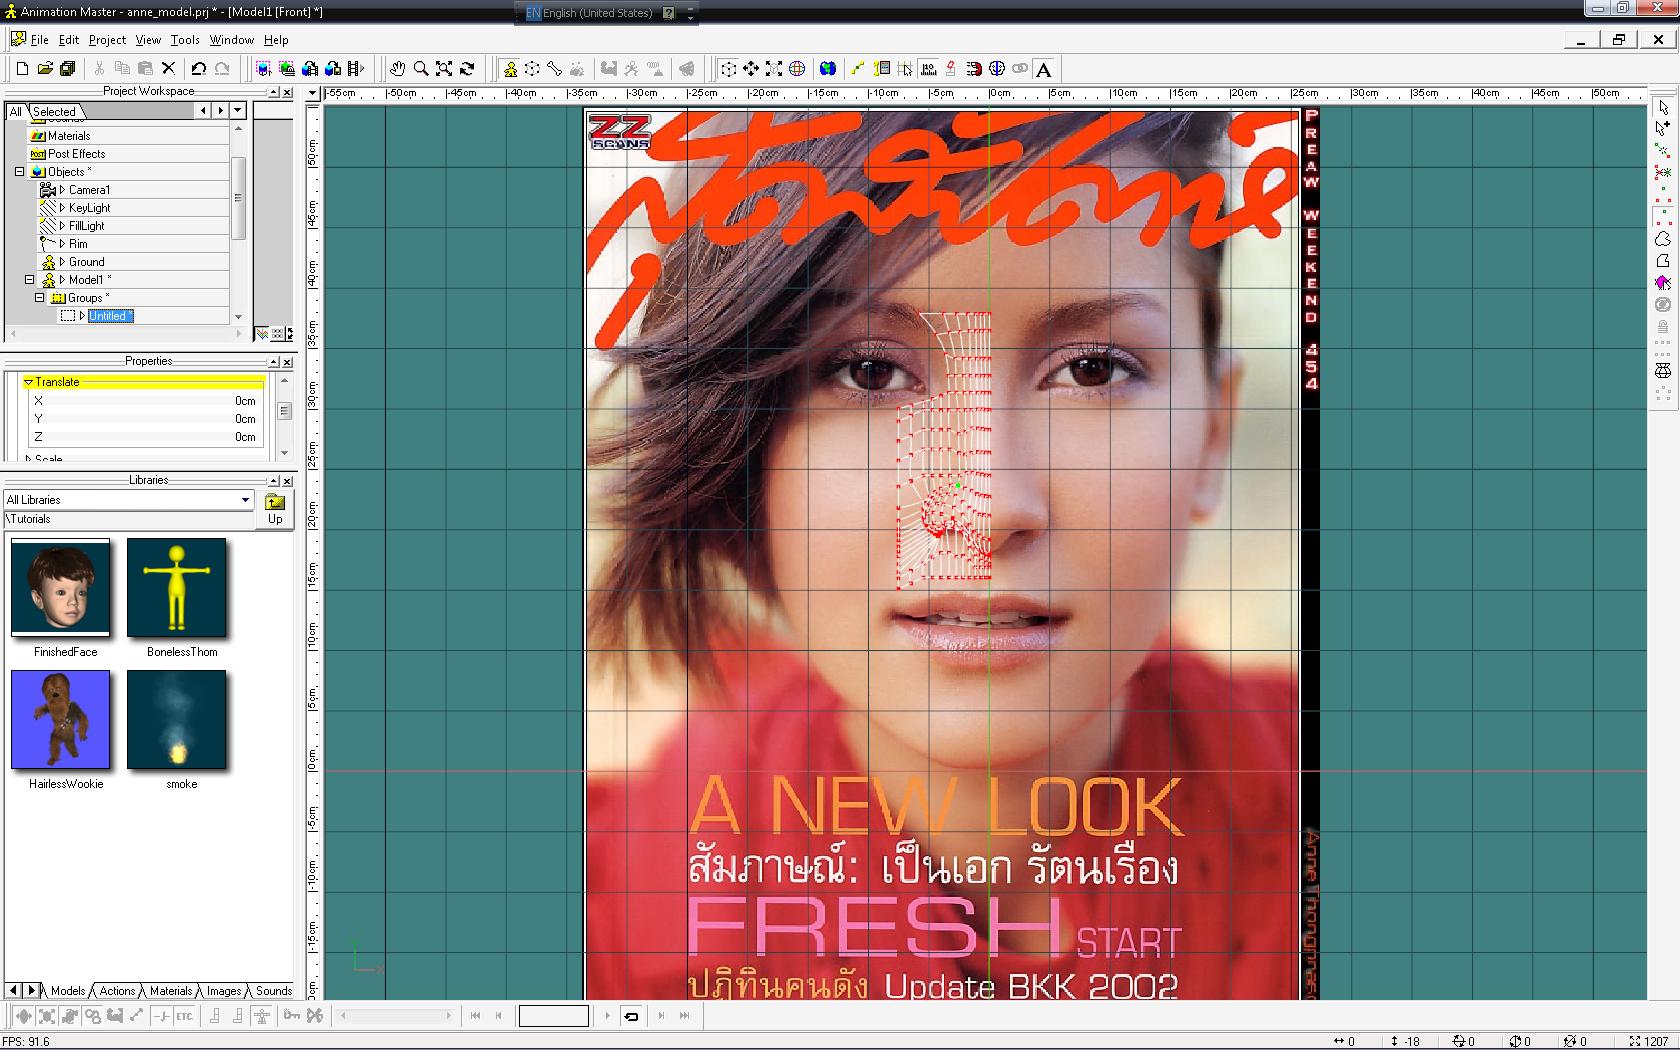
WIP... she is a beautiful Thai moview star.
StormedFX replied to StormedFX's topic in Work In Progress / Sweatbox
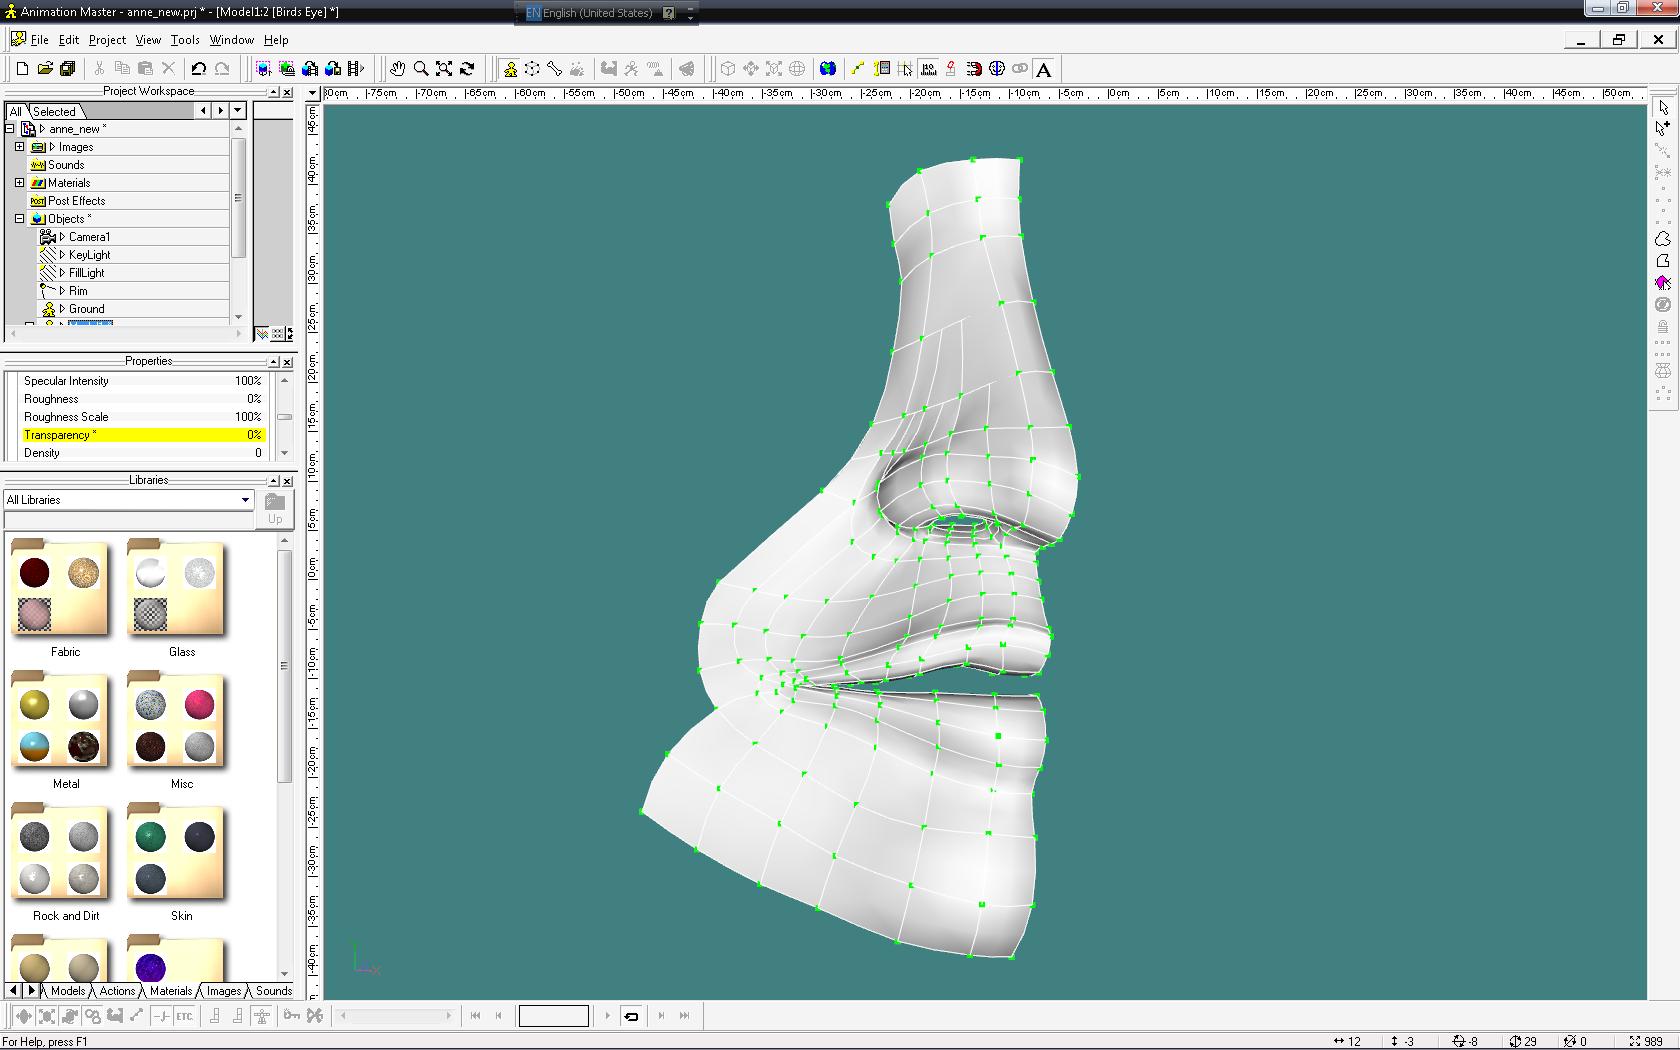
Still quite many Splines... but you handled them well. *Fuchur* YES! Still too many splines, and I am still planning to reduce to about 60% which I think the best I can do to keep her face contour and shape... Thank you for comment. CHEERS! -
WIP... she is a beautiful Thai moview star.
StormedFX replied to StormedFX's topic in Work In Progress / Sweatbox
Here is my WIP update... there are still some areas need to be tuned. Just one quick question. How can I render with lines so I can see at which CPs exactly to be tuned? CHEERS!
-
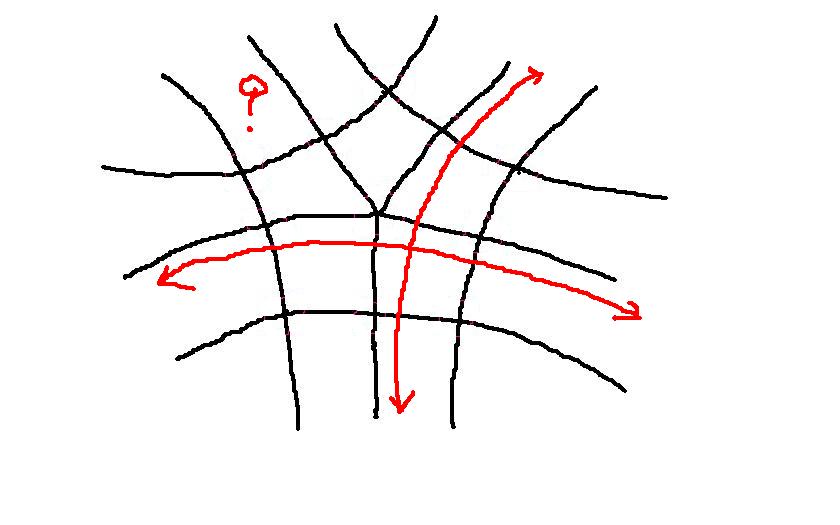
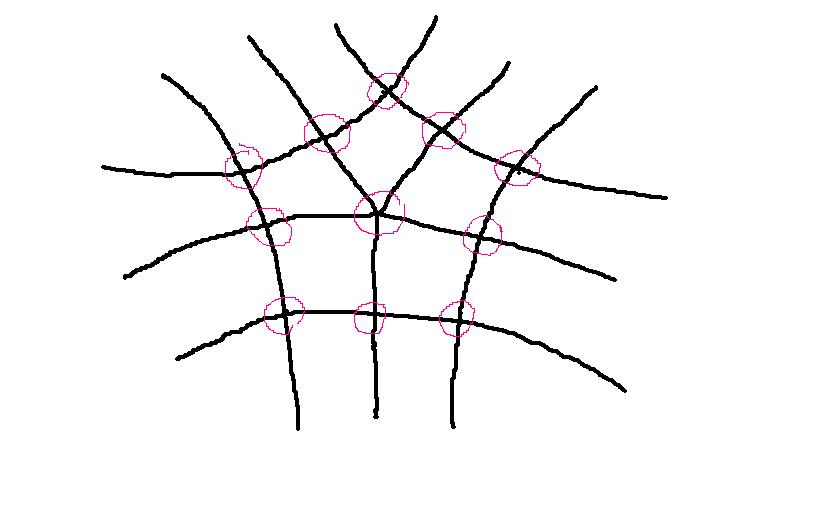
One thing for sure after a quick thought about it... One of the splines will be discontinued.
-
I have a question about this splines whether or not it will work, and if there will be any issue during an animatiion. CHEERS!
-
Still not too late for Eric to change his mind...
-
Looking great! I wonder what Eric would say about this... LOLLLLL
-
This is goning to be a great animation. Keep us posted.
-
Sorry! Forgot to tell you how to save it. In the PWS, expand the "Objects" tab, then RIGHT CLICK on the "Model1" (which you can rename it to whatever you want) and select either "Save As" or "Create Shortcut in Library".
-
Well! How abot the pictures that DarkLimit have posted? Can you use those as the reference? You are making progress, but it will be much better for you if you follow the Cooper but use different picture as I mentioned above. CHEERS!
-
How about the "Cooper Face" exercise? Try to follow it, and you will learn a lot from it. I will keep my word for it. No!!! The push-and-pull is just what I call for fine tunning the contour of certain vertices, and someone else might call it differently. That reason I call it push-pull, so you can get the same feeling as working with sculpting but not just pushing-and-pulling those vertices. You start with a spline that contour the shape from the side view, you then extrude and move it either in or out using LEFT or Right arrow as show in the picture. extrude.bmp push_pull.bmp
-
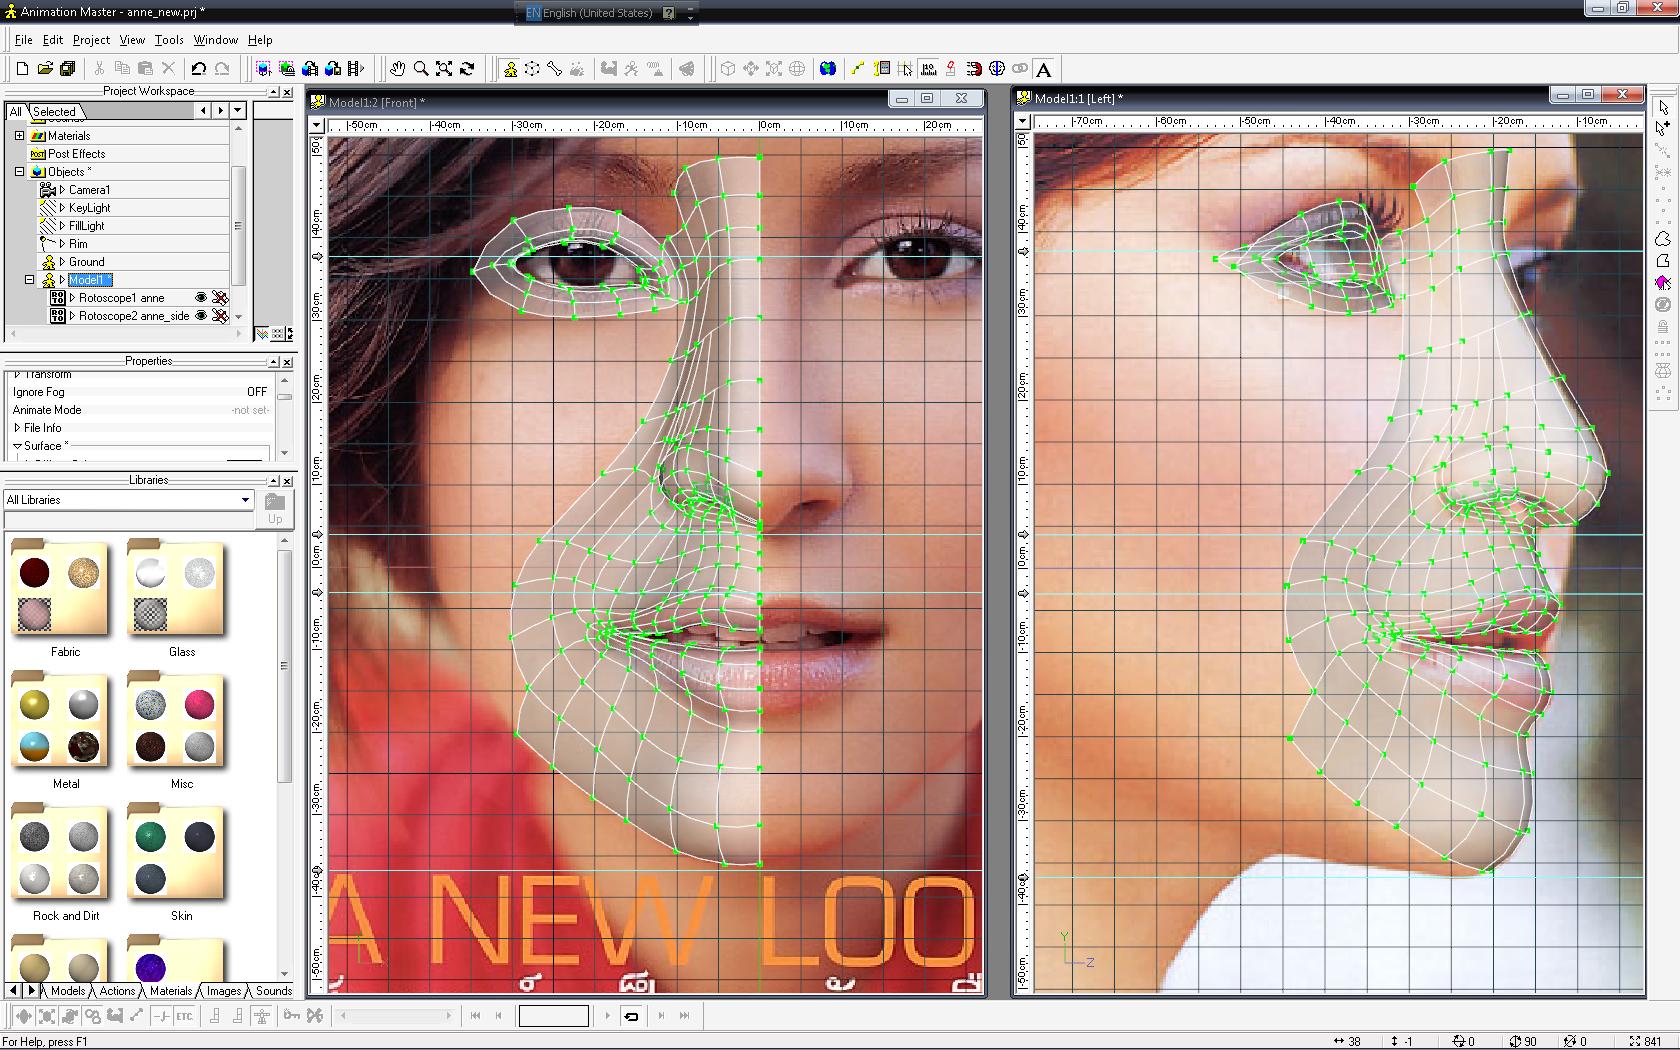
Do not forget the side view as everyone have suggested, and work your splines from the noes toward the back, so you can get the depth that way. Open front view and side view side-by-side. Rotate either view to 3D view to push and pull certain vertices, this will give that same feeling as sculpting. You are almost there. CHEERS!
-
Looking great. Keep us posted, cheers!
-
WIP... she is a beautiful Thai moview star.
StormedFX replied to StormedFX's topic in Work In Progress / Sweatbox
I used to do lots of sculpting and drawing portrait as my hobby when I was in Thailand, but not often now. This is not my job, but it is what I enjoy working on during my free time. Thank you for your comment. CHEERS! -
WIP... she is a beautiful Thai moview star.
StormedFX replied to StormedFX's topic in Work In Progress / Sweatbox
Thank you! YEP! I did find one of her semi-side view which is good enough to give me an idea of her nose contour, does not match perfectly but still better than none. CHEERS!
-
WIP... she is a beautiful Thai moview star.
StormedFX replied to StormedFX's topic in Work In Progress / Sweatbox
I have decided to start a new one with less splines, I hope so. Still try to reduce more after the whole face comes to gether. CHEERS!
-
WIP... she is a beautiful Thai moview star.
StormedFX replied to StormedFX's topic in Work In Progress / Sweatbox
YEP! I am starting it all over to reduce those splines and add more as I need it. Will keep posting the progress. CHEERS! -
WIP... she is a beautiful Thai moview star.
StormedFX replied to StormedFX's topic in Work In Progress / Sweatbox
YEP! I totally agree... I just would like to see how best the spline modelling can handle a realistic model. For certain areas, they might need more splines than that they need to in order to have more contolr and to get more realistic shape and contour close to the model as much as possible. I will keep updating my progress on this. CHEERS! -
WIP... she is a beautiful Thai moview star.
StormedFX replied to StormedFX's topic in Work In Progress / Sweatbox
Hehehehe!!!! I thought I was working with poly model. I think I might have to star with less splines and will keep posting the update. I might have some problem with her sideview if I imagine her picture incorect but will try to see "how artistically inclined I am?" CHEERS! -
Here is my WIP. I have decided to model her face only and have planned to UVmap for her texture. The only bad part is that I only have her front view image not the side view. Just would like to try my best. CHEERS!
-
Jusr would like to add my 2 cents word. Clay - the third dimesion is already there for you to work with to make it easier. A:M - the third dimension is from your imagination of how to combined the first twos and put it in the third one into the 3d world spce that is what makes it harder. But both still come to a commonsense where "Artistically Inclined" comes to play just like a mechanic always says "I AM MECHANICALLY INCLINED" where I can look at thing from the outside and figure out how it works in the inside... The same concept applies to both. You can work with clay all day long but without knowing where the third dimension should be the clay method is worthless... but with A:M if you can use your own imagination to find out where that third dimension is from those front and side view you can call yourself "I AM ARTISTICALLY INCLINE....." To me, A:M is not easy for modeling but if you can accomplish the hardest part of it you can then accomplish the rest... CHEERS!
-
Yes, you can import the texture mapping with the OBJ.
-
I have never imported 3ds format into A:M, but you might wanna try to open the texture file by itself to make sure that it is there. CHEERS!
-
Not sure why you want to convert *.obj to *.ply format, but what you can do is Import your *.obj into BLENDER and export it out as *.ply format.
-
Here are some example of the same model I made in one of opensource app and export both in OBJ format. The first one has about 3480 faces, and the second one has about 12862 faces. They both are imported without any problem, but I am sure that I do not want to spend about 3-4 days trying to fix them. I think you are better off modeling your model in A:M as others have suggested. At the meant time I am still trying to figure out the best way to model in poly and import it into A:M without having to fix it, but this will not be that easy. I have seen someone does it in ZB but not sure how. CHEERS!
-
Your OBJ file is too dense as Rob mentioned. Check how many faces your OBJ file has? Below 10,000 faces should be ok, you might have a lot of clean-up to do. CHEERS!