-
Posts
21,649 -
Joined
-
Last visited
-
Days Won
119
Content Type
Profiles
Forums
Events
Everything posted by Rodney
-
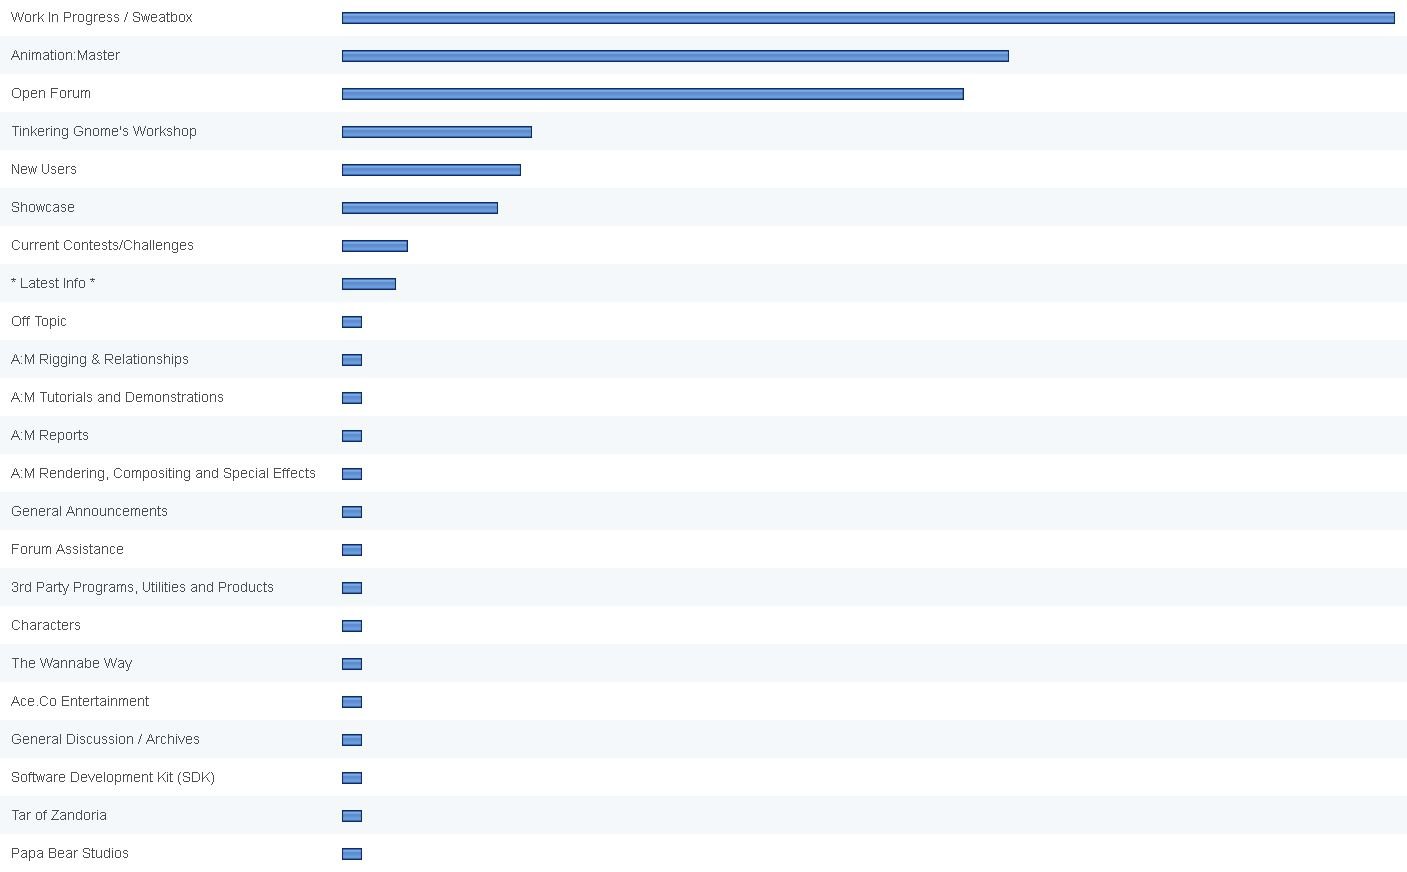
If we take a little longer view (say over the past four years) we might get a slightly different view: (yes, data intentionally cropped out... the number of views being not quite as important as what was viewed. For the curious, the top number is 375787 and everything thereafter is lower) If your topic is on the listing PM me and I'll give you the exact number of views (although most of that can be derived directly through the public forum).
-
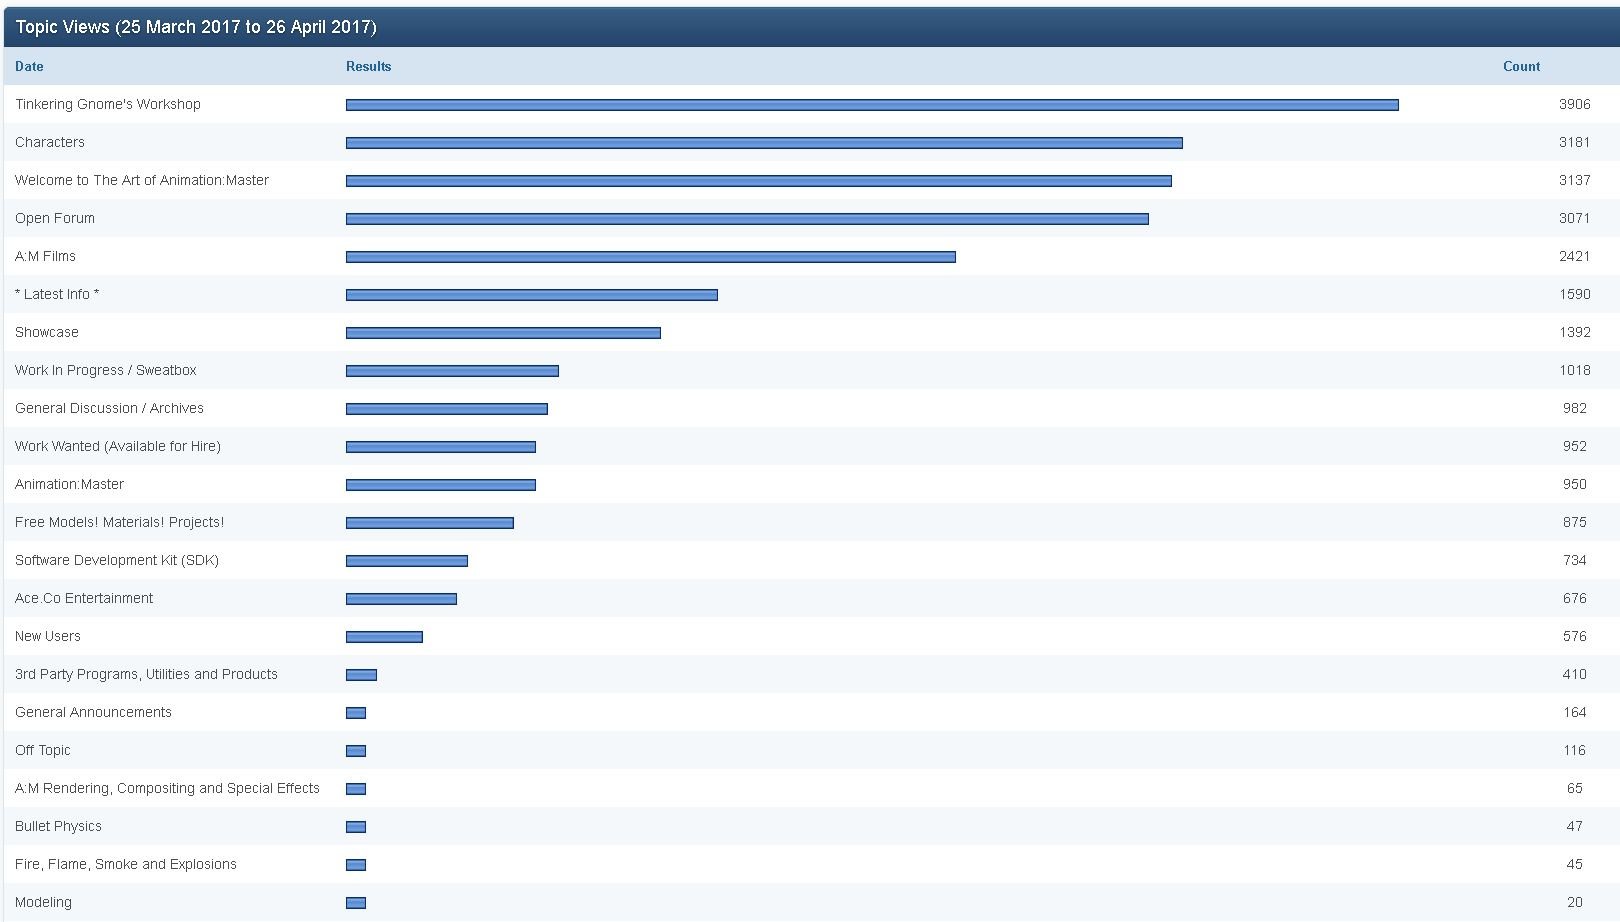
Speaking of benchmarks, milestones and such... Wouldn't it be useful if we could benchmark the interests of A:M users in the forum? Rhetorical question. Of course it would. Here's some super secret stats of topic views over the past month. Shhhh... this kind of benchmarking stuff is super secret and no one should know of it. So, what do these statistics tell us? Well, first and foremost it means I need to get back to work on getting the Tinkering Gnome's Workshop subforums operational (most probably have not ventured into 'The Unhidden Library' and 'The Unlocked Door'. Who knows what the Tinkering Gnome has been up to in those subforums. In other words, a topic high on the viewing list should at least be studied as an area of popular interest with an eye on further promoting and exploiting... yes, exploiting.. that interest. And what exactly is it that A:M Users are drawn to repeatedly in those storied topics and posts. And of course the Tinkering Gnome should be congratulated for his continuing dedication to our community. This doesn't mean every topic that doesn't get maximum views isn't important. Of course it's important. someone took the time to post it. And we should remember that while stats should never drive our decision making it certainly can inform them.
-
That appears to be the result of animating that toon line property although we'd have to check to see where that is. An important clue would be the specific character/objects the change is occurring on although... you might look first for some animated parameter under the camera. As for the number of views. We are experiencing a high number of guests and while we might hope each is a legit viewer some are surely running searches or downloading the entire forum. Some of that can be accomplished as a guest while other access would require a login. I've noticed an uptick in registrations too and some of that is legit... some opportunistic. I'm as docile as a lamb. As patient as a lion. I watch. I wait. I play and pounce as necessary. For what it is worth, I also notice there are a lot more searches from search engines these days and while most of those types of visits appear to be quickly answered, the subject matters of the searches appear relevant (as opposed to random). That is encouraging. .
-
Crazy. Now THAT is adventuring. I've told kids at church a reason pirates had eye patches is because they often needed to transition from light to dark places quickly and the patches eased that transition (without needing to wait for the eye to adjust). They've taken to asking me, "Tell us another story about when you died" due to some of my reckless exploits I've managed to survive, which I dutifully recite to them. But I've yet to prepare them for a telling of the adventures of Martin.
-
Ernest's 'Subject 99' is along those lines (although a more excellent adventure than 'Archer' by a long shot). Sadly, the links to Ernest's website and the episodes of 'Subject 99' are long gone. Perhaps he can point us to a good location to watch the episodes.
-
I can think of a few projects with great potential that used that same basic flat shaded style. (I briefly looked for a link but didn't find any) None were ever taken to a state of completion. I'll guess projects in that style render very quickly!
-
I inherited one of these from my brother but the whole setup/xbox is still in its original box. I thought I might set it up for scanning but saw that I needed that PC cable and... then read that they had discontinued making it. I'm sure it's still available especially from third party sources. From all that I've seen it works quite well. Let us know about your experience.
-
I'll guess yes. I know of several people who use that or similar equipment. Me want. (Of course any product that says 'Get free quote' is likely out of my price range although I'd guess there are companies that will rent and or do the scanning for a less costly fee.)
-
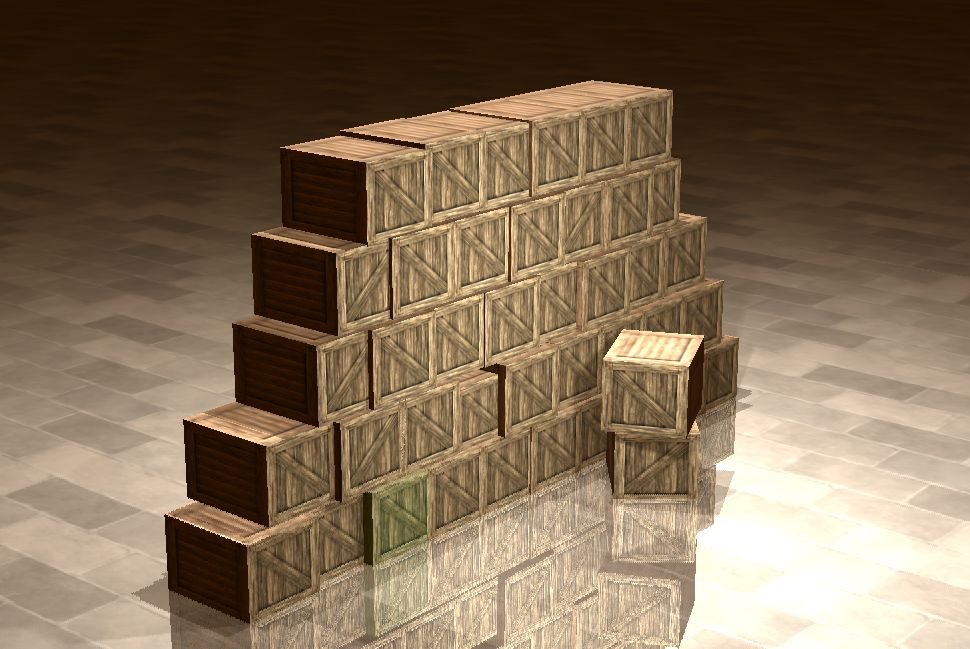
Here's a slightly similar setup consisting of: 277 patches 3 images The main benefit to making each crate a separate model is that each can be modified quickly independent of each other. Wall o' crates built using the brick plugin. crates.zip
-
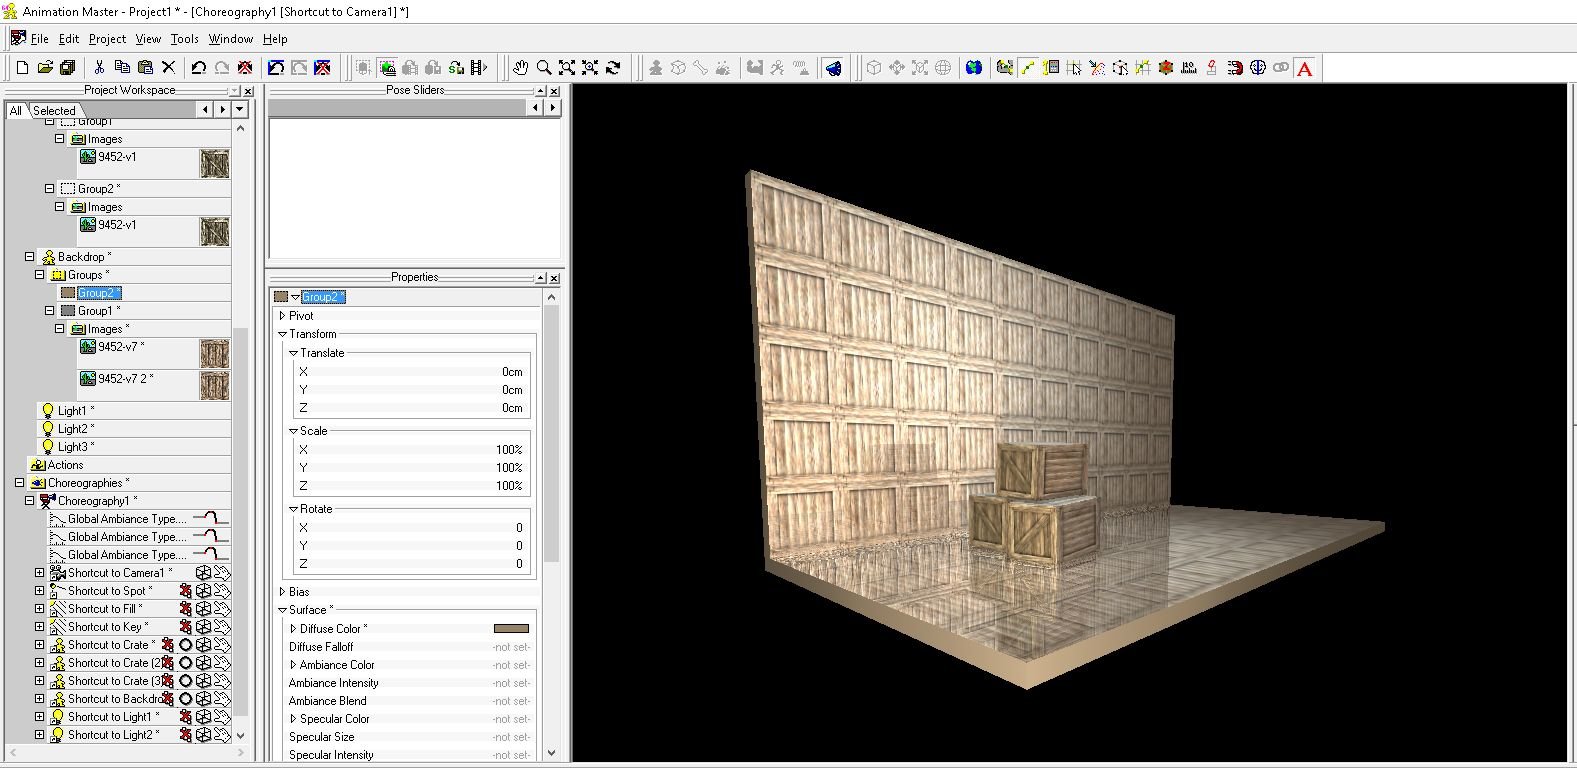
And speaking of setting up scenes.. Here's random test of a low patch scene. 34 patches 2 images (applied as patch images to those 34 patches). 3 lights (default lights are still there but turned off) The scene could definitely benefit from additional variation in the back wall (of crates). Even adding a diffuse map to alter color of individual crates would help. Not to mention a little displacement and/or bump mapping to separate the crates. An alternative might be to add a transparent border around the image so create that separation. Care must be taken to ensure those same images aren't used for the three featured crates as we wouldn't want those connecting sides to disappear. Interestingly, the patch count wouldn't be bad even if the wall (and floor) were duplicates of the crate. The brick plugin would make short work of stacking crates. Crate images were randomly grabbed from the internet. Edit: Upped from 20 to 34 patches to give the backdrop some depth/base.
-
For those that want to forego the Shareware on Sale route I see that Filter Forge 6.0 (the latest release) is on sale at 80% for one more day. I am not a fan of flash sales... just lower your regular price already... but if it saves someone money...
-
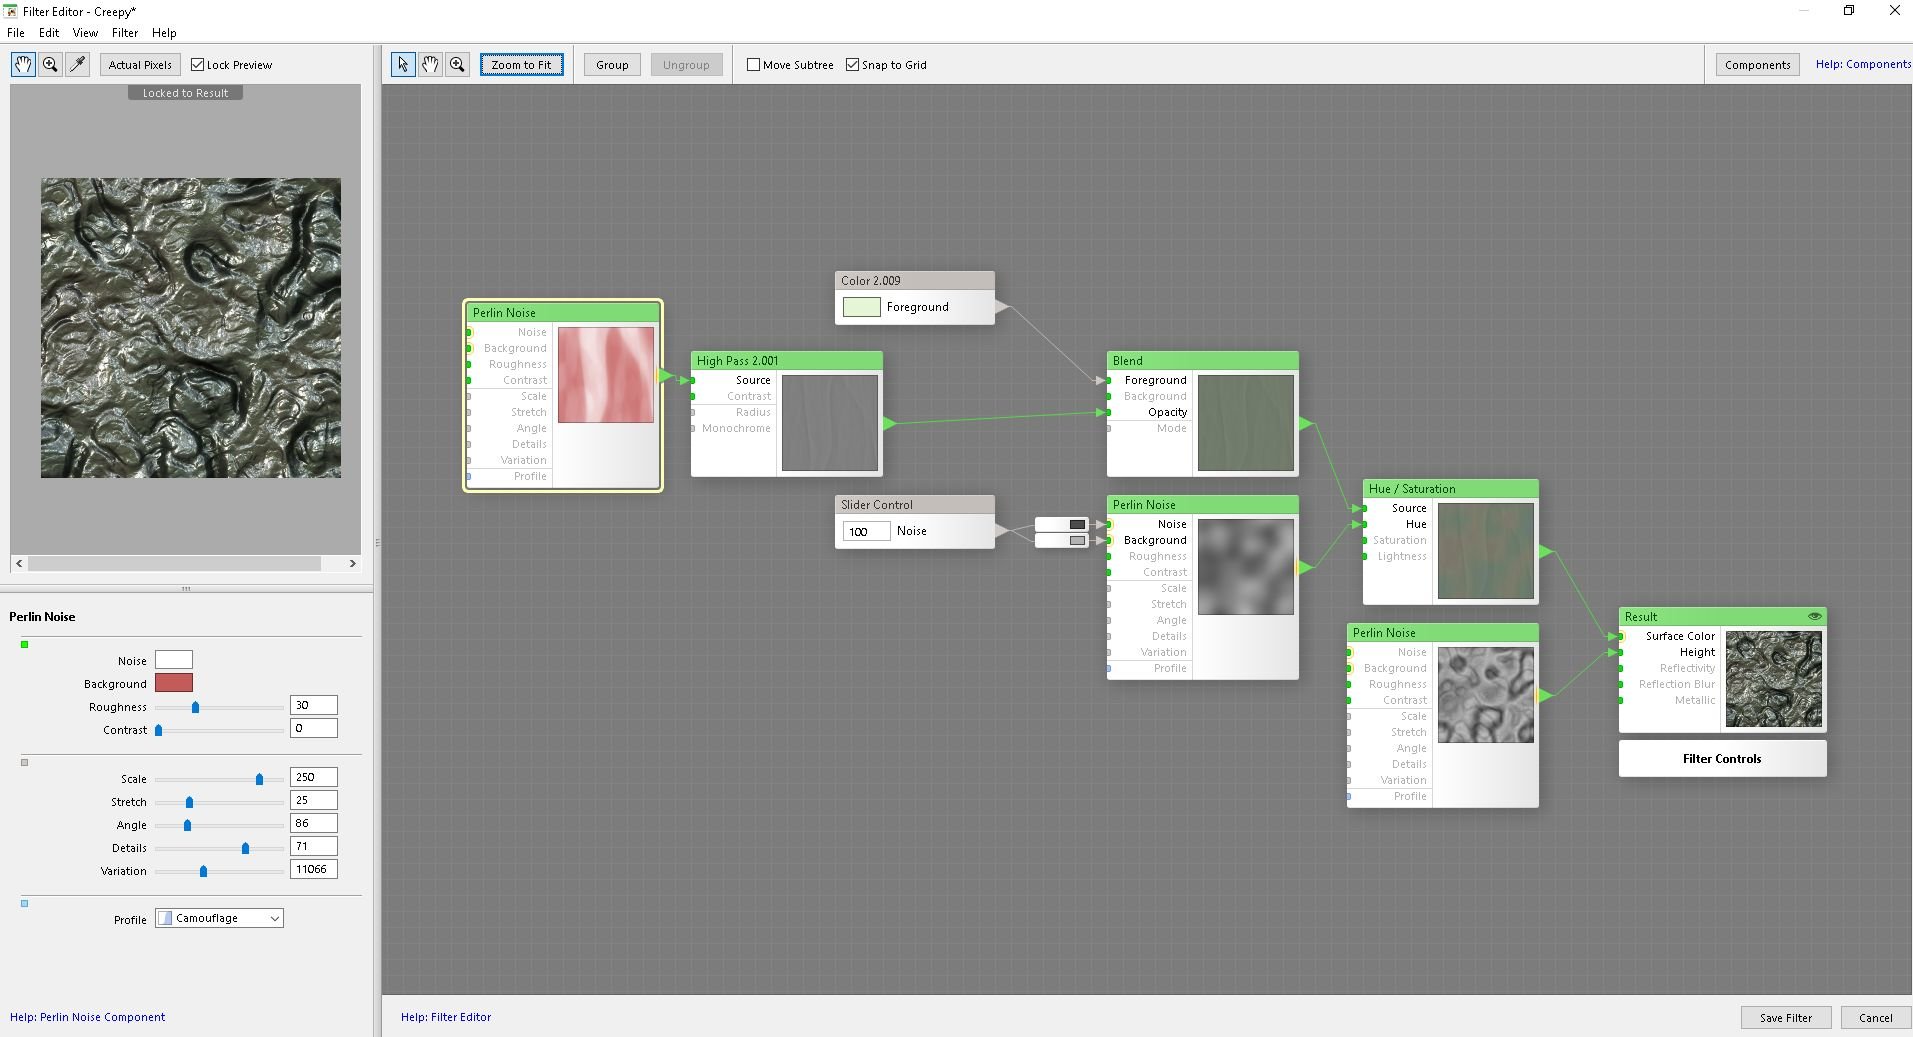
Studying how filters are created and edited can also aid in use of similar effects in Animation:Master. This is an additional benefit of the node based systems where each node can be studied individually to determine how it contributes to the effect. Animation:Master has these same basic 'nodes' but the user interface does not present them to the user. Working with nodes in another program can help in understanding the nodal process behind the scenes in A:M. The two areas where this will be most beneficial in A:M is with Materials and the Compositor (which is A:M's 'editor' used in leveraging Post Effects).
-
Standard Disclaimer: Installing software from Shareware on Sale (SoS) can be detrimental to the performance of your system. Pay close attention to information you share and the installation process. Filter Forge is a node based texture and effects editor with plugin for Adobe Photoshop, Corel Photopaint, etc. Filters created with FF can even be used in freeware programs such as Irfanview. Normal pricing is $250 but in teaming with Shareware on Sale a 100% discount is available for the next two days. I pass along this notification because I've found Filter Forge filters to be useful in the past and access to the filter editor is recommended for those that use such filters. Without the editor you must use the options prebuilt into the filter. Some details about the process of installing with SoS.. Basic details such as email address, platform etc. must be shared with SoS in order to access the discount. Once complete a download link is presented and a license key and user name is emailed. During installation SoS will attempt to install a daily notifier so that other SoS deals are sent. I recommend not installing this by YMMV. Filter Forge on its own provides a useful set of image processing filters but the true power of the filters is in the Filter Forge (node) Editor where new filters can be created. Once created those filters can then be put to use and shared. LINK At the time of this writing the offer is set to expire in just over 2 days. So if you think you may want this I recommend downloading and at least getting the license. This should allow registration of the product even after the offer ends. As for why the creators of Filter Forge might go the SoS route I would say that the release of the latest version of Filter Forge 6.0 is sufficient to grant a license of the older version for free in order to promote the new release. During installation an offer to upgrade to the latest version will appear. Filter Forge does maintain a forum where users can discuss the creation of filters, scripting tips, etc. https://www.filterforge.com/forum/ Some FF features: https://www.filterforge.com/features/
-
I probably should put posts like this on my blog but... it takes so little to amuse me. (The attachment is a test in rapidly producing storyboards) Today's word study: Premise A premise can literally be thought of as a preview; something seen (or experienced) in anticipation of an event. The origin of the word premise is said to be: It is in this sense of the word that we consider the setting of our scene, the characters that will inhabit that set and the conflicts to be staged. This setup prepares those in an audience with information we can't afford to tarry on in the telling of the tale, especially as we launch a story not at the very beginning but already well underway. Related word: Mise-en-scène (French pronunciation: [mizɑ̃sɛn] "placing on stage") is an expression used to describe the design aspects of a theatre or film production, which essentially means "visual theme" or "telling a story"—both in visually artful ways through storyboarding, cinematography and stage design, and in poetically artful ways through direction. It is also commonly used to refer to multiple single scenes within the film to represent the film.(Wikipedia)
-
Nice. I go away for a few hours and cool stuff gets posted. As an aside: The Average Normals setting is supposed to replace the old porcelain material that accomplished much the same thing (averaging/blending normals). I've heard various people say they still like to use porcelain material but that shouldn't be the case. I've yet to see (or run) any tests that confirm or deny either so that may be something we (collectively) need to investigate. Doh! You just made me realize what I forgot to do during my recent testing. I didn't crank up the ambient setting. Another trick in similar fashion is to make the ground plane mostly transparent (each setup calls for a different percentage but a good starting place is 80%). Then set the camera background color to the desired color and the ground will render 'mostly' that color and tend to fade into it as it progresses to the horizon. This also works well when rendering with alpha channel because whatever background the image is placed over will blend in with the partially transparent ground plane. As such we can control the color of background and ground dynamically on a webpage via CSS or whatever. Shhh... this is a very secret technique so don't tell anyone.
-
I have to head off to work but here's what I'd call a first stage (after modeling a quick mockup of the character**). No where close yet but I'm going through the process of reminding myself about more realistic lighting. The guy on the left is your reference image dropped into the Chor next to the model so I have a reference target to hit. **I ran out of time so I didn't model holes for the eyes and mouth. So... he's still a work in progress.
-
Let's stick with this until we get you all the way to your goal. We'll need a decent model (like the one in the image) to work with... I can replicate the model somewhat but you may have something else to work with. The first thing I note is that there is a lot to do with the image that isn't strictly speaking related to lighting. So we may need more information relating to that to narrow our focus. Regarding lighting effects: There appears to be some object out of the frame that is reflecting into the scene. Ambiant Occlusion is definitely adding some gray tones, shadows and such. It is not clear whether these images have been composited. The extend to which post processing has been accomplshed is still something of an unknown. So a few quick suggestions: Use Open EXR format (to gain higher dynamic range) You can always convert to other format later (even using A:M). For easy work of getting exactly the look you want I would render to various buffers. This can be done with PNG and other formats as well if preferred. In this way you can adjust the image to taste quickly in post (in A:M or other program) Plan on using Ambiant Occlusion SSAO is another option but I'd focus on AO first. Plan on using an Environment Map and/or 'card' to reflect light/imagery back onto the character. Use of Image Based Lighting (IBL) is definitely called for and the use of HDRI image will be ideal for maximum lighting effect This is accomplished in the Choreography's properties. We can use a single color (even animated) or an image/image sequence. It is this last one that mostly takes the place of a spinning light rig as that is accomplished by IBL automatically. I recommend working in grayscale only until you get the ideal shades, hues, saturation, etc. working. Then add color. If rendered out separately this can really pay of if compositing those images together as you can get finer control. There's more but that's what comes to mind immediately.
-
Whoa, Francois! Long time no see. It's great to have you back with us.
-
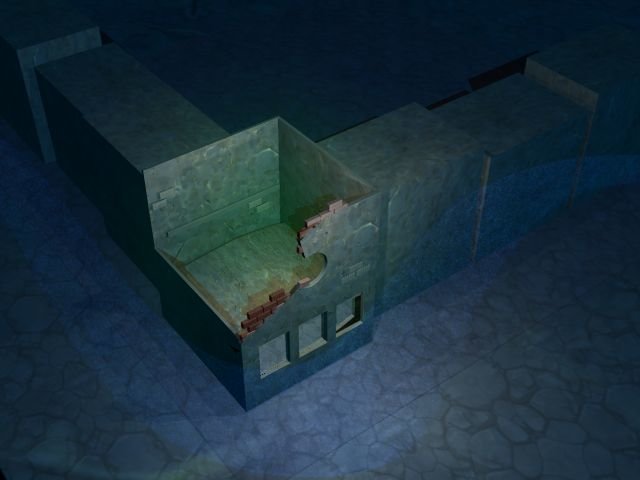
Random damaged building... Some folks may recall the story that relates to this image (ref: Loyd Moore's "Woke Up Dead") I was going for a building created out of stonework, brick and dead wood as the place these buildings are in has nothing living in it. The bluish wisp of color just to the foreground of the buildings to be replaced by blackish sweeping particles of death. Why is there no door? I assume it's because no one would dare enter/exit on the ground level in this part of the city. Although, come to think of it there probably shouldn't be windows that low either. Needed: Serious damage to the stone pavement and walls of buildings to invoke ages of scratching, scraping, and devastation as the evidence of the spirit of death repeatedly passing that way. Lots more rumble and such (detail) of damage to the corner building and detail on the adjacent stone structures/buildings.
-
Yessir. He came into existence an hour or so before I posted the drawing of him above. Thanks. I've got a few general thoughts about his personality and of course some of that is based on his physical traits. Originally I wasn't going to give him arms/hands and instead give him robotic attachments but I've got another character who that angle fits better. One thing that I need to progress on character-creation-wise is getting to the stage of giving them (audio) voice. That is so important to establishing personality and yet I can't recall every progressing one of my characters to that stage. I'm no Mark Largento so I'm not sure how decent I'd be at giving characters voice. It'd be fun to find out.
-
That was fun! Nicely done. Yes, I think so. Although it looks a bit like they are intentionally going slow so that their photos can be taken.
-
I downloaded and installed the lastest Wacom driver for my stylus and what a difference that makes! Lines drawn are now quite smooth. Although, there is something nice about the crude look with the jaggies...
-
-
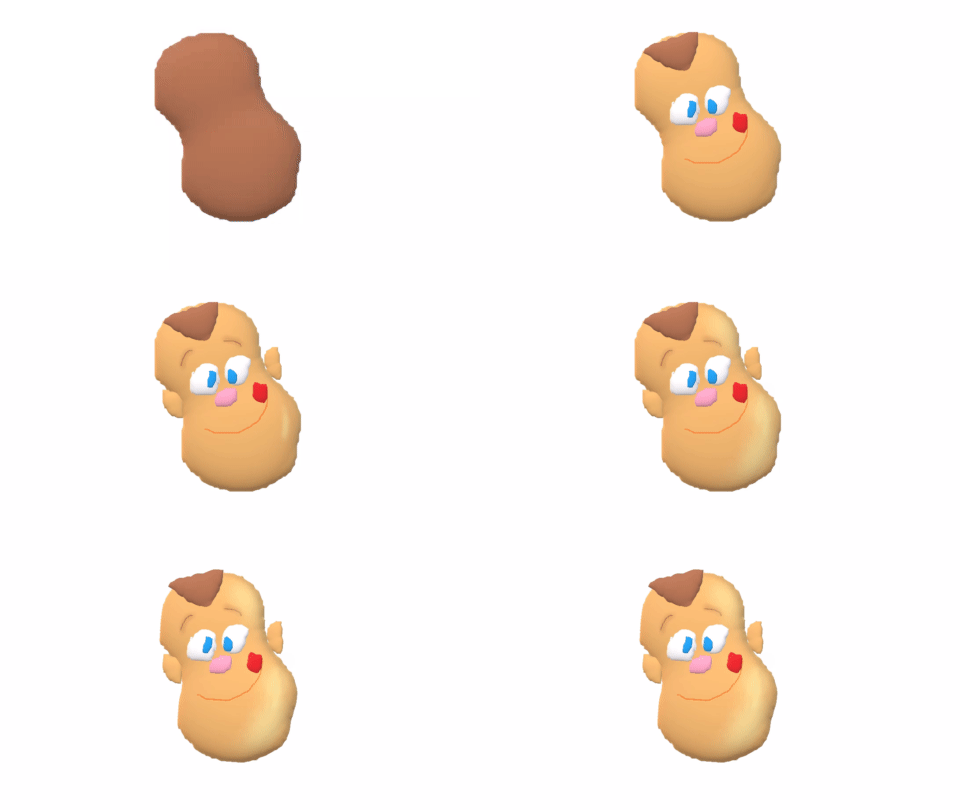
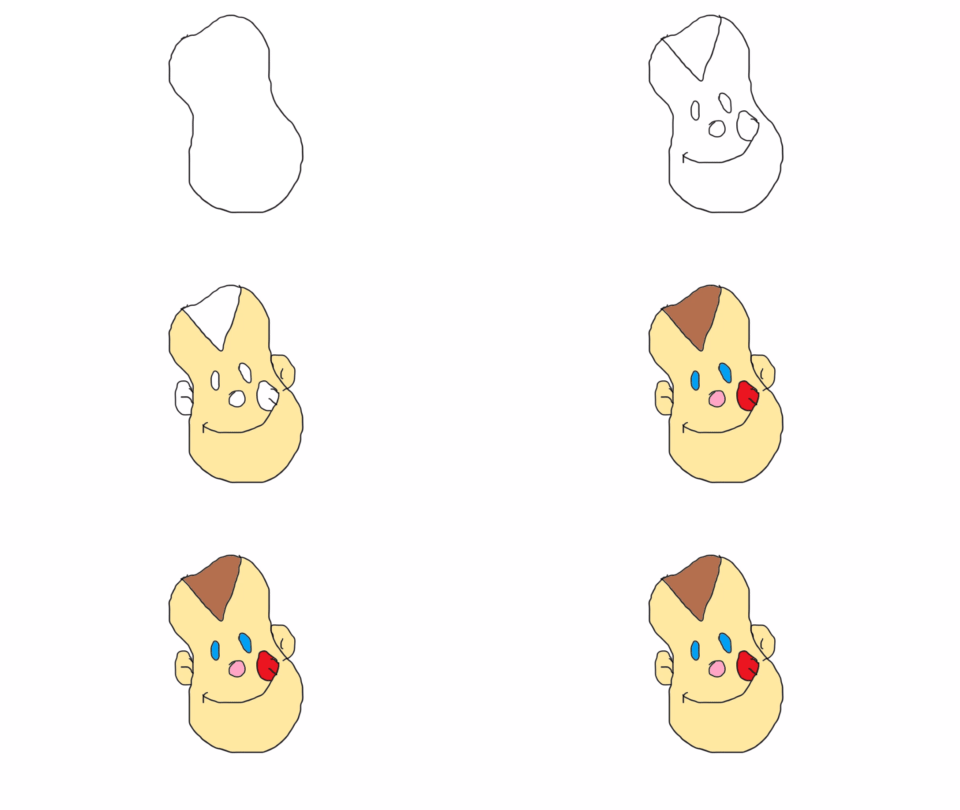
The whole of Paint 3D appears very much to be a technology preview for those that aren't yet into 3D and yet... there is that aspect of potential... that of any area of interest reaching a critical mass that suggests much can be achieved with the limited toys available. I recall holding on to Windows original paint application for a long time because it had a few bells and whistles that were easily accessible that took a lot of jumping through hoops to get at in other applications. We laugh at that program now but it was pretty useful in its day. There are a lot of little things to like about Paint 3D and I'm discovering more as I explore. An interesting aspect for instance is the history which can be quickly exported out to an MP4 video. This can make quick work of creating animation (ala stop motion methodology and drawing) in an otherwise 'still frame' application. Yes, this is pretty trivial but I'm confident it demonstrates where standard 'rendering' is headed. If a scene is already rendered to screen it is a fairly trivial matter to record that imagery. There is little need to re-render something that has already been rendered, especially where nothing has changed. As for drawing of 3D shapes... that's easy in Paint 3D but my stylus isn't quite keeping the lines smooth. There surely must be a smoothing option somewhere but I've yet to find it. Standard drawing can still be accomplished in Paint 3D but there are very limited tools. Image transparency is an issue. I haven't found a way to preserve transparency in PNGs so perhaps it's not supported. If not supported that adds another level of complexity to composting imagery as the background must be keyed out. Attached is a quick test of rendering out history (to MP4 video) from the app. The dent in my head is real the rest imagined... so don't laugh.
-
Agreed!


