Rodney
-
Posts
21,633 -
Joined
-
Last visited
-
Days Won
114
Content Type
Profiles
Forums
Events
Everything posted by Rodney
-
I've see that same thing before. Perhaps in Martin's patch technology write-up?* Edit: Didn't find it. It may also help in the understanding of it all to why such a change is needed. For instance, is there a specific issue you've run into or are you simply trying to explore and optimize? Here's a write up I'm sure you've seen Malo. I include it here for those that want to catch up: http://www.cs.sfu.ca/~torsten/Teaching/Cmp...ML/08_2Dcurves/ Of interest to me was the very last slide where it talks about testing for sharp edges and exceptions (this would be the realm of three point patches). It should be no surprise to see that they suggest handling those differently than the rest of the mesh. From that early Pixar paper you pointed to that seems to be where the scientists have been spending a lot of their time.
-
Nice pic Robert! I think that is closer to how the patches are (or can be) optimally subdivided.
-
I believe Robert is referring to A:M only. Previous to A:M (Animation:Apprentice etc.) others were certainly used. Hash Inc made an attempt to push the tech to graphics cards but (as I understand it) the math is easier to understand when using polygons. I see ut as the equivalent of working with straight math versus dealing with intensive algorithms. The algorithms perform better but someone first must create and then optimize the algorithms. This as opposed to crunching the obvious numbers via "perform math, perform math, perform math and recycle." Nice images Malo. They nicely illustrate your idea. (Disclaimer: The following is VERY naive) I can't say much regarding your thoughts on three sided patch division except to say that it appears that your proposed scheme would create shapes that are not rectangles (which are then subdivided into two polygons). They would appear to be modified rectangles/trapezoids. Therefore this new approach would have to be handled/interpreted in a different way than all other divisions, perhaps by sliding either the top/bottom or right/left sides within the given subdivision. I could see this going one way (to a renderer or to export) better than the other (import or continuity of 're-unsubdivided' or reconstituted splines). I'm trying to imagine how that would work for an importer it would have to test for both rectangles and trapezoids. I assume trapezoids first because they would be rarer and require more attention so they would have to be dealt with specially after ID'ing. So I'd guess we'd have to start with the question: Are all patches already (currently) simularly subdivided? If they are then implementing this new way to subdivide would constitute an exception which would work against optimizing. Of course, being an exception does not make it not worth pursuing. Exceptions to a rule often turn out to be that same rule (at least partially) optimized.
-
Shows what YOU can do after you've set your mind to it! I was recently viewing "Here's a Thing" on A:M Films and thinking... now that's how it's done... just dive right in and do it! Your videos are always entertaining. This is not only a testament to your talent but to the value of teaming up with other talented people. Ref: http://amfilms.hash.com/video/26/Heres-a-Thing
-

can't get automatic keyframes in an action
Rodney replied to R Reynolds's topic in Work In Progress / Sweatbox
I'm not quite following you so this may be way off the mark. Are you using Euler drivers in your rotation? That can be set/initiated via Right Click. -
Yes, it's Shift + Bake Surface. It lets us specify Higher Rez maps and you can tell A:M to overwrite previous decals. That and we can specify the overlap/margins of the generated image. (See dialogue box) - Rodney (Shift) Baker Added: I'll say this too. BEFORE YOU DELETE all those extraneous elements make sure you save your file somewhere. This will be useful if you ever have to go back to the original and bake everything again.

-
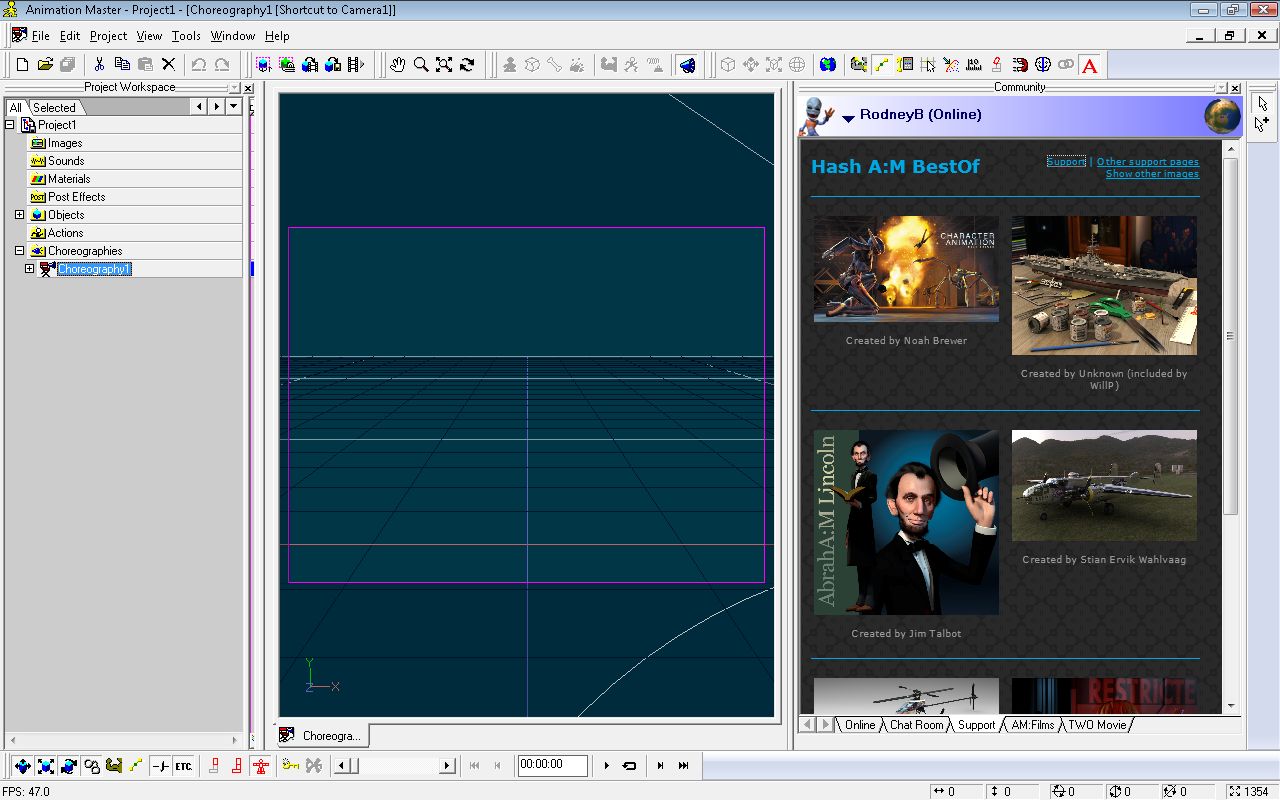
Here's a mostly undocumented feature in v17 that will be primarily of use to folks that login to the A:M Community. It can be useful for schools and small studios who want to deliver custom content and information into the A:M Community tabs. The Support tab in the A:M Community can be replaced simply by dropping an html file named 'Support.html' into the root folder where A:M was installed. For instance, if A:M installed to C:\Program Files\Hash Inc\v17 any html file named 'Support.html' found there will show up in the Support tab instead of the default support page. Fuchur designed a beautiful page to illustrate the possibilities with customizating the support tab that deserves to be seen and shared. Below is a screenshot of Fuchur's "Bestof" page in the Community Window. It displays a few images from A:M Stills. Check it out! Note that there is still a support link in the upper right hand corner of the page. Edit: Whoops. It looks like the default support page in the A:M Community links to a nonexistent support page. All the more reason to copy/paste the attached file as your new support page. Fuchur's support link will direct you to Hash Inc's current support page. Support.html
-
What key reattaches CPs in the UV Editor?
Rodney replied to pixelplucker's topic in Animation:Master
No, we are changing a representational equivalent of the mesh; (for lack of a better term) a UV mesh. So we aren't changing 'THE mesh' that is the actual geometry. But, Yes, we can change that mesh that is in the UV view. Steffen worded it better in one of this release notes but I couldn't find it. Added: Optimal workflow for adjusting both meshes would seem to be to have Modeling Window and a Decal Window both open at the same time and switch back and forth between the two. Edit: Nancy G has documented a second way to attach Control Points in the UV Editor that also attached patches if they are properly aligned and selected. In short it is: Place two CPs exactly on top of each other. Select the CPs and move them somewhere (only a short distance is required) Click on the CPs This should attach/reattach those CPs. -
I'd say that we are just on the route to the implementation of that. If you consider that we haven't had Surface Baking for that long and the steady improvements we've seen in that, it makes sense to keep moving along the hierarchical chain to the actual images and colors of each patch. Of all of the surface attributes we can assign to a surface in A:M the attributes assigned to Named Groups are the most important throughout. Patch Images are extremely powerful and IMO they often better than materials and decals. But they aren't simply images on patches. They can be percentages of Color, Displacement, Bump, Transparent Ambiance (as well as others). And all of these can can be Layered on top of each other. Knowing a little of all the variables involved convinces me that there is a lot of work involved in keeping track of and programming enhancements to that. Add to that a changing world where we expect to be able to directly paint on surfaces and things get even more complex. I didn't post just to say all of the above but rather to suggest there is something of a mid-way method that can get some of my general nonsense accomplished. The following might work well for someone that just wants to reproduce each group in the image resulting from baking a surface. - Create a Material that is of a generic color or transparent. - Drop an instance of the material on each Group you want to show up in the Decal - Bake Surface - Save Decal - Adjust in Decal View / UV Editor and Associated Graphics Package Note: If you like what you see in the Surface Baked Decal you can then go in and further enhance the Material. This is imporant because Baked Surface Materials maintain their color, specular intensity, etc. (See image) Once satified just Bake Surface again with the new material changes. Disclaimer: This workflow is extremely experimental (for me).
-
What key reattaches CPs in the UV Editor?
Rodney replied to pixelplucker's topic in Animation:Master
Thanks Fuchur, Steffen you rock! Can you imagine doing this same editing of decal placement at any scale with a millionbajillion polygons? I surely cannot. Yet another fine example of the elegance and simplicity of patches. -
I'll do that. Thanks for the confirmation. Edit: Done!
-
I'm trying to refine my workflow a little and am curious... Can we bake Patch Images into the images that result from Baking Surfaces? As far as I can tell they aren't considered part of the surface that gets baked. As they are defined by the patches themselves they'd be especially useful in defining regions for decal images created by the bake. So I'm curious to know know if they actually can or cannot be included in the bake. I'm not seeing a way to accomplish that here. As a workaround there is always the tried and true methodology of a simple screen capture and decal placement. Having patch images in the bake would skip those manual steps for patch images and result in more precise placement. This would ensure each Patch Image is matched to its corresponding patch in 3D space and that relationship recorded on a 2D plane. The latter of which I assume is the whole point of Surface Baking.
-
What key reattaches CPs in the UV Editor?
Rodney replied to pixelplucker's topic in Animation:Master
Once you've selected both CPs... Ctrl Alt Click on top of them. AFAIK the CPs have to be on top of each other to reconnect. (That makes sense when you think about it but want to make sure folks know this. It's not like in Named Groups of a Model where the grouped CPs can be anywhere.) (Side Note: I don't think I'd ever Alt-selected and moved patches in the UV Editor. Wow. That's amazing easy to move patches around. Have I really never done that before? ) -
Hi Malo, I only know the answer to two of those. Hopefully others know the historical record and can share their knowledge. Martin has not abandoned his baby. To everything there is a season... turn... turn... turn... and return. Those who find themselves too far ahead may have to wait for others to catch up and Martin doesn't have the personal resources to catch everyone up. Of course, Martin is not the only one who is waiting for others to catch up. The document you linked to from PIXAR is illustrative of that. Also: Reference the historical connection between Catmull and Hash. This is not something that is likely to be discussed here in a public forum. Launch an personal email to Steffen that outlines your interest and he will likely respond. To prevent misunderstanding, confirm with him if what he shares with you privately can be discussed publicly. I do not know what you mean here by the word 'consolidation'.
-
found an old project file for Rodney
Rodney replied to johnl3d's topic in Tinkering Gnome's Workshop
hehe. You are out of control John. -
Something I'd like to know for my own curiousity is whether or not you've got the nostrils closed off on her nose. The reason I ask is that there is that 'glow' that is appearing there what doesn't appear to be a byproduct of light so much as thickness of nose/skin/cartilage. The brightness under the nose seems to indicate that the nostrils aren't closed off and therefore the SSS isn't picking up the thickness of the whole volume of the head. (Sorry, I am not wording this correctly)
-
For those keeping track... Andrew Gordon has revealed where he'll now be focusing his attention; The Art Department (TAD). Reference the recent announcements at Spline Doctors and TAD: http://splinedoctors.com/2012/08/something-different/ http://theartdepartment.org/announcements/...m-pixar-artists A quote from the TAD article (at the above link):
-
Wow. That skin looks like a photoshop blended painting... not at all like standard 3D/CG fare. Somebody tell her she needs to comb that hair!
-
I am all about getting a Users Group going in Illinois! I hope you are serious about it too. Spread the word! Edit: It'll help to know where in Illinois you are located. It may make more sense to consider sub-groups (Chapters?) of Users Groups at more specific locations. For instance, a Chicago Users Group might be affiliated with or an extension of Midwest and Illinois Users Groups. Similarly, there may be locations that don't exactly equate to Illinois but still work for you. For instance, St. Louis is very near to the area I am relocating to so that would cover or at least interface with much of Missouri. We don't want to miss out on getting together with folks that live nearby just because they aren't in Illinois. This is true also for neighboring states and folks that are just visiting or passing through. Perhaps we need to start with a global Users Group and work from there. Hmmm... it may be time for a Users Group Survey or a relook at Matt's Frapper that helps in finding everyone's location.
-
This topic is for those interested in belonging to (or leading) A:M Users Groups. To go beyond the discussion and join a User Group follow this link: Animation:Master Users Groups
-
Looking good Mark! I foresee that in time you'll be cutting that 'few hours' down to a matter of minutes. I confess that I need to explore 'Snap to Surface' in the Chor. Up to this point I've mainly been using proxy shapes to guide the snapping to surface in the Modeling Window. Take a bunch of premade shapes and move them around to form a shape/character... lock them into position with the Lock tool... then spline all over the top of those while scrolling around in a 3D environment. Fast and fun! Your spline layout looks optimal.
-
Looks like we were posting at the same time. I've added some of the description of changes from Steffen above. Added: As Hash Inc originally referred to this feature as the "Decal View (UV Editor)" I will try my best to refer to it that way too. The use of a variety of terminology to describe what I've traditionally called "Decal Editor" may be why searching for info on the feature here in the forum is difficult. I'm in the wrong here of course as another term for "Decal Editor" is generally "Photoshop" or more generically any "digital paint program". I'll try to get my head straight on this one. Edit: It should be noted that while many aspects of the Decal View (UV Editor) were implemented back in v11 they are now much improved so anyone who used it before and thought they understood it should explore it again too!
-
Yes, there are several new improvements and we need to get those out to the public. I think a few were discussed briefly in Alpha testing but that wasn't open to the general public. As a base line to begin to establish what is commonly known (or perhaps what should be known) I'll recommend the initial write-up by Hash Inc for v11: http://www.hash.com/am2004/Decaling/UV%20Editor/index.htm In particular pay attention to the last paragraph where it says: Adding a CP must be new... I've never done that! Here's info from Steffen/A:M Reports (I've edited them for general clarity):
-
It's rather sobering to realize that there are many aspects of the Decal Editor have been around since circa v11 but never fully utilized. As Fuchur has mentioned the use of the Ctrl Key to separate patches is amazingly useful and yet not commonly used as of yet. I believe v17's improvements will change that. Note that I tend to refer to the 'UV Editor' as the 'Decal Editor' because frankly I find it unnecessary to initially burden users with learning concepts of UV editing when it is more straightforward to simply Right Click, Select Edit on a Decal Image and modify the placement of any Decal Image. Frankly, even the programmers of some features do not know the full extent of what is capable so one thing that will always help is to better understand what you currently know about a given feature; in this case, the Decal Editor. Similarly, those who use the Decal Editor likely do not know all of the innovate ways in which to use the editor. I encourage everyone with an interest or experience to post a little of what they know here so that all may benefit. In order to meet and exceed all expectations it is important to inventory what we know already. For instance, has everyone already gone through the tutorials that cover the Decal Editor? For those willing to explore... prepare to Right Click and we'll explore the Decal Editor in depth right here.
-
I'm pretty sure the filename was cybergirl.zip or something similar. The model hadn't yet been rigged so it was shared with only a few people. It was never shared broadly as I recall mainly because it wasn't yet considered 'production ready'. It should be noted that this is one of the reasons I'm an advocate of sharing files with other people. When a file disappears that's okay... it can be re-collected and replaced from somebody else who has it. The Cybergirl project was pre-Extra CD but for some reason it wasn't shared. I dunno, maybe it was because I couldn't find the file then either.