Rodney
-
Posts
21,649 -
Joined
-
Last visited
-
Days Won
119
Content Type
Profiles
Forums
Events
Everything posted by Rodney
-
Yeah, I think that is the PDF that Adam referred to in the first post. That one is for the Mac. I assume that and other information was gleaned from the Netrender forum. Jody's guides for Netrender setup (Windows) are here: NetRender_Guide-Basic.pdf NetRender_Guide-Advanced.pdf Source: Link Welcome to the forum Adam!
-
This image won't make much sense to anyone but I want to post it to remind me to delve into this area further. What it represents is a rapid workflow that didn't exist before v18 (the process could be done but not in its current form). The basic concept is this: Phase 1 Modeling - Create a simple shape/object (in this case a simple can) - Create a new Action of 5 or 6 frames in length (the number of frames really depends on what you want to produce. In this case I wanted to place a few cans in psuedo random fashion on/near an imaginary ground plane) - Turn Onion Skinning on (it's best to add this to your toolbar which you can do in v18... adjust the onionskinning so that all 5 keyframes of the Action will remain in view) - Position the can on each frame relative to the past and future locations of the can (i.e. composing the image by viewing all positions of cans that will be created later on) - Rotate the can on each frame as necessary in 3D space to further refine the composition - Export the 5 frame sequence to AV2 format (for some reason exporting to sequential A:M models is not supported. AV2 is a fairly good format for quick export and reimport although the biases and splines layout may be altered upon reimport. Hash's PLY format works pretty good too but I've always been partial to AV2) - Create a new Model and Import the sequence of AV2 models (They will all take their place as in the anticipated composition) - Save the Model Phase 2 Decaling Use A:M's Snapshot feature to capture the image of the cans (preferrably from an anticipated camera/audience view) and then immediately paste that snapshot back onto the cans as a decal Right click on the image container in the Project Workspace to open the associated image application (this could be anything but in this case it opened in Irfanview... draw/paint something and save over the top of the previous decal (Note: It would be best to save under a different name so that it can be used again if needed but the original decal is not particularly necessary) Phase 3 Refinement/Final Look (Not explored) Here you would tweak and refine the model and decal to serve the specific scenario for which it was designed in the first place. From start to finish this process should only take a few minutes (5 minutes might be optimum... 10 too much) The whole idea is to rapidly produce content that will be refined or replaced later. As such high level of detail should be avoided. If I can make any headway with this I'll share a video of the basic workflow.

-
I keep forgetting these two share the same day in history. Mark is well known to everyone in these parts. His talent is, simply put, far above what can be reasonably expected in mere mortals. Just when I think I have a favorite project of his that sets new standards of excellence and innovation that cannot be bested, he posts a new example that raises the bar to yet an even higher level. And yet, he still remains very much a mystery especially in that I have no earthly idea from where his nom de plume/moniker derives... mtpeak? I just assume it's where he lives like those other guys and gals from Mt. Olympus. Paul doesn't hang out here in the forum all that often these days but he's highly talented as well. His early work compositing animated characters over live action plates in A:M really caught and kept my attention (His flour sack running around his back yard being chased by a dog (Sack Attack)... no spoiler alert here... an instant classic). What those that have joined the A:M Community more recently may not know is that Paul was the project manager behind the A:M Extras CD. This guy is the example of organized productivity that I could only dream of attaining. Paul is also an outstanding mentor and teacher. Happy Birthday!
-
Looking very good Steve! It sure is fun seeing this project come together.
-
There are a few people that come to mind when I think about math... Anders Averö is one of them. He's got a few models and project files worth investigating on his old website: http://www.dotnet.se/aaver/Misc/Golfball/index.html http://www.dotnet.se/aaver/Water/OceanTest/index.html http://www.dotnet.se/aaver/FootPrint/Tutorial/index.html I don't think his rain plugin is still operational. And the wave/ocean plugin was never developed beyond the initial stages as far as I know. Talented guy! Anders, where ever you are... hope you have a very Happy Birthday!
-
Less than a month to go for the sci fi contest!
-
bump ...because Warner's lego movie is making its rounds.
-
I did a quick test of a single image from a sequence versus the entire sequence and it appears that A:M is reporting the size of the entire sequence even when only one image from the sequence is imported into A:M. This is obviously not correct but the more important question would be whether A:M is using that file size in any way (i.e. reserving memory space based on that variable)
-
A very wild guess here... Is it possible that your decal image is one of a sequence of images? That might explain the larger file size. (If A:M is displaying the size of the entire sequence) Added: Another thought would be that A:M is somehow uncompressing a compressed image thereby reporting it's 'real' size? More info needed. Perhaps you can share the image file?
-
.avi, .flv, .mkv, .mov, .mp4, .mpeg4, .mpeg, .mpg, .wmv There is a working demo. Demo limitations:
-
For those of you wth money to spend... Zurbrigg has released their video player that is enhanced for filmmakers and animators. Their site states that introductory pricing is $25. Keyframe MP is currently available for 64-bit version of Windows (Vista or newer) with an OS X version in development. http://zurbrigg.com/keyframe-mp There are several videos that demonstrate usage: [vimeo]90056692[/vimeo] Getting Started with Keyframe MP (Direct Link) [vimeo]89196777[/vimeo] Keyframe MP Overview (Direct Link)
-
About halfway down the page of Newton Physics examples are two projects that demonstrate a floating/bouyancy effect. That might work better than material effects. http://www.hash.com/NewtonPhysics/samples.html The projects have two movie files: Here: http://www.hash.com/NewtonPhysics/samples/fluid.mov and here: http://www.hash.com/NewtonPhysics/samples/tugboat.mov With regard to the second video where there is some 'sinkage', there is a tutorial (with link to project file): http://www.hash.com/NewtonPhysics/fluid.html
-
The Dress Me plugin should be there in the Mac as well. Make sure you are in the Chor or other appropriate place for the plugin to appear. For usage you want to make sure the Bones of the clothing (or anything you wish to attach to the main model) uses the same Bone structure as the original. One of the best ways to do this is to make a copy of the original and then edit that to include all the various things. I think the Dress Me plugin could be duplicated and the duplicate renamed to something like 'AttachMe' because it does a whole lot more than simply dress models.
-
That's the ticket! 32bit v18d is working without installing with the SSE4 option. Thanks Steffen!
-
Changed to OpenGL Restarted computer and followed your steps (double checked to make sure OpenGL was still set) No difference here on 64bit v18d.
-
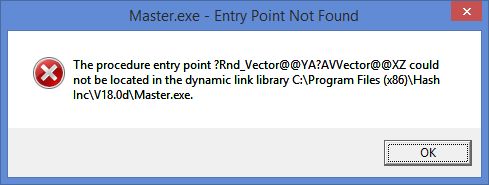
I should have noted that I was using the 64bit install. Things are working fine there. I still haven't been able to get the 32bit installer to work (I thought I had but I'd mistakenly reinstalled 32bit v18b) The error message remainst the same for me on startup of 32bit v18b:
-
ok, now what? What should we be seeing?
-
Boy does that rendering take me back. Let's hear it for the need to update showreels! Looking very good.
-
I hope you can take some Stalled Trek videos to the show too! Those are sure to get the attention of folks that won't bite with the Zombies.
-
I was thinking about your topic when I ran across this photo/drawing by legendary Disney animator Milt Kahl. In it he attempts to distill how to translate the character Alice from the photo reference of the child actress, Kathryn Beaumont who also supplied the voice of the title character. Source: http://andreasdeja.blogspot.com Now, there are several things that are interesting about this drawing/photo. The first is that many people don't think Milt Kahl used photo reference. But there is an interesting dilemma to resolve with regard to CG animation for a stylistic approach like this. How does one shrink and enlarge the body or the head at will? Is it better to have multiple models and then use them where needed? Should the rig be created to scale the parts up and down as necessary? And how does one animate on the fly if/when the character moves in and out of the space delineated between close up and long shots? Some interesting question derive from such a simple image. In the case of CG the whole line of consideration (that of proportion)isn't as valid at the end (but moreso at the beginning) because the model can stay (relatively) the same size once it is created unless specifically needing to be changed. It isn't under the same constraints of an artist's constantly shifting perspective and sense of scale. Perhaps this is why some don't like to use reference? Milt is cluing us in a little bit here by illustrating how to distill the essence of his source material and adjust wherever necessary.
-
Thanks Jason, I attempted to download again from the FTP site but that installer failed as well. Steffen suggested installing without the SSE3 option checked and that worked! He'll be rebuilding the installer to take care of that issue but in the meantime installing without SSE3 works for 32bit v18d. Thanks!
-
This (ability to change the default keyframe interpolation) is a highly sought after and useful addition: Very nice!
-
A subtle yet very nice improvement to Render As Lines! Thanks!
-
This has led to several fixes in A:M Composite. Nicely done! Added: As an example; for the first time ever the response of Denoise is quite snappy!
-
OOOOooo... I like that!