-
Posts
2,059 -
Joined
-
Last visited
-
Days Won
46
Content Type
Profiles
Forums
Events
Everything posted by Roger
-
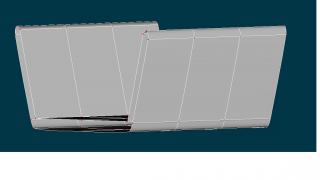
Robcat, I did some new panels with smaller bevels. Let me know what you think.
-
Sorry for the lack of updates recently, I've been fighting off pneumonia and haven't been able to do much of anything. I'm hoping to get back on track soon.
-
-
I'll give that a try and see how it turns out. I don't want to lavish too much time on this one model.
-
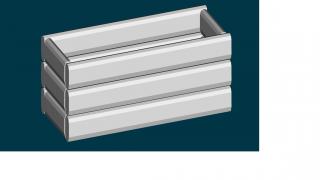
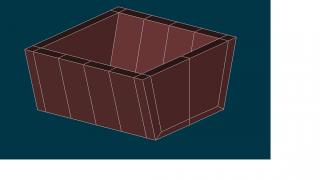
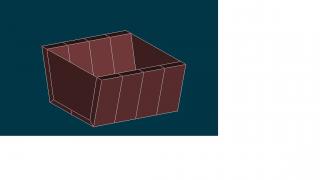
Ok I think I have something that I am starting to like here with the treasure chest made of the individual boards. I still need to make the iron bands to brace the sides and top. Let me know what you think:
-
I think that buried treasure chests are one of those movie cliches that have been around so long no one really thinks about them. Even covered in tar or something, I can't imagine wood would last too long in the ground.
-
Yes, it is a treasure chest/pirate chest type thing. I see what you are saying now - model each board separately, then piece it together. I was just modelling the side and bottom panels, but that wasn't working quite like I thought it would. I was planning on using a texture to indicate separate boards. I'll probably need to do nails, too so that it will look like it is actually held together by something. I'll give that a try tonight.
-
-
Working on the chest again tonight, trying to see if I can get it looking closer to how I want it to look. I have modeled each panel of the chest separately, currently they are just sort of jammed together. I probably need to connect them with splines to the other panels, but not sure of the best way to do that.
-

Lothario & Ida Do the Undie Cover Dance Thang
Roger replied to NancyGormezano's topic in Work In Progress / Sweatbox
Really well done and cute. I like Lothario's look, kinda reminds me of the cowardly lion. -
Well, I closed and reopened the project and it is working now. Not sure what happened there.
-
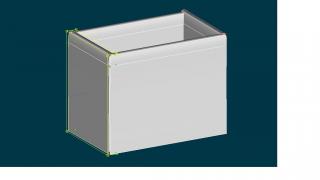
Ok, I have beveled the chest but I can't really use the same tactic I used last time to cap the ends off - if I try to use a spline to join the two topmost inner points on the end, the spline automatically curves. If I try to peak that spline, it removes the bevel from the area where I want it. There must be a better way to do this. Too bad you can't model a boxy item and then run an "autobevel" or something.
-
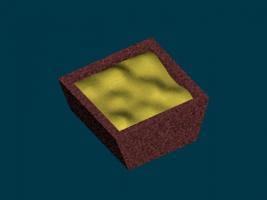
Here is a test rendering of the treasure chest. I used the grid wizard and pulled the points to come up with a large mass of gold, which I will then put maybe a dozen or so coin models on top of (along with jewels, etc). Or would it be better to model one coin, duplicate it 500 times and use Newton physics to dump them in the box? Seems like that would be a lot of overhead to calculate. The gold looks ok (its actually the default brass material from the AM library) but the wood material doesn't look much like wood. I think I'm going to have to experiment with that some more.
-
Yeah, that reminds me, I have a funny story to tell you about googling for reference images.
-
I am hitting the "render to screen" button (the one immediately to the left of the render lock button) and am not getting any output to the screen - it renders like it normally does but then never shows the image on the screen. Render lock seems to work normally. Anyone have any ideas what may be going on?
-
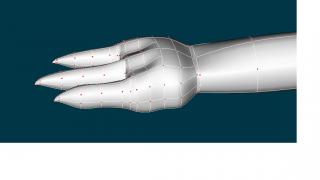
I know it is difficult to tell from that pic, but I did attempt to mimic normal finger length. Part of it is the angle of the pic, and the other part is that while there are differences in finger length, they need to be more pronounced. Here is a screenshot of the tweaks I made. I do think this one looks better but it is still a bit funky.
-
I think you are right about the cuticle, and the claws probably are too long. I wish I could figure out what it is about the hand that is still bothering me.
-
Well I think I figured out a solution to my problem: extrude the parts of the chest that make up the side one more time, and then manually insert the connecting splines to close it off. Now my problem is that since I didn't build any bevels into the chest, it looks way too knife-edged. Maybe if I go back to the drawing board and bevel the corners of the shape that makes up the side, I'll get the look I am going for.
-
Anyone have any ideas as to how to best add depth to the sides of this chest? I extruded a shape to make up the base and walls, but have not come up with a satisfactory way to cap off the ends.
-
I think this hand looks a lot better. I want to refine the palm a bit more and I would like to get more of a suggestion of knuckles on the fingers, but I think this looks much better than the overly segmented looking hand from before. I have also added claws to it.
-
What exactly does the World Space button do? I pressed it but didn't notice anything happen.
-
I'm working on modifying the hand on my dragon, it looks pretty bad. I have raised parts of the back of the hand to suggest tendons, as far as the fingers go I think I need to make the knuckles less pronounced and maybe cut down on the number of spline rings that are making up the fingers. I think I have way too many right now. I'm also going to add claws to the ends of the fingers.
-
I think I know what I was doing wrong here, I'll play around with it, if I keep having problems I'll post an example.
-
Do you want them all on one plane? Select them and scale that group to 0% on the axis perpendicular to that plane. Yes, that is what I want to do. I must not have chose the correct axis to scale on. I'll see if I can post an example in a bit, need to step away from this for a sec and get some caffeine.
-
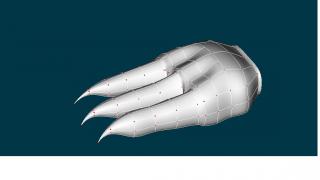
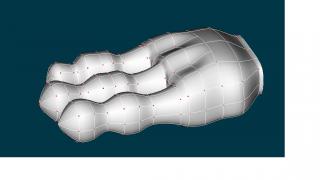
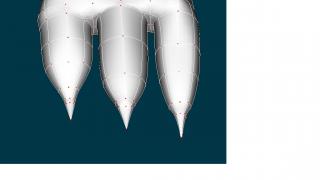
Fixing my dragon's feet. The toes look better and I have a bit of a nail or claw at the end. I still need to adjust the sizes of the toes relative to each other, they still look off. Big toe should probably be shorter than the middle toe, but still longer than the little toe. And I think I need to make the little toe not quite so thick. I think these are a significant improvement over the original feet, which were quite bony or segmented looking. I also need to adjust them to get more of the wedge shape that Robcat was talking about, but I think this is a promising start. Well, for the 2nd time I've done it


