Roger
-
Posts
2,078 -
Joined
-
Last visited
-
Days Won
48
Content Type
Profiles
Forums
Events
Everything posted by Roger
-
I just grabbed Homeslice's tutorials (should probably have done a forum search first) so I'm going to go over those before I post any further. Seems like I must be missing something obvious though.
-
Ok, so I have decided that rather than try and tackle brand new material when I'm exhausted at the end of the day, I'm going to try to finish things I'm a bit more proficient at, like modeling projects I've been working on. I only need to do a few more parts for my treasure chest, and it will be done. One of those things is a clasp for the padlock to go through. I'm trying to make a U-shaped piece of metal, and have drawn out my path and the cross-section for the path. When I do the extrude along a path operation, though, I get a strange twist in the object. I don't see any kind of twist settings in the plugin, so I'm not sure what I'm doing wrong. Here is a screenshot of what I'm talking about: I can use the sweeper plug-in instead, I guess, but what confuses me about that is you can use the drop-down arrow in the interface to choose the cross-section but there is nothing to define the path (unlike in the extruder).

-
Well, this particular dragon is bipedal. No quad legs. I thought about using Setup Machine to rig him, might not be a bad idea as the character has a tail, but I thought perhaps I would rig that separately.
-
I think it may be easier for me to delete one half of the bones (like the left half), position them, and then use the mirror bones plug-in to create the other side. Any reason this wouldn't work? Also, is there any way to do a group selection on several bones and move them all at once? I find I'm having a hard time getting the bones back in their original positions after moving them, and am concerned that will be a problem.
-
Yeah, you're right. I've been back to modeling so long I forgot about the different modes.
-
So I'm trying to install the Lite Rig in my dragon model, the PDF says to position the model before moving the bones. I have the model selected (all the CPs are flashing yellow) but when I try to translate it the bones move instead. I must be doing something wrong but I'm not sure what.
-
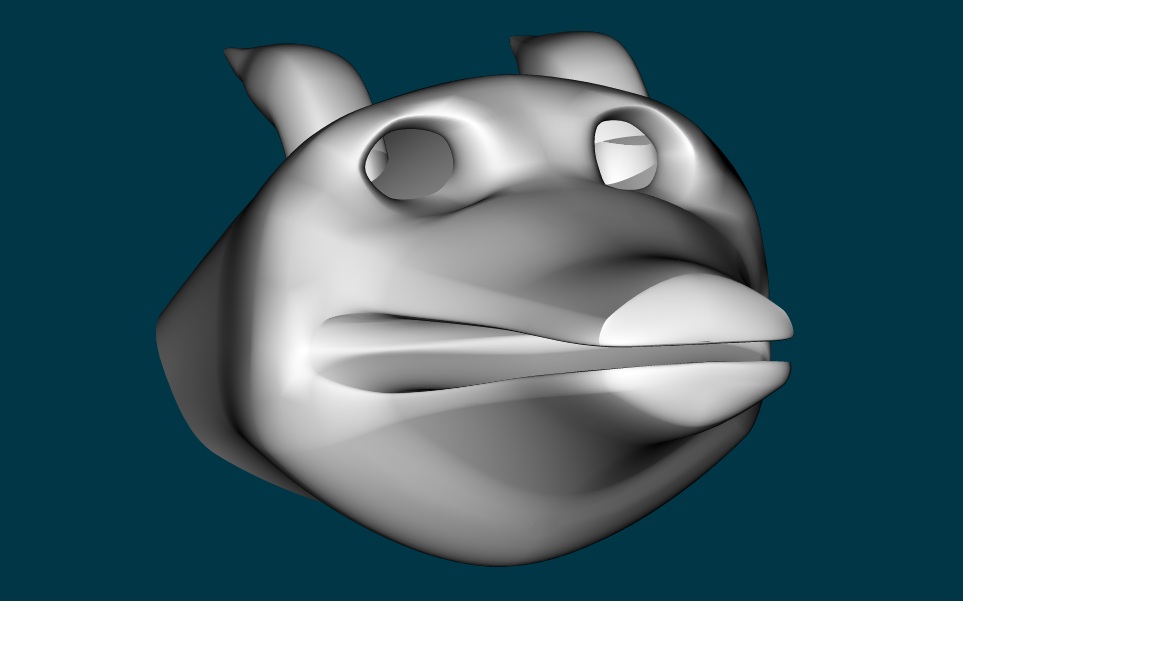
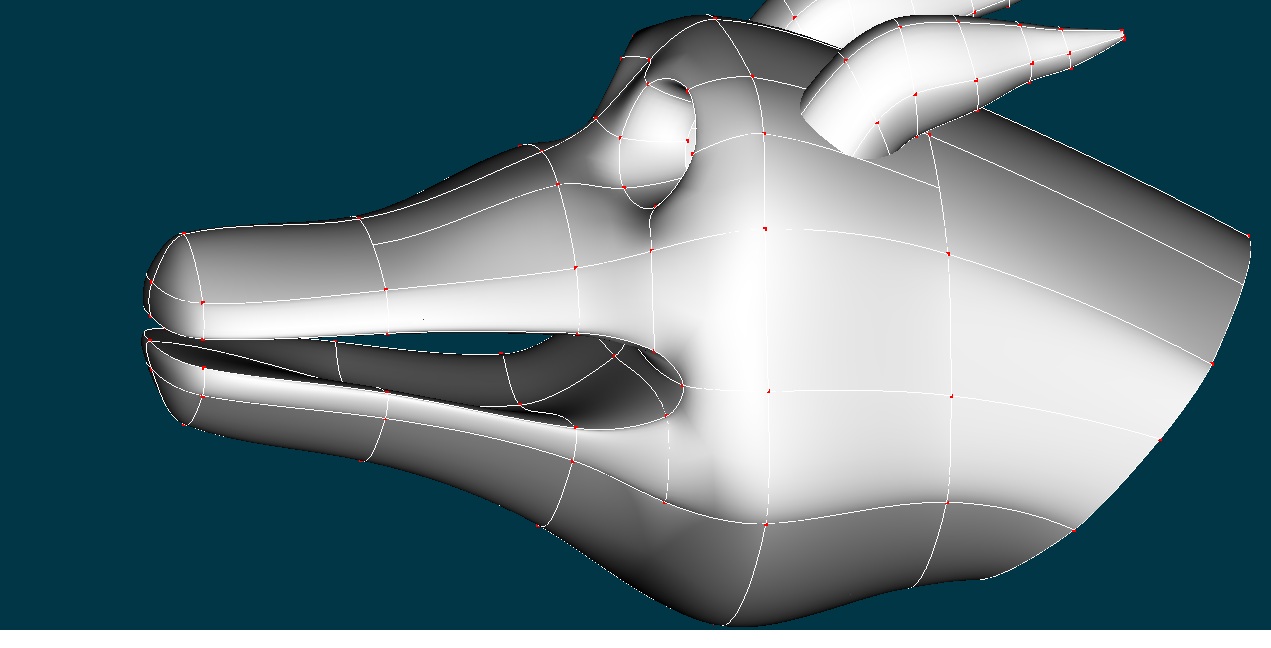
I closed off the back of the eye sockets, added sphere primitives for the actual eyeballs and then did a half sphere for the lids. I think it looks fairly decent, so I'll probably go that route with the penguin but add some long eyelashes. This is starting to look fairly decent.
-
Ok so I have added some patches to the upper part of the snout. I'm more or less satisfied with the way this is looking. However, I'm not sure how I'm going to do an eyelid. I've thought about using a half sphere for the eyelid but not sure how thta is going to look. Maybe I would be better off with a different style eye?
-
That's a good idea, I'll give that a try.
-
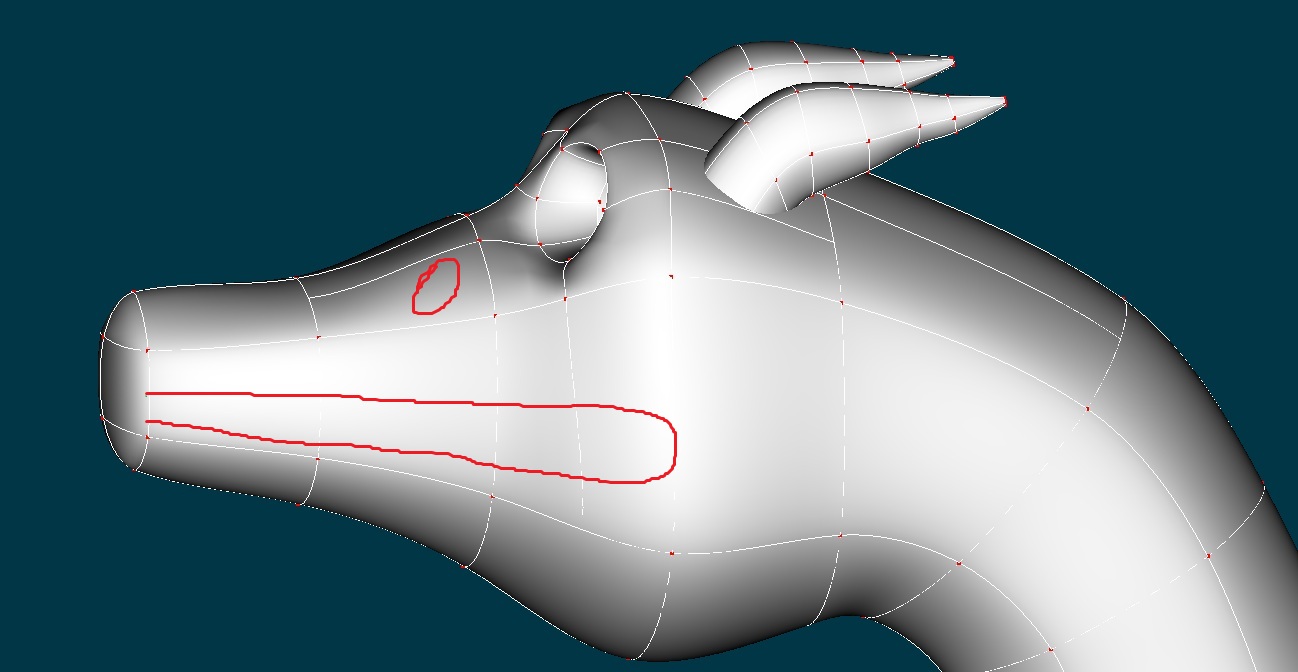
I just added another patch to the top half of the front of the snout, but I still have 3 point patches. I'm not sure I'm going to be able to get around that. How do you go about adjusting bias? There is alpha, gamma and in and out magnitude. I'm not really sure what I should be adjusting.
-
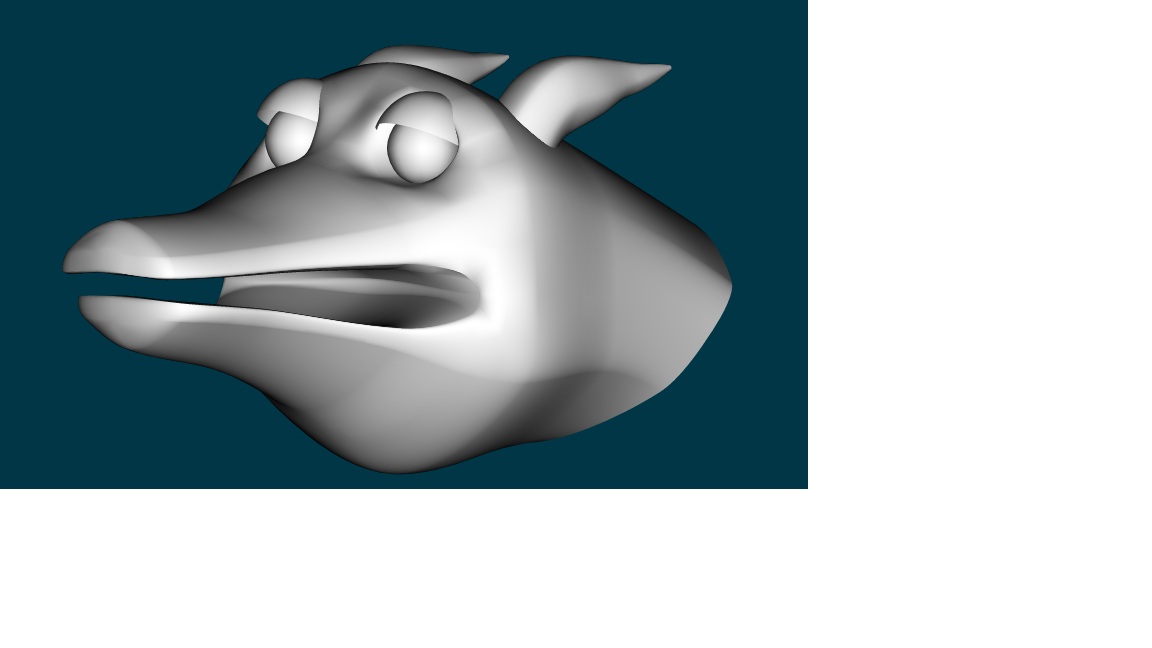
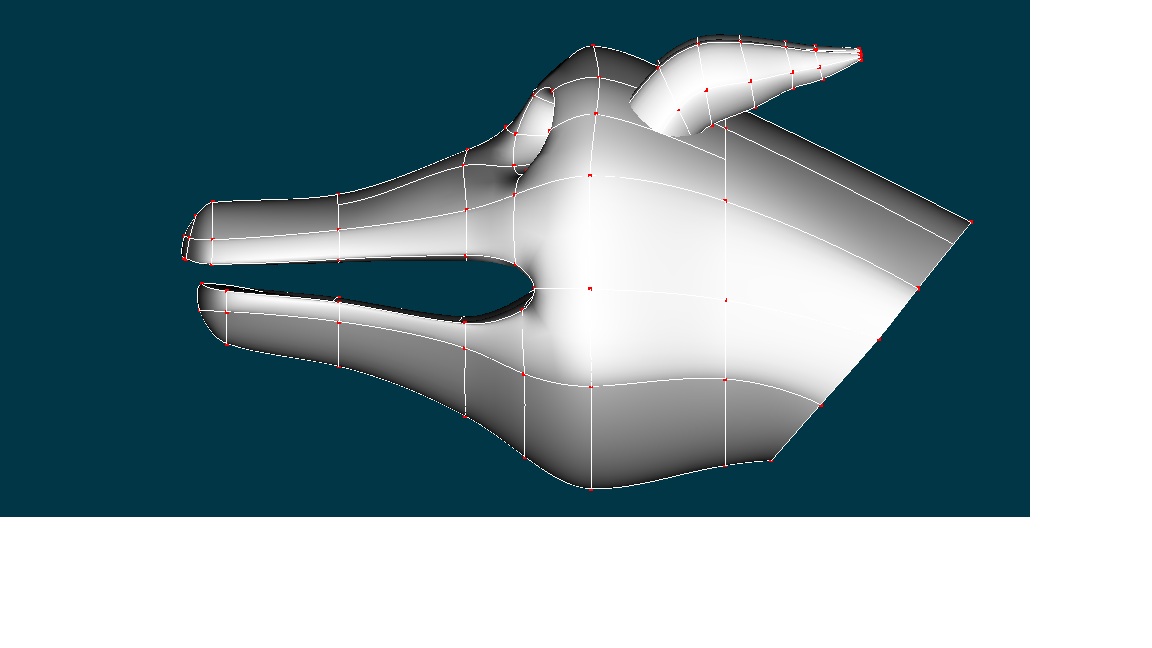
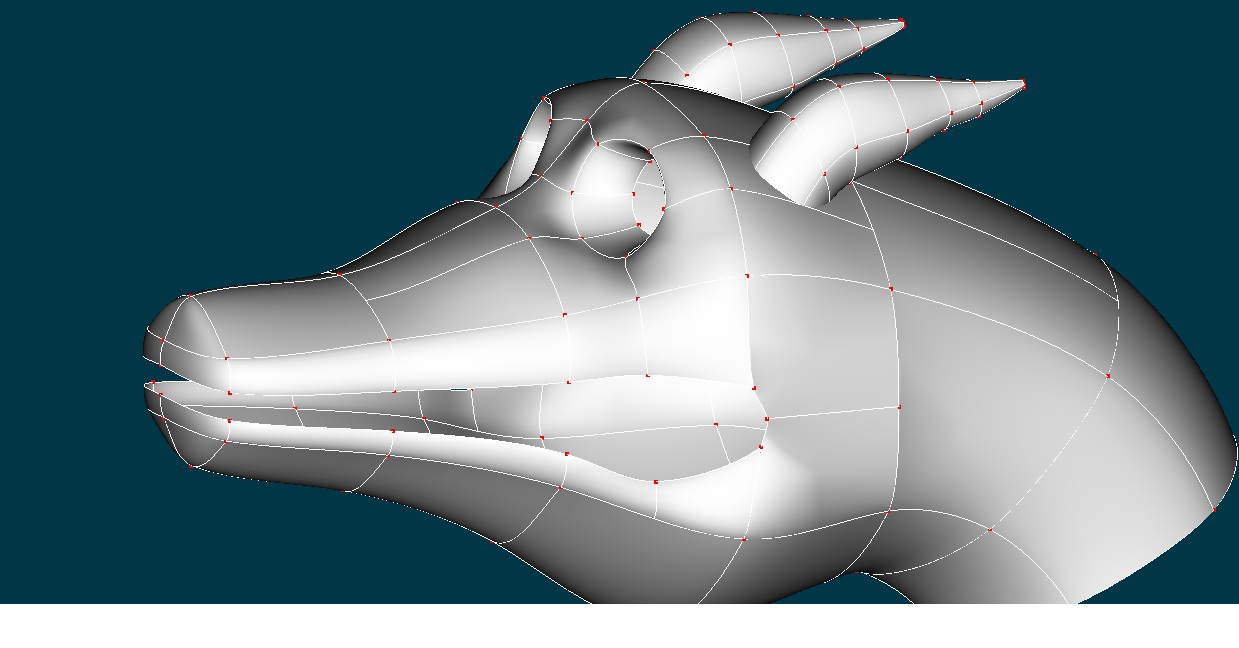
Yeah, I caught that and fixed it already. I'm getting some weird looks on the snout, though. Almost as if the points are peaked, but they're not. Do you have any suggestions for how to deal with eyes and eyelids on this model? I've got the eye sockets in but I think I'm going to have a tough time getting the eyes to look right.
-
Well I definitely think this one looks better than the other. I have a much more pleasing look to the corner of the mouth, even if it is not perfect. I think I may be able to redue the detail on the front of the snout a bit. The inside of the mouth wasn't as bad as I thought it would be to do.
-
Well, I have a rough mouth splined in so far but it has me wondering if maybe it goes back a bit too far? Also, the corner of the mouth is really bad right now and I'm not quite sure what todo to fix it. I think the mouth might look better if the hinge point of the jaw is moved up another patch, but I'm still left with the problem of how to make that corner look natural.
-
So after having some time away from my experiment at an alternate dragon, I've decided it is pretty awful. I'm going ahead with my original model but making a few tweaks to it. I am going to try to have some kind of mouth for him, since in my mind it doesn't make much sense for him to have no mouth. I'm posting a screengrab of the spline I'm going to add to create an upper and lower jaw, and I'm also thinking about putting some nostrils in. I will have to experiment to see where they look best.
-
Yeah, no mine has to have arms, it's important to the story that he be able to grasp things. I think I just need to make a few subtle changes to my existing model, rather than re-work the whole thing. I'm not happy with the revision I did yesterday, that is for sure.
-
Yeah, I really hadn't seen him as being a quadruped. In my storyboard sketches he is able to stand and walk upright. Although originally he did have quad legs and regular arms.
-
It doesn't need to, but it is bipedal, the legs are jointed like a person's legs are. So I figure the expectation will be it should walk like a person. I could do a stiff-legged robot walk, but that would look odd (unless he was pretending to be a robot). I'm going to have to experiment with some walks and see what looks best.
-
Here is with the head. Again, I'm not sure I'm going the right direction with this. It is a simpler character, though.
-
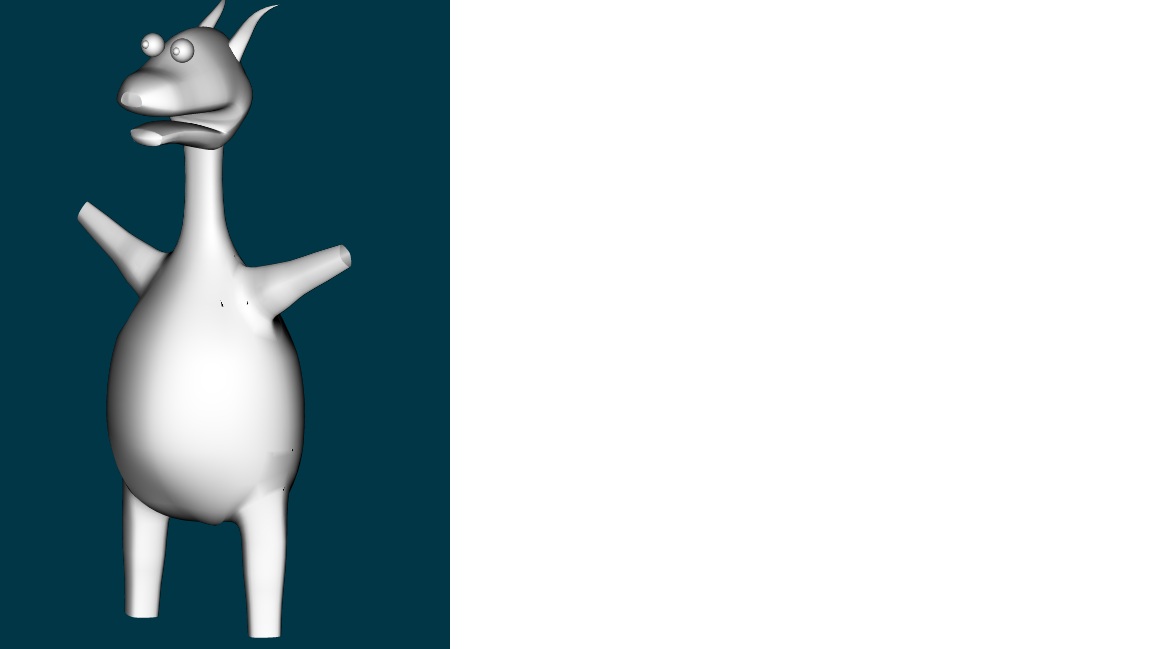
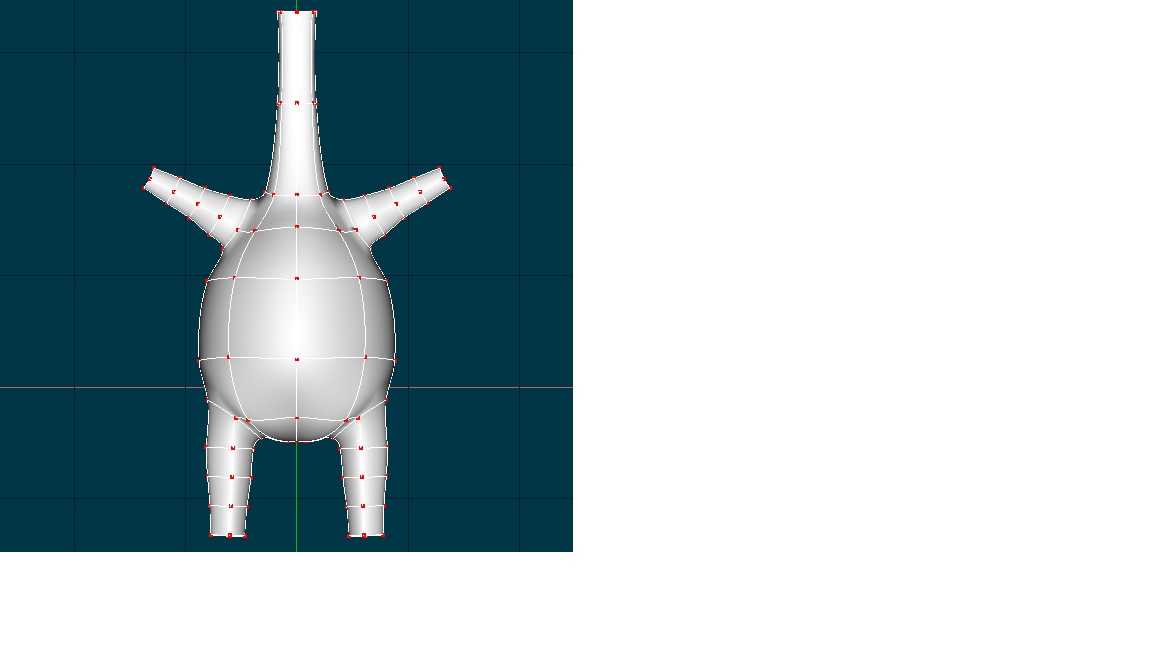
Here is another take on my dragon, so far. I don't have the hands, feet or head modeled yet, but I'm getting better at modeling quickly, anyway. This took me about an hour to do, compared to a week to knock out the first (very) rough version. I'm not sure how productive, this is though. Even though I'm trying to create a more limited look I seem to keep coming back to the same general body shape.
-
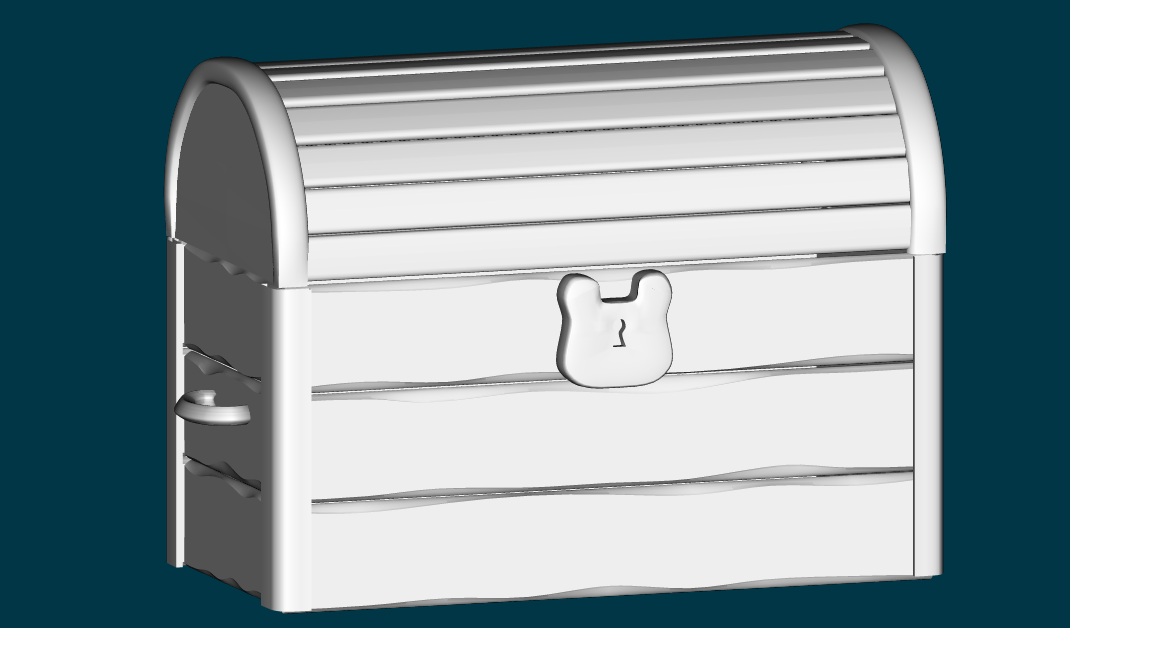
Here is the more or less completed chest. I've adjusted the spacing on the planks that make up the chest bottom, but there still seems to be something missing. Guess I need to make a latch for the padlock to dangle from. I'm not sure how much I like the metal parts that keep the slats which make up the top together, but given that this chest is going to have a clay shader applied to it I'm not sure how much sense it makes to stress about them.
-
Ok, I just checked it, hopefully that should fix it. What is OpenMP btw? Something to do with multiprocessing?
-
That is cute. I haven't decided if I'm going to significantly modify my dragon or not. It will mean throwing out a lot of work if I do, BUT might make him easier to animate. Or at least reduce expectations that it should move like a person. Having something I can animate rapidly is going to be critical in being able to finish this in the time frame I've allotted myself. My penguin char is already fairly simple, I just need to add some finishing touches.
-
Thanks, I'll check that.
-
When choosing File > Save Project As, shouldn't you get a field for the name, in case you want to update the name or change it in some way? I don't have that, and I'm pretty sure it's something I used to have.
-
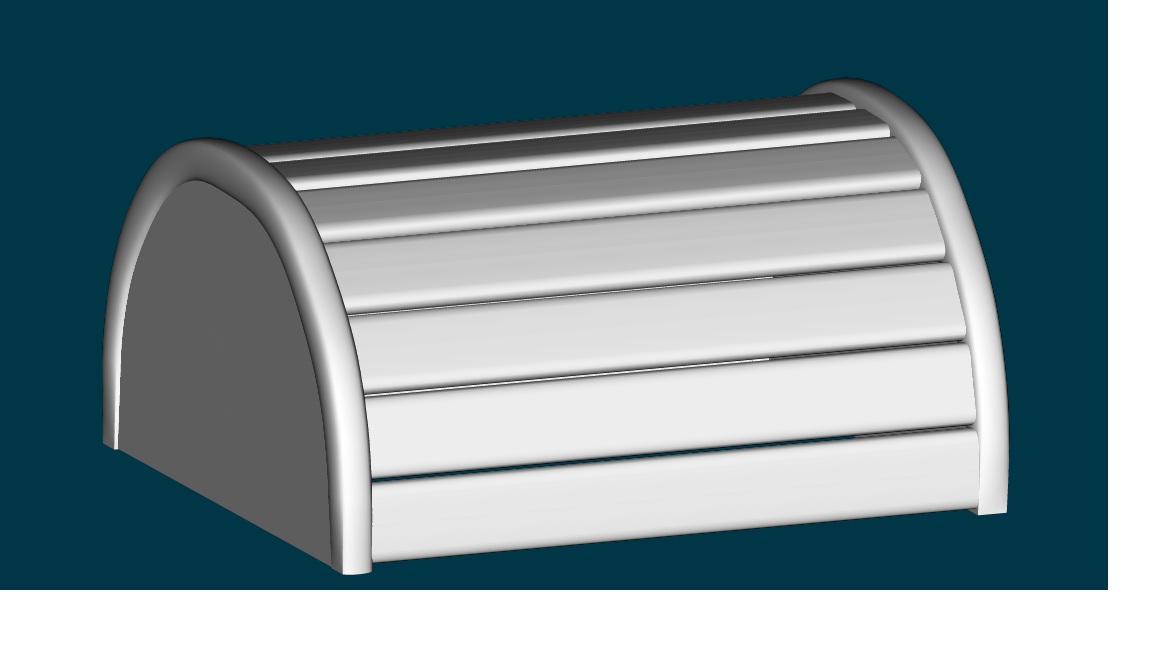
Ok, here is the chest top more or less finished. The spacing between the slats is just a hair too much, but I'm really loathe to go back and adjust this now, because it was a real pain in the butt doing it the first time. I'm sure something will be completely off if I do it, so it may just have to be that way for now. One solution might be to make another semi-cylinder that would nest inside and block the view of the interior. I do plan on adjusting the other slats, just not these.