Roger
-
Posts
2,078 -
Joined
-
Last visited
-
Days Won
48
Content Type
Profiles
Forums
Events
Everything posted by Roger
-
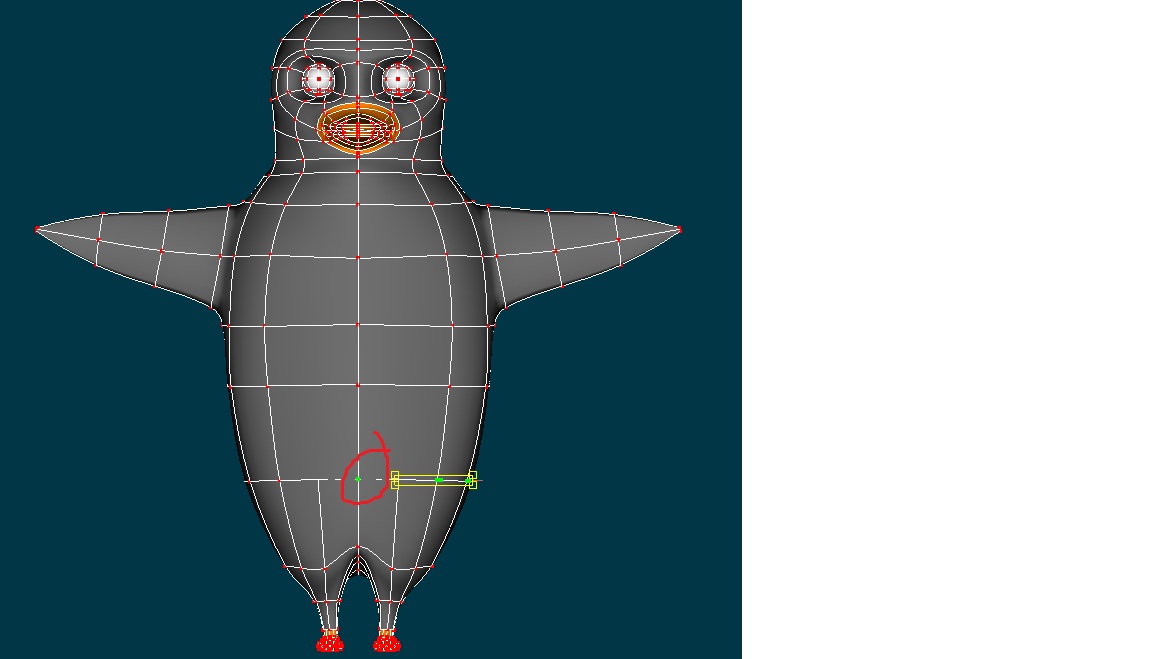
I'm trying to select just the points that make up the right half of the spline ring where the leg starts. However, when I do that the point right in the middle that I have circled in red keeps getting selected. If I try to deselect it, I also lose the point that is directly to the right of it. Any ideas what I am doing wrong here? I need to get my weighting identical to what it is on the other side.

-
I opened your .PRJ file but there is no .jpg for the roto. If it is anything like this, though, what I would do is extrude along a path for the upper and lower limbs. The hand grip, if it is like this one is going to be trickier. Probably what you would want to do is place splines along the outside (trace the grip, I guess) and then extrude that up 3 or 4 times. That will give you some points to work with so that you can match the contour of the grip from the front view. The left and right sides of the grip will not have any patches, so you will need to stitch those in manually. I'm still learning myself so I'm not sure how much this helps you, but that is the way I would start. There may be a better way.
-
When exactly do you want to use an action? I have a bit of confusion as to when you would want to use them. I am guessing something like walk or run cycles would best be handled by an action, while blinks, winks or hand clenches could be driven by pose sliders. Am I correct in assuming that most animation you are (in general) going to want to do pose-to-pose in the choreography?
-
I will have to save a separate project file for experimenting with. I got the smartskin looking ok, so I may stick with that. Not sure why one side was bulging out before but I think I had mirror mode turned on. As far as the neck getting hinky, I just straightened that spline out as part of the smartskin. Finally, this is starting to make some more sense.
-
What is the better practice, creating a smartskin in Bones mode or in an Action? I noticed you get the option in both modes when clicking on a bone. Could being in a different mode produce different results?
-
Yes, CP weighting has been done. Maybe I'll try and weight these points instead of using the smartskin. While I don't think I will be having the penguin doing side bends, it would be nice to have the option.
-
Ok, so I successfully made my smartskin, but now I have a strange kink in the spline running down the middle of the neck, and also the middle spline is bulging out on the righthand side (if looking at the penguin, lefthand from the penguin's point of view). Not sure what I did that this happened, and I'm trying to figure out how to fix it. May need to delete the smartskin and redo it.
-
Ok, I figured out what I was doing wrong, I was not in the Action mode when trying to adjust the bone.
-
So I am working on smartskin to adjust the area where my penguins flippers connect to her body. I am selecting the torso bone and doing New > smartskin. Problem is when it jumps to the 90 degree rotation. I understand this is normal, however, I can't see the bone to move it back and it seems to *really* distort the model. Should I keep my model in shaded wireframe mode while doing this, or would just wireframe make seeing the bone easier?
-
Thanks, I think I got close manually doing it but that should let me know if I've got it exactly.
-
So I am going through all my "pre-flight" checks (so to speak) before starting trying to animate with this thing. I was looking at the bones that make up the spine and were a little concerned that they all seemed to be rotated just a few degrees off-center of the y-axis. Is this cause for concern? I have managed to get them more or less squared up, except for one. It still looks a little off to me. I took a screen grab looking up from the bottom. The pelvis and first spine bone look absolutely square, the 2nd spine bone and head look like they are still off a little bit.
-
Ok, thanks Nancy and Xtaz. I should be able to scale it back up. Not sure how that happened but I must have done it inadvertantly at some point.
-
Ok so I don't need to be overly concerned with it. Shouldn't it be larger though? I don't remember scaling it down that small. Also, how do I deselect it so if I start assigning points I'm assigning them to the bones I want and not the model bone? If I click off the model it seems like that bone is automatically selected.
-
Ok I moved it from where it was and it does appear to be a bone, when I moved it diagonally from where it was it scaled way up and is a black bone. So I am thinking it maybe is the model bone after all. If it is the model bone, shouldn't it be larger and not scaled down so you can't see it? Is this bone not normally visible? When I start reassigning points, are they no longer going to be assigned to this model bone? Also I can't figure out why it is scaling when I move it around, I don't have scale selected on the toolbar just "standard mode".
-
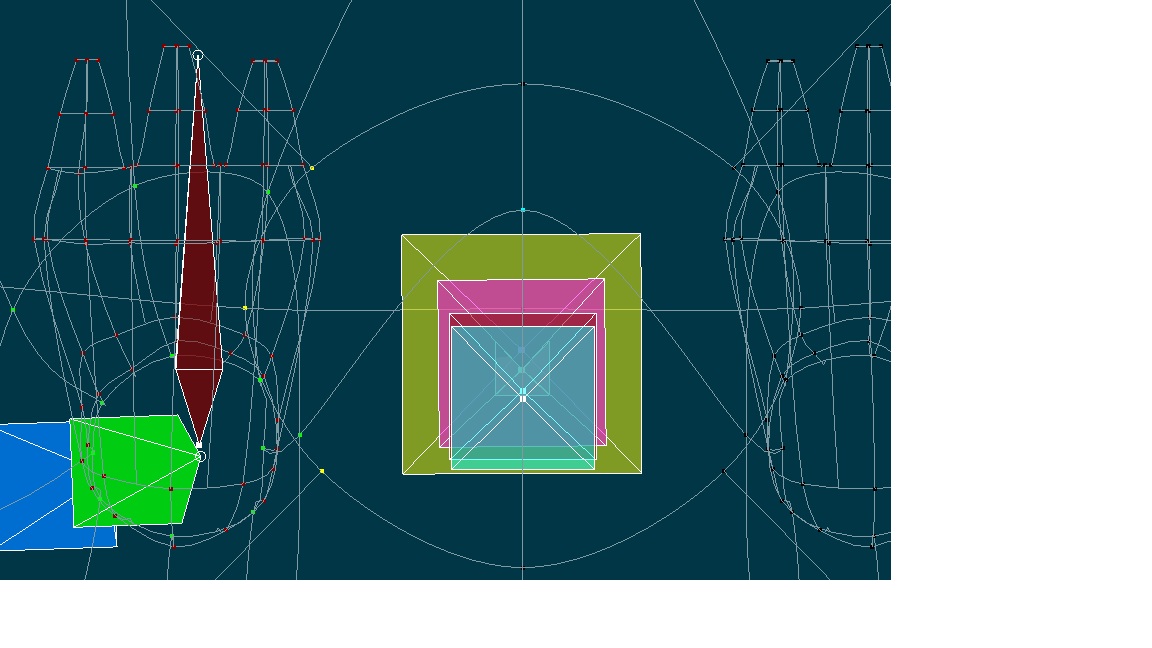
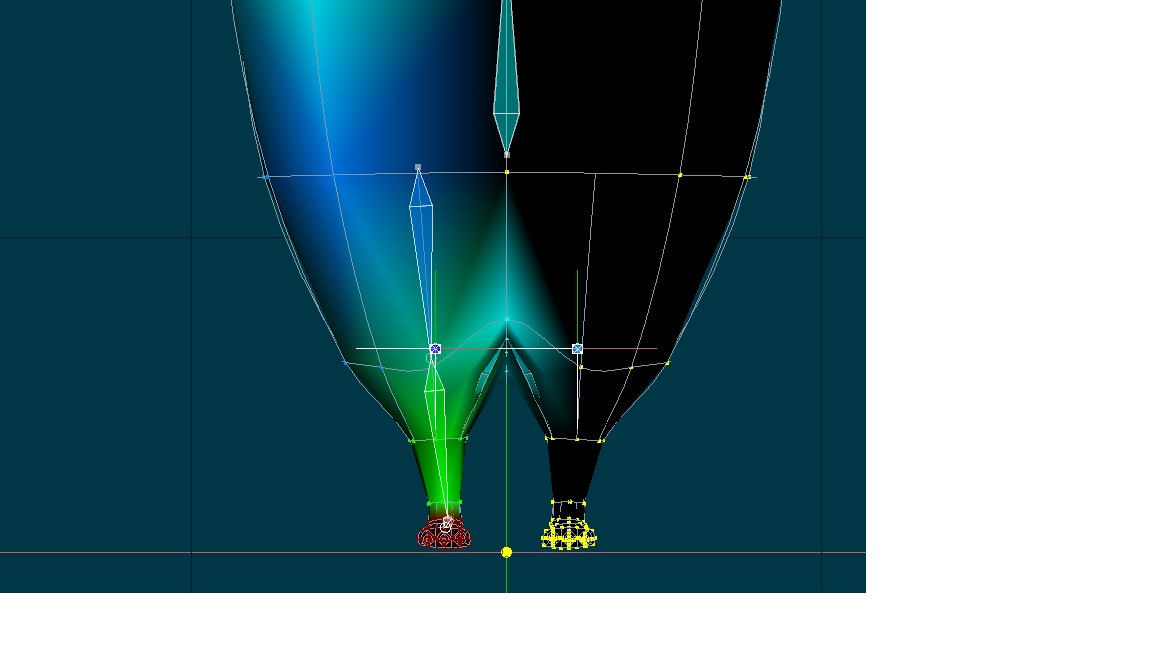
Hello I am not really sure what the yellow dot is done at the bottom near the origin and between the feet. I wonder if it is the model bone, but it doesn't seem to have any scale to it and if I rotate around it it appears to be a singel point. It has the name of a previous project ( think I opened that project and save it with a new name) and if I right-click it and choose delete my entire penguin disappears (which leads me to think it is the model bone but I thought normally those aren't visible?). Also when it is selected all the points on the left-hand side (right if you are looking at the model) are selected. Any ideas as to what the heck this might be?
-
Will importing a saved model file from your local disk screw up a project, such that you get the problems with prior versions losing their changes? I thought this only happened if you saved something from the project as a model file. So I am assuming it goes the other way as well? Or am I wrong here? Because I just imported an eyeball model from the extras, it turned my entire penguin orange (not sure why but it looks like it applied the beak color to the entire body) and then when I went back a version the penguin was also orange. The version before that is ok, and I didn't lose much in the way of work but this makes things difficult. I guess I will have to model everything in the project and only import models into a chor.
-
Also, thank you Jakerupert for the merge&purge plugin.
-
tools/Customize/keyboard/export will get you all the shortcuts in a KeyboardShortcuts.html file in your hash folder on your HD. Wow - that is really cool. Printing one up right now - thanks Nancy
-
/ will select all CPs connected to the one you have selected. I bet that was in TAoA:M. I suppose I deserved that dig. I used to have a quick reference card (from wayyyyyy back in the MH3D days) but seem to have lost it. Is there one still floating around anywhere? Or a current version?
-
I fortunately don't have a ton of 5 point patches, and there is something very Zen for me in the act of closing them by hand. I would probably change my tune if I had more than to do, though. I think I am just going to delete all the extra groups. I've notice some of my groups no longer activate any splines, though? I thought that was strange. It is like they are no longer associate with the splines that were selected when the group was named. I suppose this could happen if the model was changed enough? I know if you hit the comma key, that will select every point along a spline - is there a way to select all the points that make up an object? I'm trying to figure out how to select the eyes so that I can move them around, now that they no longer appear to be part of a group.
-
So I am working on cleaning up the penguin - I am redoing the patch coloring after doing my CFA. Is there an easy way to choose additional adjacent patches to have the color I want, or should I just create a new group and reapply the material? The only reason I am not doing that is I have a ton of groups as it is and probably should start deleting them. I'm not even sure what some of them are. I don't know how I ended up with so many groups, it looks like they are copies of the existing groups I have (numbered 2-7).
-
Ok, that worked. Maybe I still had the action window open when I was trying to do that? Would not have thought that would keep me from doing that, but I guess that is the way it is.
-
Well a forum search revealed (duh, should have done this first) that You need to delete them from the Properties panel > user properties > right click the pose and choose delete. Except when I right click it, there is no option to delete it. Hitting the delete key on the keyboard also does nothing. Anyone have any idea what I'm doing wrong?
-
I am working on fixing the stuff witht the penguin rig, I am still wondering how to get rid of that pose1 though. There doesn't seem to be any way to delete it. I guess I will worry about that after I get the other stuff cleaned up.
-
Ok, will do. I must have forgotten to fix that when watching your tutorial. I am not sure, its been a while since I worked on it. I really need to get back to working on this on a regular basis. The knee targets I am guessing should also not be children of the feet? I moved the feet up to the level of the pelvis.