detbear
-
Posts
946 -
Joined
-
Last visited
-
Days Won
29
Content Type
Profiles
Forums
Events
Everything posted by detbear
-
So what settings do you make for each of the "groups?"
-
After I made the rings a good bit larger, the same results still happen. The drive goes flying away.
-
Watch how this balance beam gets thrown out of its seating starting from the first frame of simulation. newton_test_A.mov
-
Robcat.....I agree with ya 100%....... But so far I have investigated all elements in each model and their settings in the choreography....and haven't discovered where I'm going wrong. My setup does not have the same Paddle type geometry though. I did notice that the paddle wheel has a different Gram mass on the individual paddle flaps while the rod/ arms are set to a lighter mass(in the models "newton"groups) I'm looking at this also...because there are more physics in the project than just buoyancy. Trying to get my feet wet in the newton plugin world. I will endeavor on William
-
I have a sphere set as a dynamic spheroid and when it drops it goes straight through a Dynamic object below. This Below dynamic object is set up on a base so that it will spin. The base is set up as a static object. However.....when the sphere drops, it passes straight through the dynamic object. I even copied the settings on the objects in Steffen's "Wing" example and it still didn't work.
-
Very hard for me to easily get Newton to work with what I'm trying to do. Crashes every time. I'm sure theres a way to get it to work but too much trial and research time.
-
Hey Rob, Looks really cool. I'll have to study what you have going on there. I'm in a research mode where I need to accurately simulate something virtually. So it needs to accurately work like Archimedes principle. I was hoping newton plugin would be able to do that, but it may not. REGARDLESS, your example is really awesome. Thanks for working that up. It looks really good. I need to study the project to see how you got there.
-
Hey everyone, I need to simulate(If possible).....a weighted but Bouyant object in a tube filled with water. It needs to be able to be flipped kinda like a "Sand Timer" and have the bouyant object rise to surface according to real world physics. Is it possible to use Newton Physics in A:M to simulate Bouyancy like this? Thanks so much, William
-
Really nice lighting match on your character to get him blended in with the background. Cool. William
-
Hey Rob, I think Robcat has a great suggestion there with the Boulean approach. I normally avoid Bouleans if I can because of the render times, but that doesn't look like it will be hindered much in your case. Another thing to consider in that respect is whether you're going to have to export the geometry into any other APP. If not, it will make things much easier. But if your final destination is somewhere other tham A:M, make sure what you do in A:M will work elsewhere. Looks like a great project. Nice work. I agree...... Robcat and Rodney, as well as others help to make A:M a great experience. William
-
Ok.... I went back and dug up some of the old composite layers. ALSO....There is a scratch...test animation with the "ground" objects I used to try and get the speed of the plane looking right. Here's the scratch animation test: Dragon_Fokker_Try_N_dynamic_tail_.mov Cheers, William

-
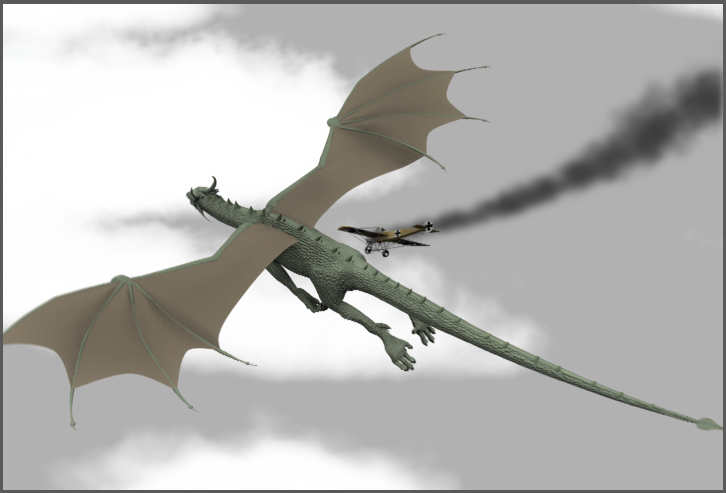
Hey Everyone, Thanks for your comments. I hope to improve some things on the dragon's motion and to the (Eindecker)planes overall feel. It kind-of loses it's flow of motion just before the dragon makes contact. One of the major challenges was to get the Dragon and plane to believable fly at a similar speed with the Dragon only relying on its glide and flap thrust. Once you get a certain amount of animation and staging built into this type of shot, it's hard to go back and change even the smallest things without actually starting over. Originally I had a different background with the plane going close over treetops and then swooping down into a Valley. Mechadelphia..... I started very basic with shapes under the plane in order to get the speed looking somewhat believable. Although I could have approached it a different way, I decided to actually have the plane moving through the air rather than stationary with only a moving background. I had an ILM animator tell me that they used this same approach for the aerial shots in the movie "Iron Man." I'll see if I can dig up some shots and post shots of the WIP stages. I modelled the Plane & Zepplins in A:M. The dragon is of course from one of the A:M CD's. I had to re-rig the dragon at a few places in order to get the motions I wanted(Just my preferences). Each individual model was rendered in A:M and then loaded into After Effects. for final composite. The Breaking up of the plane was done by hand/ key animation rather than by simulations. I think I added a small effect in post to smooth it over though. The background is a single still image that I created in Vue. I hand keyed it to add the look of movement at that high of an altitude. Clouds were created with a particle simulator, rendered separately with a "Mask" and added into the composite along with everything else. Smoke trail was also a separate sprite based creation. I chose to use partical illusion for that. BUT A:M can produce incredible sprite smoke as well. William
-
I ran into this old WIP that I shelved a while back. It wasn't turning out the way I had hoped so I stored it away until I have time to go back and give it another go. Final_Dragon_Shot_.mov William
-
Hey Rob, I modeled it for you. See Attached. Might not be the best approach, but I hope that will work for you or give you a start. I put a few extra spline rings on the top in case you need it to have more beveling. Cheers, William chuck2.mdl
-
Also check your "Model Bone" itself...and any other "area" controllers you might have on your rig. If that has a key on it somewhere, it might have a wide spline curve making the shift.
-
Giligan's Island all the way Mark......That would be one of the best choices in my opinon. William
-
Cool Fuchur.... That's great to know. I'll have to check that out. Thanks for posting.
-
ACTUALLY.....you can overlay a jpeg shadow using Multiply mode in PS or AE but I agree that it isn't ideal.. I wish that at some point an easier method of separating shadows in rendering could be done. It would require a layered render option that would give several files for each frame. AS I mentioned before, the EXR output does this currently, but it isn't a straight forward process either.
-
If you don't want to see your character, set it to "flat shaded" and front projection. To get just the ground shadow, without the ground.......set the ground to both "front projection" and "receive shadows only" to ON Use PNG and see if that gets your layered image. Oh and make sure the shadow buffer and alpha buffers ar set to ON. William
-
Hi Rusty... Try Jpeg and PNG format. Alpha seems to have some querks. Use the EXR output also because it has a nice shadow buffer. I did several things here really quick... You need to also set the "front projection" to on and mess around with it. William
-
Hey..... I re-activated my subscription a few days back. Worked fairly seemlessly. Thanks A:M..... And thanks to the A:M community here.
-
After distorting out of the gate.......Slide the % slider around and then back to 100% and see if you can select the distortion handles again. I cannot. It will no longer allow you to select the distortion handles. So you've got to get your distortion done correctly without moving the pecentage slider. That makes keying at multiple percentages not possible without starting a fresh new distortion box.
-
OK.....so actually it does key BUT here is the real trouble. After using the distortion handles to morph cps you slide the % slider to see how the transition is looking......Needs further refinement, so you put the slider back at 100%........Yikes....you can no longer select the distortion handles. William
-
Within a new pose, can you use distortion mode to move and key cp's...... I get odd results in v16. William
-
Awe Man Guys.... I get antsee about this every year it seems. I'm about to have to do my renewal. I hope I can remember the right steps... Seems like when I purchased/ downloaded.....it installed everything without giving me the opportunity to remove paste my .lic into the right place. After I purchase my new subscription, do I remove and paste my .lic file somewhere (for safe keeping) and then install the new stuff...... Also....is re-installing even necessary....can I somehow just get a new .lic file and keep on using the current version?