detbear
-
Posts
946 -
Joined
-
Last visited
-
Days Won
29
Content Type
Profiles
Forums
Events
Everything posted by detbear
-
Hey Everyone. I tried to find my old thread about this but could not locate it. I inquired previously as to if there is a way to snap a bone's base to a cp. Has that been figured out? Or is it still not possible? Sorry about the re-posted subject. Cheers, William
-
Hello everyone. I had some thoughts today about artists and their potential works. Specifically I was thinking about the kickstarter world and all the projects that have had the dreaded "Funding Unsuccessful." By no means does this mean the project is unsuccessful!!!! But it has to be a real downer to put one's heartfelt work out there and have it seemingly rejected by the world. Kickstarter, although a clever way to get a project done, should by no means be viewed as a "Project Killer." O.K. ......So maybe the thing might need more work......Maybe people need to learn more about it or see it a little closer to finished quality. Maybe people need to know more about you...the artist. BUT is the project all of a sudden a shelved failure???? NOT AT ALL. When I started out on my half hour pilot, I had 3 very clear things going through my head constantly: 1.I can do this. 2.Is this really worth the time and money I'm spending. 3.How am I ever gonna get all this done. This went on for years(Literally).....2007-2010 Then one day, I rendered the final frame and sent the final 28 minute edit to print. There was no such thing as Kick starter. If it was, maybe the film would have never been completed. Looking Back at it makes me realize how laughably bad it is at parts, but you know what......I'm so glad that I was able to work through all the head aches and days I wanted to quit it all. Don't give up on your dreams of making that project happen. You may have to pace yourself. It may take longer. You may have to spend some money. But don't give up. William
-
My first thought after watching that is "We've lost something"......I guess technology hasn't made everything better. What incredible, complicated, and impacting work must have gone into just a few of those episodes. I understand how they must have timed the music and animation together into that, but WOW.......that had to have taken great talent and planning. Awesome. William
-
Currently there is no way of doing this without performing the steps that you want to avoid....."Flattening" etc. And rightly so....That's a rediculous amount of work when it could be avoided. But currently there is no cut and dry method. I hope that some more research & Development can be done to allow for this, but it takes a bunch of time and work to program such features. I'm happy about the import/ export plugins because I use them all the time, but it is on my wish list that in the future this and several other improvements can be made.
-
Heiner, This is very possible unless you plan on changing the geometry after importing the model into A:M. For instance, when I import a model from DAZ and import that model directly into A:M as an .obj import(A:M's .obj import plugin converts the DAZ model into splines), the maps from DAZ are placed exactly where they were. Which is great. HOWEVER.....if you delete any of the imported mesh the UV maps are effected with no current way to "re-stamp" them. But it is possible for A:M's .obj importer to convert the model to A:M splines and place the external UV's where they need to be. I would imagine that your problem is Blender's export. Cheers, William
-
Hey. Has anyone else noticed that sometimes the rotation handle on the model doesn't match the axis in the graph editor? I've seen this happen on several occasions in V17 this year. But I thought I'd at least mention it here. I ran into another case today. If you look at this screen capture, you'll notice that I'm moving the X(red) axis rotation of the bone, but in the graph editor it is registering as the Z(blue) axis. That seems very odd and can get confusing when animating. Has anyone else had this happen? Cheers, William

-
Hey Carol8, I inquired about this not long ago and I'm hopeful that it will be added in the near future as a feature. Great thing about using Hash A:M is that they try to add the things that us as users find important to our workflow. I have been "eye-balling it" mostly. If you need a bunch of precision, take a screen shot of your "Birds eye view." Save it in a photo app. Then add it to the camera as a back drop.....Make it transparent. Then move the camera to line the image up with the scene. Not the best option in the world, but it will help. William
-
Will, That's really cool. I have a question about your A:M export to Sculptris. When you export an obj from Hash into Sculptris, what settings do you use. My obj's into sculptris from Hash have gaps between the poly's. This becomes apparent when I try to push/ pull on it within sculptris.
-
Hey Simmon, It's been a while since I worked on a project that required a spin more than 360 degrees. This issue comes up when you have a wheel, a propellor, or in your case a basketball spinning on a finger. Whatever bone is controlling your spin needs to be set to Euler interpolation so that when it gets back to 1 degrees it doesn't start over but rather continues the spin. There is a process to change the bones driver to Euler, but I can't remember what that is. On the "Extras" DVD, there is a project called "Mufoof" that shows you how to set this type of thing up as far as I remember. Maybe someone else here remembers all the steps.
-
I Agree JB...... It isn't as intimidating as I was expecting. It's actually fun to work with. It exports a really nice Obj that works well with Hash. I like that Sculptris keeps the toolset fairly simple. It's a form of Z brush in a way but keeps the toolset condensed. PLUS....it allows sculpting to work into A:M really well. Animation Master is such good software....I was excited to be able to sculpt and bring it into Hash. Part of the Pixologic plan with sculptris seems to be aimed at allowing people to test out 3D sculpting to see if it's a good fit for their art.
-
Hey Rodney, You modeled Dirk? I must've missed that one. Wish I would have known that. I would have asked you about it. I'd love to see your version. I'm sure it was awesome. I have to keep myself in check because I tend to be a "Splineaholic." I always have more splines than necessary. One of these days, I'd like to recreate one of the Dragon's Lair scenes in 3D just for fun. Maybe one of the simple ones that don't have a bunch of detail. That would be a fun project.
-
Hey David, I feel the same way as far as sculpting. From what some people told me, the sculpting thing was a very odd and strange departure from the traditional modeling techniques. Because of this, I anticipated getting frustrated with Sculptris. But after a bit of trying the tools out, it actually feels really fluent to me. I have to use the old "Undo" a bunch through
-
Thanks guys. William....Those zbrush tools are really cool. Sculptris seemed like a good place to start for me with sculpting in 3D since it's a free app. Hopefully one of these days I can add ZB into my budget. I have to admit that my first impression and experience with 3D sculpting has been really exciting. It has a really good artistic feel to it. Since I'm not experienced in rigging on other Apps, I just wanted to bring it back into A:M to see how that workflow felt. William is also right......the retopo was not easy. But it actually works fairly well. I've found from using A:M's "snap to surface" tool on this and several other projects that it is a good tool. We all have a wish list of things that would make A:M import polygon models more conveniently, but this is a good backup process if a project requires that you duplicate a model into Animation Master.
-
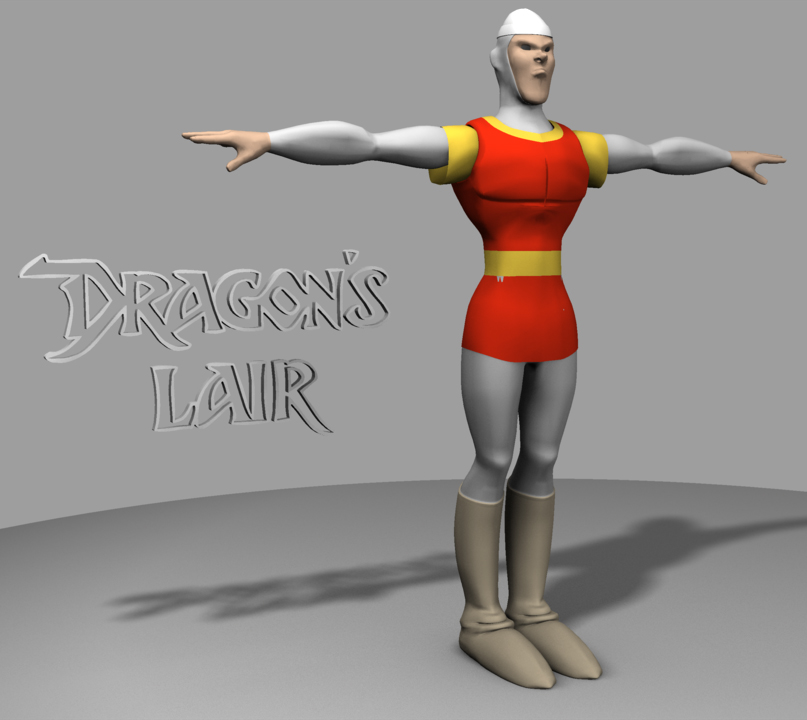
You guys may have seen my recent post of the fan art model I did. I wanted to test out sculptris with Hash and how well the obj export from it would work in Hash's "Retopo/ snap to surface feature." Since I'm new to sculptris and 3D sculpting in general I was hoping to get the basic shape of Dirk the Daring's head fairly close. I knew that the spline modeling in A:M would work much lighter and smoother. However, I like the way sculptris allows me to get the overall shape. Attached is a video of the progression both in sculptris and then on into hash for conversion to a spline copy based on the obj. The body was all done in Hash. Model_Steps_Sculptris_to_Hash.mov Cheers, William
-
Decided to Do a little Fan Art Model of one of my favorite characters from Dragon's L.
-
Yes...I am using a modeled spline rather than a straight out path in the choreography. Robert, I sent you a few files. It's so hard to explain this stuff in text. Not you guys fault at all. My own Brain freeze.
-
I have the motion working ok. Looping it is the concern. When I say loop I really mean that I need the bones to go around the path more than once. It can't be a restart on a previous frame. I'm not sure where to try and set keys at the ease frames....Not sure how to tell which those are. Also if I set more keys it seems like that will lock the speed of the path. I hope to be able to adjust the speed of the path if I need to. Ultimately, I need to be able to manipulate the path splines themselves while the bone chains rotate around them. So the paths themselves will have control bones also. No....this is not a Tank Tread....so an animated decal won't do.
-
Ok.....I've got preliminary tests on the way, but nothing to show yet. The path has to run in a stretched oval loop. Like a chainsaw. Since the path can't repeat, I looped it around several times. BTW....Is there a way to loop the path flow when it reaches the end? The bone chain goes the length of the entire path...like a chain on a chainsaw. Then things become a bit more complexed.....I need several of these paths running side by side. Kind of like 3-4 chainsaw chains sitting next to each other. I'm not sure how to duplicate this in the same seen without doing them all separately. I have to also be able to move/ animate each of the individual paths which gives me control over how the bones chain is moving. VERY Complexed...but I have gotten some success with a single path. But I don't know how to have the chain run around the circle more than once. Simply looping the time doesn't work because I have to control the path itself in animation longer than the loop runs. William
-
Needs to be really close
-
That's really cool Robert. Thanks for that... Is there a way to work out the timing/spacing so that you can get the bones to sit in a parented location so that there's no spaces or overlapping? I have a bunch of bones too which complicates things. That's a great tutorial also.
-
Hey Everyone. I have a chain of bones. (Bone 1, 2, 3, 4, etc.) I'm constraining them to a spline using a path constraint. I want them to move along the path keeping their distance. But when I constrain each bone to the path, they attach to the same start point right on top of each other. Is there a way to offset each bone so that the chain does not group together to follow the path? Thanks, William
-
I'm wanting to get a really nice caustic like crystal ball texture on a shere. A sphere with the look of colored glass. Anyone know of a really nice way to get this done?
-
Yeah... I bet the budget for what's already been done there for "Goon" would shock people. I agree with Largento. Will has something unique there. If he had Blurr's staff of artists and their budget, Tar would be just as "Glitzy." Besides, I think Tar could take "the Goon" in the arena....don't you?"
-
Wow Rodney, That does sound cool. I would also think that a quick and dirty version of that process could be done with a single patch also. Kinda like a real time/ editable post effect. You could make the patch a red tint with transparency and get a real time tint overlay. Add a layer with other properties, etc. But I'm sure what you have in mind there is much more detailed and would work much better. That is so cool. I bet you could attach a few of those concepts on a grid constrained to the camera fairly easy. William
-
Rodney, Just a thought. May not be much..... For a single frame, on screen, test render. I wonder if you could scroll the view back so that the renderable area is further away/ smaller.....Then the actual render area may be smaller/ render faster. Not sure if that would even work.... I'm away from my workstation so I haven't tried it. William