detbear
Craftsman/Mentor-
Posts
946 -
Joined
-
Last visited
-
Days Won
29
Content Type
Profiles
Forums
Events
Everything posted by detbear
-
I've got several projects pending but I'm really glad to be finishing this 1 minute short(or about that length). It's crazy the amount of mental planning, problem solving, artistic choices, and R&D that goes into producing a short clip. Then there are the things I often have to just "go with." The only budget for this is whatever time I have. So the budget is whatever motivation and time that's available. Then there is that artist part of me that is never satisfied and is often forced to abandon things while calling them finished. Simply because being a perfectionist rarely sees anyhing as finished or completed. I had to come up with several effects and "looks" that I wasn't sure originally how they should be. But the completion is nevertheless close for this short. Then it will be on to several others in the works.
-
Hey Rodney, I'm also not as familiar yet with the SSAO as it exists in the new versions. I used Jenpy's "Fake AO" plugin quite a bit in previous versions. They don't seem to operate exactly the same. Overall....I've found some strange banding with the SSAO when combining it with motion blur and things like glow. I guess discovering that "Sweet Spot" setting is key. I am rendering with an alpha channel.....so that could be contributing to the banding. I did increase the multi-pass count quite a bit because I too suspected that this might blend the bands a bit better. But that did not seem to make much difference. I'll figure it out. It will take some more experimentation with the SSAO.
-
Hmmmm....Rodney could be right. I'll have to check it out. Nancy.....If the problem persists, I'll post something. I'm about to post a new version of one of my short films. This glow thingy may not be a huge issue......Yet
-
I was rendering a shot with a glowing object and I noticed that Screen based AO causes a 'banding' in the glow/ halow/ orb is present at the end of the last render pass. I wonder if this has to do with a setting or just a casualty of using screen based AO.... The glow is looking great until that last pass finishes and the AO is added in. I'm in V18. I increased the multipasses but that didn't help. Both with and without motion blurr carries the same results.
-
Hey Paul. I have a texture suggestion that might give it a bit more realism. I think throughout all the objects this could improve your image but especially the brick wall. It would look more believable if you placed a "dirt/ grunge" overlay on it. It appears very uniformly textured. If you added an overlay to give it a shaded look that is not the same throughout, it would appear more natural. You could create a PNG in Photoshop and stamp it across the surface. Kindof like a shadow but with a "grungy look." That wall looks like it would have some "grime" and "gook" on it. Same goes for the light shade...But the wall is most noticeable. Looks like a really nice composition. Lighting will look better also.....if you add shaded texturing onto those surfaces. Otherwise they will seem flat shaded a bit.
-
Yes....the hide feature is very useful, but cp's are visible again when you re-load the model. Strangely enough the same is not true for "locked" cp's. If you lock a cp or group of cp's, they will still be locked when you reload......That is if you saved the model with them locked.
-
I notice that when I choose EXR file to save a frame, there is no "shadow buffer" to select. Didn't EXR have this option in the past? It's been a while since I rendered this format, so I may be missing a step somewhere.
-
Hey Matt C., A quick question and very important... Is there a way that you know of to match the Camera(and camera motion) of an A:M shot with Element in order to also match a shot? Thanks, William
- 31 replies
-
- render
- alternate renderer
-
(and 3 more)
Tagged with:
-
"Redshift" has some amazing capabilities. It's not super expensive yet. But it is limited to XSI and I think Maya. So it doesn't work on a large number of packages yet. Although I think they are attempting to expand. DAZ studio has just added Iray to their latest beta release(4.8) and it's pretty amazing. If possible, I don't think Hash should avoid this progress in the CG world. It will soon be out of reach. There is a huge need for Hash to be able to connect with external sculpting and rendering engines. Most of us here on the forums really like Hash and we understand how difficult it is to make the spline platform work in a poly saturated industry. BUT the reality of where things are and are heading is staring all of us in the face.
-
I will see what I can do
-
Wilsided.... Any area that is tight with crowded or clustered cps will be easier if you use plates for percentages of the motion. For mouth movements and eyelid movevements I've actually used plates for every 2-5% of the motion. This takes forever, but since there is very little movement, there are often no "MIS-SNAPS"......Hey, I just came up with a new CG term. Robert.....That would be valuable for people to see. This is why I suggested the "snap to cp" function way back. BTW....I see where 18L has added "Bone to cp snap"......That will add another dimension to this because it will accompany the group constraint. This could potentially add a way to swap these face morphs between characters so that once you create a "Phoneme set" of morphs on one character, you can paste them onto a second character by having bones control cps on two separate face shapes.
-
Wild Sided, I've been doing this for some time now. ONE THING YOU MUST REMEMBER: to get the morph to translate correctly, you need multiple "Inbetweens" If you just go from "Neutral" to "Frown", it will go linearly without curves. So you'll need to have more than one "Mold Plate" So....here is what you want to do. Take your neutral Base Face and open the frown morph model in the same model.(so you have both models within one model.) Then make a new pose. select the cps of the base(within the pose window) and RIGHT CLICK/ Snap to nearest cp. Then it will ask you for a group to snap it to. (You need to have a group for the frown created)....... Choose "Frown"... The cps of the base face will snap to the frown. WARNING.....If the cps have to move a large distance, especially in the lip area......cps will snap to the wrong cps. THIS is why having several(or a bunch) of plates is important so that you can snap in incriments over time. Hope that helps. It does work.
-
Thanks guys, That helps me. I will see if I can get it to run. I'm finding that I want to work on some things back home. But I don't have a newer version on that old system. I confess that I'm spoiled to some of the new features added to A:M in versions 17 and higher.
-
This is probably an extremely ignorant question.....But here goes. I have an old laptop that I would like to install A:M 18 onto. it's way old and 32bit. Does our subscription allow for installation on a laptop by any chance? AND........does that require an internet connection? I don't think my old laptop even has the ability to go on the web. It might if i put a bunch of work into it. But i doubt i will. But it seems to work well...
-
You Know, It seems like those flashes of inspiration that are often unplanned remain the best pathway. The worst thing is when you dread it, and then have to do it. In that case, I think the art can lose a bit of vibrance. So... if it's a dread, step back and have a breather until that flash of inspiration overcomes a slothful state
-
Big Rodney. I like where your test is going there. At the end, I would add secondary motion with about 10 or so frames.... bringing the back arm(club) around and visible. Also, some more follow through with the body forward but with mostly from the torso up.... Throwing arm should have a bit more drop toward the ground and ease in rather than stopping abruptly. That will keep it from hitting a still wall so-to-speak. I like your key poses. That has much potential. A cool action with some massage. Most people end up trying to repeat a baseball pitch. But I like the feel of bulk and strength in the keys you have there.
-
That's awesome Rodney. Thanks. There's a bunch of good stuff in there.
-
Dimensions? optimal frame size?
-
Will, Looks great. I see you chose the more "human-like" leg for the Water Buffalo. I should've gone with the human legs on the sculpt
- 10 replies
-
- Pitch
- TAR of Zandoria
-
(and 2 more)
Tagged with:
-
Very Cool Mark. I hope things go well with that. Sounds like a bunch of fun. Art looks great.
-
There are very few cases where you can avoid moving cps manually after the flatten process. I think the flatten should be updated where you don't have to spin the axis handles around. There should be a way to flatten from front view where the axis is automatically adjusted. I normally do both the back and front side. Not only on a character's head....but also on the body. The other issue that I never quite understood, was how to make an "Exact" match between photoshop and the A:M decal. At least in the way Talbot did it. I always "fudge" it a bit.
-
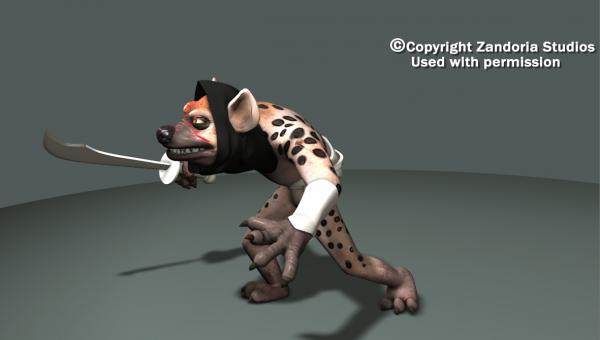
Hey Will, Here is my first rough pass at a Hyena Sneak. If I were a Hyena and just happened to be a ninja.....And really wanted to get a Very Large Hippo.... Here's how I might Go About it Image Here: Movie here: Detwiler_Hyena_Stealth.mov Set your Player to LOOP
-
It Can't Be Done Mini-Series! Bone Snapping
detbear replied to robcat2075's topic in A:M Tutorials & Demos
Robert is correct. The cp "snap to" works really well. I for one am very greatful that they chose to add that. For a case where someone would like to have each cp controlled by a bone, a macro would cut down on the setup time. -
It Can't Be Done Mini-Series! Bone Snapping
detbear replied to robcat2075's topic in A:M Tutorials & Demos
Yes....I'm not good at all with explaining things via text: BUT yes....I was attempting to make note of the rigging potentials. ALSO......Robert is correct. A macro to place bones on every cp of a heavy model would be ideal. There are models out there with morphs on them that could be automatically matched in a pose and then the pose could be connected to the joint movement. That way a heavy meshed, imported model would not need to be re-weighted. Therefore the textures from the external could also remain intact.


